Table of Contents
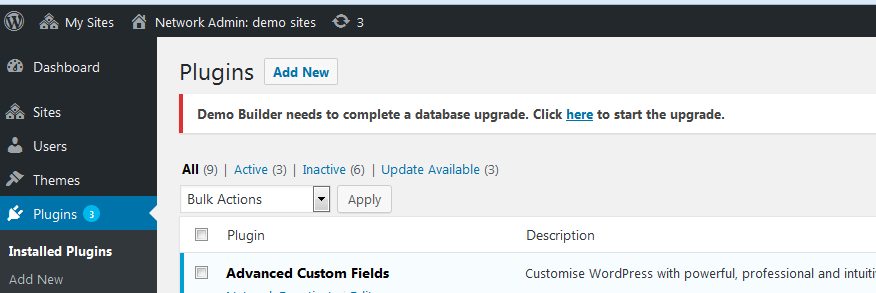
Please Note! The plugin may require some database updates. In case you run the plugin and see “Demo Builder needs to complete a database upgrade. Click here to start the upgrade” notification, please follow the instructions for the plugin to work properly.
Steps to create a multisite network (read Create A Network guide)
Enable Network Setup menu item to allow multisite
Open up wp-config.php and add code
/* Multisite */ define( 'WP_ALLOW_MULTISITE', true );
above where it says /* That’s all, stop editing! Happy blogging. */.
You will need to refresh your browser to continue.
Install a network
1. Navigate to Tools → Network Setup sub-menu.
You may be asked to deactivate your plugins before enabling the Network feature. Deactivate plugins and back to Network Setup sub-menu.
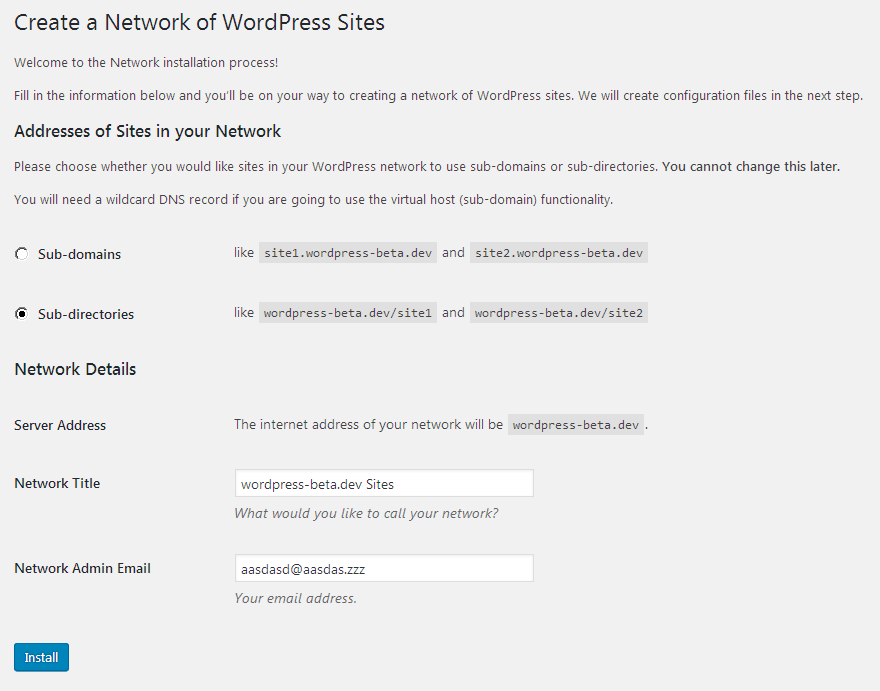
2. Choose “Sub-directories” option under Addresses of your sites in the network.
3. Double-check the details and press the Install button.
Enable the network
Follow the instructions appeared on the Create a Network of WordPress Sites screen.
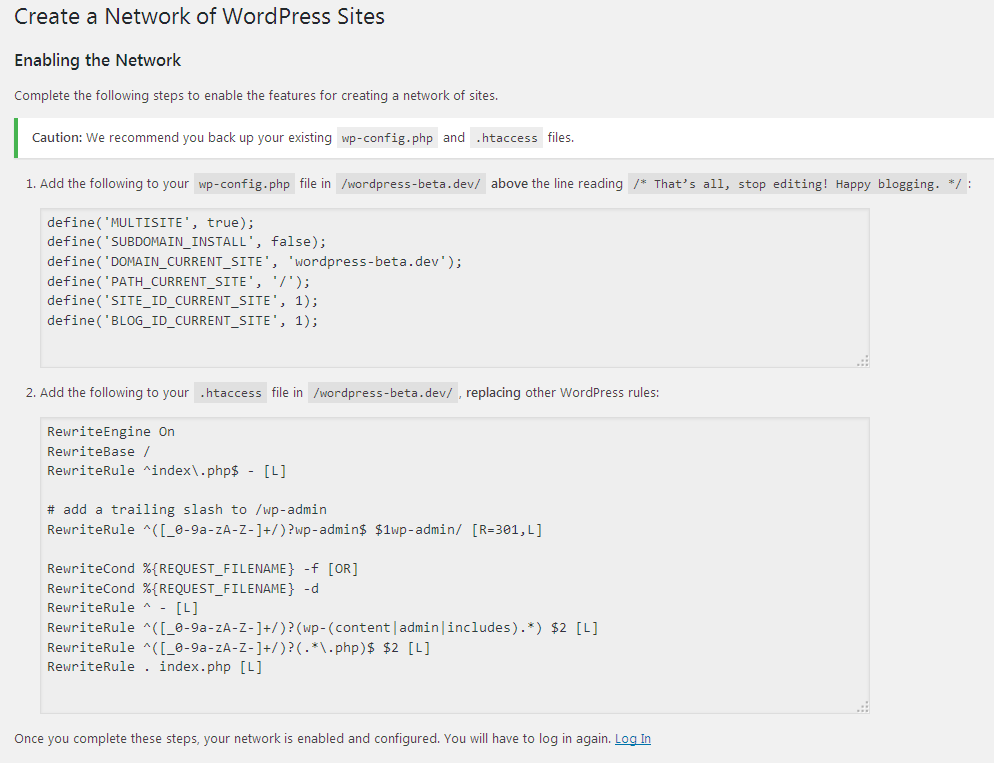
Backup your existing wp-config.php and .htaccess files, unless this is a fresh install and you have nothing to lose.
1. Add the specified lines to your wp-config.php file.
2. Add the specified lines to your .htaccess file.
If you do not have a .htaccess file, then create it in the same directory as your wp-config.php file. If you already have a .htaccess file, replace any existing WP lines with these new ones. In some cases you might also have to add Options FollowSymlinks at the start of the file.
3. After completing these steps, log in again using the link provided.