Table of Contents
Install and set up the addon
You can use the add-on with your active Google Analytics 4 account or set up one when connecting the add-on.
- Install and activate Google Analytics for Appointment Booking (requirements: Appointment Booking 1.17.2 or greater).
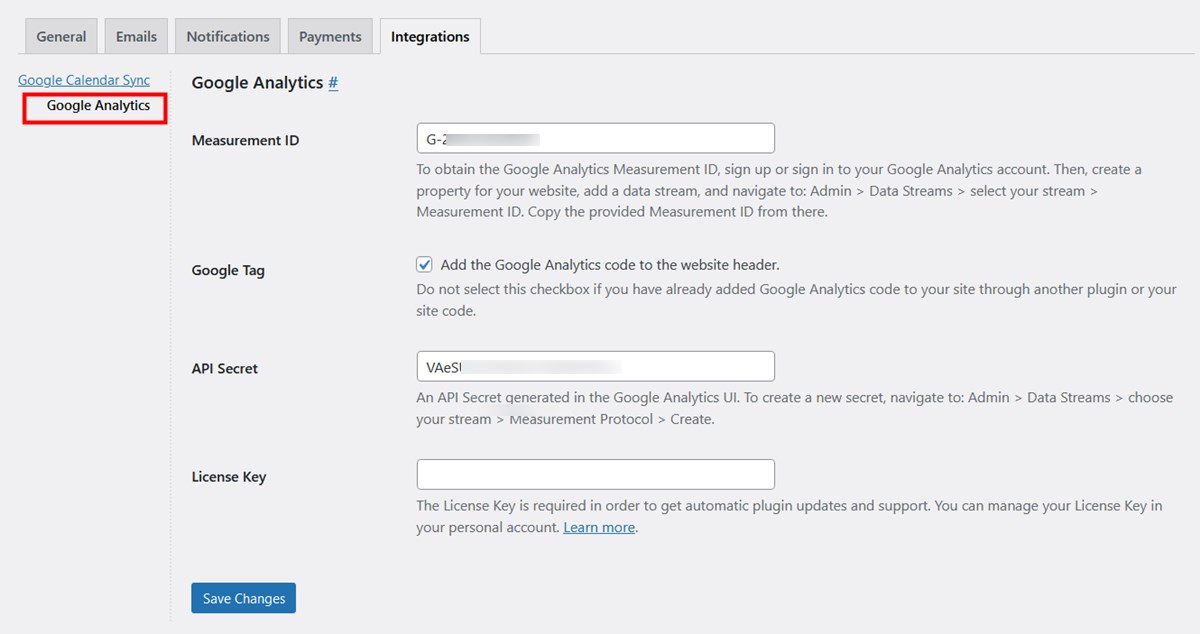
- Go to Appointments > Settings > Integrations > choose Google Analytics.
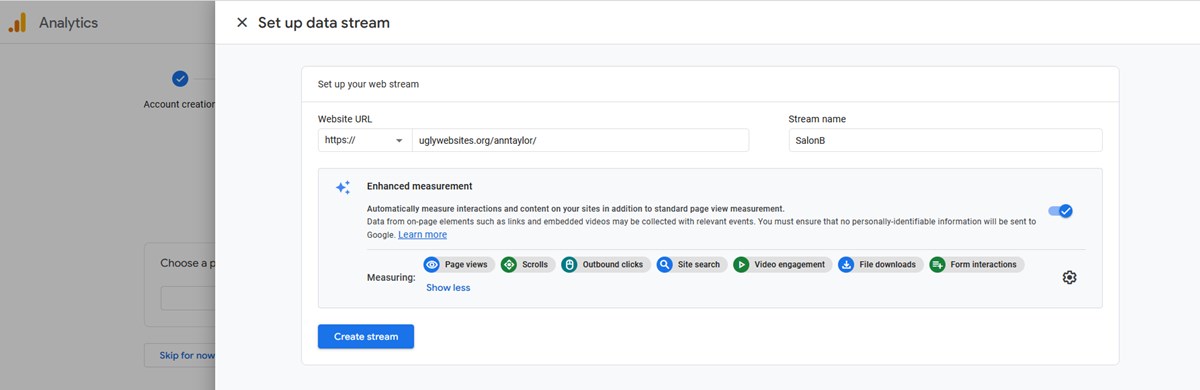
If you are setting up Google Analytics for the first time, you’ll need to create a data stream for it. It will be associated with the particular domain name.
Fill in the required fields with the data associated with your account in the extension:
Measurement ID
Create and copy the ID in your Google Analytics account via: Admin > Data Streams > select your stream > Measurement ID.
Google Tag
Check this box if you still don’t have Google Tag installed on your website. It will be automatically added to all pages to track interactions (‘events’) with the booking form and services pages. Normally you’d need to do it if you are registering the Google Analytics account for the first time.
If you are installing the tag for the first time, it might take up to 48 hours to collect the data and display it on your Google Analytics.
API Secret
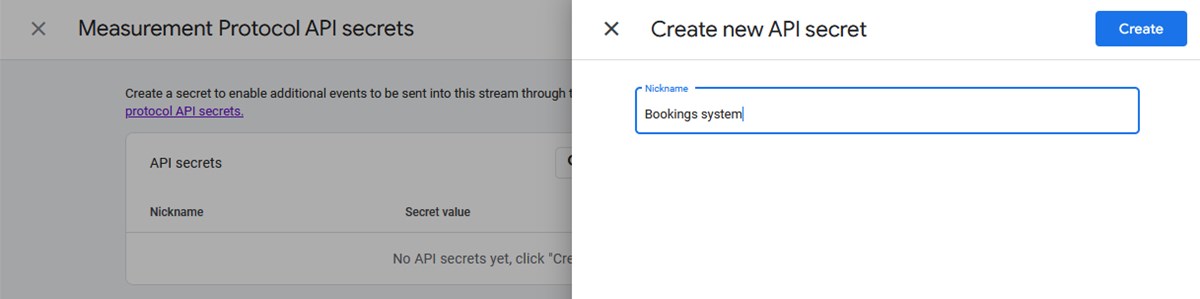
Create and copy an API secret via: Admin > Data Streams > choose your stream > Measurement Protocol > Create.
If you create an API secret for the first time, acknowledgement will be required – simply click on the prompt and select ‘I acknowledge’, this will activate the API secret creation functionality.
License Key
Add the license key you get with the Google Analytics for Appointment Booking add-on.
Once you’ve added all the data, save the changes.
How does it work?
This add-on basically adds seven so-called e-commerce events that will help you track the interaction with the booking widget added to your site via the Appointment Booking plugin:
- View item
- View cart
- Add to cart
- Remove from cart
- Begin checkout
- Refund
- Purchase
The ‘refund’ and ‘purchase’ events are directly associated with the booking statuses in the Appointment Booking plugin.
If a customer clicks ‘Back’ in the booking widget, the ‘begin checkout event’ won’t be sent for the second time.
You can view data on visits, conversion and more in real time. However, it might take up to 24 hours for the events data to appear in all other menus of your Google Analytics.
Note: Since Google Analytics 4 allows you to customize the reports to meet your needs, you might experience a different interface.
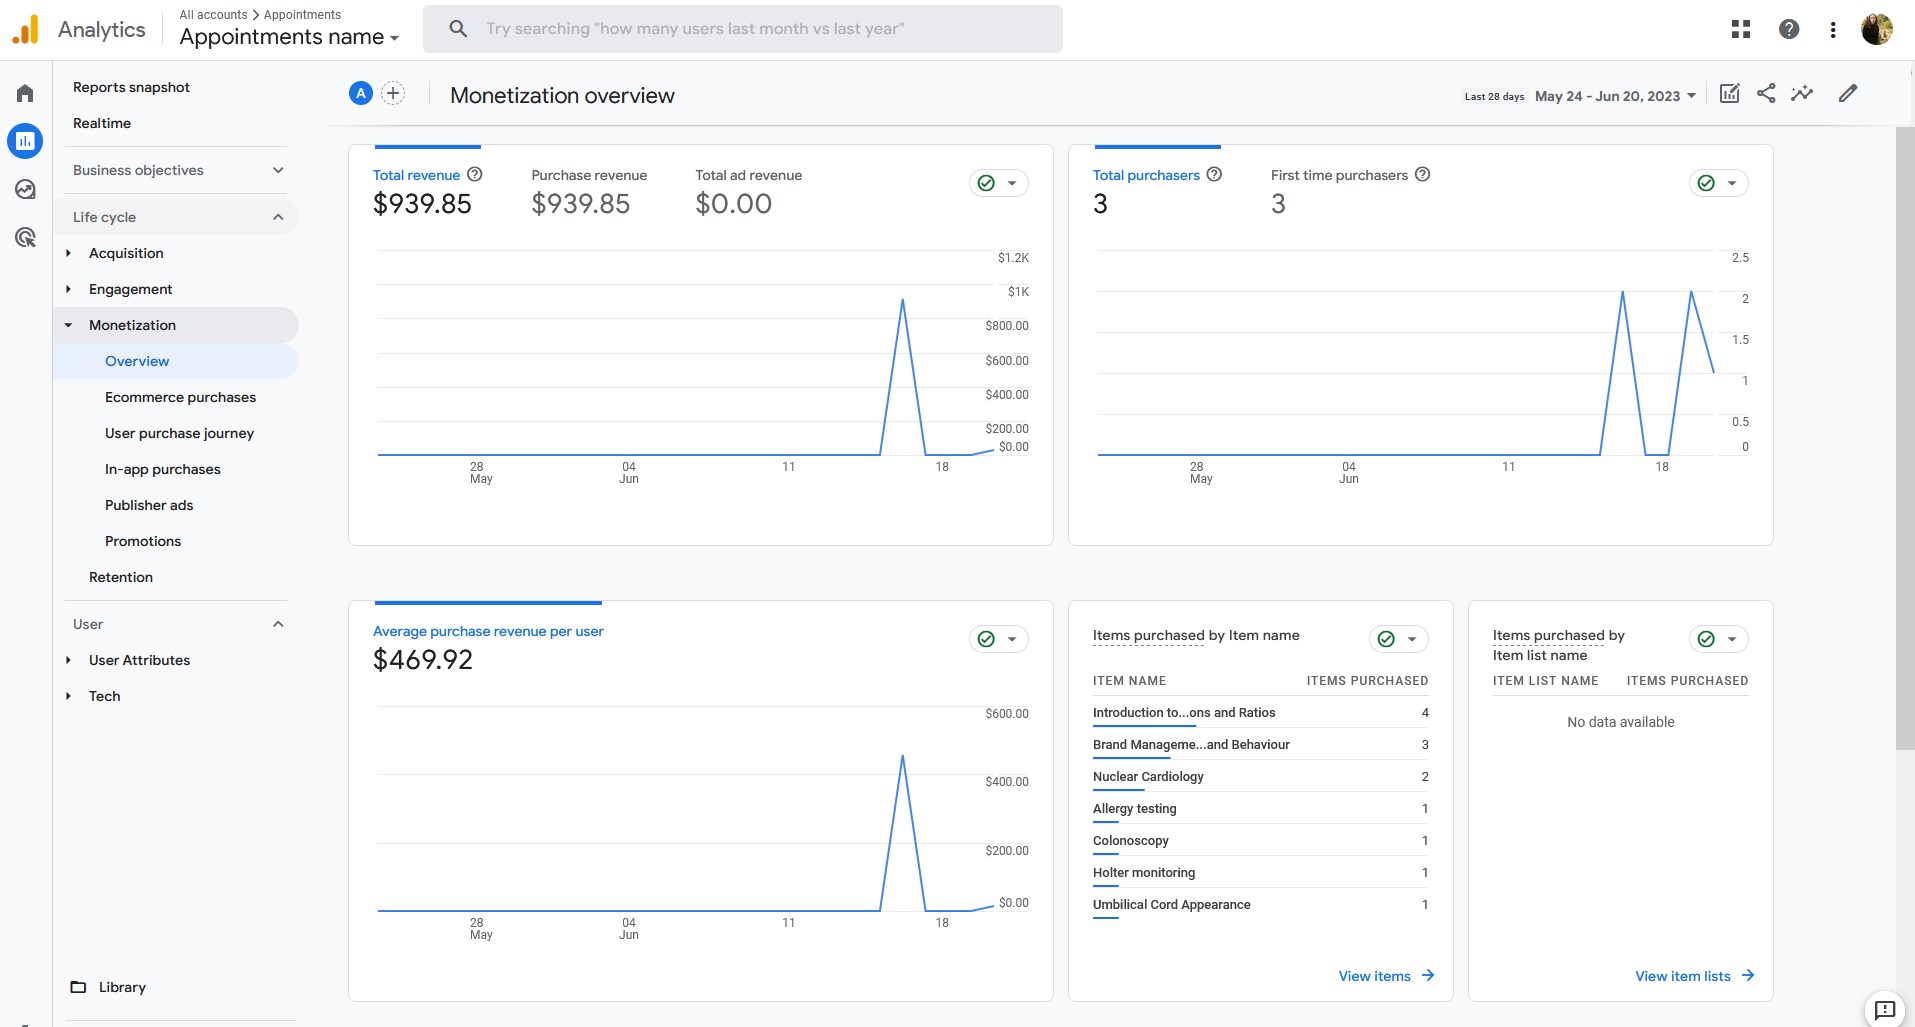
1. Where to see purchase statistics?
Reports > Monetization > Ecommerce purchases.
2. Where to see names of booked services?
Reports > Monetization > Ecommerce purchases. You can find items by the names or item category.
3. How to understand the journey to a purchase?
Reports > Monetization > User purchase journey.
4. Where to view revenue per item?
Reports > Monetization > Ecommerce purchases > Item revenue.
Watch video about how to integrate Google Analytics with your appointment booking website
Helpful links
The more you are experienced with the default tools of Google Analytics, the better insights you can gain and turn them into actions of improving your customer experiences on the website. If you are new to Google Analytics 4, here are a few helpful links to help you better befriend with it: