Table of Contents
The Checkout Fields add-on allows you to edit the checkout step in the MotoPress appointment booking form by adding new fields or editing the default ones (a name, email address, phone number, and customer notes).
Installation and setup
- Download a .zip archive with the Appointment Booking Checkout Fields add-on files.
- Install the plugin from your WordPress Dashboard via Plugins → Add New → Upload Plugin → Browse → Install Now.
- Activate the plugin.
- Go to Appointments → Settings → Integrations → Checkout Fields → copy and paste your license key and save the changes.
- To edit checkout fields, go to Appointments → Checkout Fields.
Working with Checkout Fields Addon: A Video Guide
How to add a field
- Go to Appointments → Checkout Fields → Add New.
- In the Field Type area, select a field type.
- Configure settings offered for the field.
- Optionally mark this field as required.
- Click the ‘Create’ button to save the field.
- Go to Appointments → Checkout Fields again.
- Drag and drop the new field to the needed position in the form.
How to customize fields
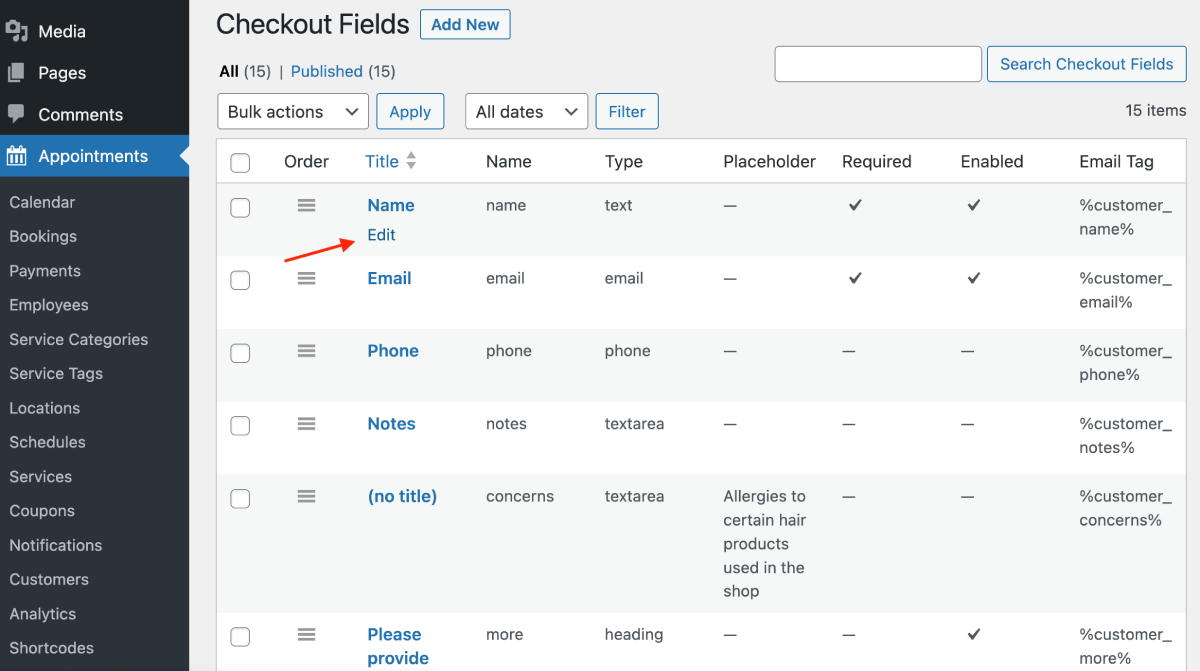
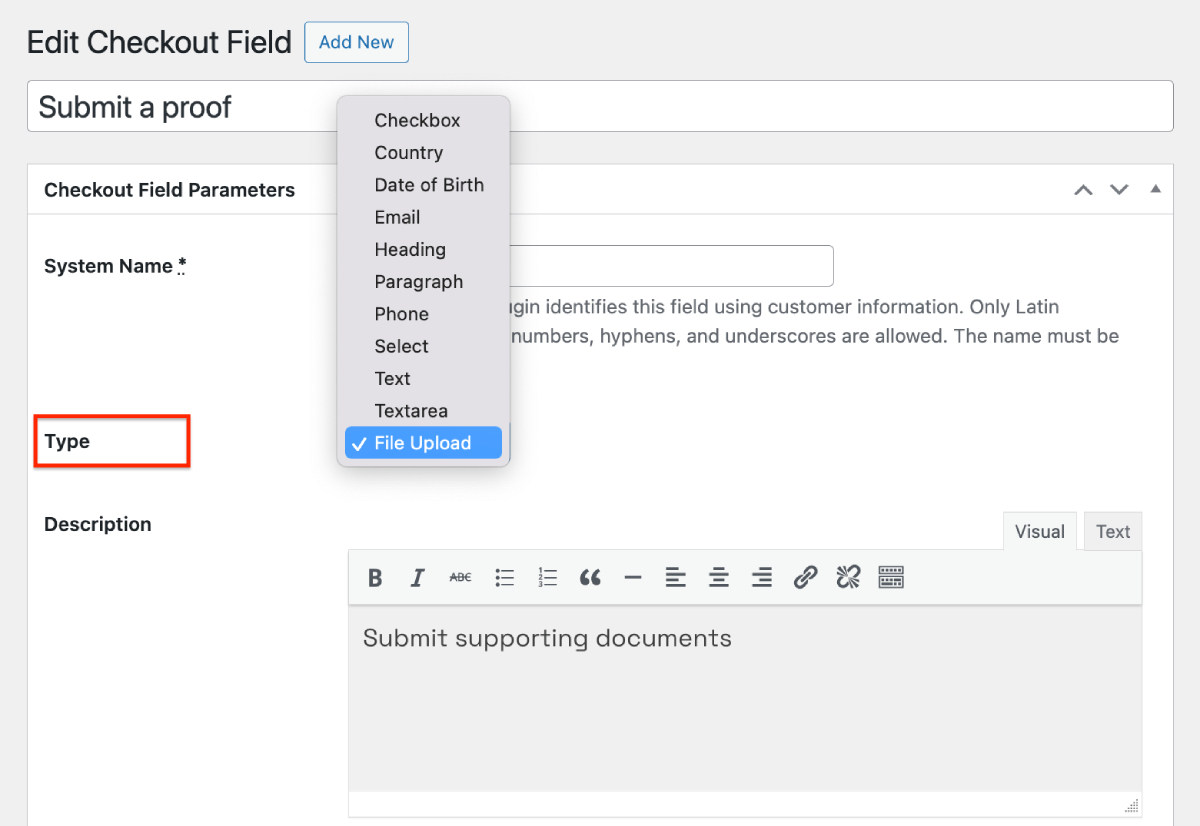
To edit a field, hover you mouse over the chosen one and click ‘Edit’, then select a field type.
General settings for the field include:
- Add a visible field title (optional).
- Add a placeholder (optional).
- Enable or disable a field.
- Mark a field as required/non-required. Warning for making the email field non-required: Email address is usually important for customer references. Also, you can’t disable the email field if you allow customer account registration on your website.
- Add CSS classes (optional).
- Change the order of the fields at checkout by simply dragging and dropping the fields to the needed position.
Extra settings depend on the field type.
Field types
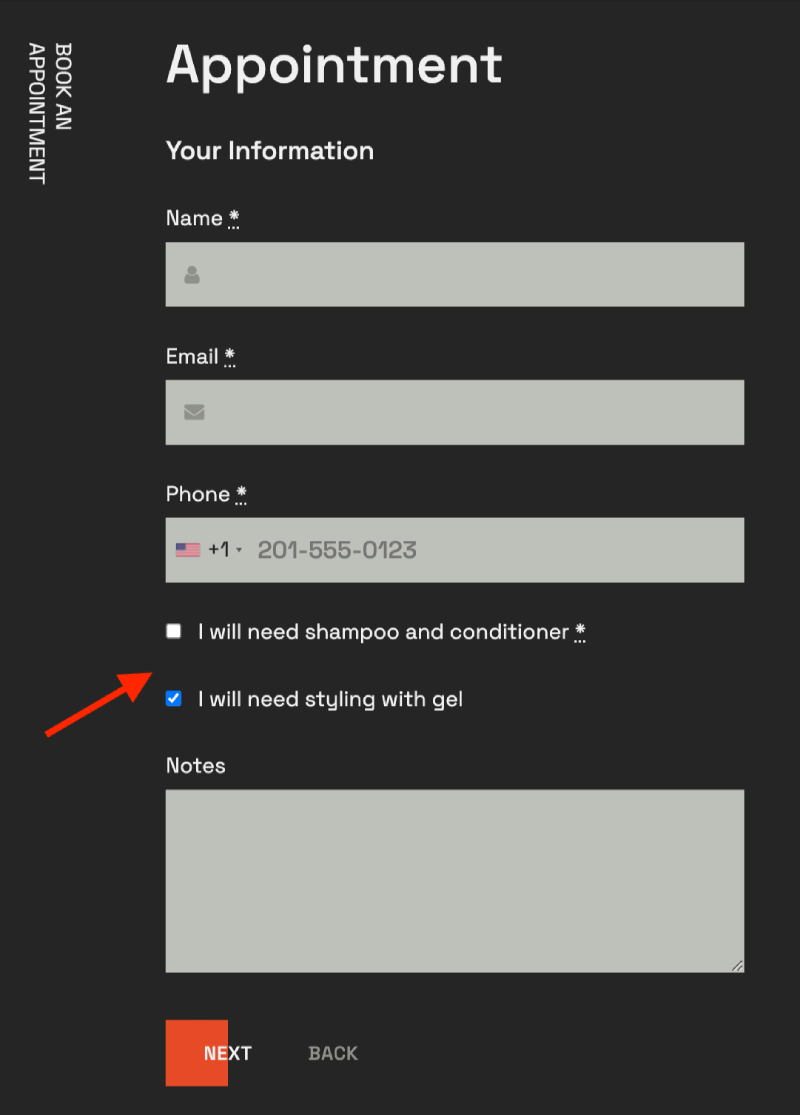
Checkbox field type
A checkbox with each option having a corresponding text field next to it. If you want customers to be able to select multiple options, create a new field for every new option. You can choose to display such fields checked by default.
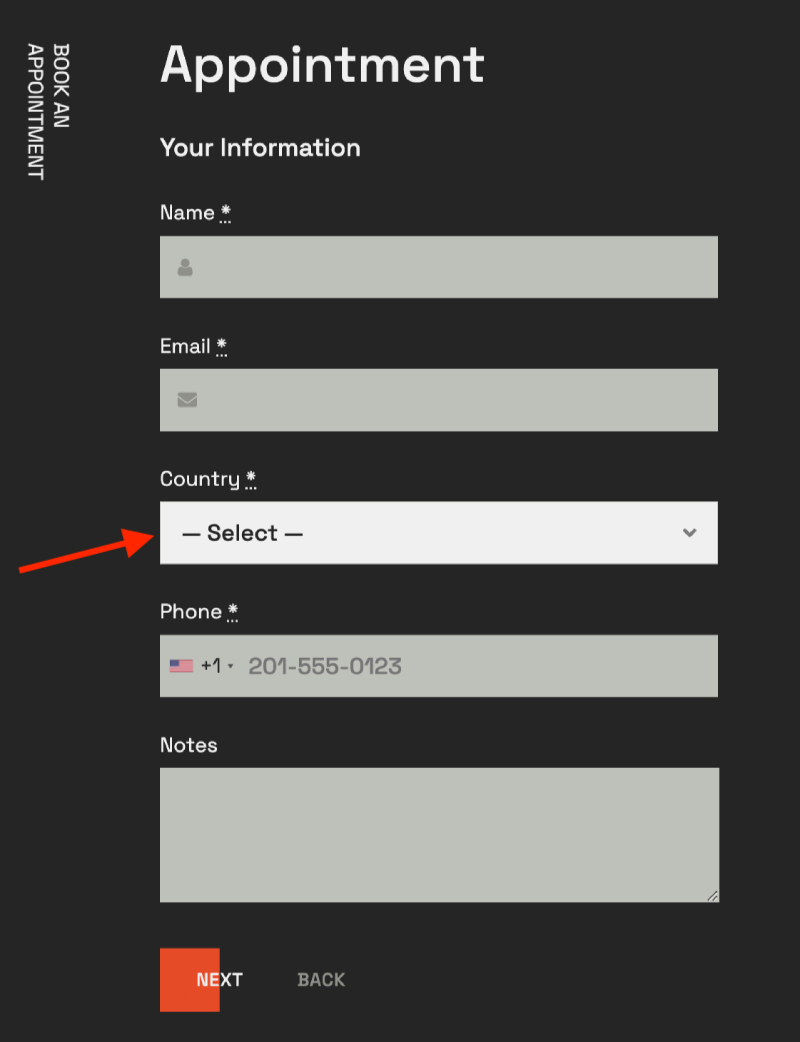
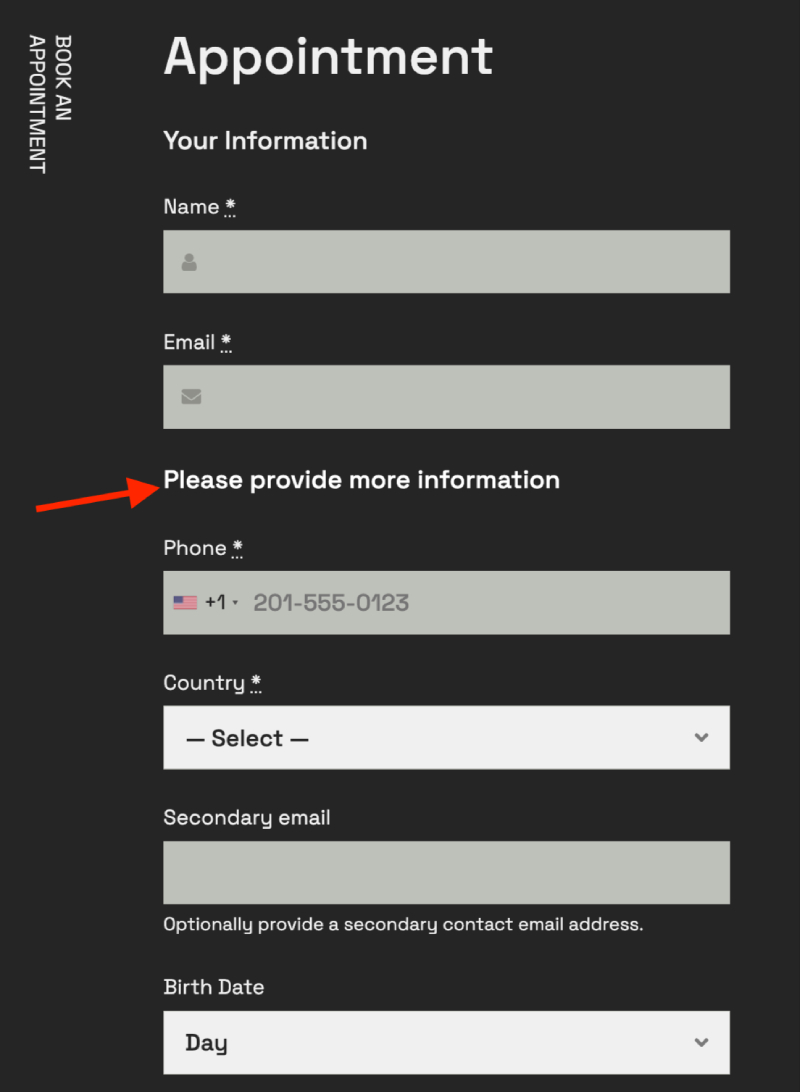
Country field type
A simple country selector, which is a dropdown menu with list of countries.
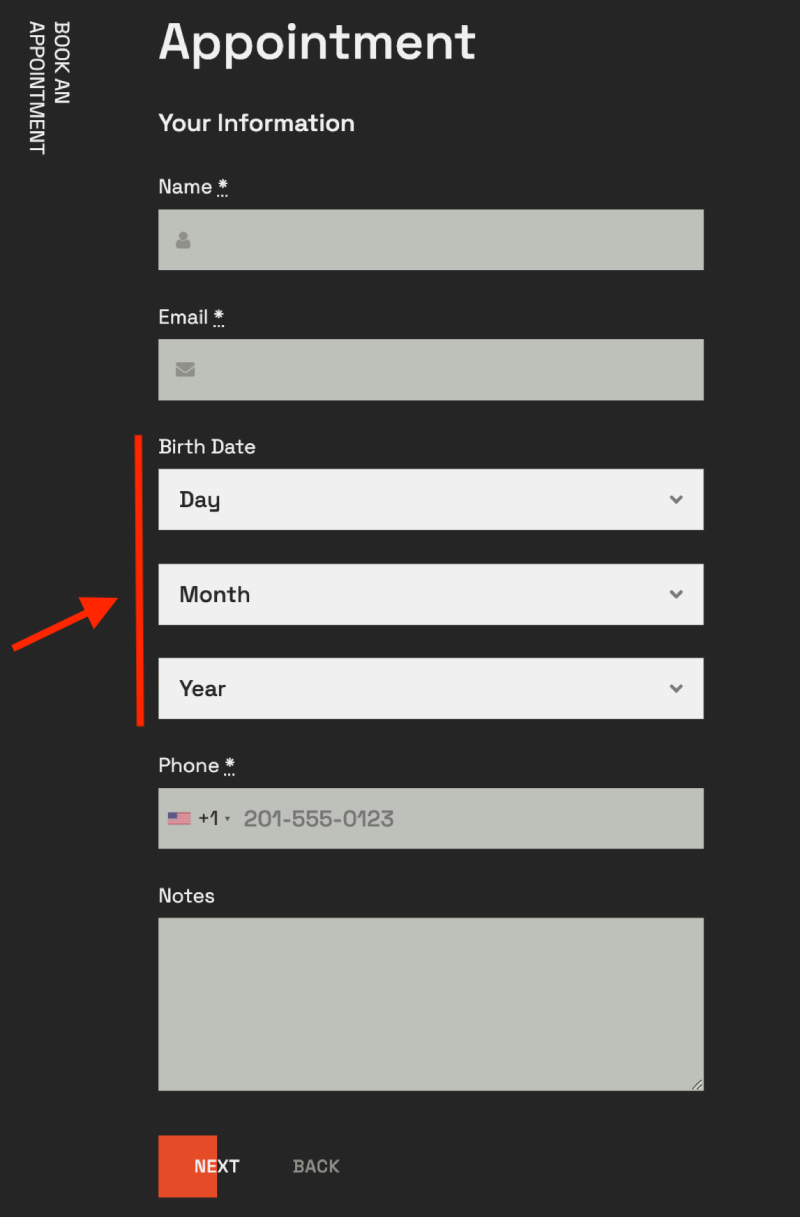
Date of birth field type
A handy three-field selector for choosing a birthdate (date, month, and year).
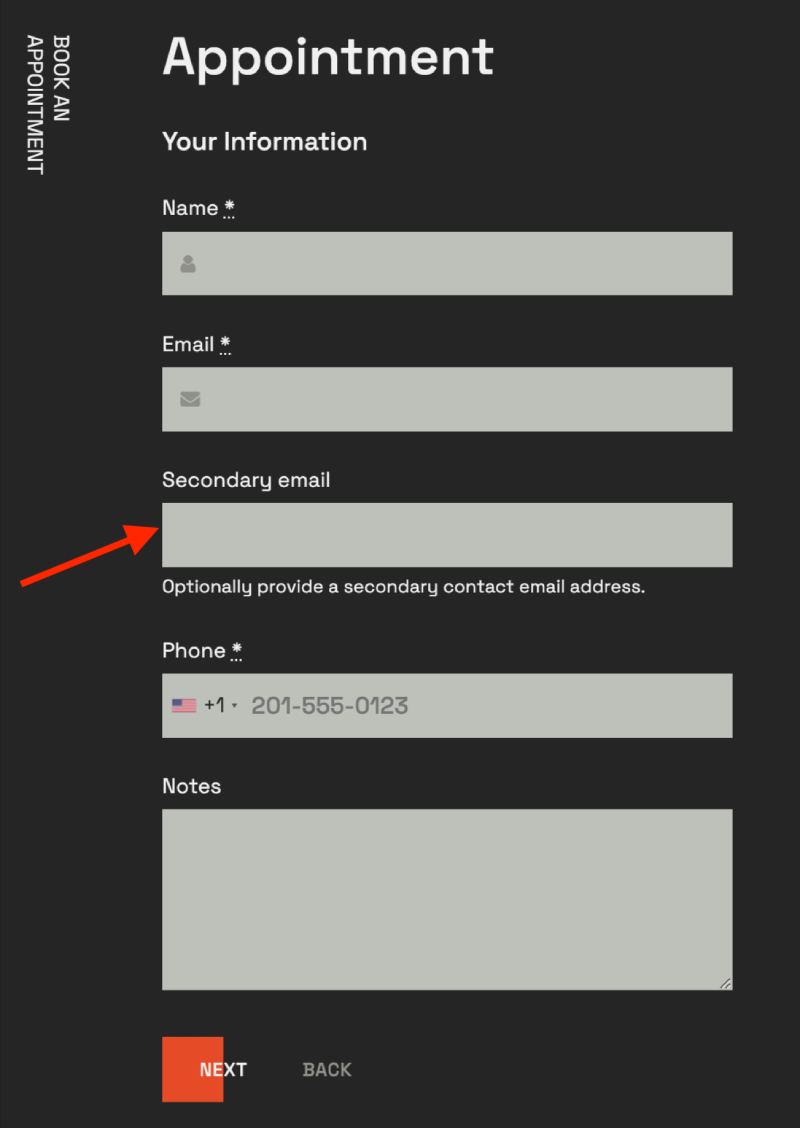
Email field
A standard email field if you need to ask for the secondary email/ or when someone might be booking an appointment for another person.
Heading field type
A heading field that can serve as a section divider for your checkout form.
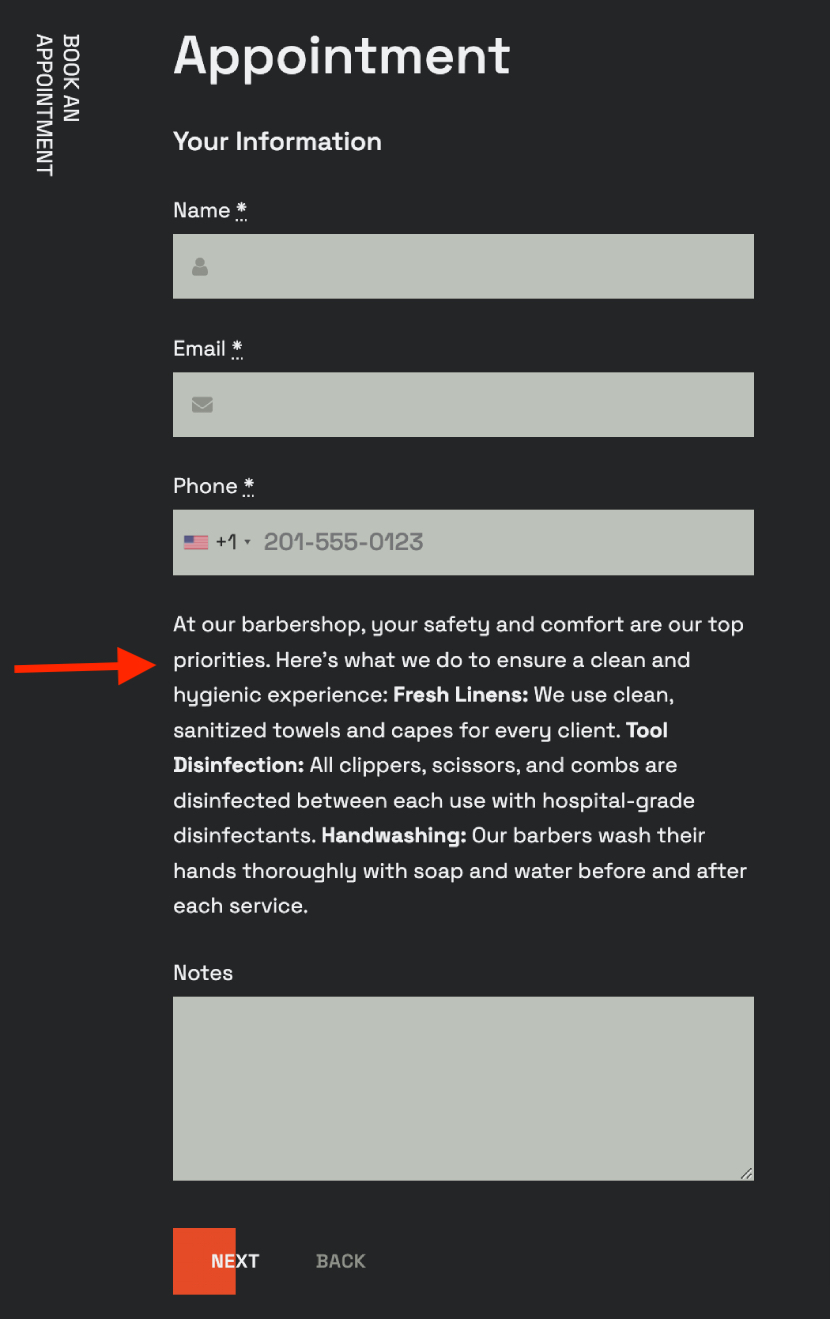
Paragraph field type
This field type if normally used for displaying a longer explanatory text.
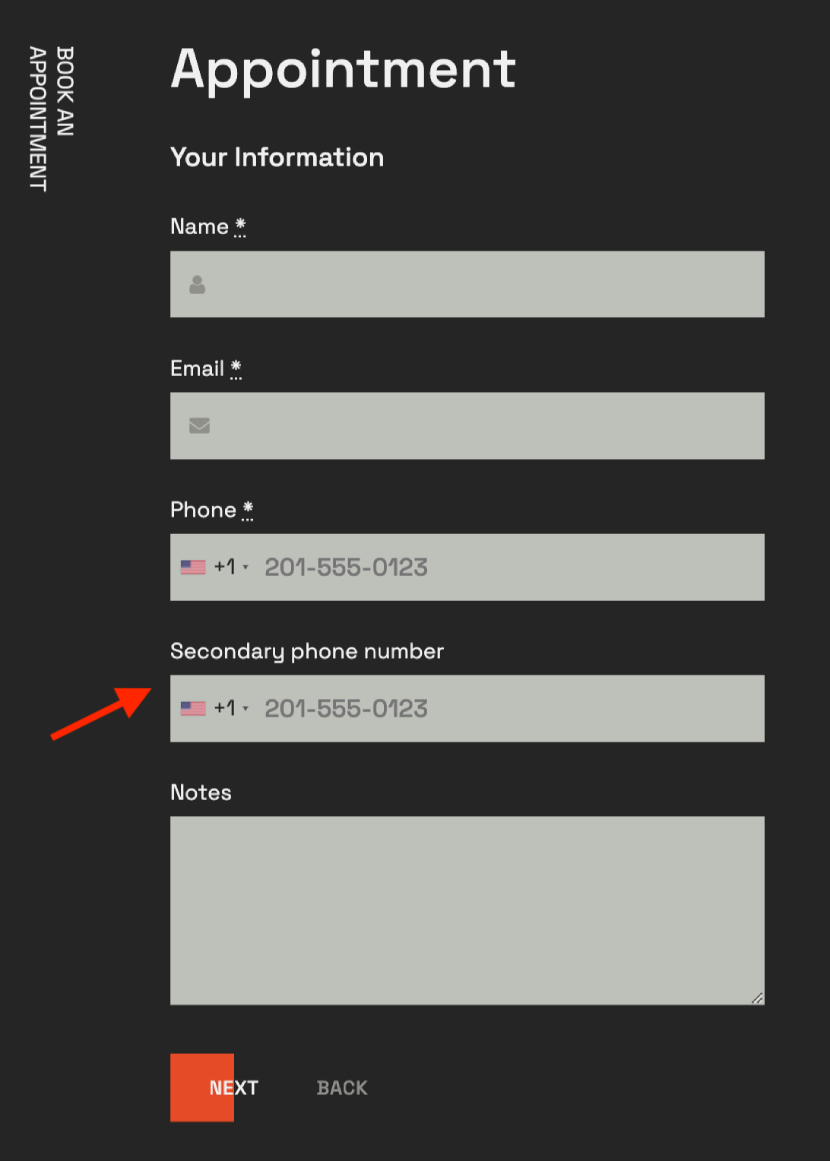
Phone field type
Using this field, you can ask a customer to provide a secondary phone number.
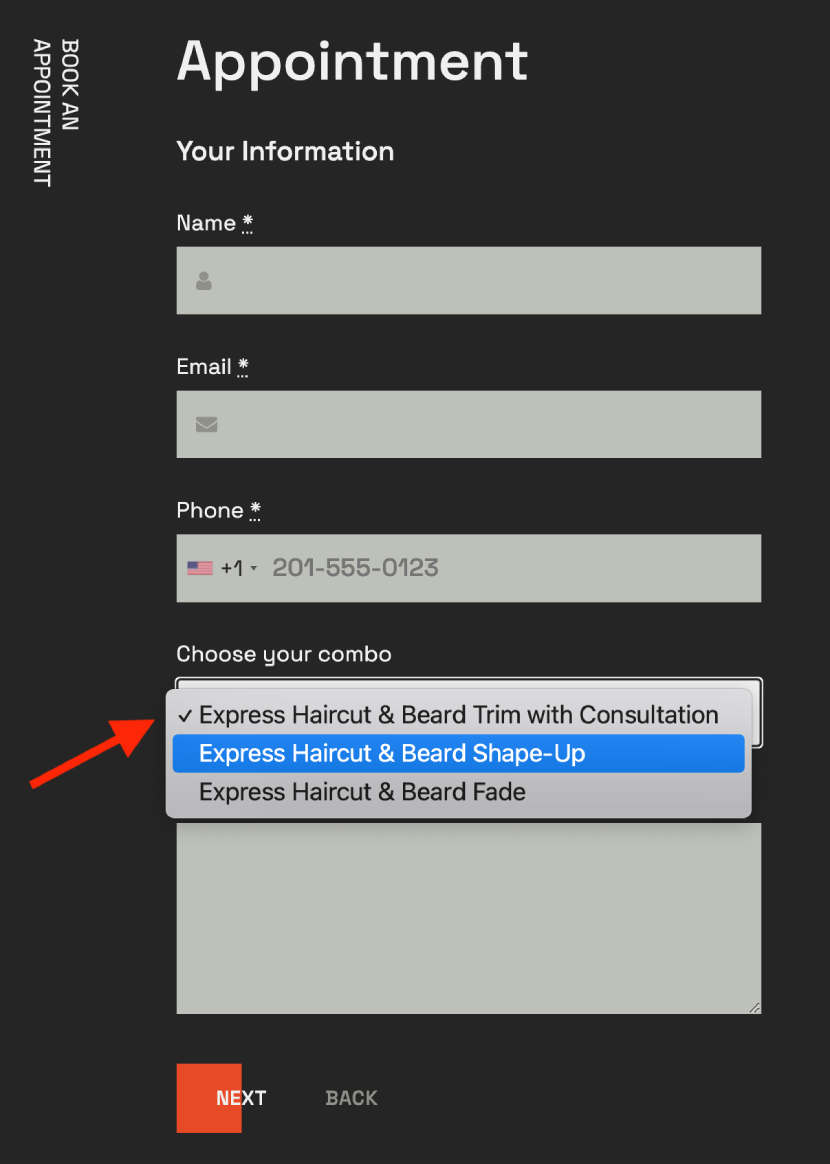
Select field type
Give customers a few options to choose from. All options are created within one field.
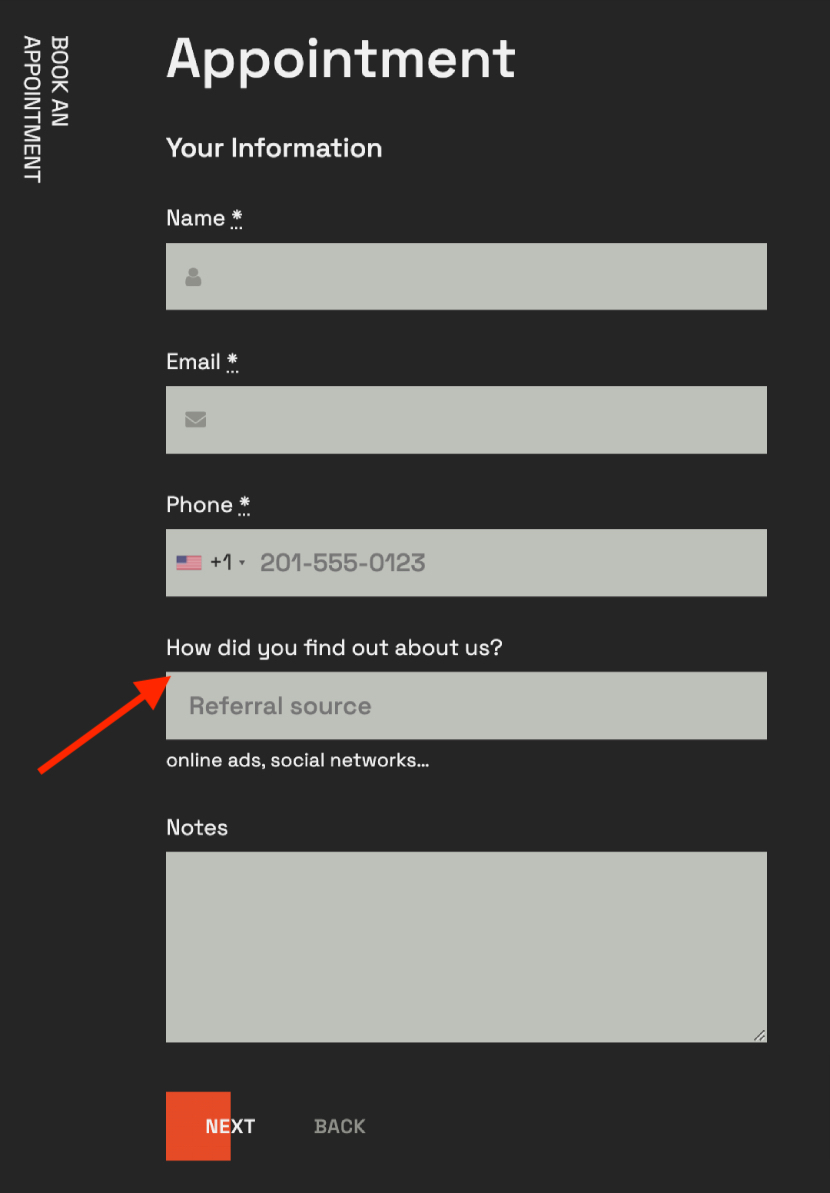
Text field type
Enable a customer to submit a short text via the checkout form.
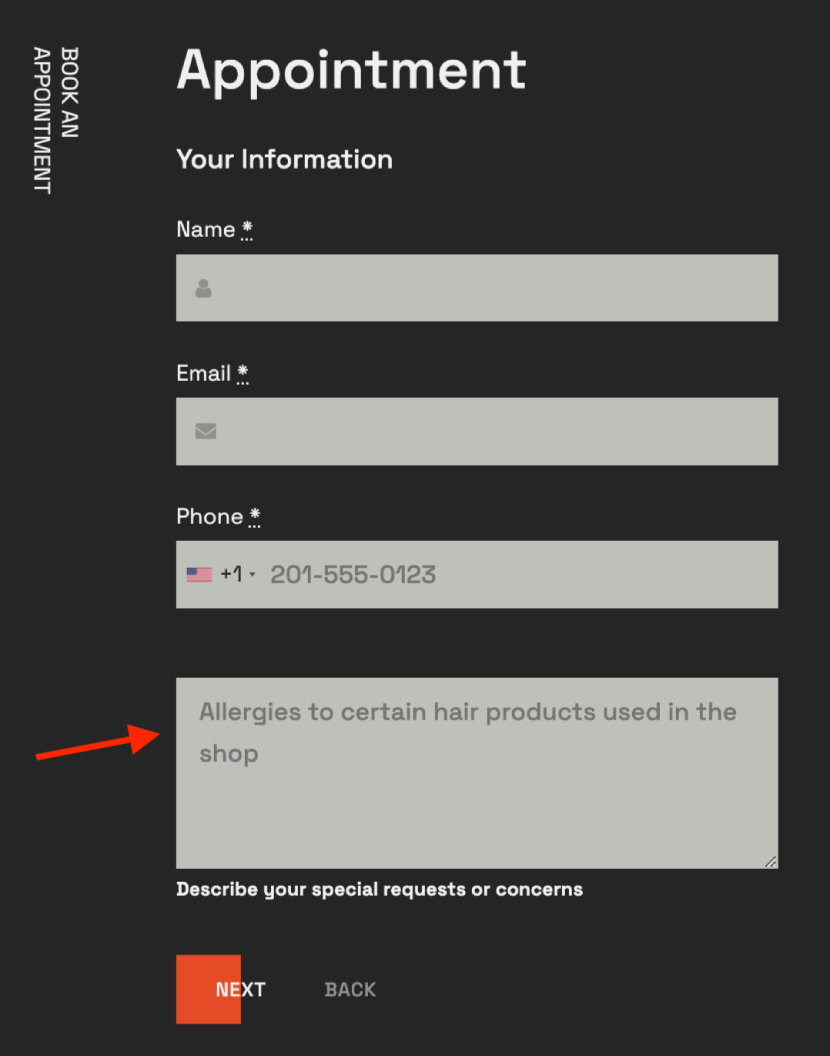
Textarea field type
Allow customers to submit a longer text answer.
File Upload field type
Enable clients to upload files of the specified format and size. View upload files individually for every booking.
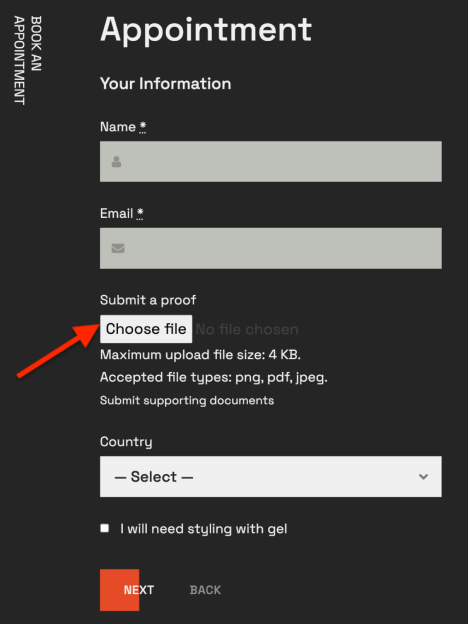
These booking form screenshots are created with the free barbershop WordPress theme.
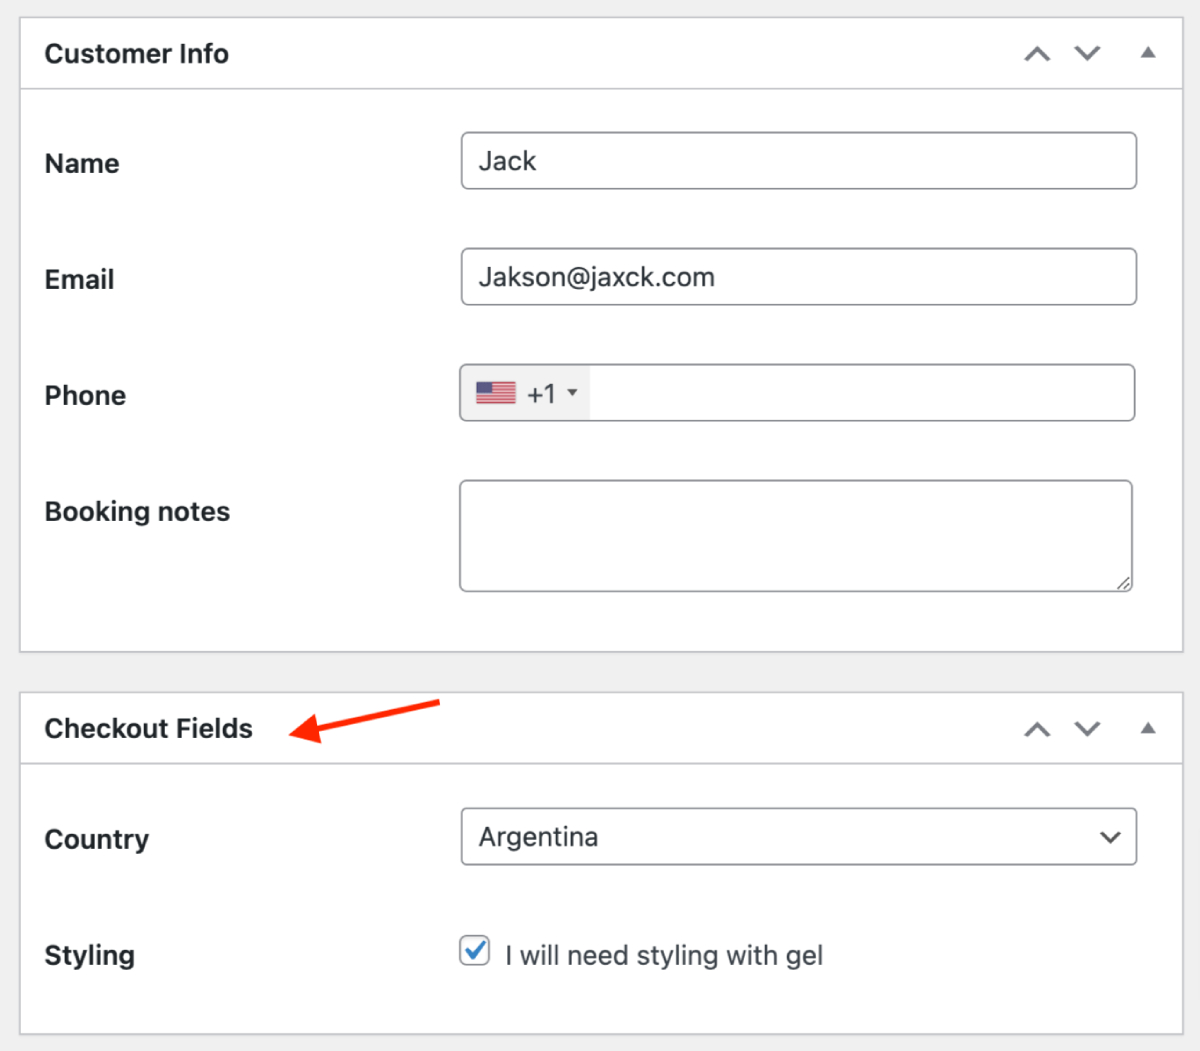
Where data collected through these fields is saved
This data is saved in the Bookings menu. To see or edit it, go to Appointments → Bookings → open the needed booking → scroll down to the “Checkout fields” section. You can also edit this data.
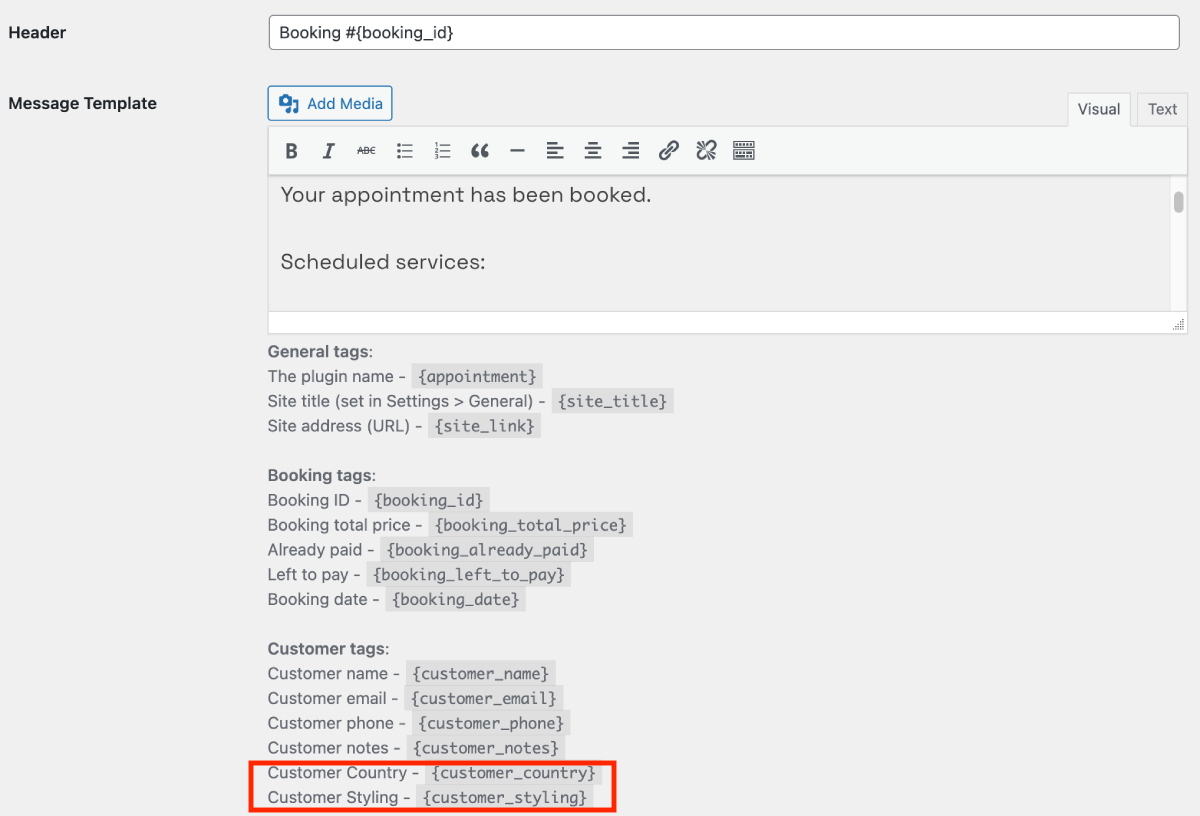
Include this data into automated emails
If you want to include custom checkout field data in your automated customer emails, follow these steps:
- Navigate to the desired email template: Go to Appointments > Settings > Emails and select the specific customer email template you want to modify.
- Insert data tags: Look for the available tags listed below the template. These tags correspond to the custom checkout fields you’ve enabled in your form via the Checkout Fields menu.
- Copy and paste tags: Simply copy the relevant tags and paste them into your email content at the desired location.
FAQ
Can I change the order of the fields?
Can I make a field mandatory?
Will my form work if I make all fields non-required?
Will data collected through custom checkout fields be exported to CSV?