Table of Contents
Default customization capabilities
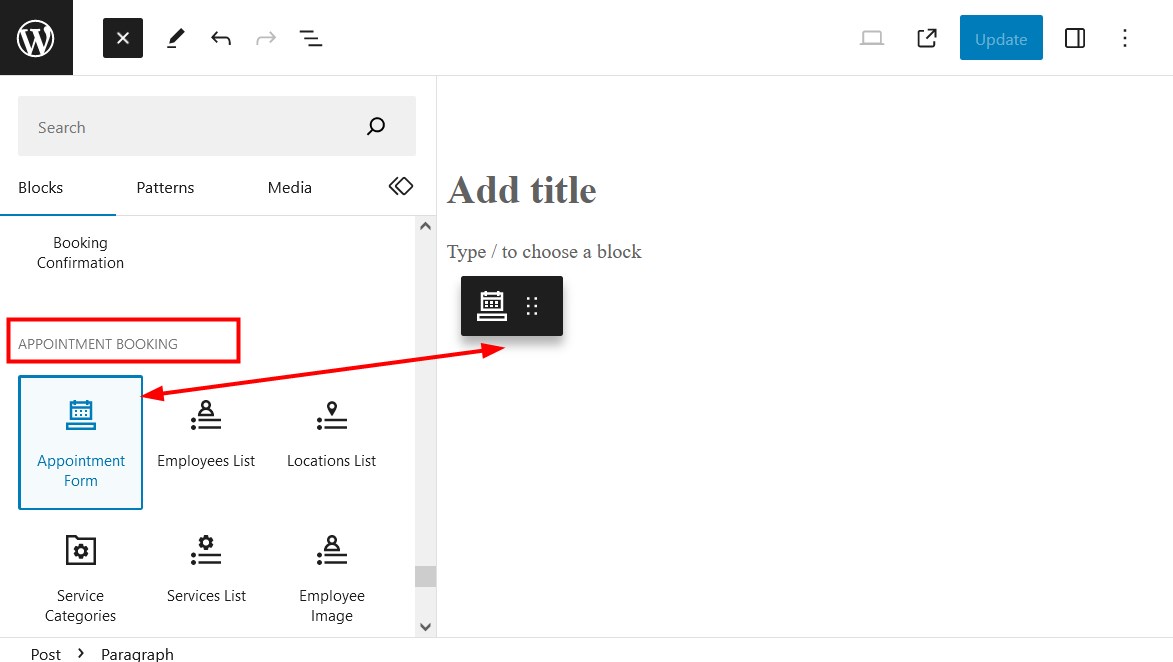
You can customize and add the appointment booking form of the MotoPress Appointment Booking WordPress plugin in a few ways:
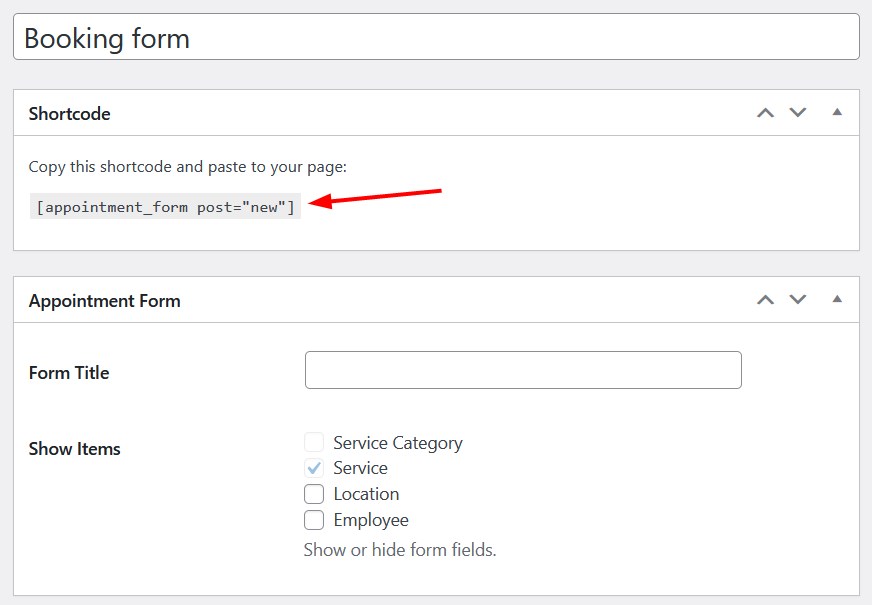
- With a shortcode: Appointments > Shortcodes > Add new > Appointment form.
- Visually in the WordPress block editor/Elementor/Divi. There is a dedicated ‘Appointment form’ content element.
Using either method, you can:
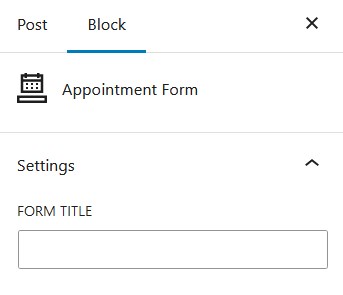
- customize the form title.
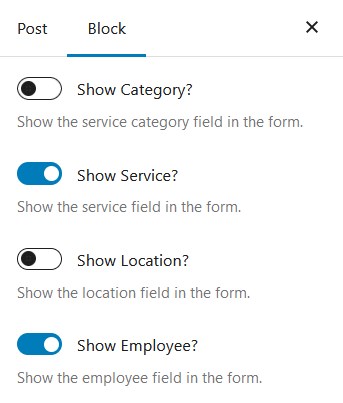
- choose which fields to display and which to hide.
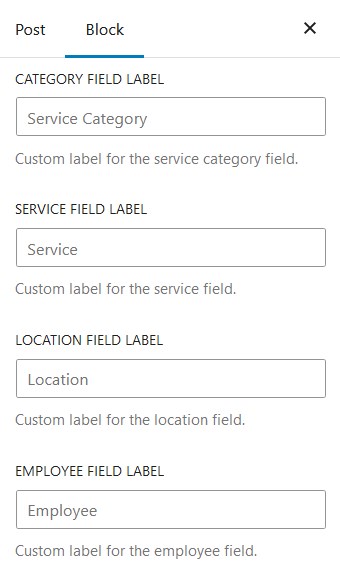
- customize booking form field labels.
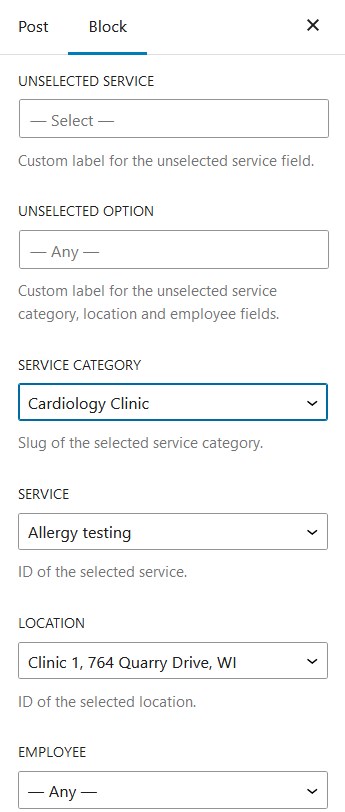
- pre-select values for fields if you want to enable booking of individual services/locations/employees.
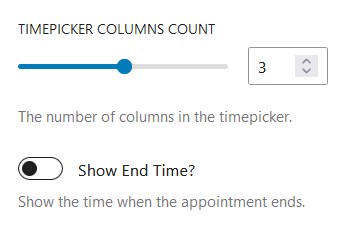
- select a preferable number of columns in the timepicker.
- show the start-only or start and end time of the appointment.

How it works:
- If enabled, clients see an “Add to Calendar” button on the final booking confirmation page.
- Clicking the button opens their preferred calendar app or downloads an iCal file.
- Clients can add the booking with customizable details and notifications.
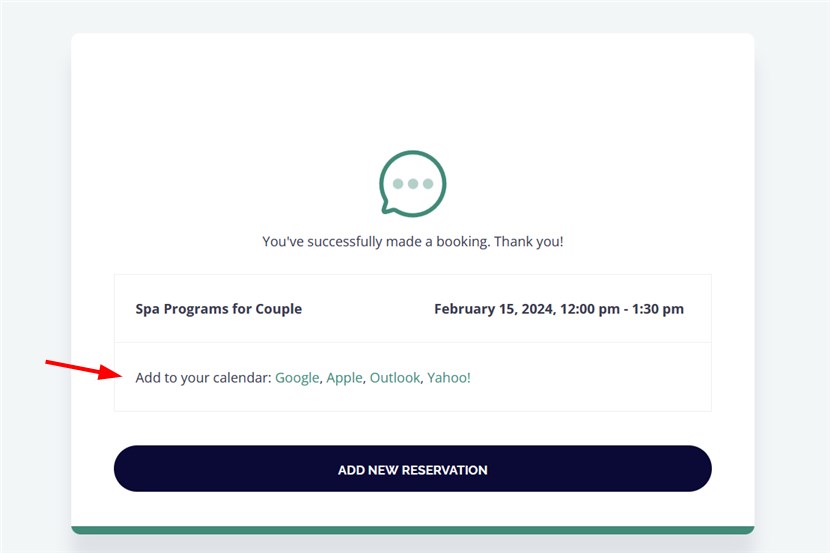
Supported calendars:
- Google Calendar
- Yahoo Calendar
- Apple Calendar
- Outlook Calendar
Additional details:
- Date format and time zone are automatically adjusted based on client settings.
- Clients can add multiple appointments individually.
Booking for only specific service, location or employee
If you want to hide all the fields and enable booking for a specific service, location or employee, it’s necessary to pre-select a value for them in the booking form block settings.
For example, here is form with all filters turned off, and a specific service selected:
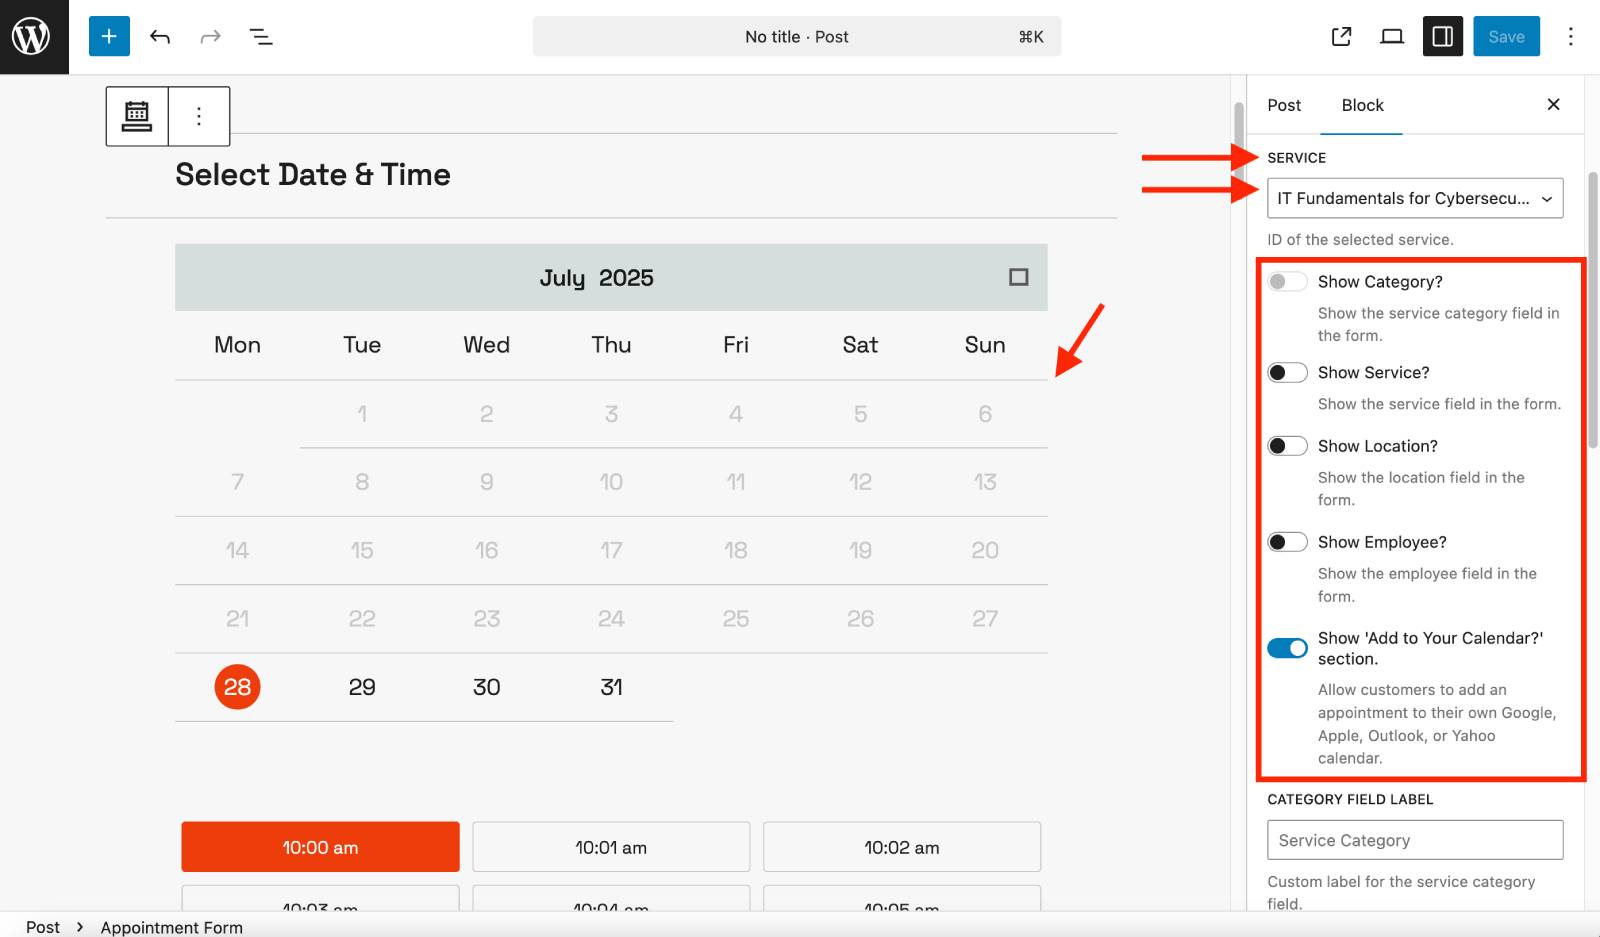
This way you will enable customers to start a booking process from the availability calendar for that specific service, without a need to apply search filters in the booking form.
If you don’t pre-select locations and employees, the first ones will be chosen automatically, which means for more tailored booking experiences, it’s recommended to select all the values.
For example, you might want to display the service field available only in a specific location – then you can choose the location but don’t even show the location field in the booking widget.
To customize the booking form in the block editor, simply drag the widget to the page, configure your preferences in the block settings and save the page.
You can apply the same changes in the shortcode editing interface. Once you are done with your edits, save them and the shortcode will be automatically generated.
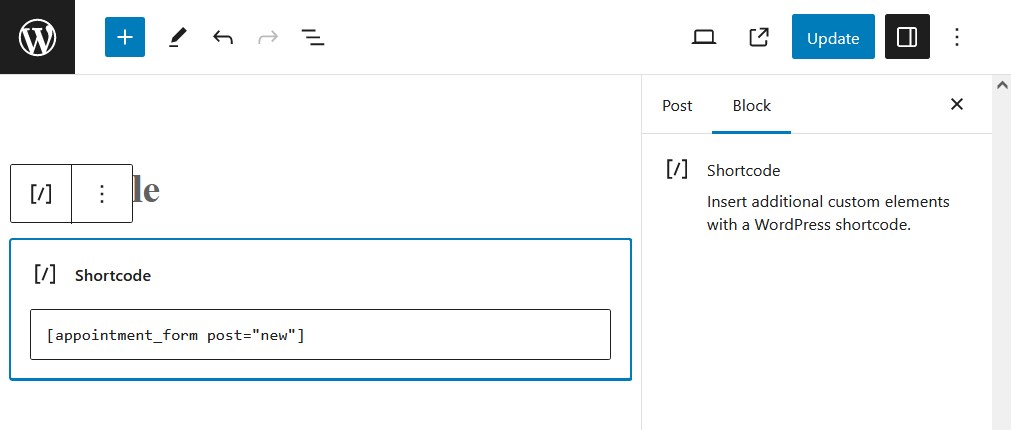
Now you can paste this shortcode to any page using the default Shortcode block for the block editor or any other shortcode-specific widget by third-party builders like Elementor.
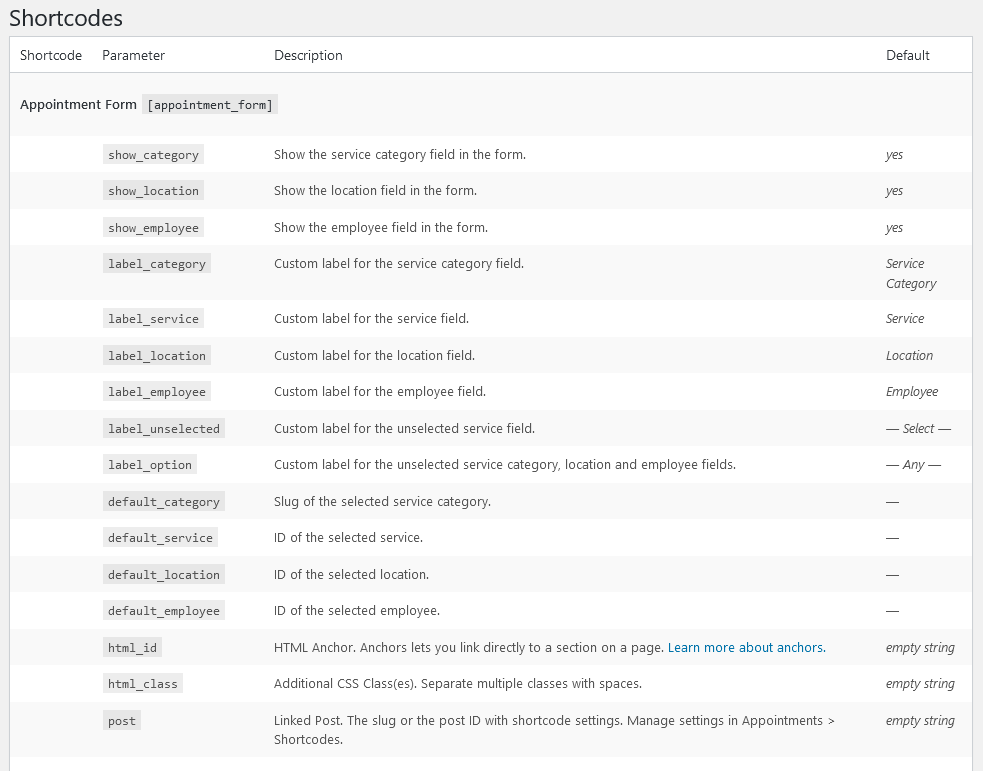
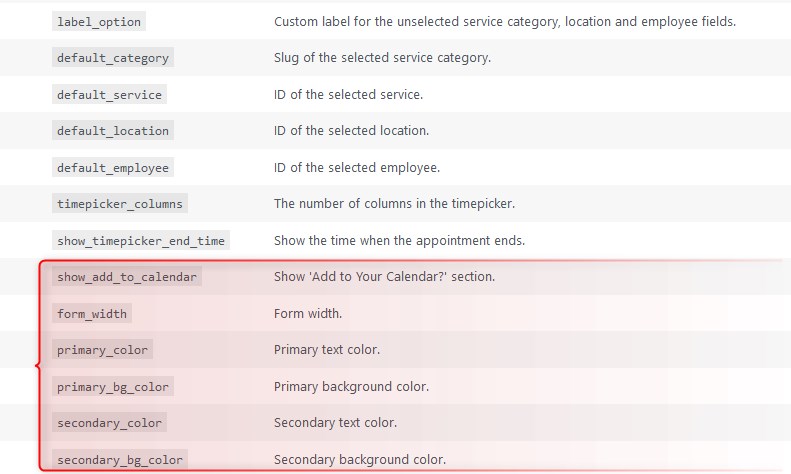
Note: changes you set in the shortcode general apply globally to all forms; if you use the booking form on different pages and want to make different changes to individual forms, you need to customize chosen shortcodes only using the needed shortcode parameters from the Help menu:
The shortcode will run the one-page booking wizard for your clients, where they’ll be offered to complete several steps to submit a booking.
Let’s take a class booking example from our Edme appointment booking WP theme to see the process your clients will need to go through.
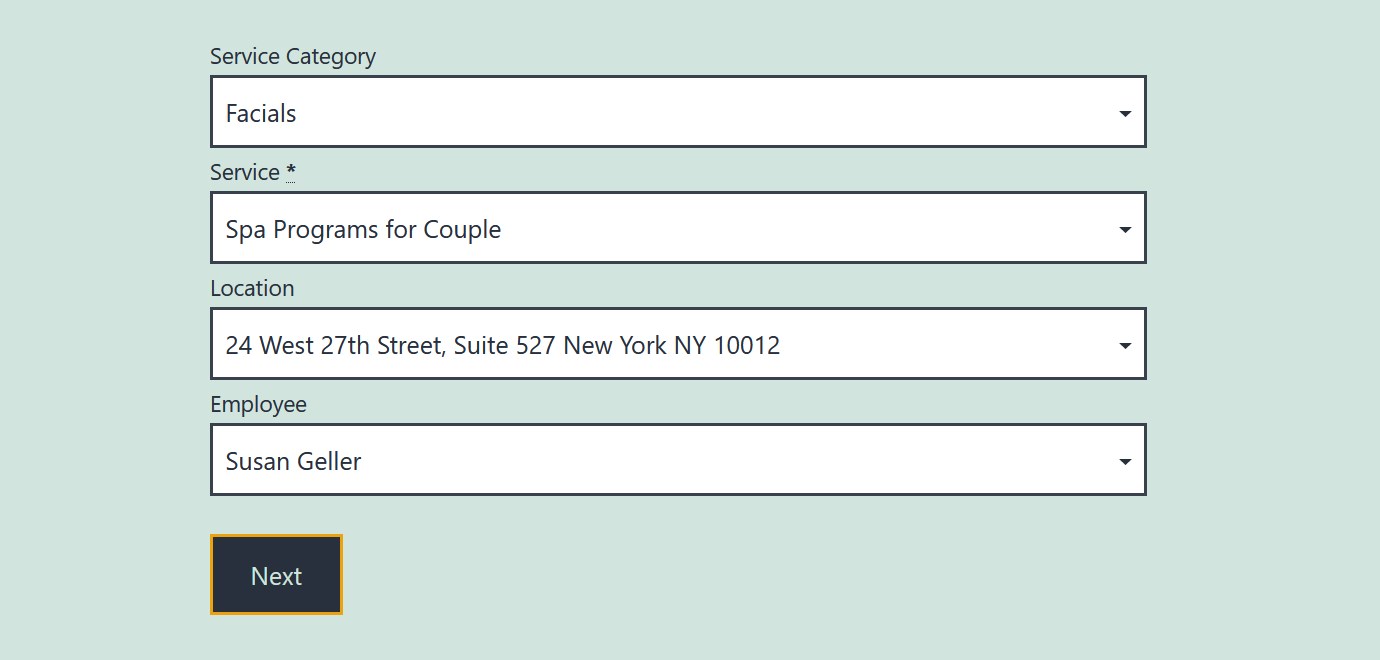
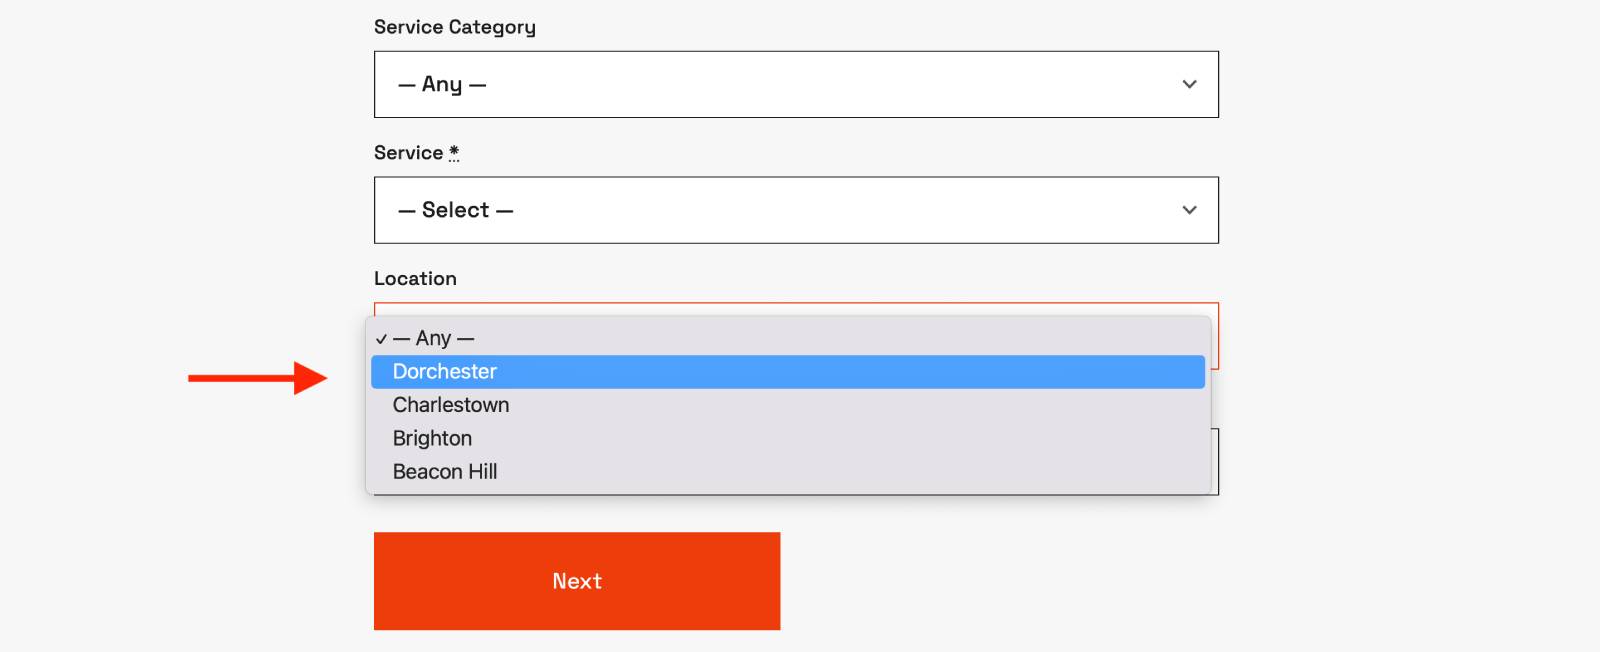
Step 1. Choose a service category, service, location, and an employee (or optionally go with ‘any’).
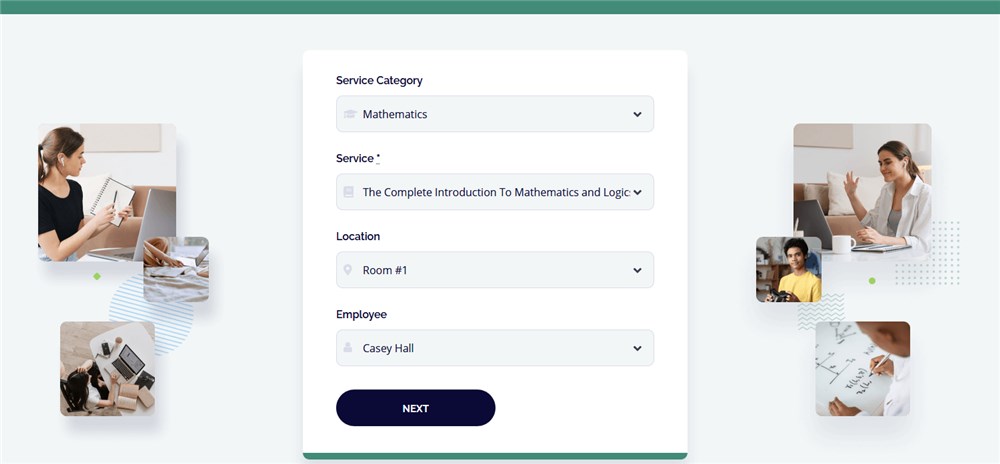
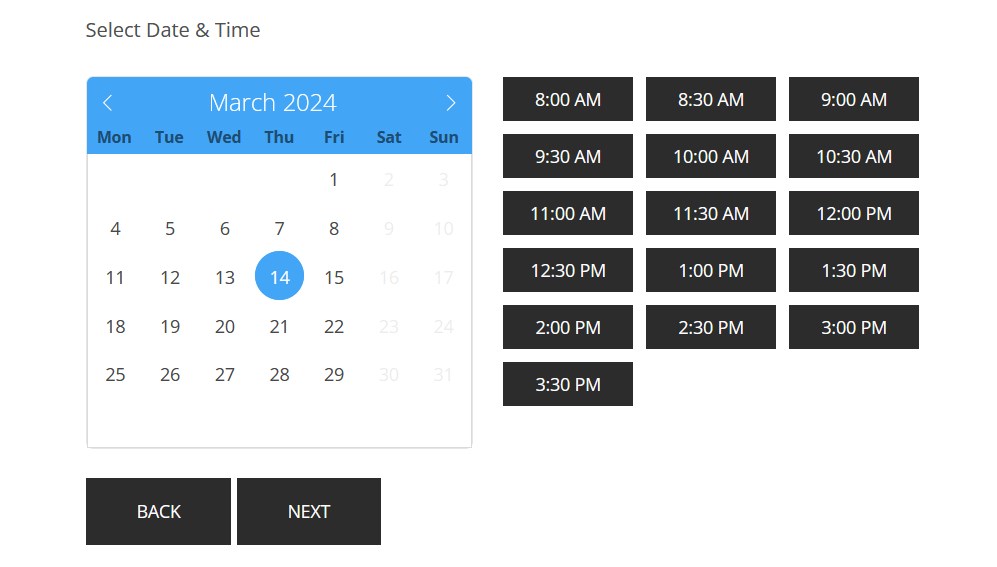
Step 2. Select the date and time and choose a free slot from available ones. Note: since plugin version 1.4.0, clients can add several services to cart during one submission process and choose the number of people they are booking an appointment for.
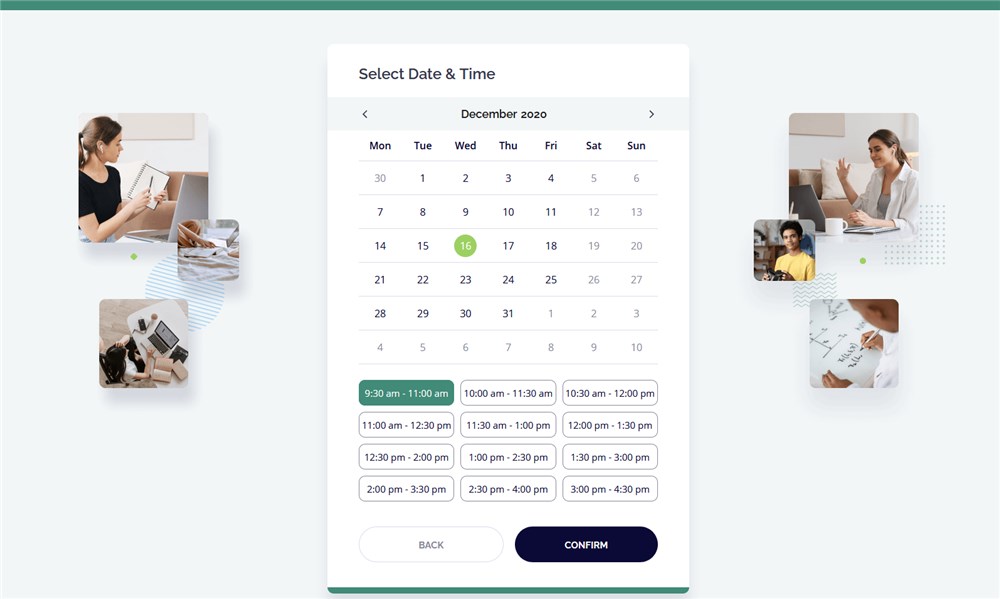
Step 3. Clients provide personal details (an email address, name, and phone number). Here might be payment gateways shown if you turned them on.
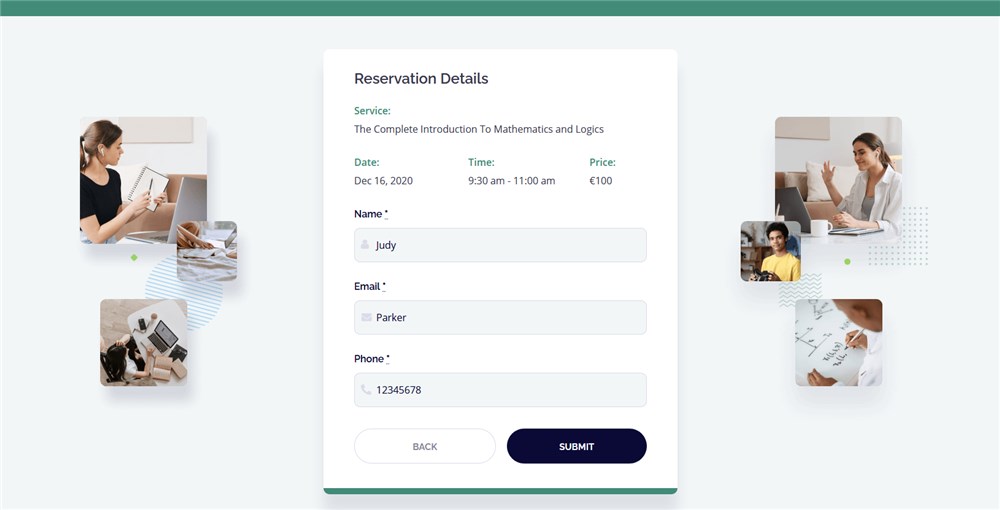
Note: Your booking wizard might look different depending on your settings.
If you turn off the all the fields and pre-select the values for them, the booking process starts with the availability calendar:
Customize the booking form styling (colors, calendar themes)
Default Form Styles
Access ‘Default Form Styles’ global setting for the booking form via Appointments > Settings > Misc tab.
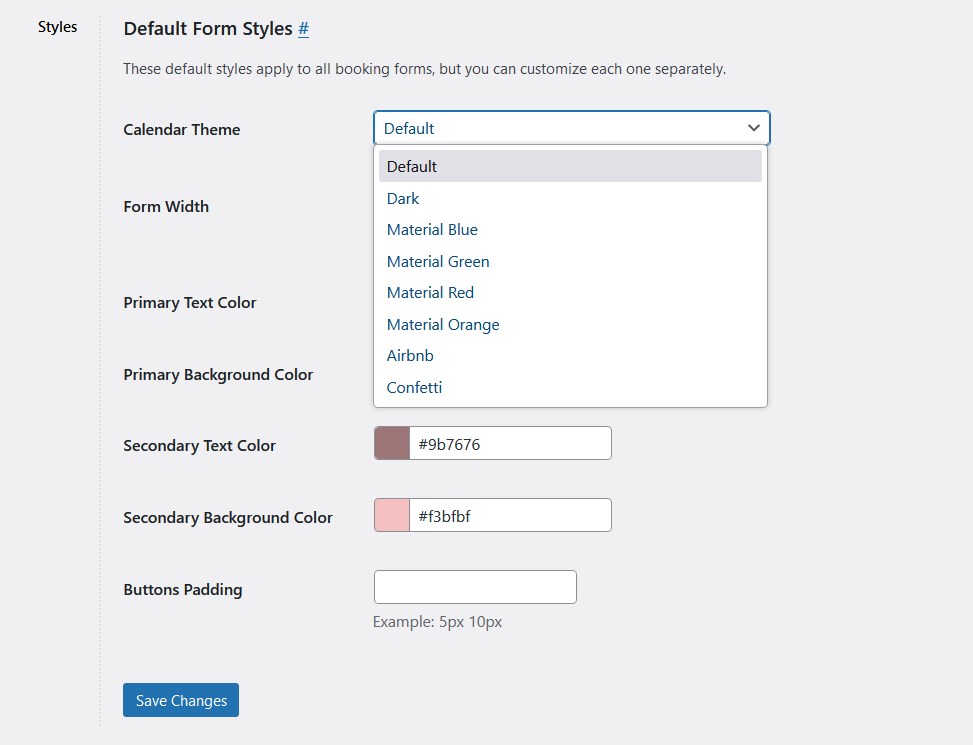 These settings apply universally to all forms, regardless of how they were integrated into your website – whether through Elementor, the block editor, Divi, or shortcodes.
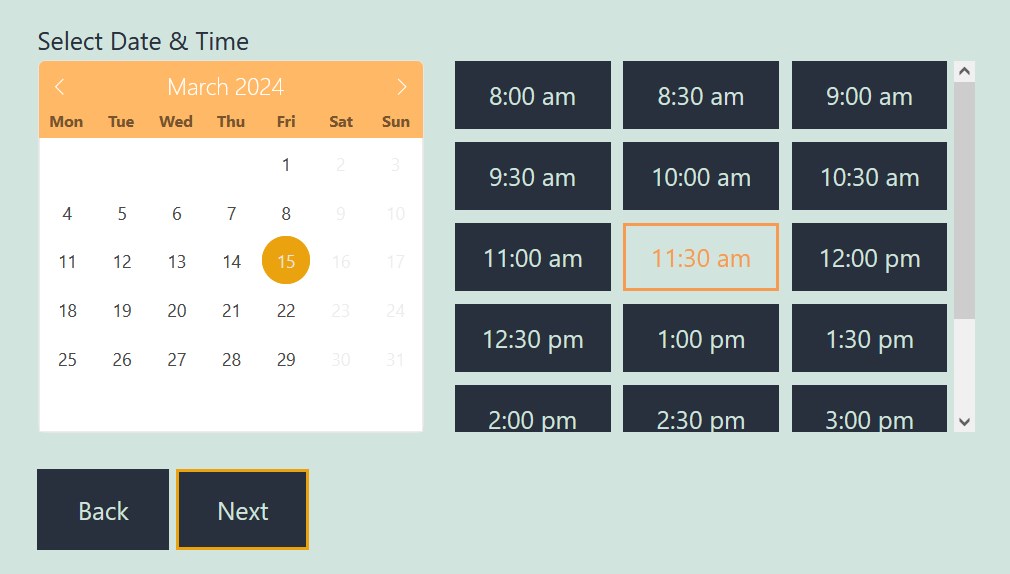
Calendar Theme Styles
These styles feature different color schemes, including Dark, Material Blue (example below), Material Green, Material Red, Material Orange, Airbnb, and Confetti. They are designed to complement your website’s design and can be applied to calendars with date pickers.
Form Width
Adjust the width of the booking form. By default, the form width is set to 50%, but you can customize it to suit your website’s layout and page width. Below is an example of the 100% form width.
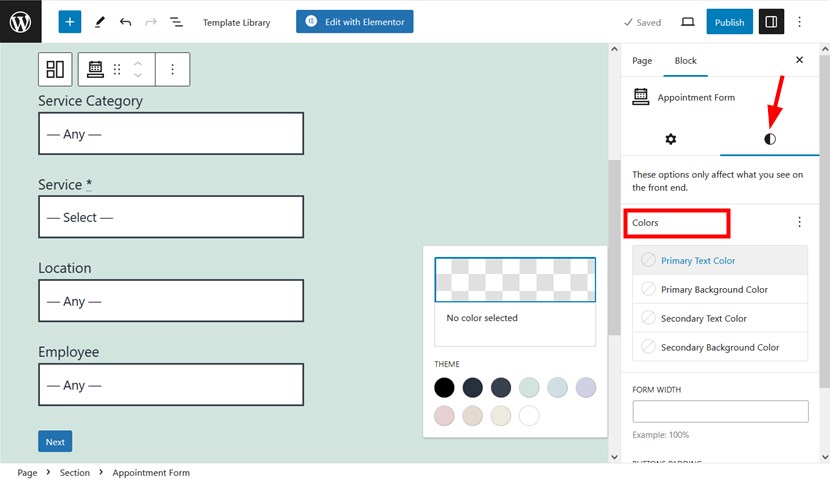
Colors
Customize the colors of various elements within the booking form:
- Primary Text Color & Primary Background Color: Apply to Next and Add More buttons, as well as the active state of dates in the calendar and time slots.
- Secondary Text Color & Secondary Background Color: Apply to the Back button and the inactive state of dates in the calendar and time slots.
Button Paddings
Adjust button padding to control space between the button’s edge and content. Increasing padding adds space, while decreasing reduces it.
Customize individual forms
These settings apply globally to all appointment scheduling forms created with the Appointment Booking plugin. However, you can override these settings individually for specific forms.
To customize a specific appointment form:
- For the block editor: Find the Styles tab in the Appointment Form widget.
- For Elementor: Find the Styles tab in the Appointment Form widget.
- For Divi: Go to the Content tab > Appointment Form Styles section in the Appointment form module.
- For WordPress widgets: Use the Styles tab for customization.
- If you use shortcodes: Explore new parameters for style customization via Appointments > Help > Appointment form. Alternatively, access the Shortcodes builder via Appointments > Shortcodes > select Appointment form to visually build a shortcode.
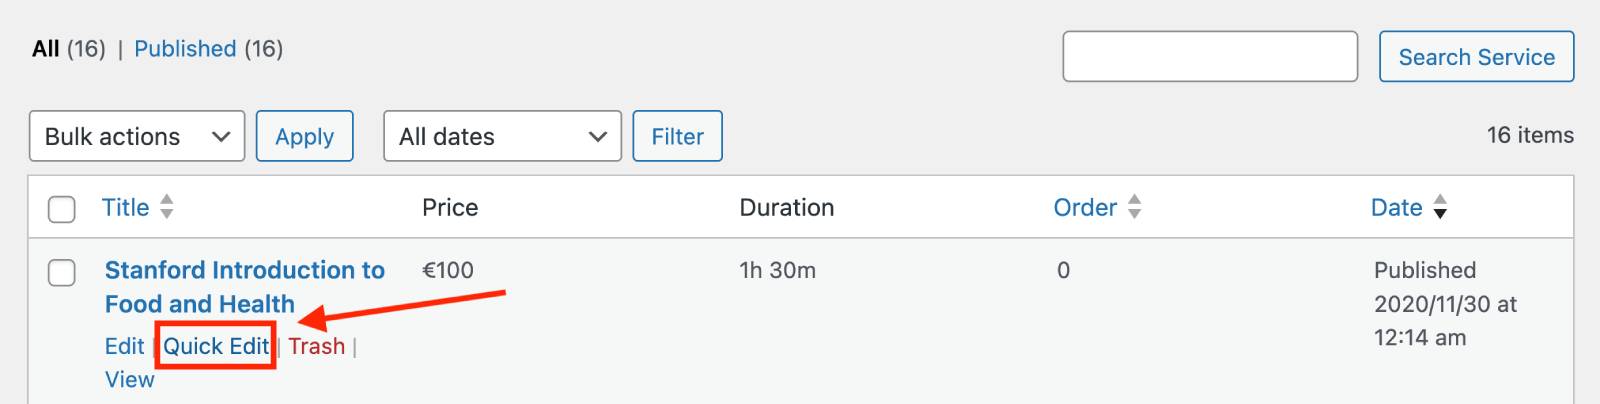
How to order services, employees, locations, and categories in the drop-down
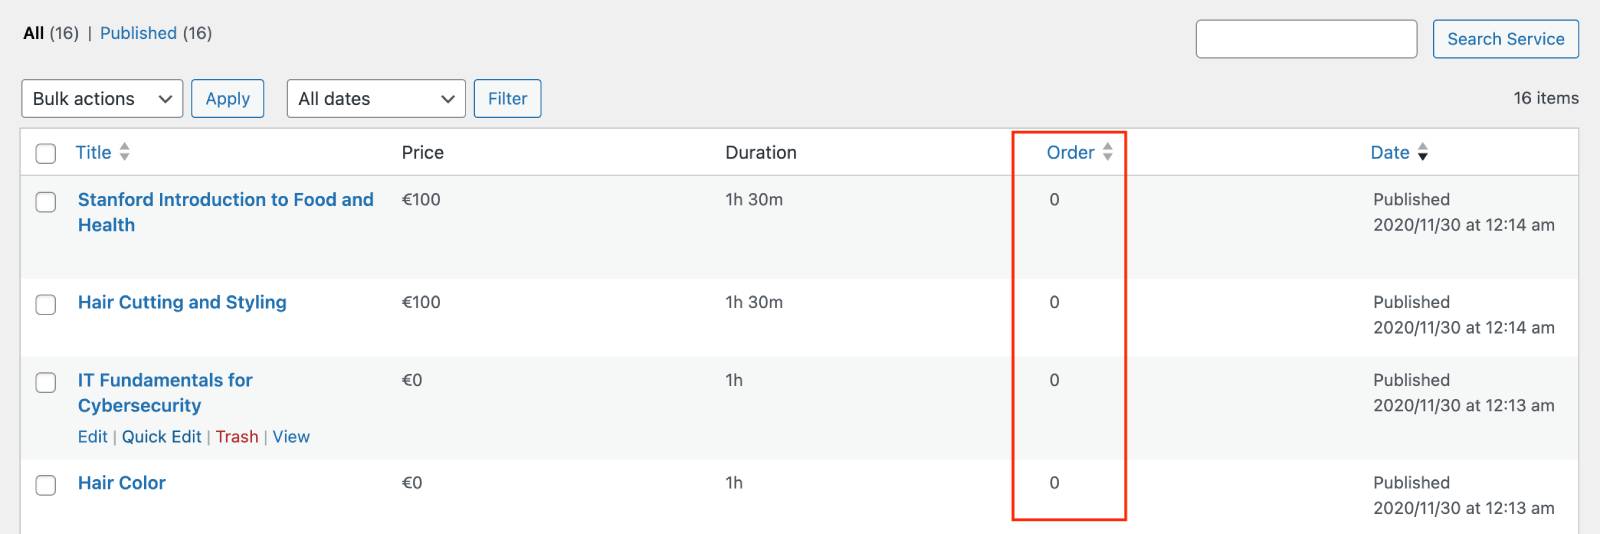
If you need to adjust the order of services, employees, locations, or categories used as filters in your booking form, use the ‘Order’ field in each relevant menu – Services, Employees, Categories, or Locations.
How to Set the Order
To control how items appear in the dropdown, simply assign a number to each item based on the desired position:
- Go to the needed menu (Services, Employees, Locations, or Categories).
- Hover over the item you want to reorder.
- Click ‘Quick Edit’.
- Enter a number in the ‘Order’ field. For example, set the order to 1 for the item you want to appear first.
- Click ‘Update’.

Important Notes: Once you start using the ordering feature, you need to assign an order value to all items within that menu (Services, Employees, Categories, or Locations) for the sorting to work correctly.
If you have many items but only want to control the position of a few, you can use negative numbers to move specific items to the top of the list (e.g., use -2 to display an item first, -1 to display it second, while the rest remain in their default order).
How to make any button or link open your sidebar
To open a sidebar by the button or link on your website, you need to add either the ID sidebar-toggle or the CSS class sidebar-toggle-button to any link, button, or menu item of your website.