How to Use Divi Booking Plugin for Appointment Scheduling WordPress Website
Table of Contents
Using the Divi theme? Building an appointment scheduling WordPress website in Divi takes two things: booking functionality and a niche business design you can access in Divi Cloud.
As for the latter, you probably already have one!
If you are just starting out, however, you’ll be quick to discover such a library when you start familiarizing yourself with Divi. Beauty salons, hairdressing services, consultants and therapists – there are astonishing starter designs for everyone.

As for the booking functionality, which actually deals with appointment scheduling, you can integrate it with Divi via:
- Contact forms: get an appointment request just like a normal website inquiry.
- Booking plugins: a native WordPress way to integrate automated bookings.
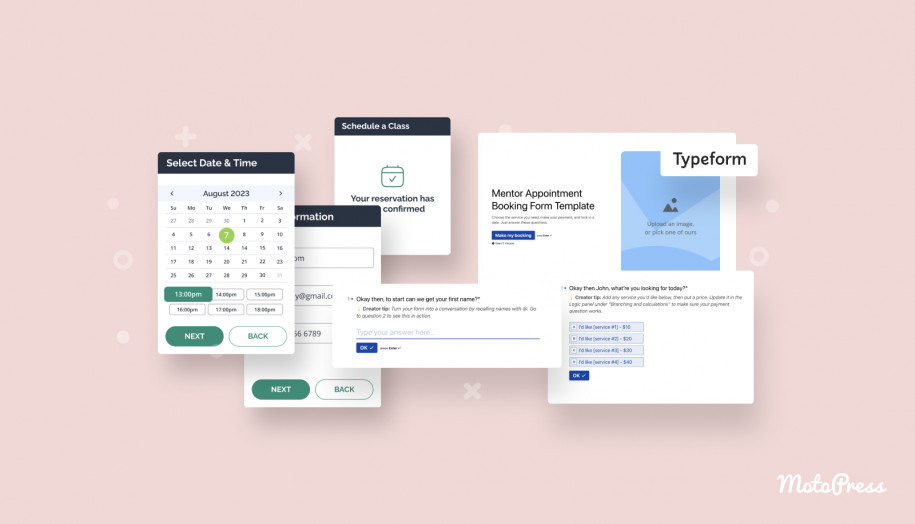
- Third-party booking software: a non-native to WordPress method of integrating appointment scheduling options.
In this post, we’re talking about the second approach, which offers a wealth of benefits for your service website, including affordability, automation, and scalability.
We’ll use the MotoPress Appointment Booking plugin, the purpose-made appointment scheduling solution with payment options, which smoothly integrates with your Divi design.
What exactly can you do with this Divi booking plugin? Just a few key benefits are below:
- Add a booking calendar with available and non-available days to your website.
- Enable customers to search for the required service and book it instantly, optionally paying for it online.
- Offer unlimited services and accept unlimited bookings.
- Manage your reservations and clients under one roof within the plugin.
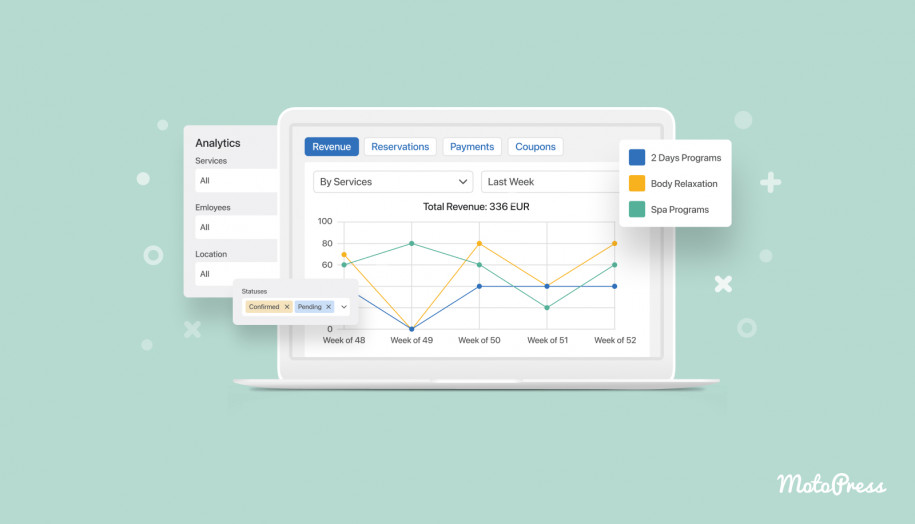
- Measure the performance of your site bookings using the pre-built analytics dashboard or even connect your Google Analytics 4.
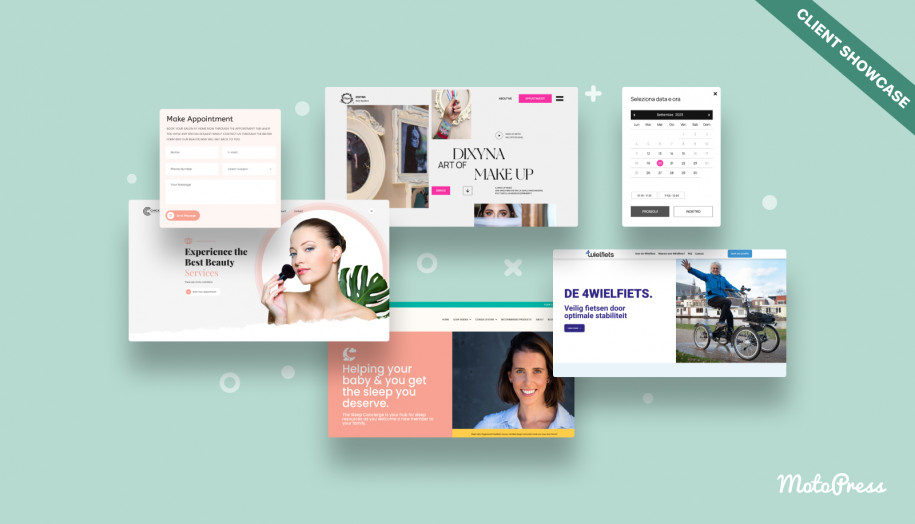
See client website examples with Divi & Elementor
How does the plugin work with Divi?
A Divi Appointment plugin – is this something any other WordPress calendar plugin can do? Not exactly.
In practice, the appointment integration with Divi means that the plugin developers deliberately create dedicated Divi modules that appear in your Divi Builder only when the booking plugin is activated. Magic!
Why is this helpful? This allows you to control the look and behavior of the appointment booking calendar and other related widgets right within the visual interface of the Divi builder!
In simple language, this is a more user-friendly and Divi-native approach of working with the appointment plugin’s content. And yes, not every appointment booking plugin does that; some use shortcodes but that’s a different story.
So, your next step in building the appointment scheduling WordPress website is installing the Divi appointment plugin for scheduling appointments.
Install the MotoPress Appointment Booking plugin to enable Divi appointment scheduling
First of all, to properly create your Divi appointment scheduling website, install and activate the plugin:
- Go to the WordPress dashboard, then ‘Plugins’ > ‘Add New’.
- Search for MotoPress Appointment Booking or download it here. If you are downloading the plugin manually, click ‘Upload plugin’ in your WP dahabord.
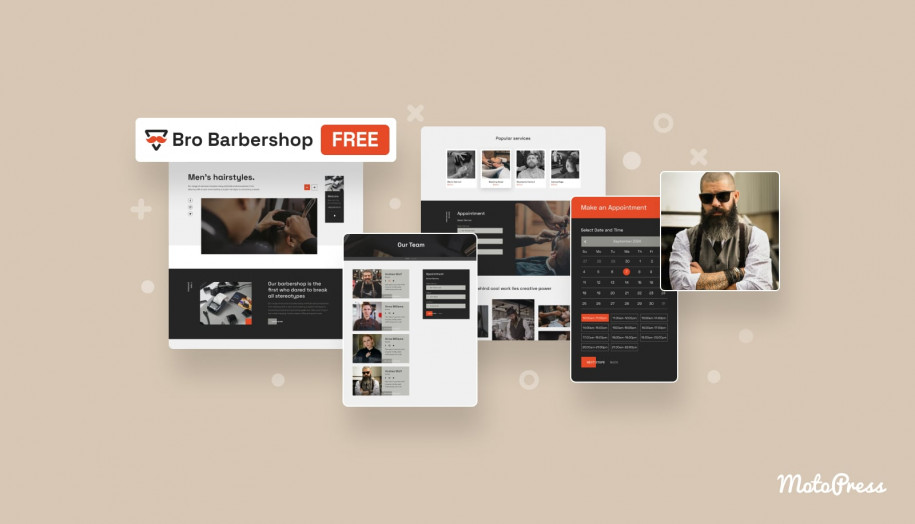
You can also use a free hair WordPress theme for a salon with the appointment booking plugin included.
- Click ‘Install Now’, then ‘Activate’.
If you need all the premium features of the plugin, install the Premium version. Curious what features are locked in Lite but unlocked in PRO? A brief list:
- A wider range of payment gateways.
- Sync to Google Calendar.
- Register new customers by hand via the backoffice of the plugin.
- Add more custom recipients for email notifications.
More than that, you have a great chance to save up your money if you subscribe to the membership plan. In addition to the core plugin features, it unlocks unlimited access to all premium extensions and designs.

Configure the main settings for the Divi booking plugin
Once the plugin is activated, you need to add your content to it, such as, list your bookable services with prices, create schedules for service providers, and all this routine!
Let’s take a quick look at the fundamental configuration.
Currency
Select your preferred currency that the client will see when making a booking.
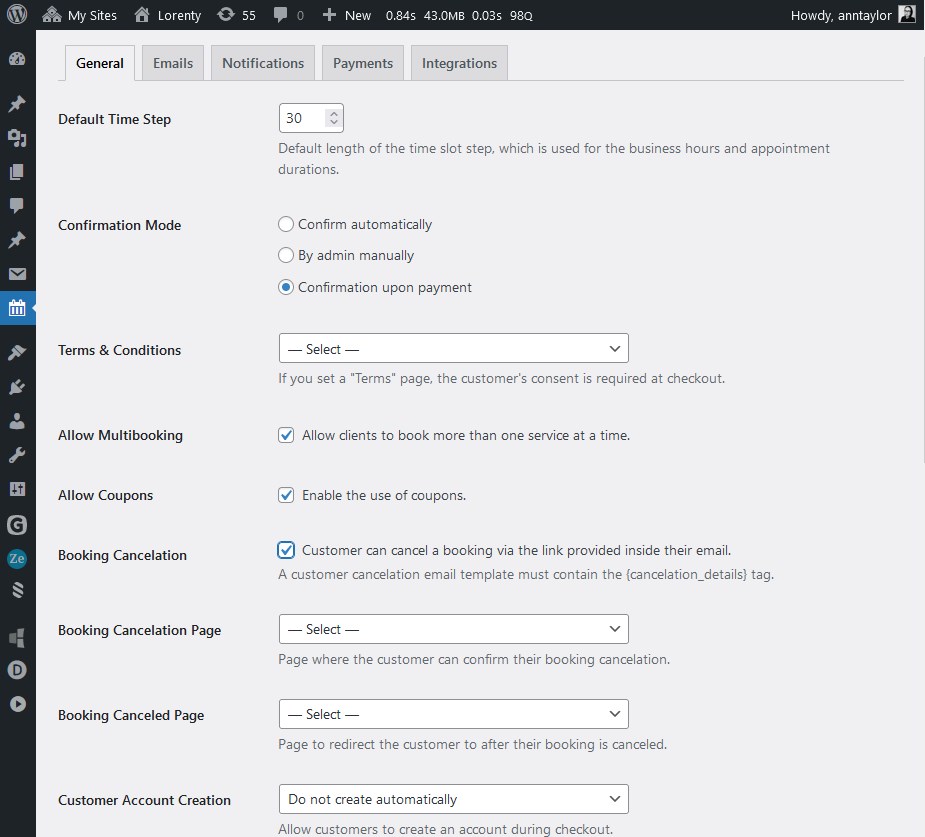
Booking confirmation modes
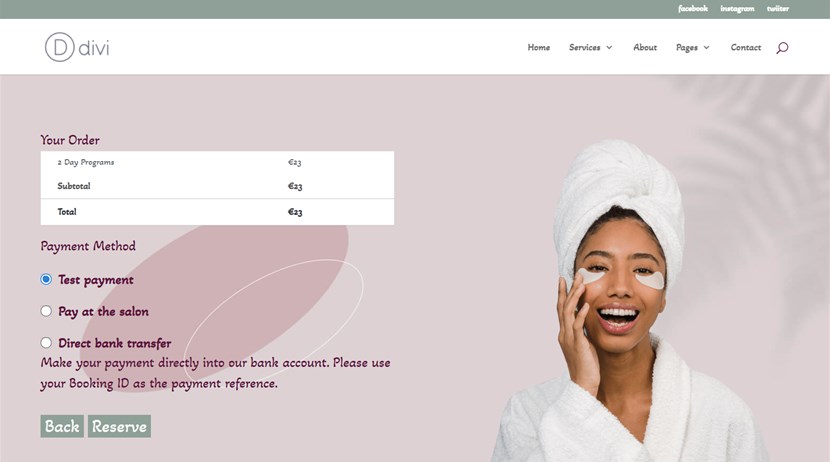
Determine how you want to approve booking requests: manually yourself, enable confirmation by client, or by payment (the free version of the plugin supports on-site payments only; Direct Bank Transfer, Stripe, Bancontact, iDEAL, Giropay, SEPA Direct Debit, and SOFORT, Apple Pay, Google Pay, and PayPal are available in PRO).
Default time slots
Establish flexible appointment durations to accommodate various service offerings. Create time slots such as 1 hour, 2 hours 10 minutes, and 45 minutes to cater to your diverse service durations.
Coupons
Enable bookings with discount coupons of a fixed or percentage value.
Allow multibooking
Enable this if you want to make it possible for a client to schedule multiple services in one reservation.
Enable customer account creation
Want a client to keep track of their bookings and payments in their own account? Enable the account creation process.
Email notifications
Create templates for sending out automatically triggered emails to clients and staff. They are created to help you manage approvements, cancellations, and rescheduling with ease. Brand and style your emails with custom colors and texts.
For a detailed guide, refer to the docs.
Customize settings for the services, schedules, and more
Staff
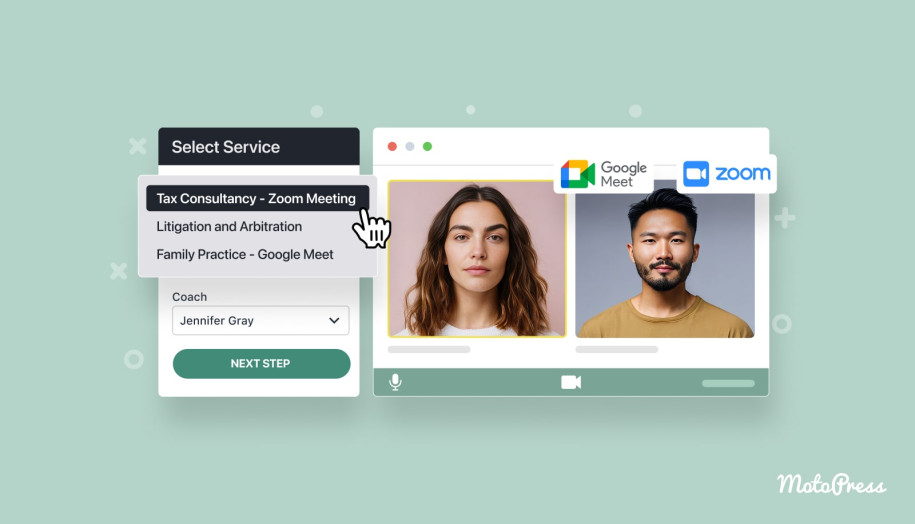
The MotoPress Appointment Booking plugin allows you to add any number of the staff members, optionally adding their bio and other details. All of them can have individual working schedules with price variables based on the services. Selecting a staff member is one of the steps in the booking wizard.
Locations
If you operate in multiple areas or at least have multiple rooms/departments in your office, use the Locations menu to add all the areas clients can select during the booking procedure.
Services
Add services you sell! They can be easily adapted to the needs of your business:
- Tailor the cost based on the duration.
- Add buffer times before and after the service.
- Assign staff members who are eligible for the service provision.
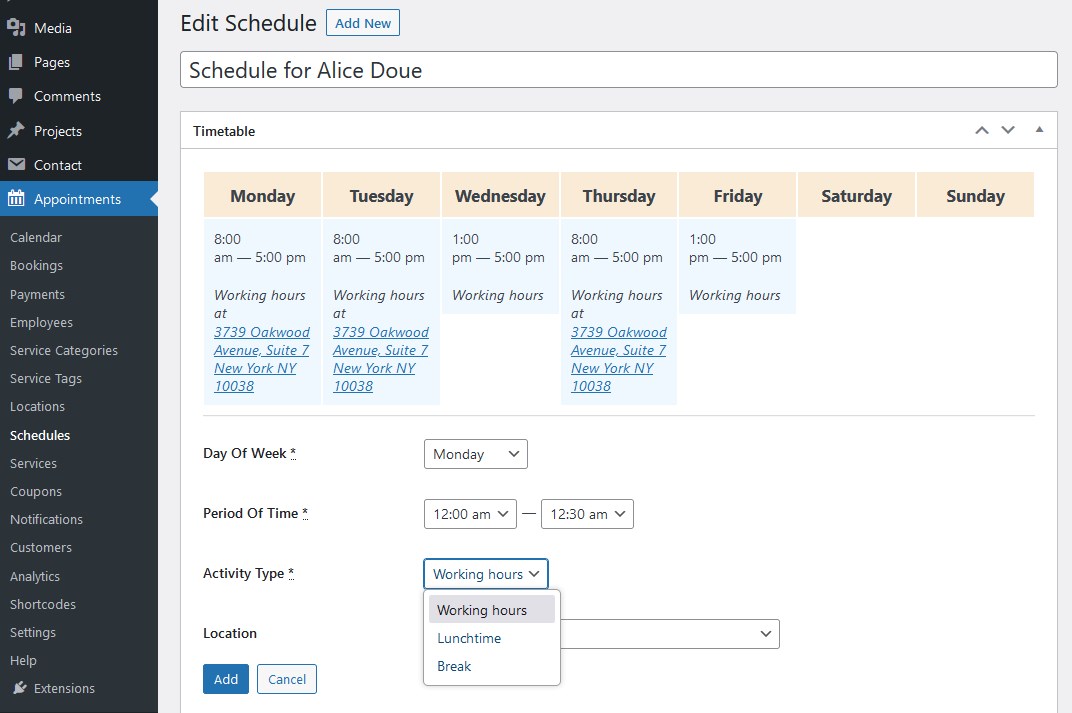
Schedule
You can create a location-based schedule for every employee with variable working hours and days off, including vacations. There are tons of settings to make it work for your business.
Divi appointment plugin: Using MotoPress with Divi
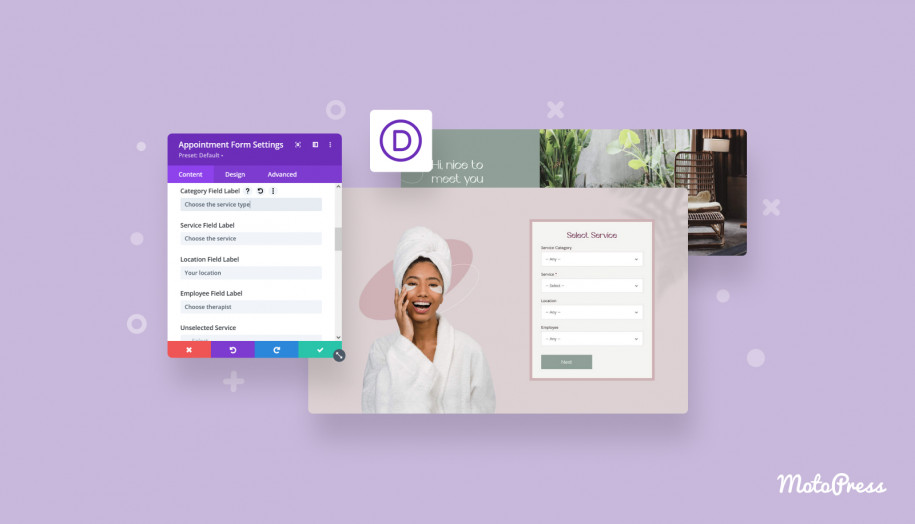
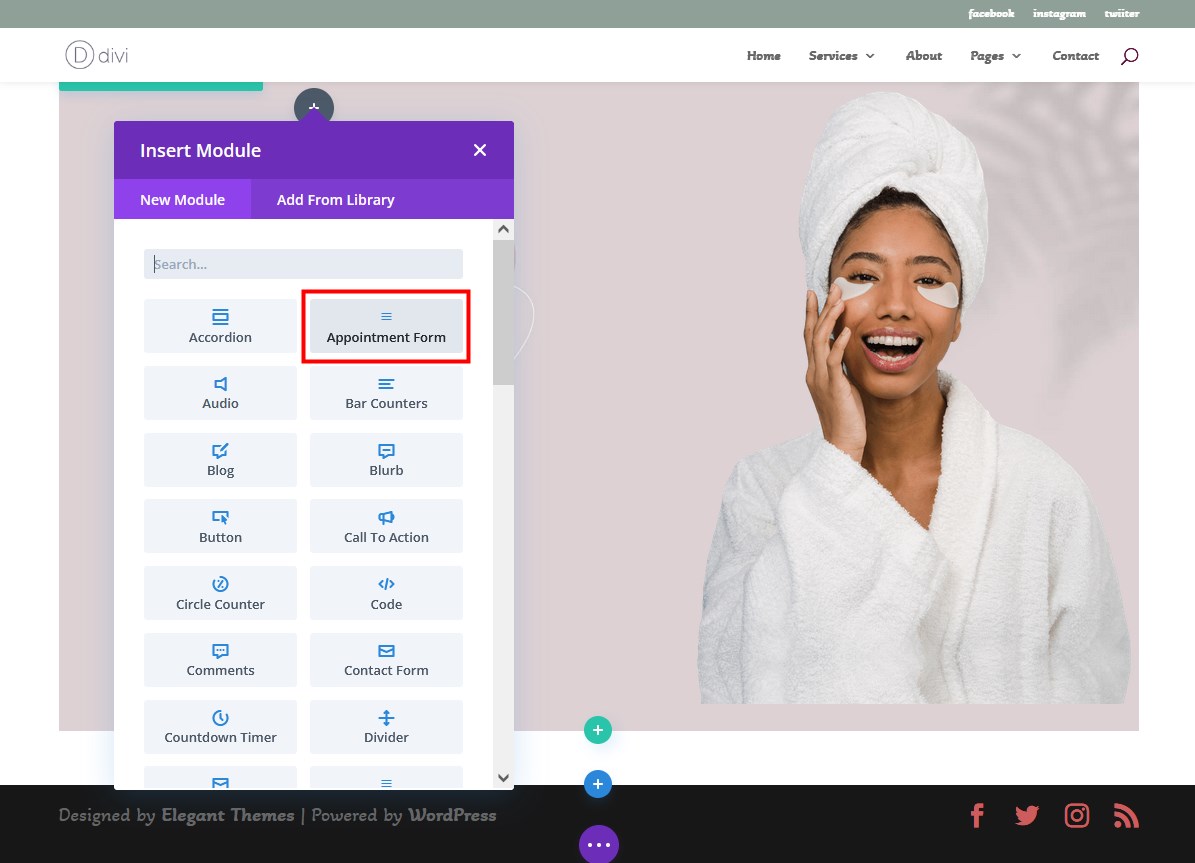
Finally, let’s create an example of the booking form by MotoPress Appointment Booking in the Divi builder.
First, choose the preferable page layout in Divi, then add the ‘Appointment Form’ module:
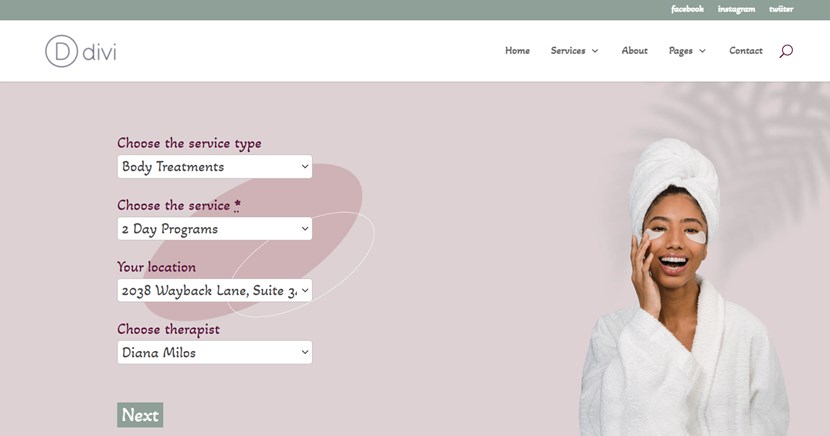
Have already tried the plugin but the form looks too plain? The look of the booking widget will depend on your activated Divi skin and the WordPress Customizer settings.
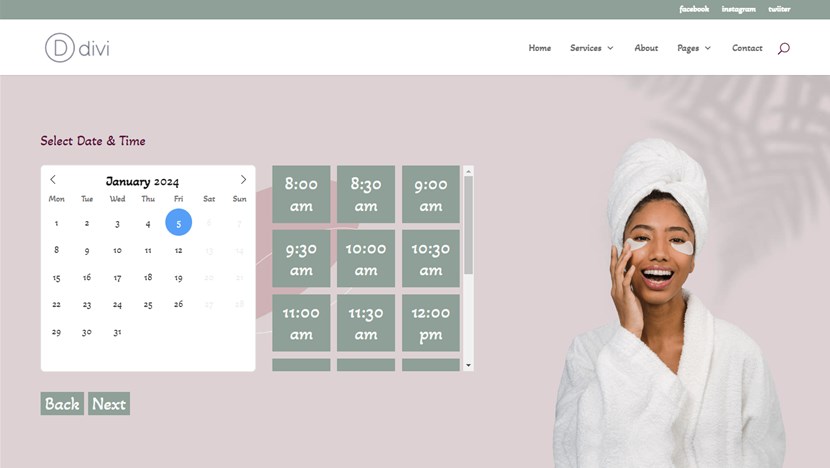
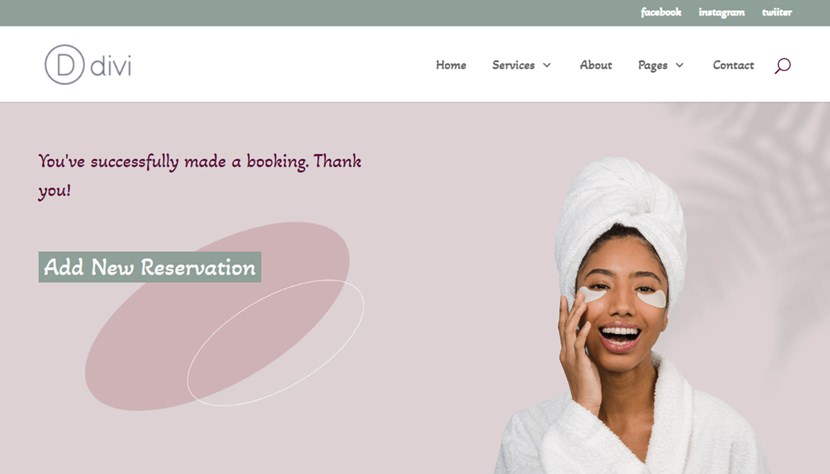
In our example, we’re using a default Divi theme with custom styling (typography, colors, and layouts) applied via the WordPress Customizer. Plus, we’re using a custom background image for the section added via Divi, and a two-column layout – one for an illustrative image and another for the booking widget itself.
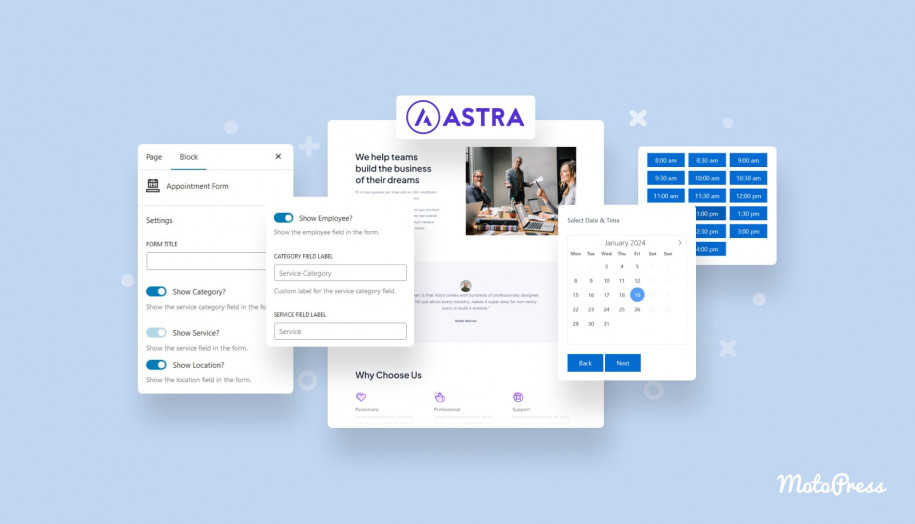
Right in the Divi module settings, you can apply changes to the appointment scheduling widget:
- Change search filter (field) labels.
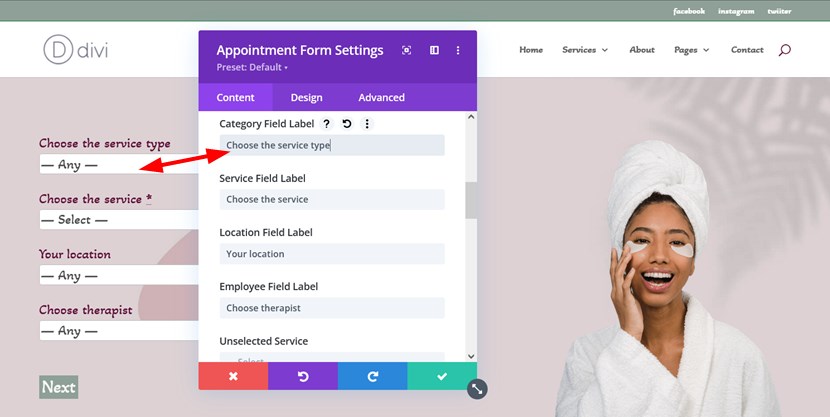
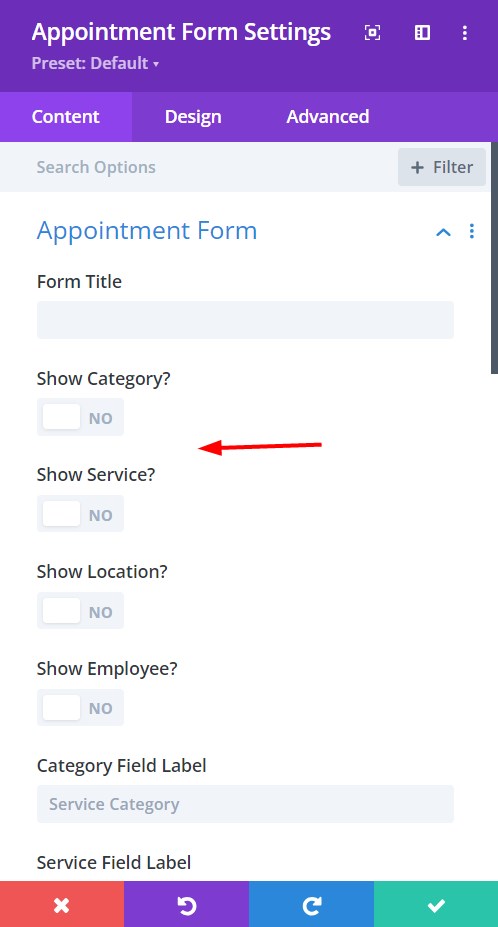
- Show or remove fields.
- Show or hide the appointment end time. For example, this form shows the beginning and end time of appointment:
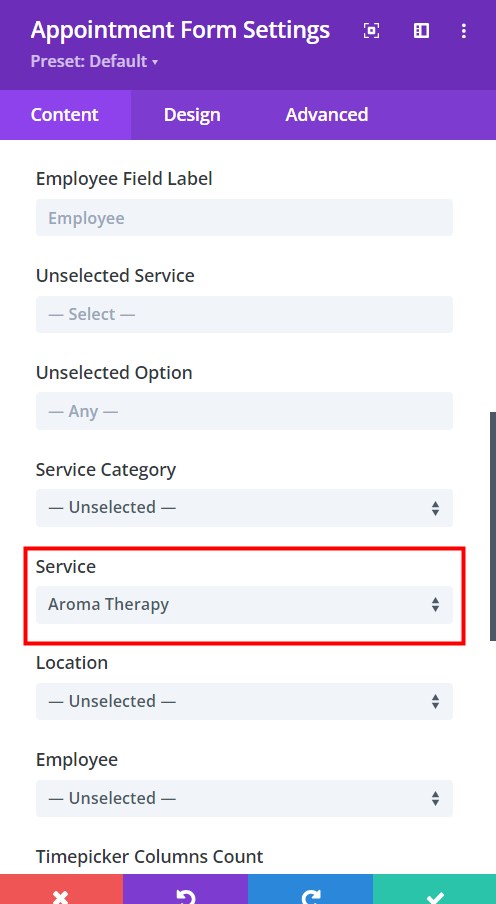
The second option (hiding form filters) is super handy when you want to simply display an availability calendar for an individual service / schedule for an individual employee only. That is, you hide all the filters, but choose the pre-set service that must be displayed.
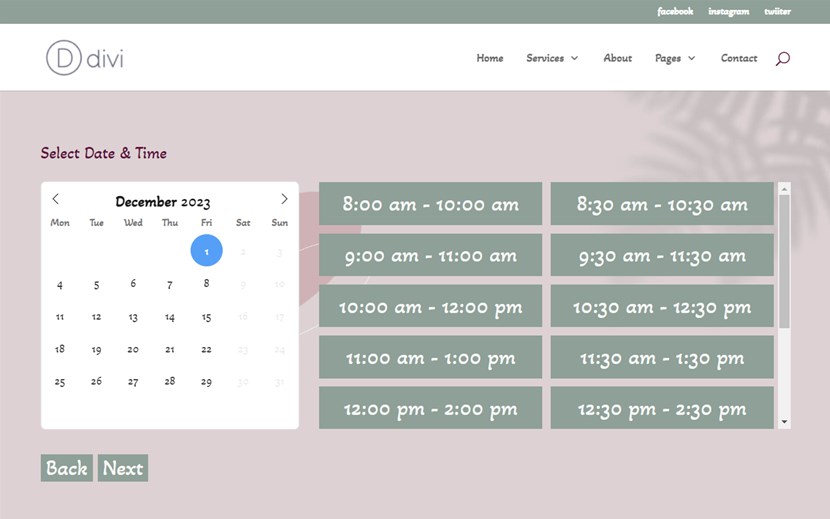
This way clients see the booking calendar immediately. Like this:
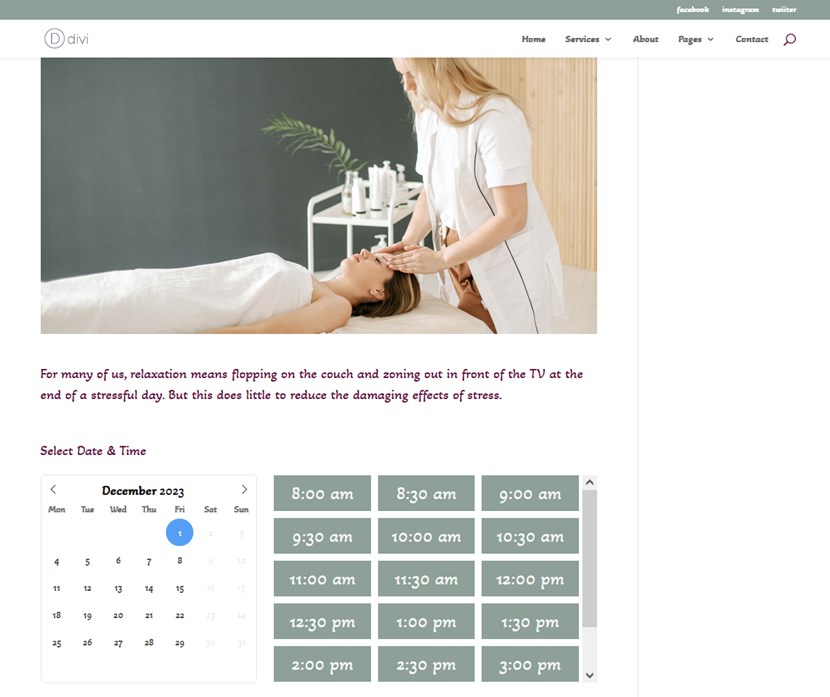
Here is your appointment scheduling WordPress website widget on Divi form step by step:
- Applying search filters.
- Choosing available time.
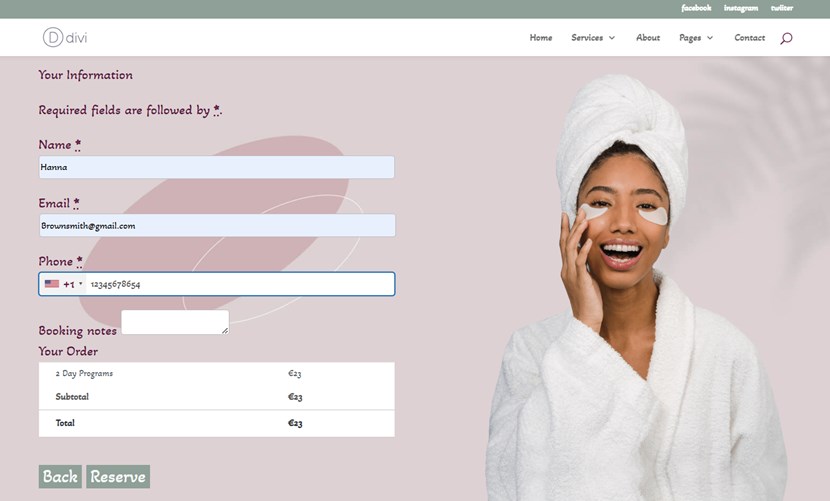
- Filling out details.
- Choosing a payment method.
- Success!
Remember that clients can add many services to the cart:
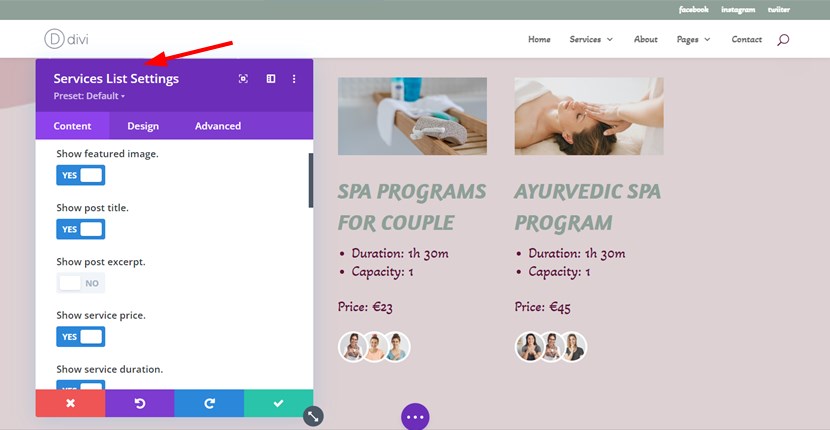
Above that, there are a few more supporting Divi modules that fetch content from the Appointment Booking plugin, such us:
- List your staff members.
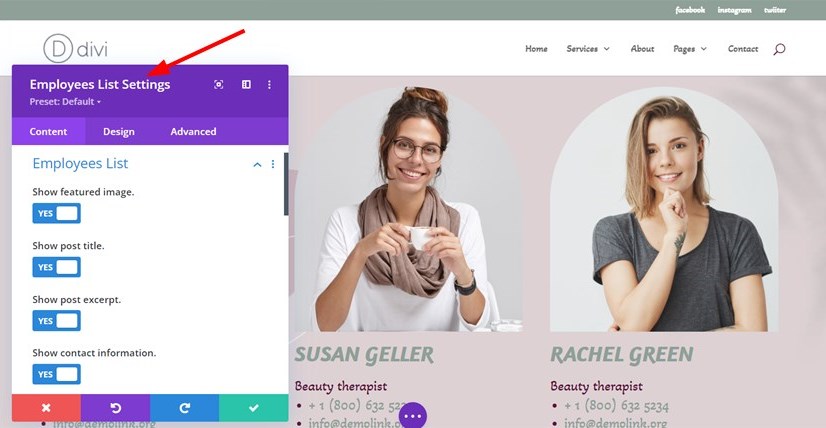
- List your services.
- List service categories.
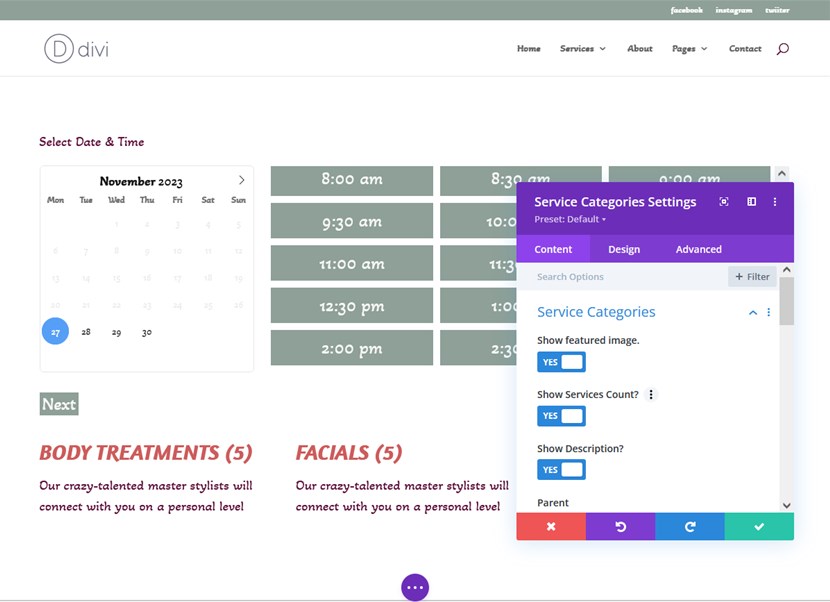
Of course, every Divi appointment plugin module comes with a range of extra settings to assist you in making your design more suitable to your requirements.
On the backend, the plugin is ready to aid you in viewing all upcoming and past appointments, customer details, user accounts, charts on the generated revenue, and much more information.
Final thoughts: Why build an appointment scheduling WordPress website in Divi
Divi is one of the most recognized website builders and powerful WordPress themes on the market; it can boast a thriving community of developers, users, and resources that can help you tackle any issue along the way. Besides, it smoothly integrates with purpose-made appointment scheduling solutions, such as MotoPress Appointment Booking, helping you accept appointments on WordPress without third-party SaaS solutions.
FAQ
Is there a Divi appointment plugin?
How to add appointment scheduling to website?
To add appointment scheduling features to your WordPress website in Divi, follow the next steps:
- Install and activate the Divi theme.
- Install and activate the MotoPress Appointment Booking plugin.
- Configure the general settings of the appointment plugin, such as add the currency, confirmation modes, and more.
- Add services, employees, schedules, and locations.
- Go to the Divi builder > add the Appointment Form module to the page.
- In the Divi module settings, customize the look of the appointment scheduling form and publish the page.
What is the best Divi builder integration plugin?