
How to Register & Change Domain Name for WordPress Site
Table of Contents
To start, a domain name is a sequence of symbols entered into the address field of a browser. For instance, “google.com” and “motopress.com” are examples of domain names. They are essential for directing a browser to a server hosting the desired website. In this tutorial, you will become acquainted with the process of registering a domain name for your online project. How to register domain name for WordPress? Read on as we delve into this process in great detail.
Technical Aspects of Domain Registration
To give you a more comprehensive understanding of the underlying processes, let’s delve into some technical details. WordPress is essentially a program, but its main difference from other programs you might typically use is that it is designed to serve other people via the web.
From this concept, we can draw two conclusions: the program (WordPress), which will become the basis for your website, must be installed on a computer that is continuously connected to the Internet (hosting). Additionally, people should be able to find it easily. The primary method of identifying any resource on the web is through its IP address, which is a sequence of numbers, like this: 65.154.57.135.
To simplify the process of looking up web resources, the DNS (Domain Name System) was invented. This system connects the actual IP address of the server hosting your website with the human-readable moniker — the domain name.

Understanding Domain Registration and Ownership
We will not delve into the intricacies of how the Domain Name System functions, but the main facts important for our discussion are as follows:
- A domain name cannot be owned by someone forever; it is exactly “registered” or leased for a period of time. The ownership lasts until the registrant transfers it to someone else or stops paying the renewal fees.
- The minimum period for registering most domains is one year. If your project is going well and you want to keep it active, you must renew the registration by paying the fee for the following year or years. If you do not continue the registration, the domain name will be disconnected from your website, and you may lose it.
- The main connection point that helps link the domain name with the actual IP address of the resource is the domain name servers. Therefore, to associate the domain with the website, it will be necessary to set up the domain name servers for the domain. We will describe this process in more detail later.
When to Register a Domain Name
Now that we understand the main technical concepts, we can answer one of the key questions related to the specific subject of our article: “When is domain registration necessary?” It is essential when we want to help people find our website using a domain name. This applies to 99% of public websites, whether created for business or personal needs.
To put it more simply, the answer is: always. Whenever we start a website intended for the public, such as a direct booking one, and not solely for personal use (for personal purposes, one can use the “localhost” moniker on a local PC or an IP address), it is always necessary to register an easily memorable domain name in a domain zone that corresponds to your business. Most commonly, this is the “.com” zone.
Scenarios for Changing Your Domain Name
Regarding “When to change the domain name?”, there are several possible cases (we provide only some of them here, but actually, there may be many more reasons):
- Rebranding: If your company undergoes a rebranding that includes a name change, you would typically need to change your domain to reflect the new brand identity.
- Legal Issues: If there are legal challenges, such as trademark disputes, related to your current domain, you might need to change it to avoid legal complications.
- Improving Brand Clarity: If your current domain name is confusing, too long, or difficult to remember, changing it to something more concise and clear can be beneficial.
- Geographical Expansion: If your business is expanding internationally and your current domain is region-specific, you might change it to a more globally recognized domain (like “.com” or “.net”).
- Updating to a More Relevant Domain Extension: This is the opposite situation to the previous case. With an abundance of new top-level domains (TLDs) available, you might find an extension that is more relevant to your business (such as “.hotel”, “.travel”, etc.).
A recent practical example that has been on everyone’s lips is the change from “twitter.com” to “x.com”. This instance can be categorized under the first and third cases. We will discuss the actual practical steps required to properly change a domain name in one of the following sections.
How to Register Domain Name for WordPress Website
The overall approach is simple: you should find a company that offers domain name registration services. It is important to read feedback on various forums and rating websites to choose a reputable domain registrar. Subsequently, as soon as you register the domain, it will be necessary to associate the website, which is hosted elsewhere, with the domain name.
Often, hosting companies also offer domain name registration services, so if you prefer, you can acquire both hosting and a domain simultaneously. Additionally, during certain promotions, you may be able to register a domain for free if you rent hosting from the company for six months or more.
That being said, based on our experience, we believe it is advisable to separate these processes. Register your domain with one company and acquire hosting services from another. The main reason is that hosting needs may change, and it is much simpler to switch from one hoster to another if your domain is registered separately.
Regarding practical steps, we’ll help you learn how to register domain name for WordPress website on NameCheap.com as an example. This service is renowned for its high customer satisfaction ratings, competitive pricing, and easy-to-navigate management panel. Additionally, NameCheap offers specialized WordPress hosting, but this is the subject of a different article. Now, let’s focus on the domain registration process itself.
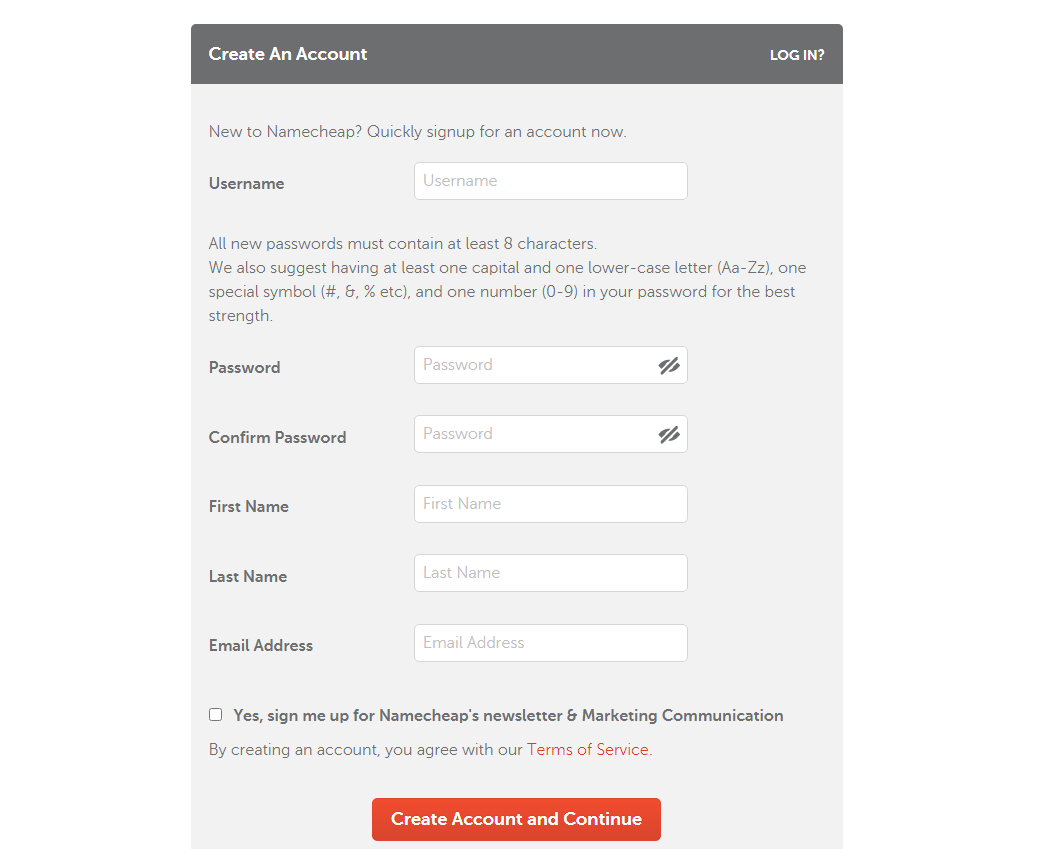
Step 1. Create an Account
The most evident and straightforward step is to create an account on the NameCheap website. Visit this link: https://www.namecheap.com/myaccount/signup/, fill out the form, and press the “Create Account and Continue” button:
Shortly, a letter will be sent to your mailbox. Click on the corresponding link to confirm your email address.
Step 2. Log in to Your Account
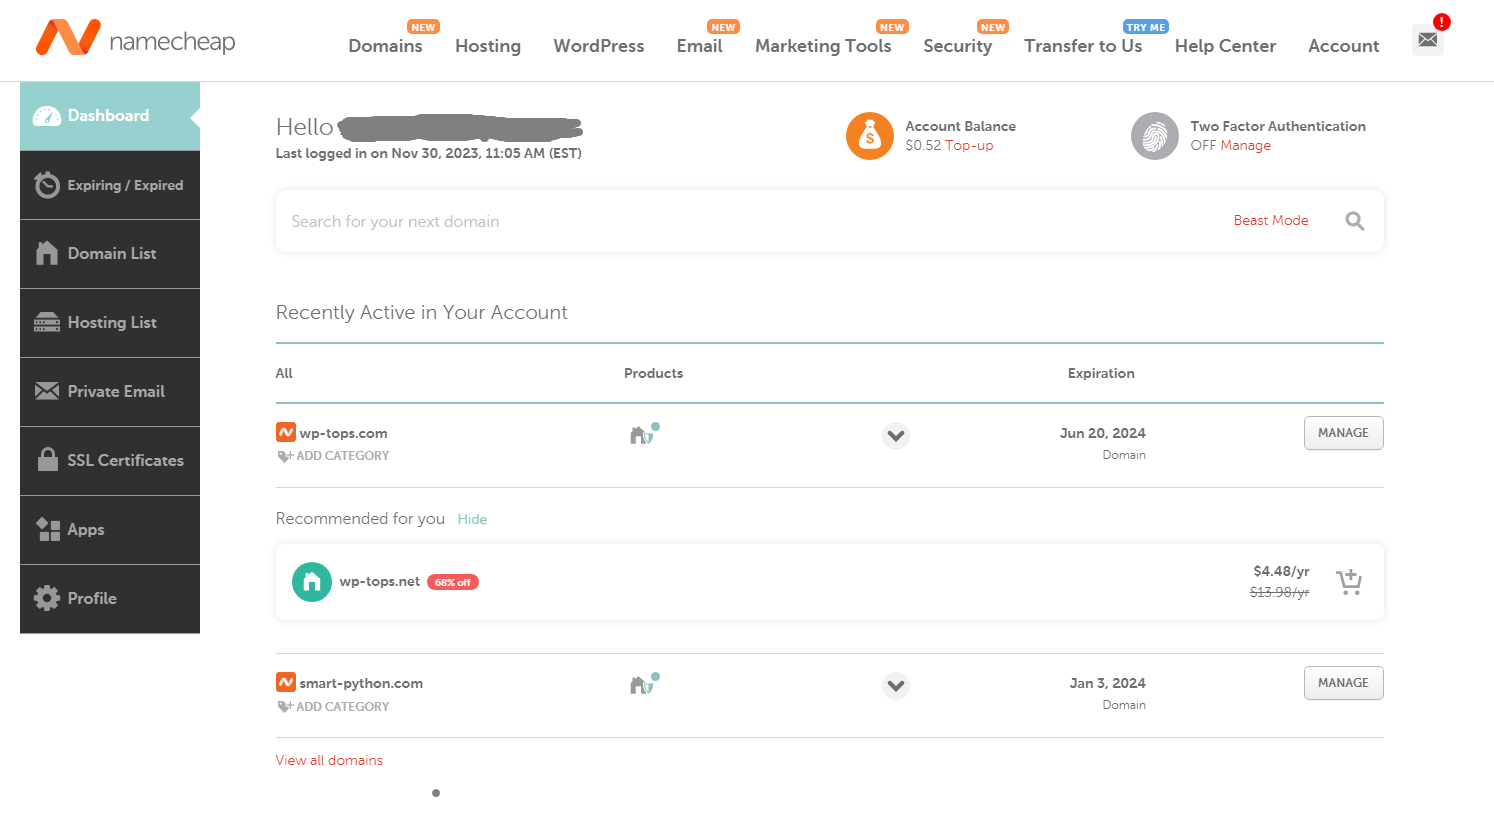
Right upon registration or by entering your credentials on the login page at https://www.namecheap.com/myaccount/login/, you will be redirected to the dashboard. Here, you can manage your domains and all other NameCheap services:
Step 3. Check the Domain Name Availability
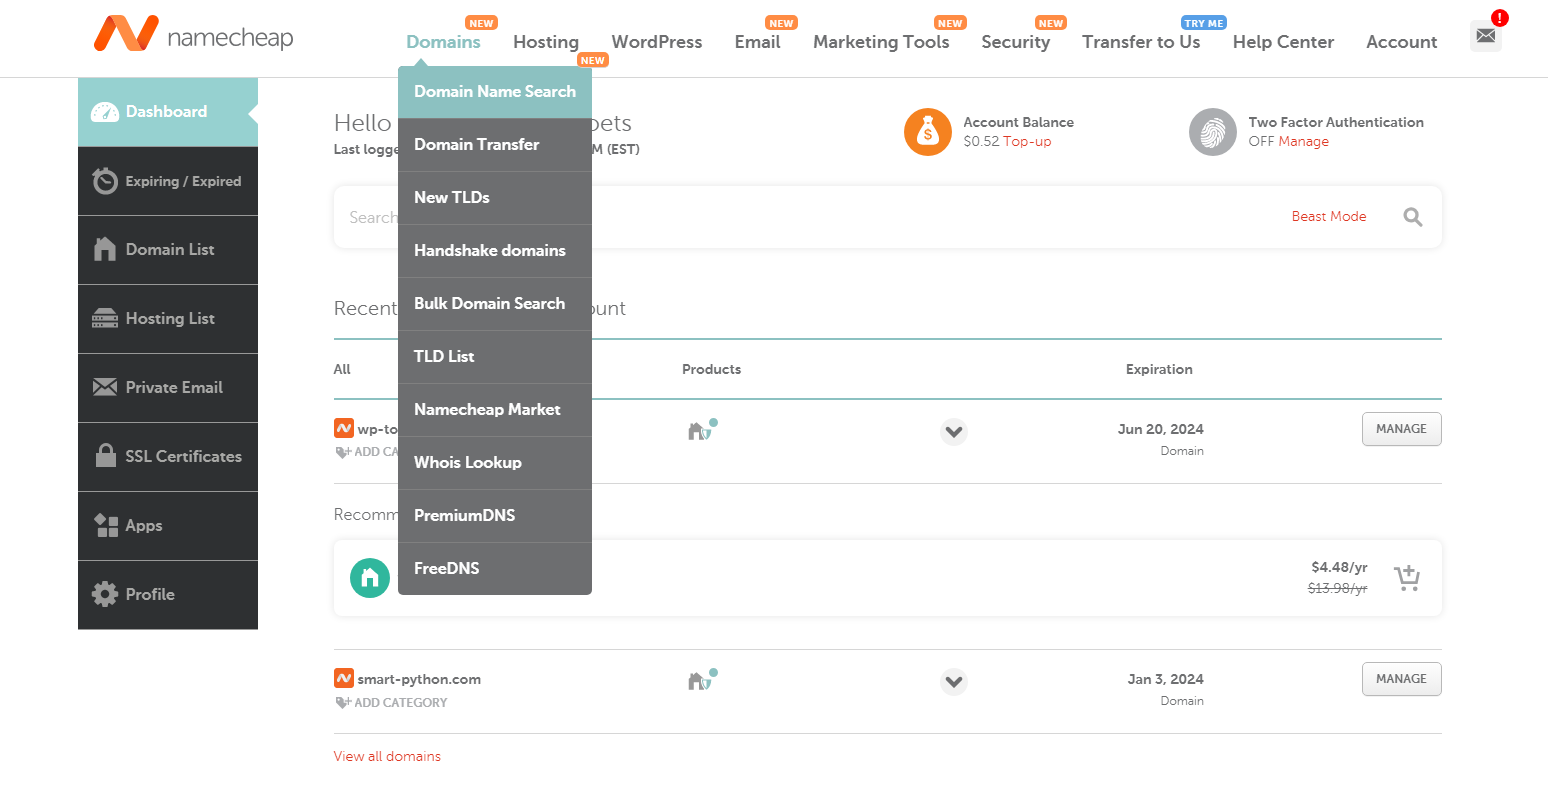
Navigate to “Domains” > “Domain Name Search”:
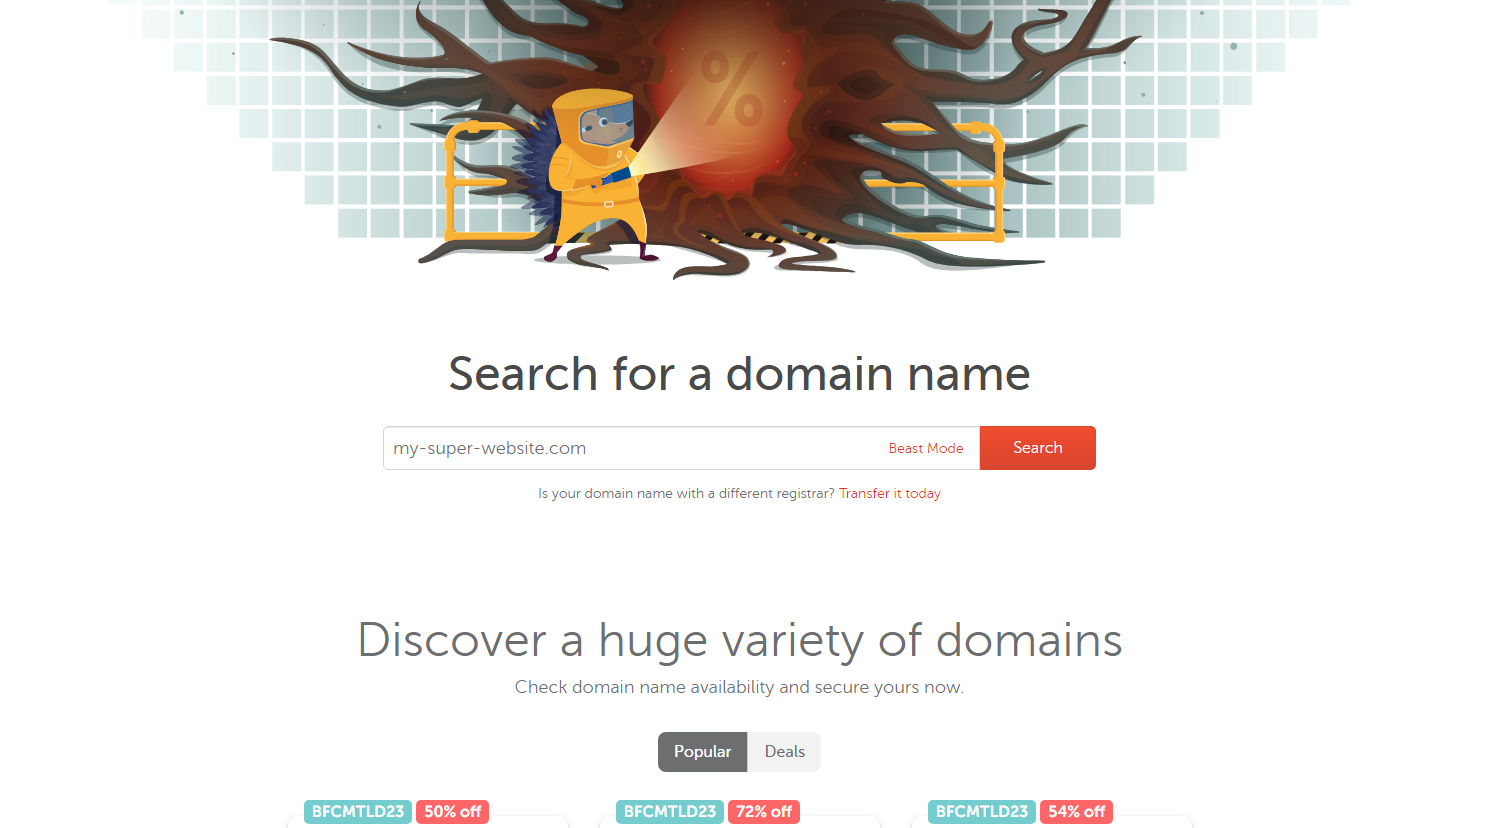
Enter the domain name you want to check; for instance, “my-super-website.com”, and press the “Search” button:
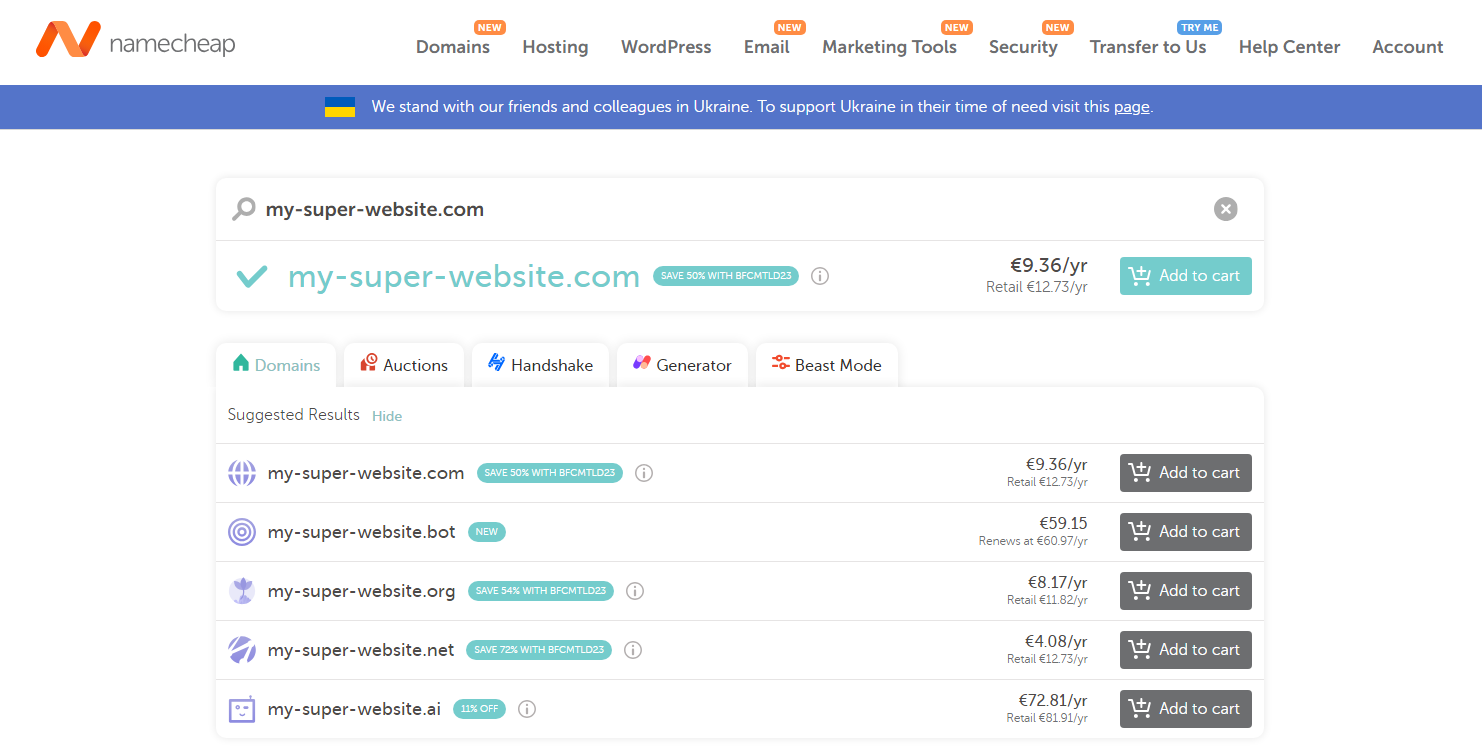
Step 4. Add the Domain to a Cart
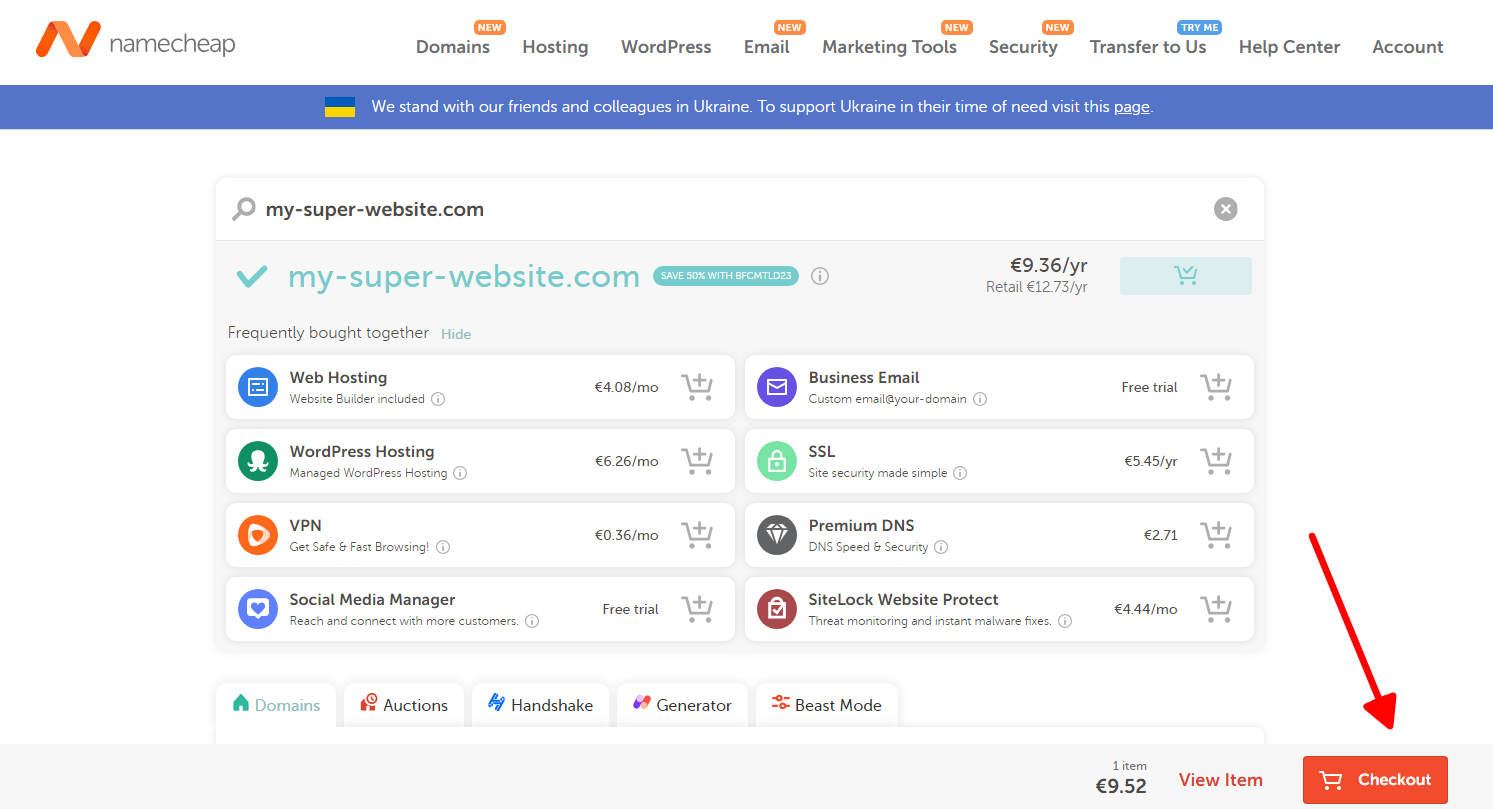
As you can see, the domain is available for registration. Press the “Add to cart” button:
If your initial domain choice is already registered by someone else, you will need to select a different domain zone or change the domain name completely.
Press the “Checkout” button:
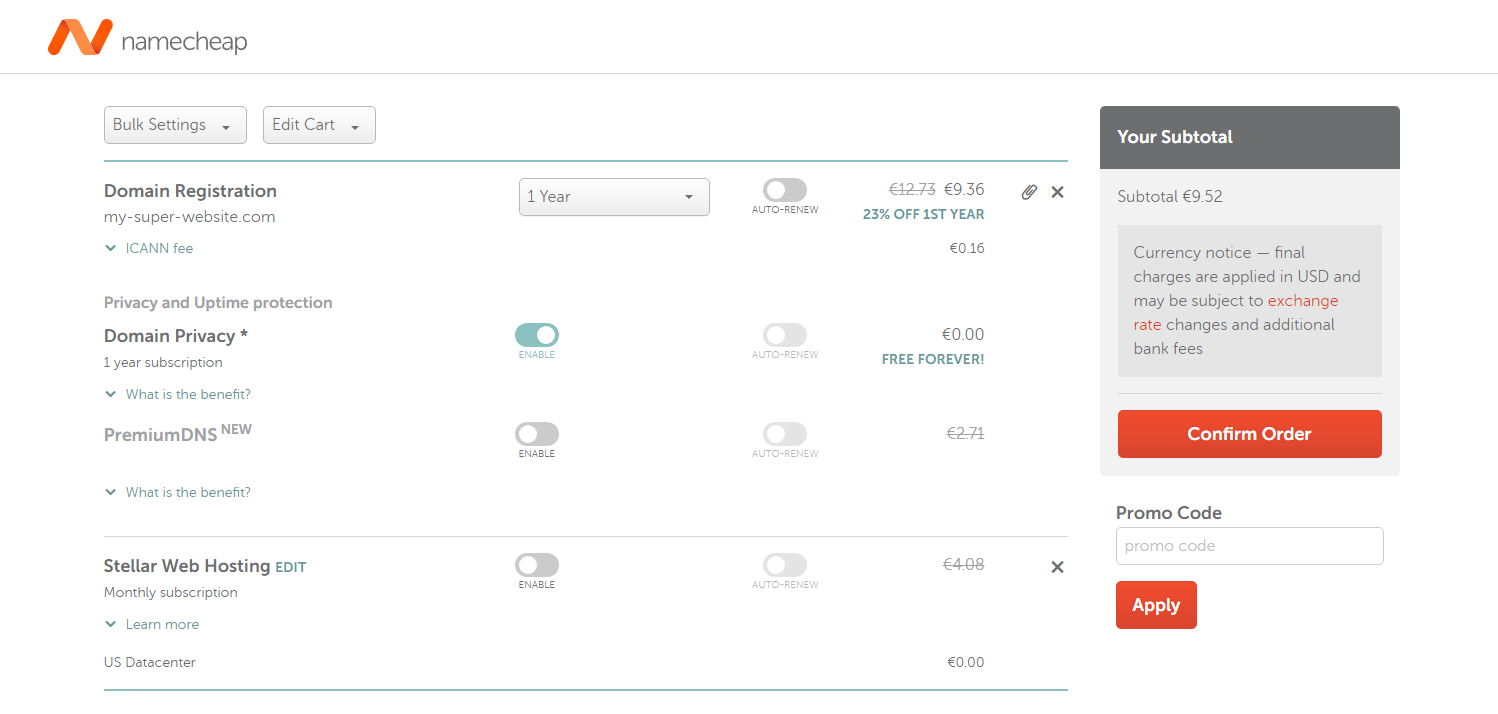
Pick some additional options, if you want to, and press “Confirm Order”:
Step 5: Enter Your Personal Information for Domain Registration
Next, you will need to enter the first name and last name of the domain’s owner. By default, these fields will be pre-filled with the name and surname you entered during registration, but you can register the domain for someone else. Additionally, fields for address, city, country, etc., are also required. Don’t forget to turn off the checkbox “I’m registering on behalf of a company” if you are not registering for a company:
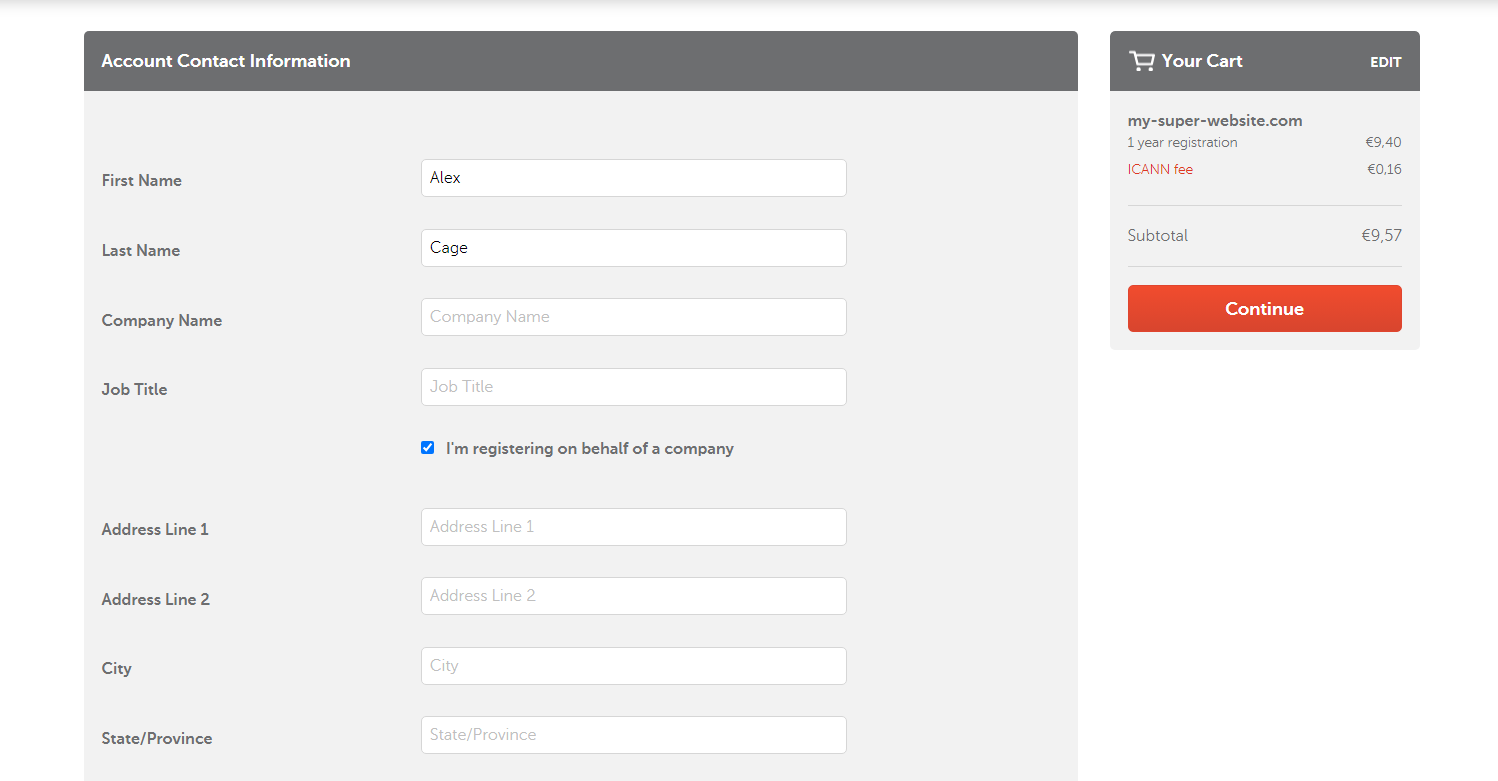
Press “Continue” once you have filled in all the necessary data. Adjust the Whois contact information if necessary:
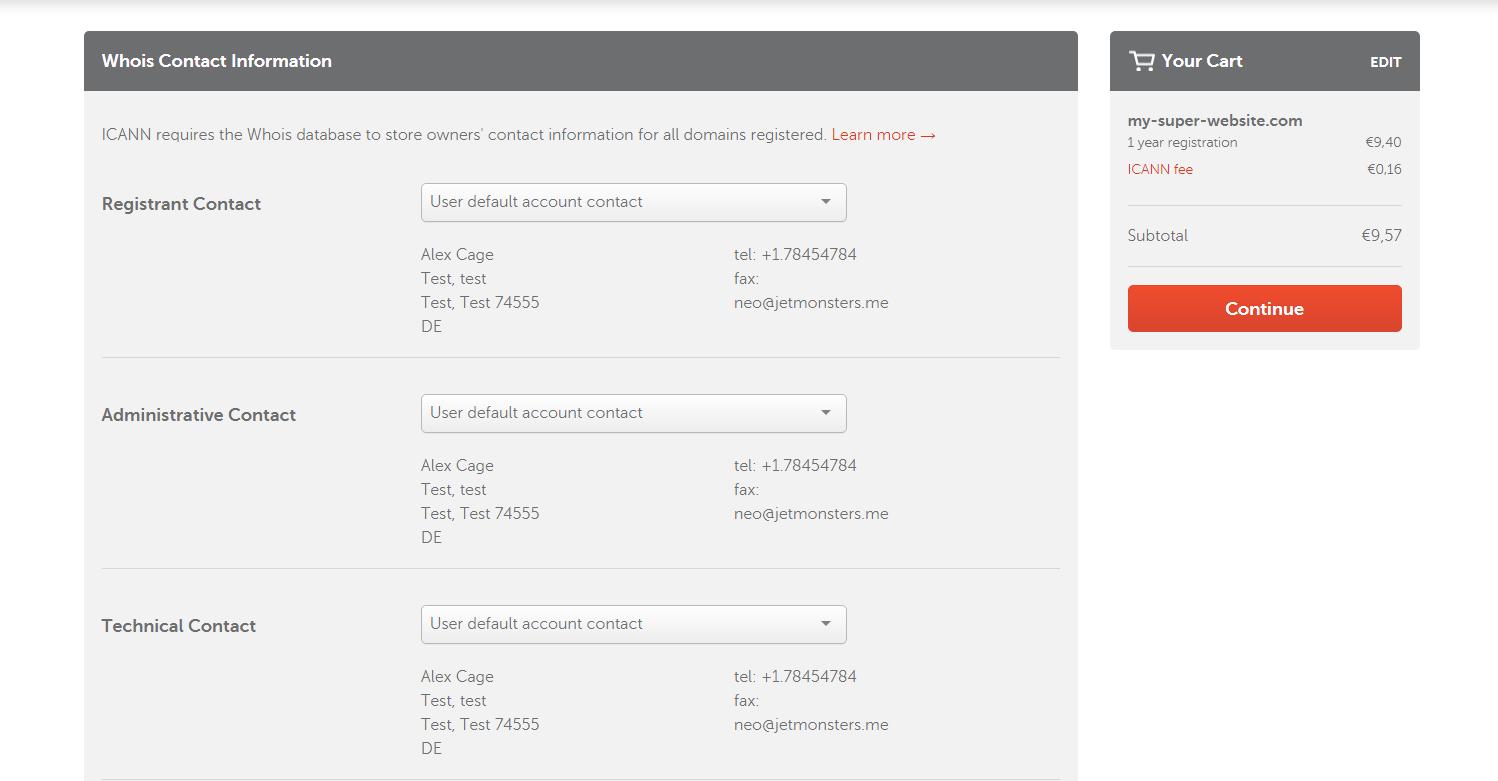
This data will be publicly available to anyone who wants to check the domain owner’s contacts. NameCheap usually hides this info for privacy, but by default, if privacy protection is not included, any person can access the domain owner’s data via specialized Whois services. Press “Continue”, again, if you don’t want to change anything.
Step 6. Make a Payment for Registration
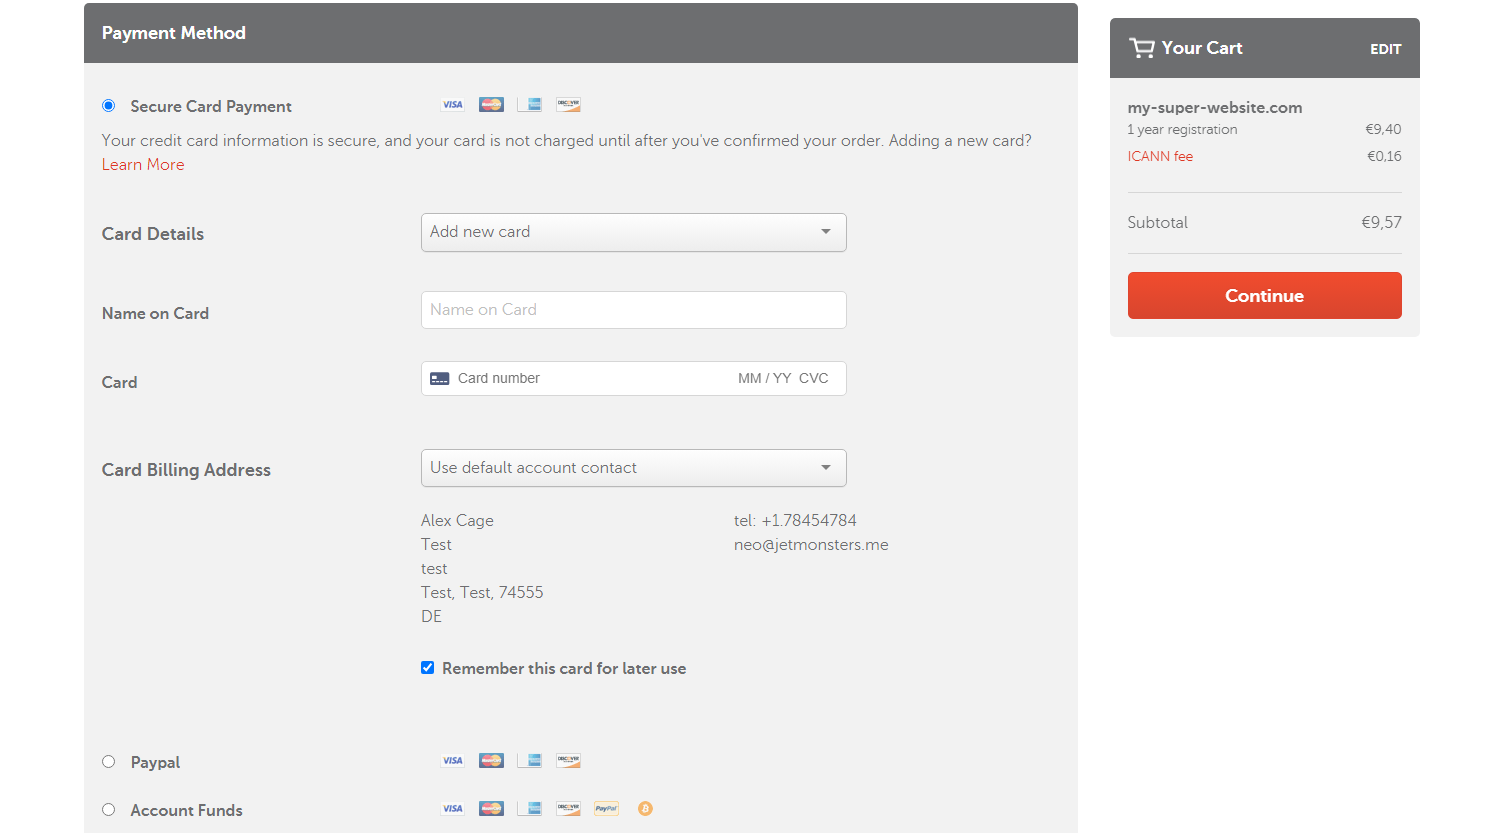
Enter your debit or credit card details if that is your chosen payment option, or select another payment method. Then, press “Continue”:
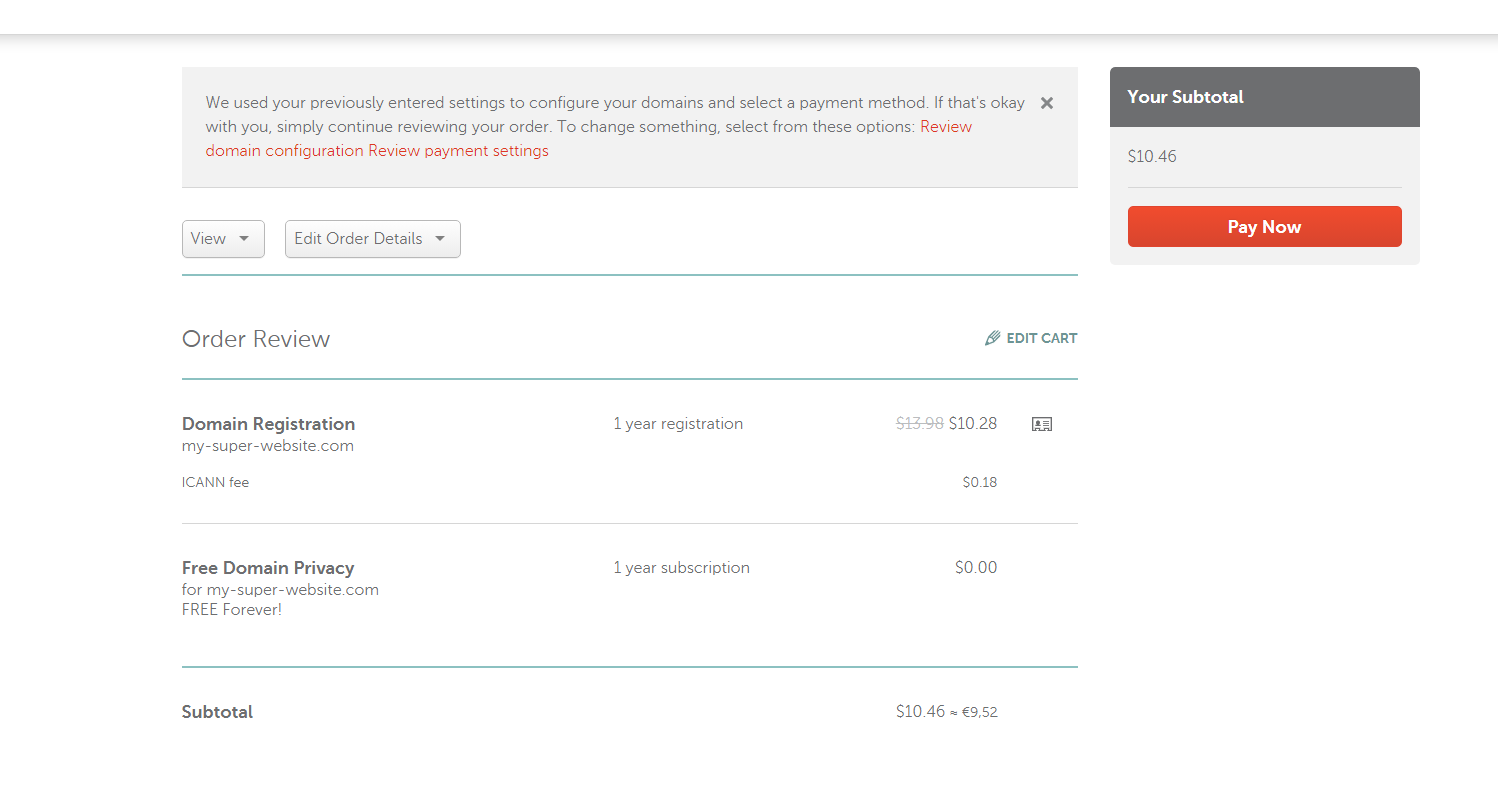
Check again to ensure everything is correct with your order, and then press “Pay Now”:
If everything is okay with the payment, you will see your newly registered domain in your account.
At this point, you should essentially be completely aware of how to register domain name for WordPress website, since the registration process is mostly complete. However, to ensure that the domain functions properly and is connected to your hosting account, it is necessary to fill in the DNS entries.
As soon as you purchase a domain name, it will be showcased in your dashboard like this:
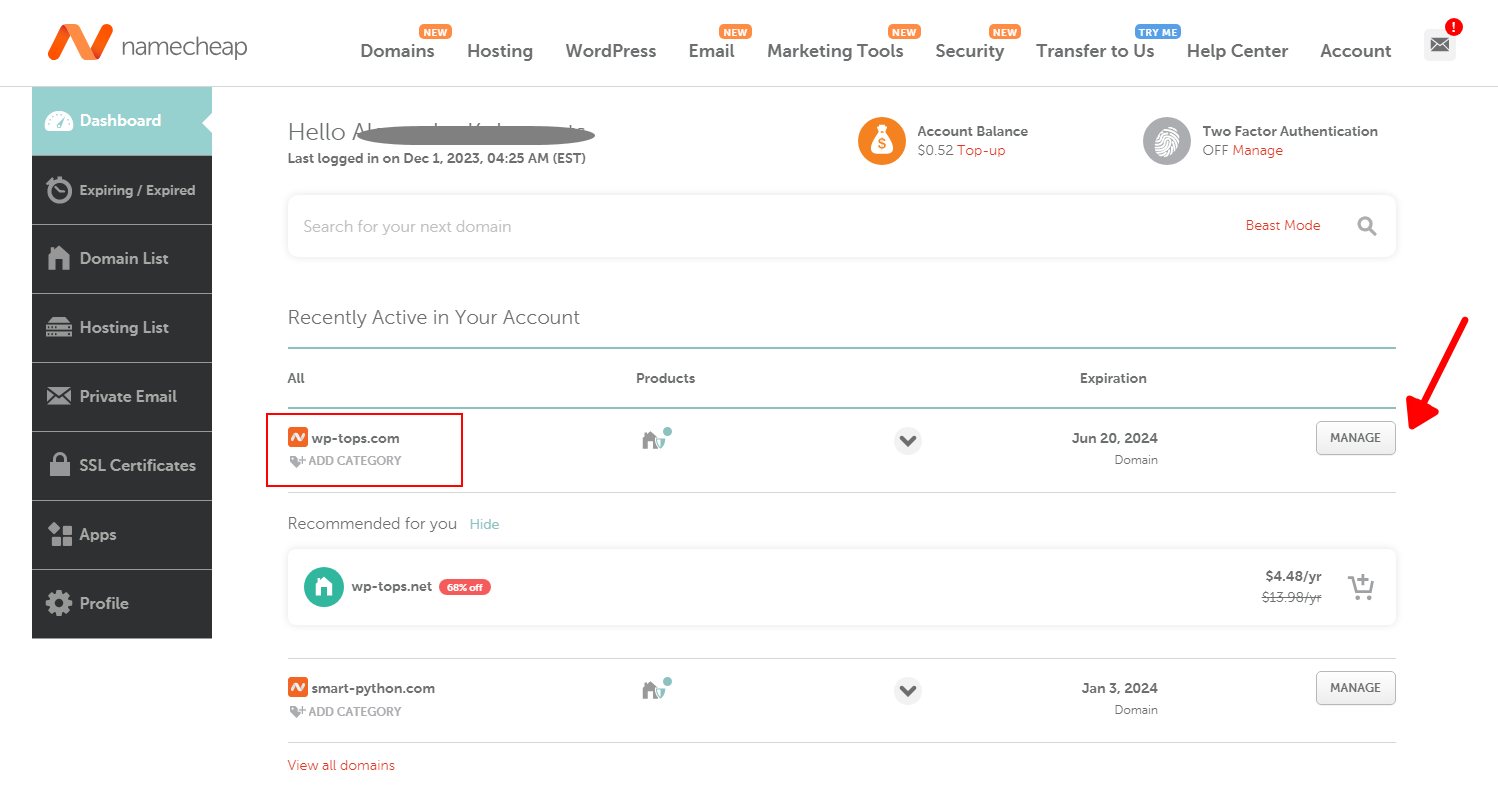
Upon clicking the “Manage” button next to each domain name you have purchased on NameCheap, you will be taken to the settings panel for that domain:
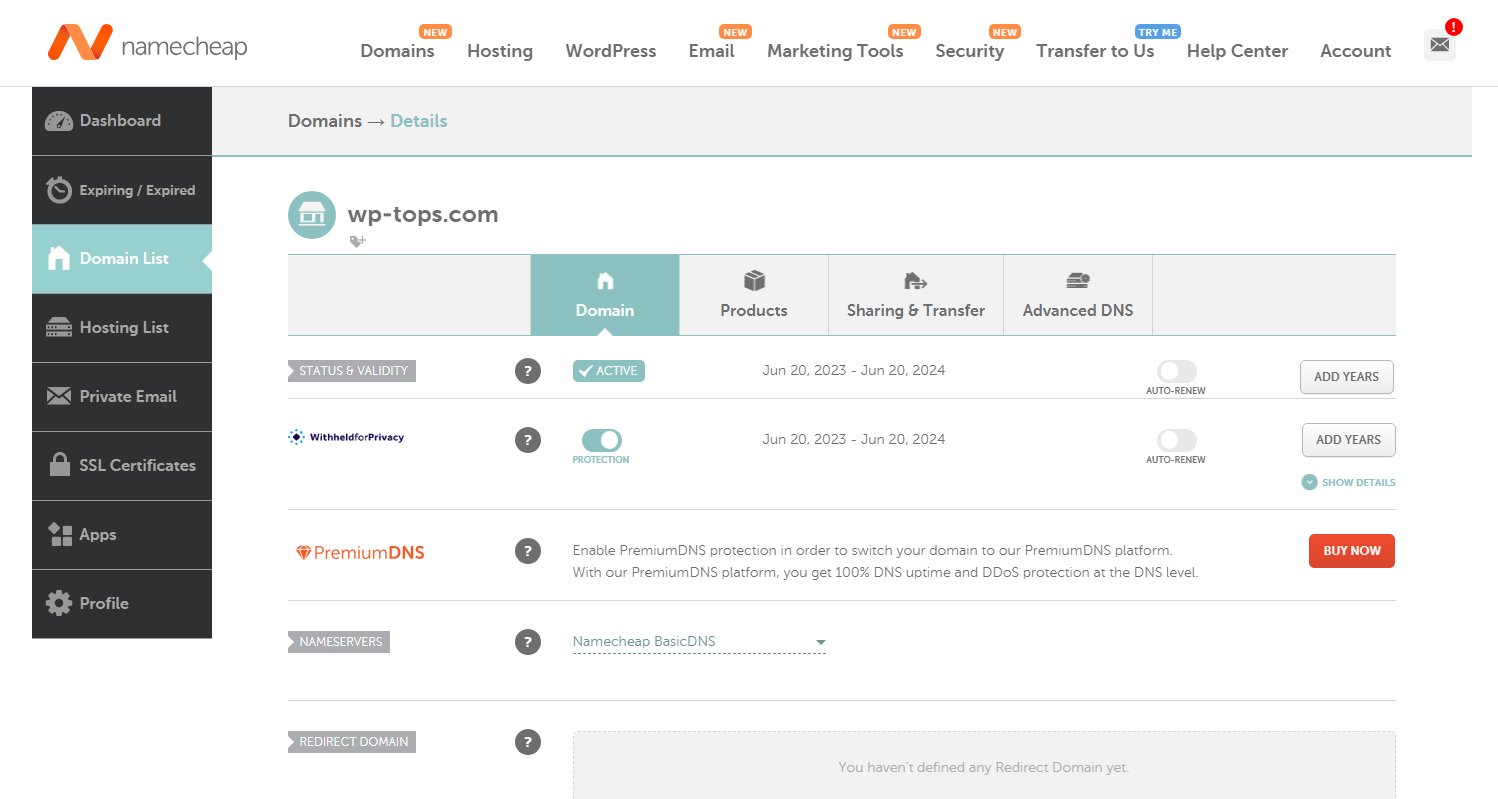
In this section, you can set up redirects from one domain name to another, enable or disable the display of domain owner contact details in Whois checkers, and most importantly, manage the DNS entries.
Step 7. Adjustment of DNS Entries
To connect your domain name to a hosting account, there are two possible approaches, depending on where your WordPress website will be hosted: on a shared hosting account or a dedicated server.
A. Shared Hosting
First, let’s consider the case where you have chosen the most popular and straightforward option, which is ordinary shared hosting. In this scenario, your website occupies a portion of the computer resources on a provider’s computer, where multiple other websites are also hosted.
In this case, it is common for the provider to offer their own DNS servers. Typically, when they send you a letter with the necessary credentials for accessing your hosting account, they will also provide you with the DNS entries that you need to enter in your domain management panel. These DNS entries usually look like this:
- ns1.hosting.com
- ns2.hosting.com
- …
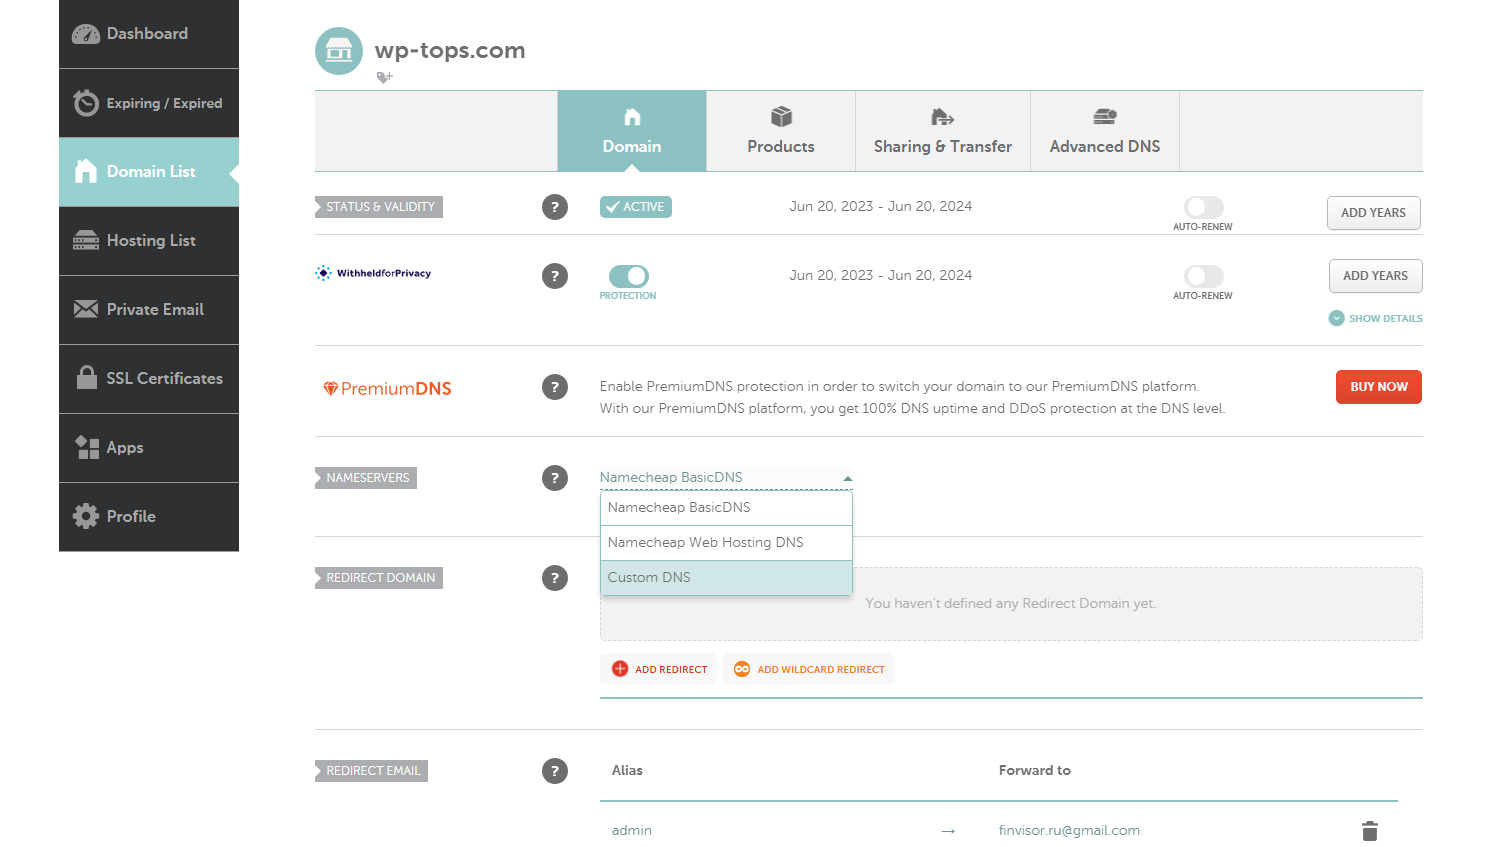
So, where exactly should you enter these DNS entries in your NameCheap account? Let’s assume you are already on the page where the settings for a particular domain name are adjusted (refer to the previous screenshot). In the “Nameservers” section, you need to select “Custom DNS”:
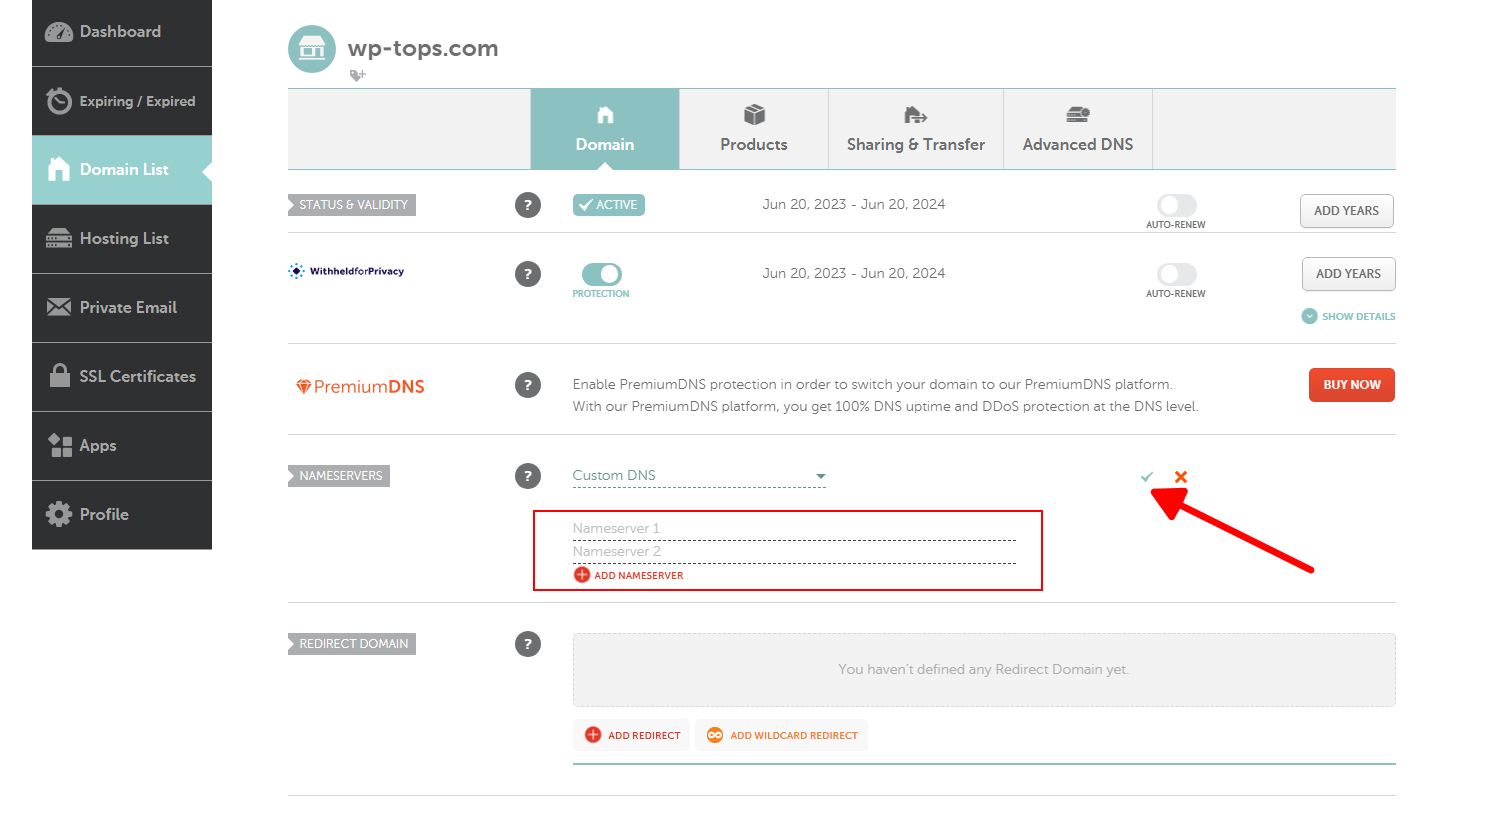
Enter the nameserver credentials provided by your hosting provider into the fields that appear, and click on the check mark, as showcased in the screenshot below:
If you are interested in the underlying principle of the actions taken above, it is important to understand that in this case, you are essentially pointing your domain to the DNS servers provided by your hosting provider — these DNS servers then direct traffic to your hosting account.
In other words, the DNS servers act as a bridge between your domain name and the web server where your website is hosted. Your hosting provider configures its DNS servers to recognize your domain name and direct requests to the correct location, allowing your website to be accessed on the internet.
B. Dedicated Server
This case is more interesting compared to the previous one, as here you will need to configure the DNS servers yourself. You won’t need to set up the DNS server from scratch; rather, it will be necessary to provide some instructions to point the NameCheap DNS servers to your dedicated server where the website is hosted.
Let’s assume that you have configured the web server on your own or with the help of a system administrator, and you already have a WordPress website that can be accessed via the web server’s IP address.
For instance, if you enter 68.134.45.78 into your browser’s address bar, you can access your site. However, you want this website to be accessible by entering “my-super-website.com”. So, how do you connect this IP address to your domain name?
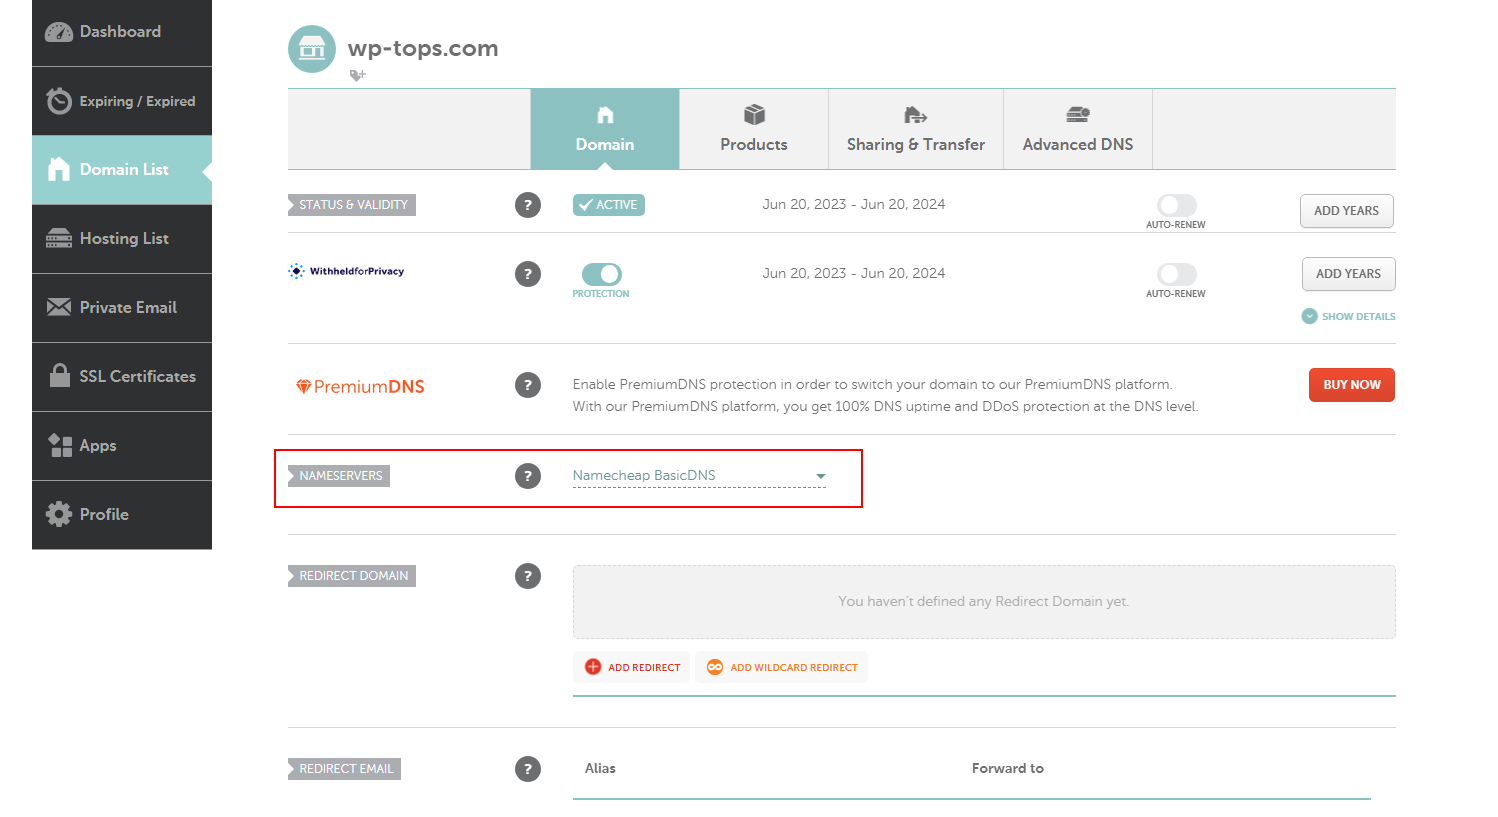
In the same “Nameservers” section on the page where you configure the settings of a particular domain name, ensure that “Namecheap BasicDNS” is selected. If not, switch to it from the other options:
Next, visit the “Advanced DNS” tab. This is precisely the place where you will manually configure the DNS servers provided to you by NameCheap (Basic DNS):
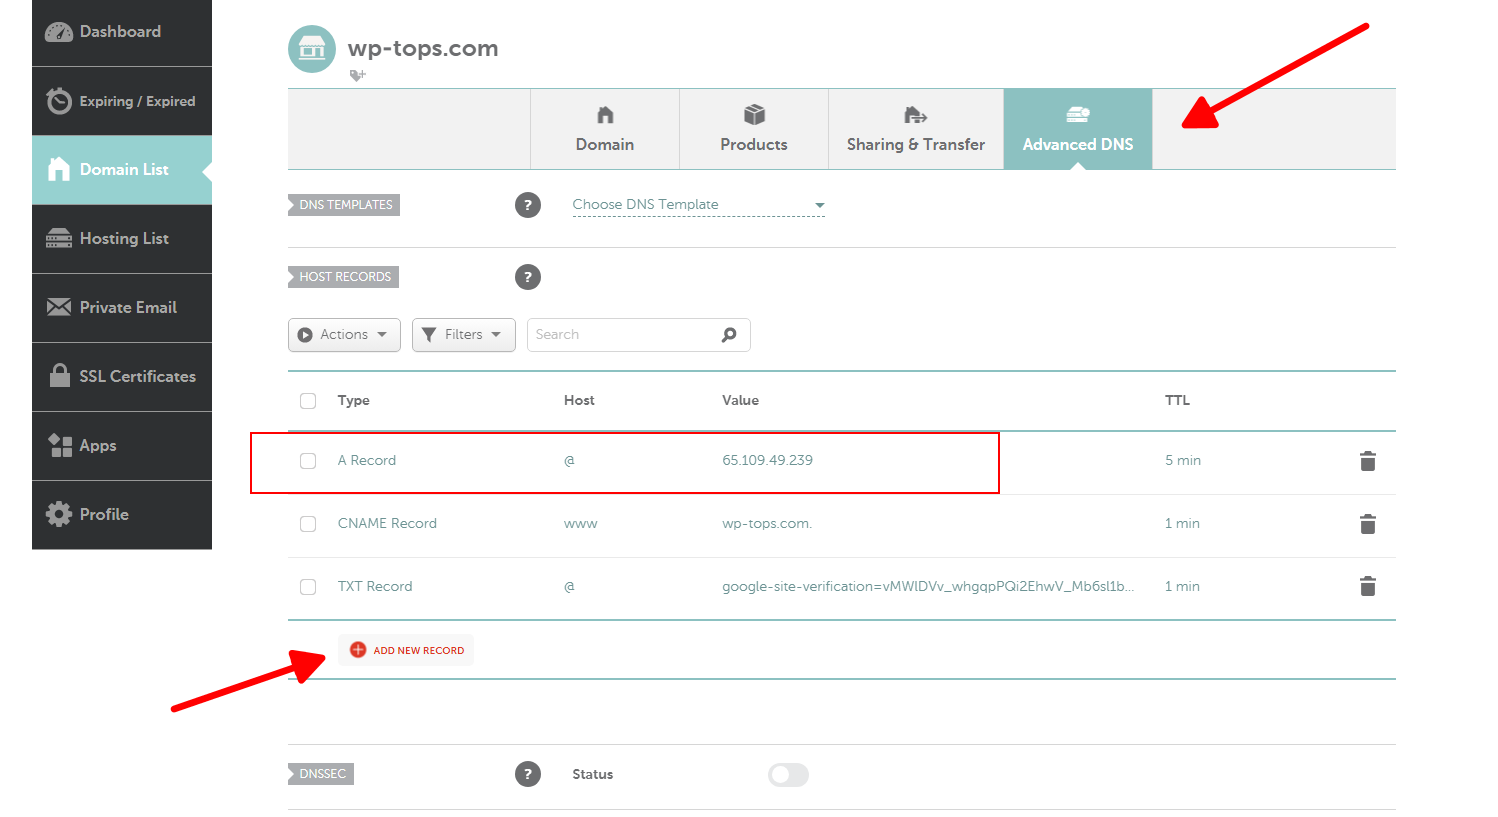
Here, you can see an example of an already-created A-type record. It is responsible for redirecting all requests to this domain to the IP address assigned to the A-record. To add it, you need to click on “Add New Record”. Also, if you want your website to be accessible with the “www” prefix, you can add a CNAME record, as shown on the screen.
That’s it. After a while, your website will be accessible via the domain name, thanks to your manual configuration of the DNS servers on the NameCheap platform.

How to Change the Domain Name of a WordPress Website
Regarding changing the domain name, to put it briefly, it all boils down to two main steps:
- It is necessary to configure redirects from each old inner page to the corresponding inner page of the new website on the new domain.
- It is necessary to ensure that all mentions of the old domain name in the database or the WordPress files are replaced with mentions of the new domain name.
In other words, your task involves setting up a new website under a new domain name, following the standard procedure for a WordPress site. Then, you should restore backups of the old website onto this new site, ensuring that all internal links lead to the new domain name. Furthermore, it’s essential to implement instructions on the old website to guarantee that users are seamlessly redirected from each page of the old site to its respective page on the new site.
There are several approaches to performing this task:
- The first method involves configuring redirect instructions directly in the management panel of the old domain. However, this approach is primarily suitable for simple websites, as it does not facilitate redirects from individual old pages to their new counterparts. With this method, anyone accessing any URL from your old website will be redirected solely to the homepage of the new website under the new domain.
- The second approach requires manually inputting specific configuration instructions into the .htaccess file for Apache servers, or the nginx.conf file for Nginx servers, located in your hosting account where the old website resides. Additionally, you will need to manually, or with the aid of specialized tools, replace all references of the old domain name in the database with the new domain name.
- The third way involves using specialized WordPress migration plugins that handle backing up the old website and often include a feature for automatically updating the old domain name to the new one in the database.
Let’s discuss each of these approaches one by one.
1. Configuring Redirects in Old Domain’s Management Panel
When we covered domain name registration and introduced the personal dashboard for managing your registered domain name on NameCheap, we noted the possibility of setting up a redirect. This is precisely the option you need for the simplest type of redirect, where accessing any page of the old website will result in a redirection to the main page of the new website. Here’s what you need to do.
Step 1. Visit the Domain Name Management Page
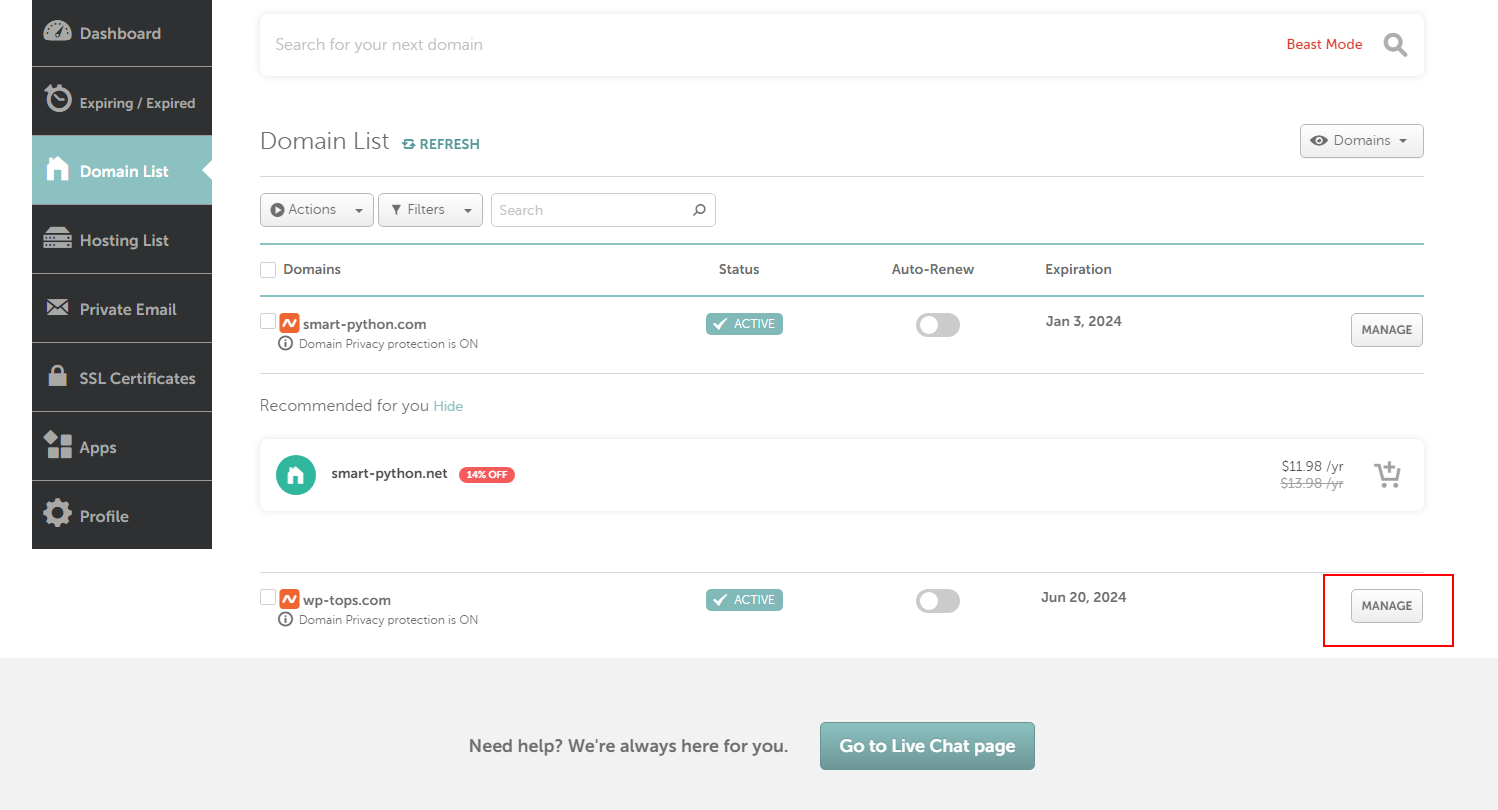
We will continue using the NameCheap dashboard as an example. So, click on the “Manage” button next to the domain name from which you wish to set up a redirect to the new domain:
Step 2: Ensure You Are Using BasicDNS
In the “Nameservers” section, the “Namecheap BasicDNS” option should be selected. This means that you will be using Namecheap’s DNS servers, which allows you to configure them directly. This is unlike the scenario where you add external DNS servers via “Custom DNS”, which would need to be managed on the hosting provider’s side and not in the Namecheap panel:

Step 3: Add Redirect Entries
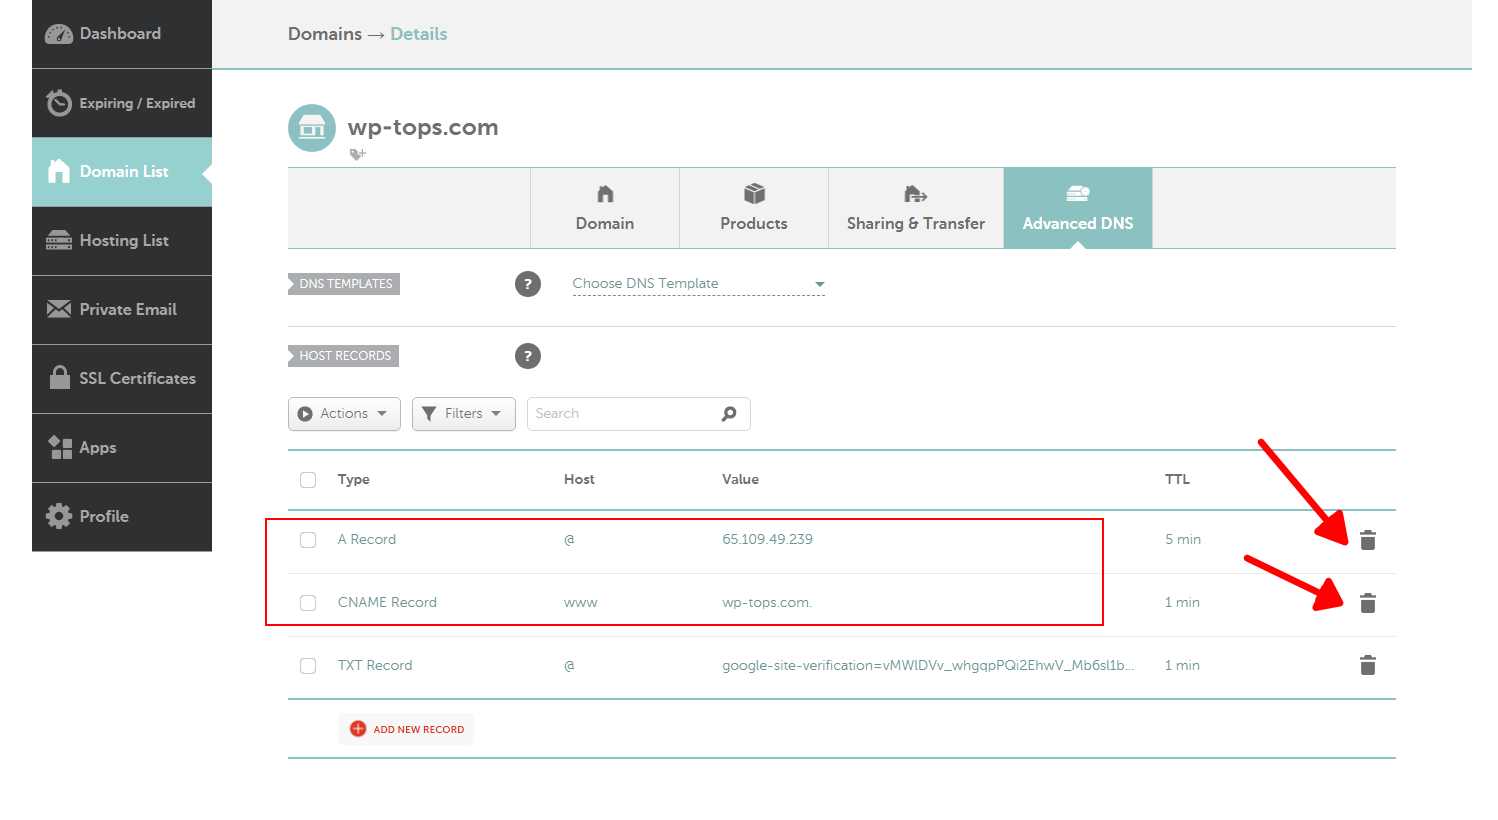
You can set up a redirect via the “Redirect Domain” section, located right under the “Nameservers” section. However, in this case, you will still need to access the advanced settings to adjust some configurations. Therefore, we will move directly to the “Advanced DNS” tab from the start. On this tab, it is necessary to remove all A and CNAME-type records, if they are present there:
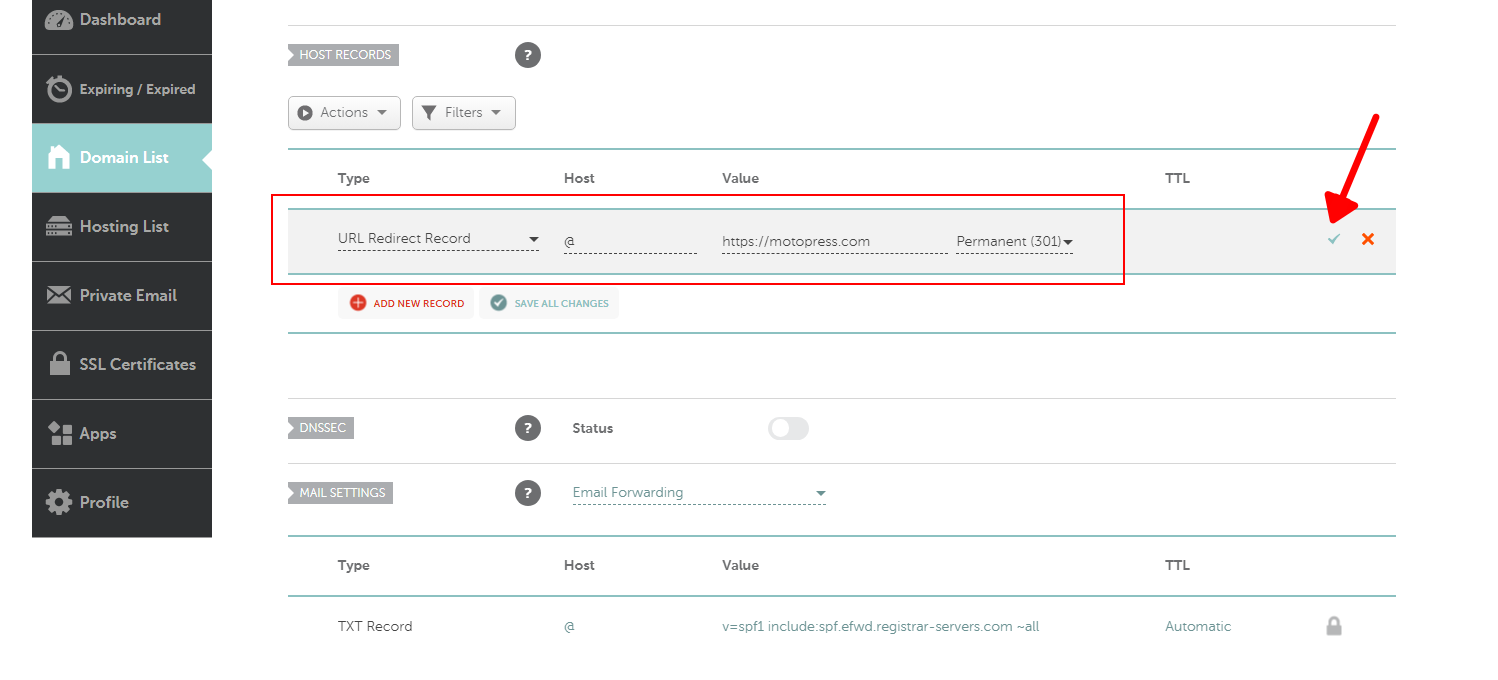
Next, click on the “Add New Record” button and select “URL Redirect Record” from the drop-down menu in the “Type” column. In the “Host” column, add the “@” symbol (which represents your root domain). In the “Value” column, enter your new domain name, to which you want to redirect all traffic from the old address. Then, in the subsequent column, choose “Permanent (301)”. Don’t forget to click the green check mark after you have filled in all the fields:
As an additional step, if your old website address used the “www” prefix, you can add a second entry with the same contents. The only difference is that instead of the “@” symbol, it is necessary to enter “www” in the “Host” column.
That’s it. In about half an hour, the redirect will start working, and every request to the old address will reroute users to the new domain name. If you want to read more about setting up redirects in the Namecheap dashboard, refer to this link.
2. Manual Configuration in .htaccess or nginx.conf for Redirects
Setting up a permanent 301 redirect for each page from your old domain to the corresponding page on your new domain might seem a bit cumbersome, but it’s more universal than the previous method.
This approach makes sure that anyone visiting a specific page on your old website gets seamlessly redirected to the same page on your new site, keeping the path and query details intact. Here’s how to achieve this for the two most popular servers.
If you are using shared hosting, visit the page where your specific hosting plan is described. Usually, this webpage includes information about the server being used. If this information is not available, contact support and inquire about the exact server provided for your hosting: Apache or Nginx.
For Apache Servers (using .htaccess)
- Locate or create a .htaccess file on the hosting account of your old website. This file is typically placed in the root directory of your WordPress installation. Create one if it doesn’t exist.
- Add to it these lines:
RewriteEngine On
RewriteRule ^(.*)$ https://new-domain-name.com/$1 [R=301,L]
This rule redirects requests to each particular page from the old domain name to the same path on the new domain. The advantage of using .htaccess with Apache is that these files can be placed directly in the hosting folder, eliminating the need to access the Apache configuration directly.
For Nginx Servers
- Edit the Nginx configuration file, which is usually located at /etc/nginx/nginx.conf or in the /etc/nginx/sites-available/ directory on your old website’s hosting server.
- Add this line to the “server” block of settings:
server {
...
rewrite ^/(.*)$ https://new-domain-name.com/$1 permanent;
...
}
This configuration redirects all requests to the corresponding path on the new domain. If your old website is located on a dedicated server, there shouldn’t be any issues, as you have access to this file. But in the case of shared hosting, it’s relatively rare for providers to allow editing of this file. Therefore, it’s advisable to opt for Apache hosting when initially choosing a shared hosting service for your WordPress website.

Updating WordPress DB: How to Replace Old Domain Name with New One
The next step, after setting up redirects from the old domain name to the new one, is to check if there are any mentions of the old domain name in our database. If such mentions exist, they must be replaced with the new domain name.
For instance, if you have used a link in your post that points to another publication on your website using the full URL, this full URL containing the old domain name will be stored in the database within the post. Therefore, when you transfer this database to the new website with the new domain, these URLs should be updated to correspond to the new website’s links.
Here is what you need to do to address this situation.
Step 1. Create a Backup of the Database on the Website with the Old Domain Name
Most hosting accounts enable website owners to manage their site’s databases. For MySQL databases associated with WordPress CMS, PHPMyAdmin is the most commonly used management tool.
If you’re not familiar with how to access PHPMyAdmin on your hosting account, you can reach out to customer support or refer to tutorials on your hosting provider’s website. As a friendly hint, PHPMyAdmin is likely the tool you used to create your WordPress website’s database right before installation.
So, to create a backup, visit the PHPMyAdmin panel and click on the database related to your WordPress website. Then, go to the “Export” tab:
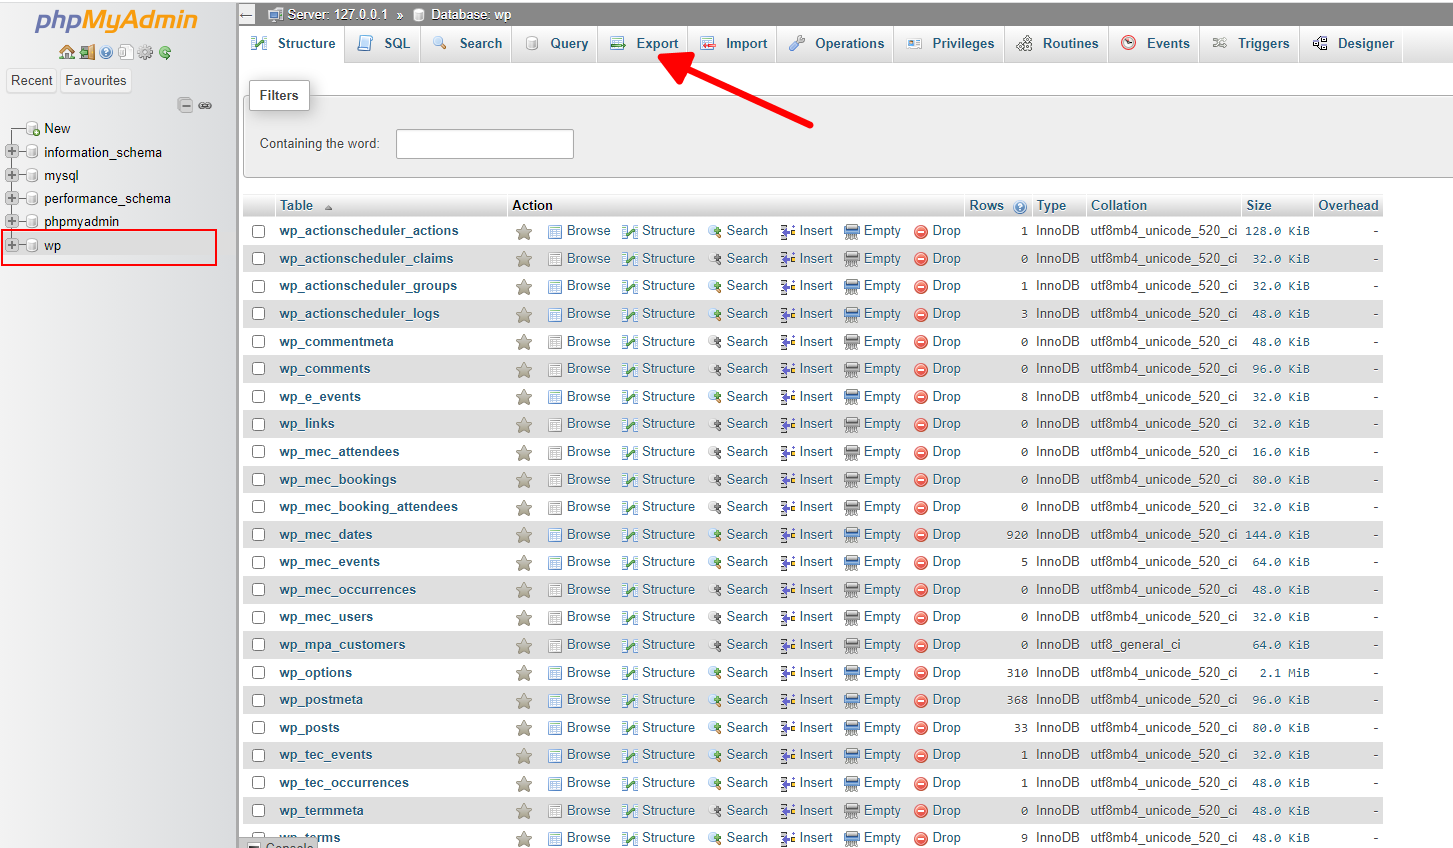
On the “Export” tab, there is no need to change anything if you don’t want to delve into the intricacies of the process. You may leave all settings as they are and simply press the “Export” button:
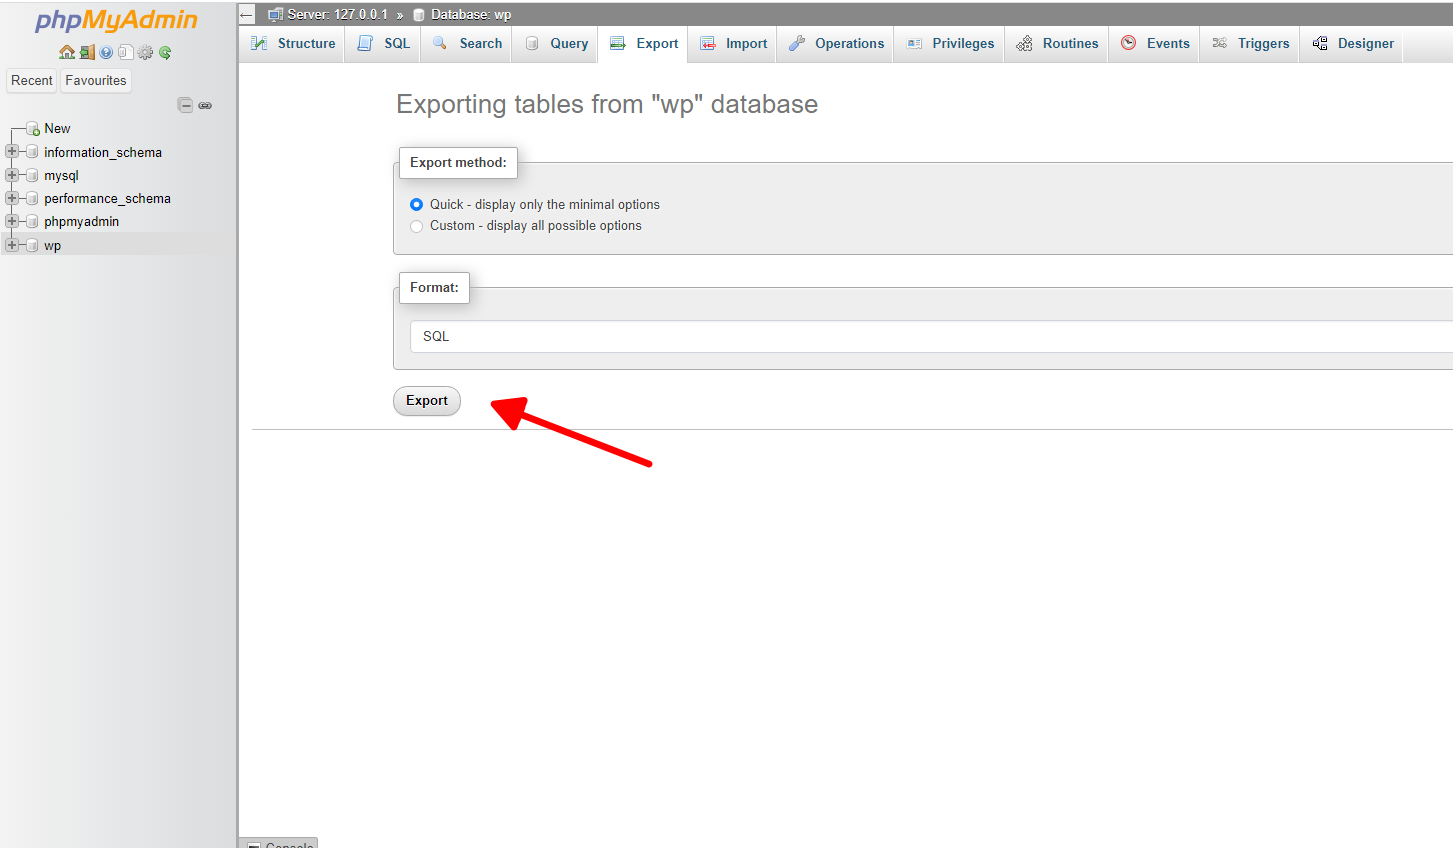
As a result, a file with the “.sql” extension should be downloaded to your PC.
Step 2. Restore the Database on Your New Website with the New Domain Name
Visit the same PHPMyAdmin panel, but this time on your new hosting account where the new domain name is attached. We assume you have not yet fully installed WordPress on the new website. This means you have started its installation but have not yet created a database. In this step, you will need to import the database downloaded from the old website and connect it to WordPress with the new domain.
This process is the same as restoring WordPress from a backup when transferring the website from one hosting account to another. The only difference here is that we are restoring our old website on the new hosting account, which has a new domain name connected. (Meanwhile, your old website remains as it is, located where it was, but configured to redirect users to the new domain).
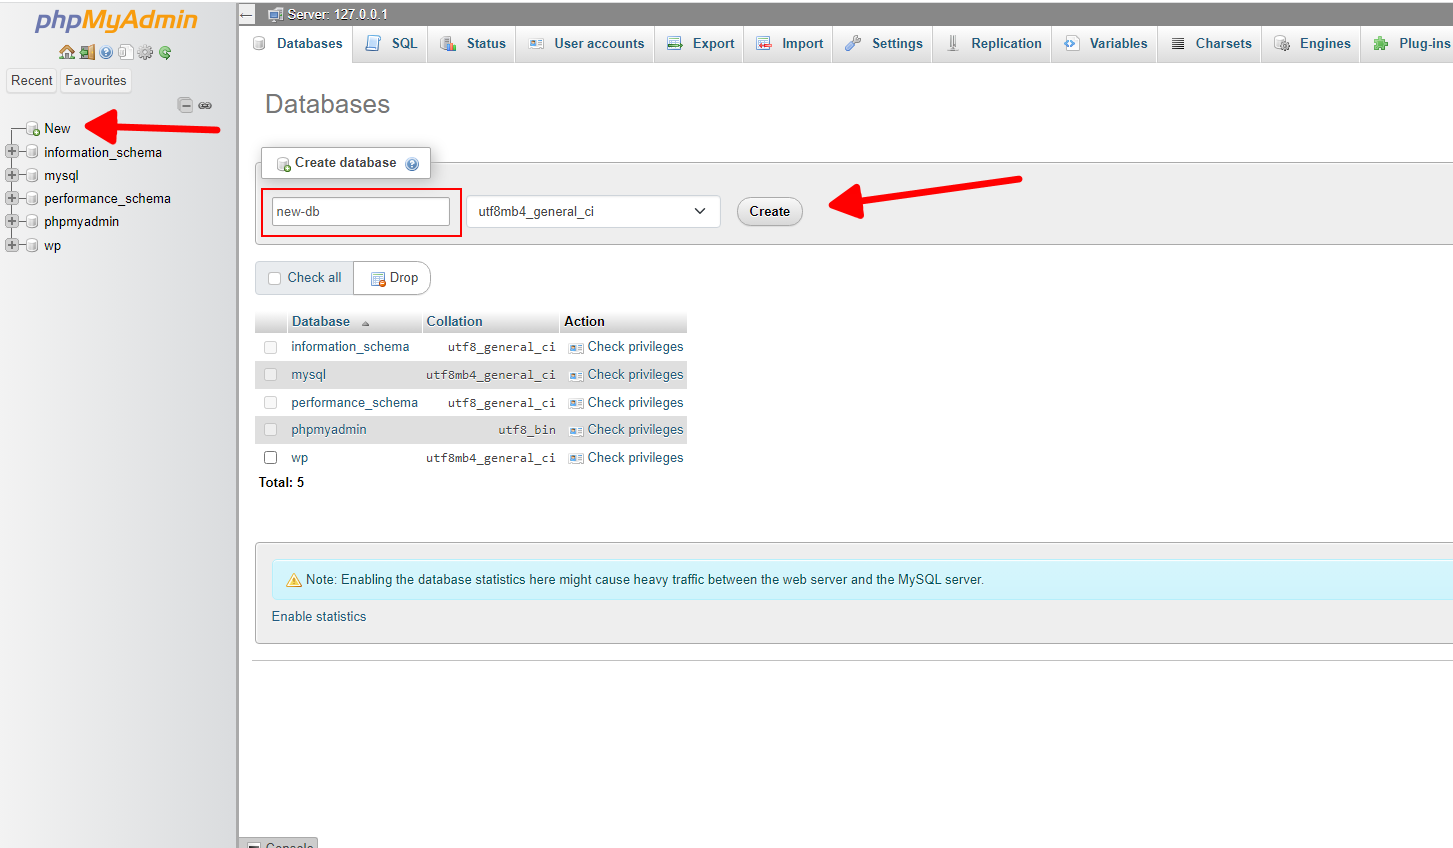
So, create a new database via the PHPMyAdmin panel:
Make the newly created database active, visit the “Import” tab, and choose the file that you obtained in the previous step:
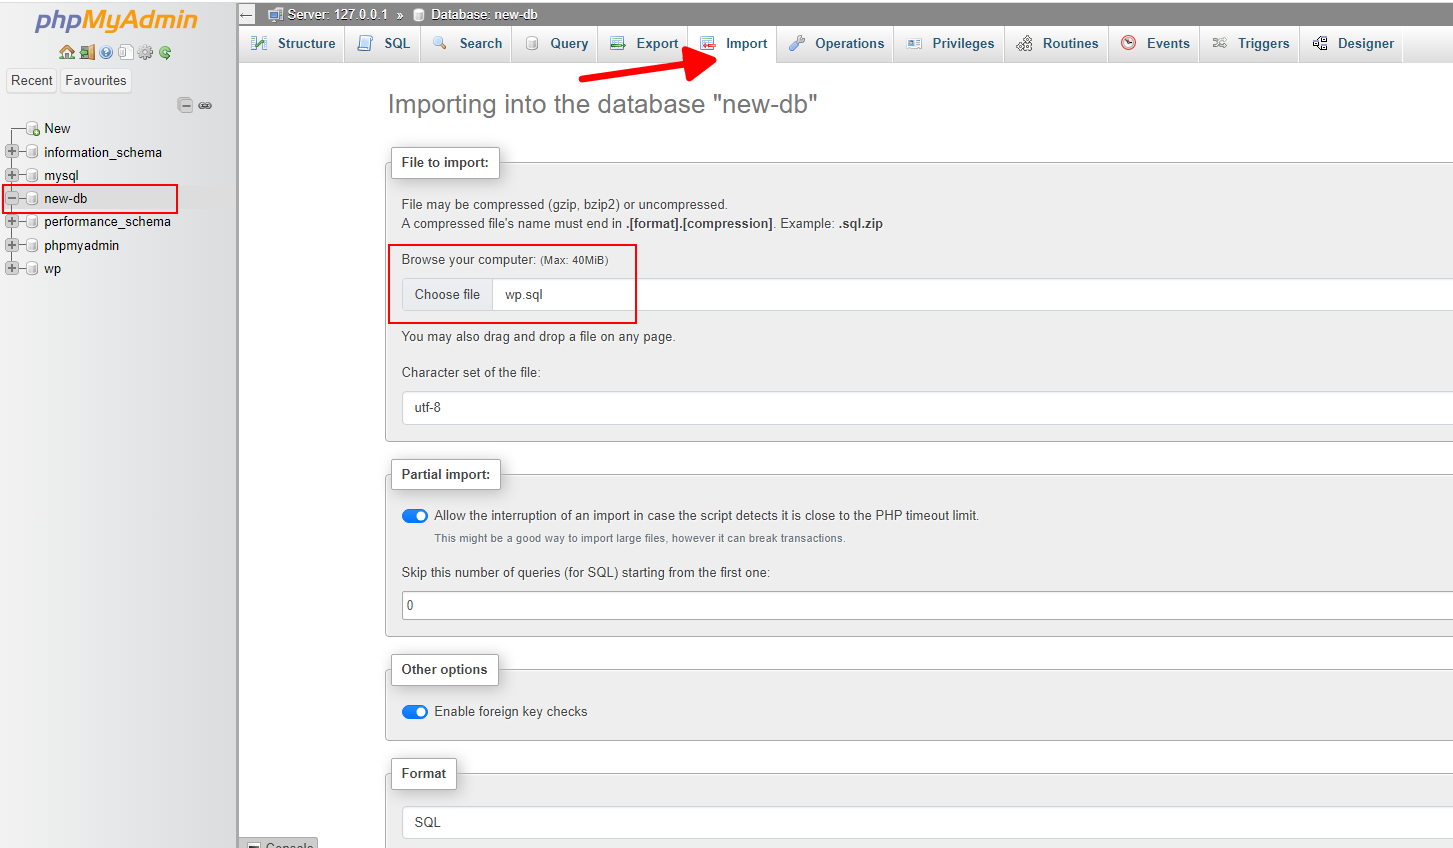
Scroll the page down, and press “Import”:
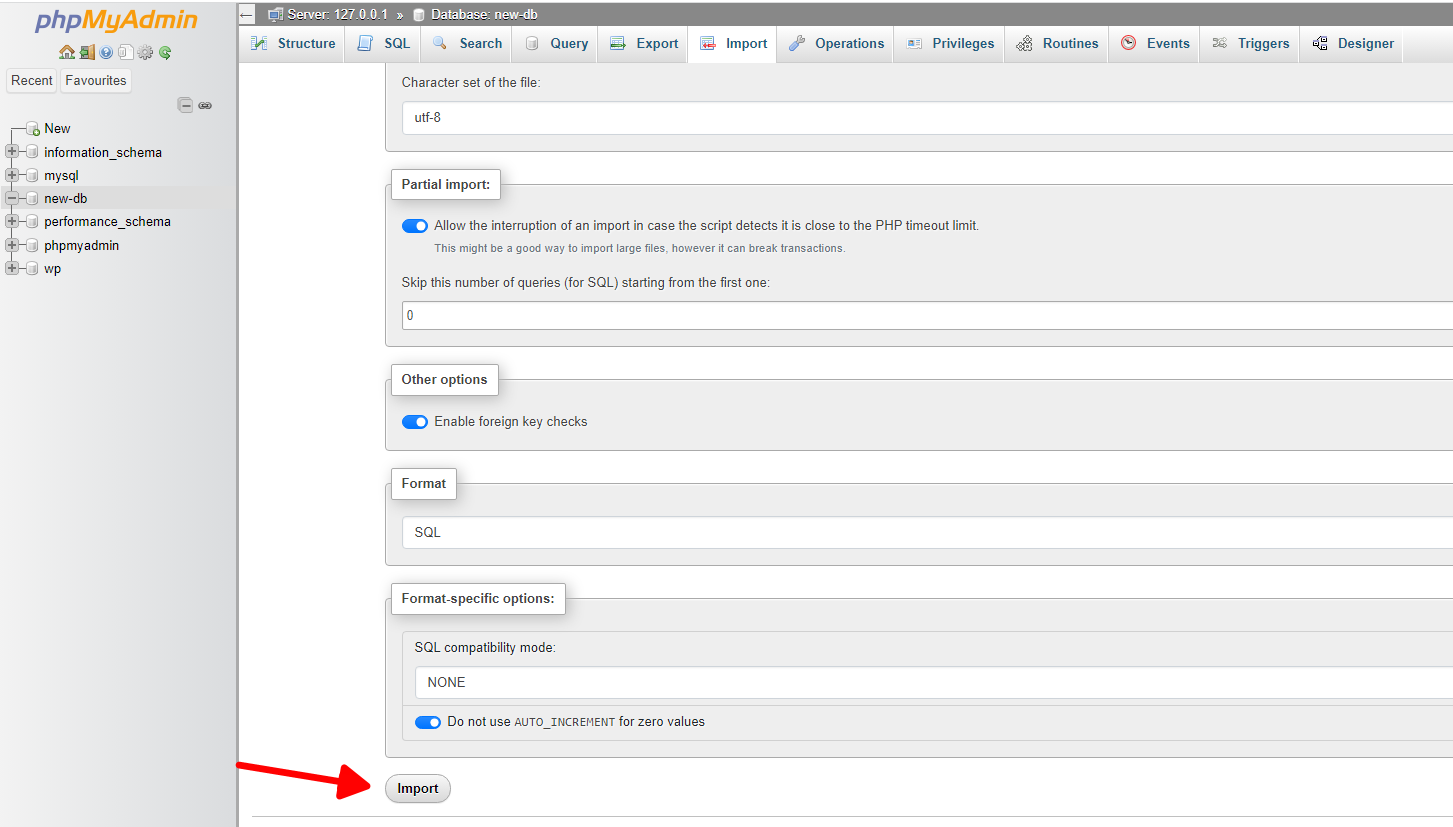
If everything was done correctly, here is what you will see:
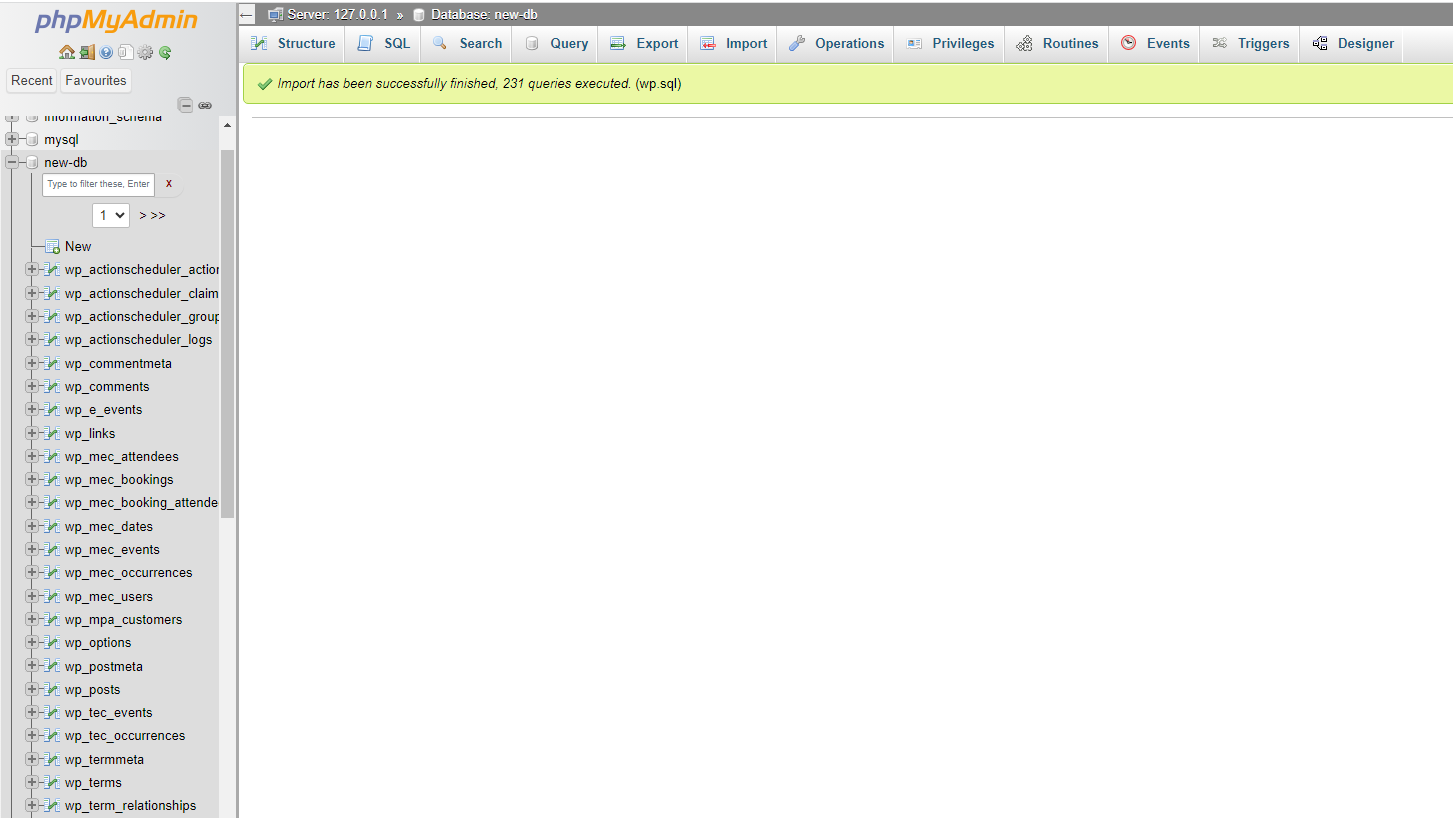
We have just imported the database from the old website to the new one. Subsequently, it’s necessary to create a user with a password, assign this user to the database in PHPMyAdmin, and add the corresponding database name, username, and password to the WordPress CMS config file. This step enables the CMS to connect to the database. For the sake of brevity, we will skip a detailed explanation of these activities, as they are pretty standard in the backup restoration process.
Instead, we will proceed to the step that involves replacing the old domain name found in the database tables with the new one.
Step 3. Replace the Old Domain Name with the New One in the Database
As previously mentioned, your posts may contain links to other publications that include the old domain name. We will search for these references and replace the URL segment “old-domain-name.com” with “new-domain-name.com”. Additionally, it will be necessary to change the default domain name in the WordPress options. Here’s what you need to do.
In the PHPMyAdmin panel for the new website select the database for your WordPress site. Then, identify tables, where posts are stored. The primary tables where you’ll likely find the old domain name are “wp_posts” and “wp_postmeta”:
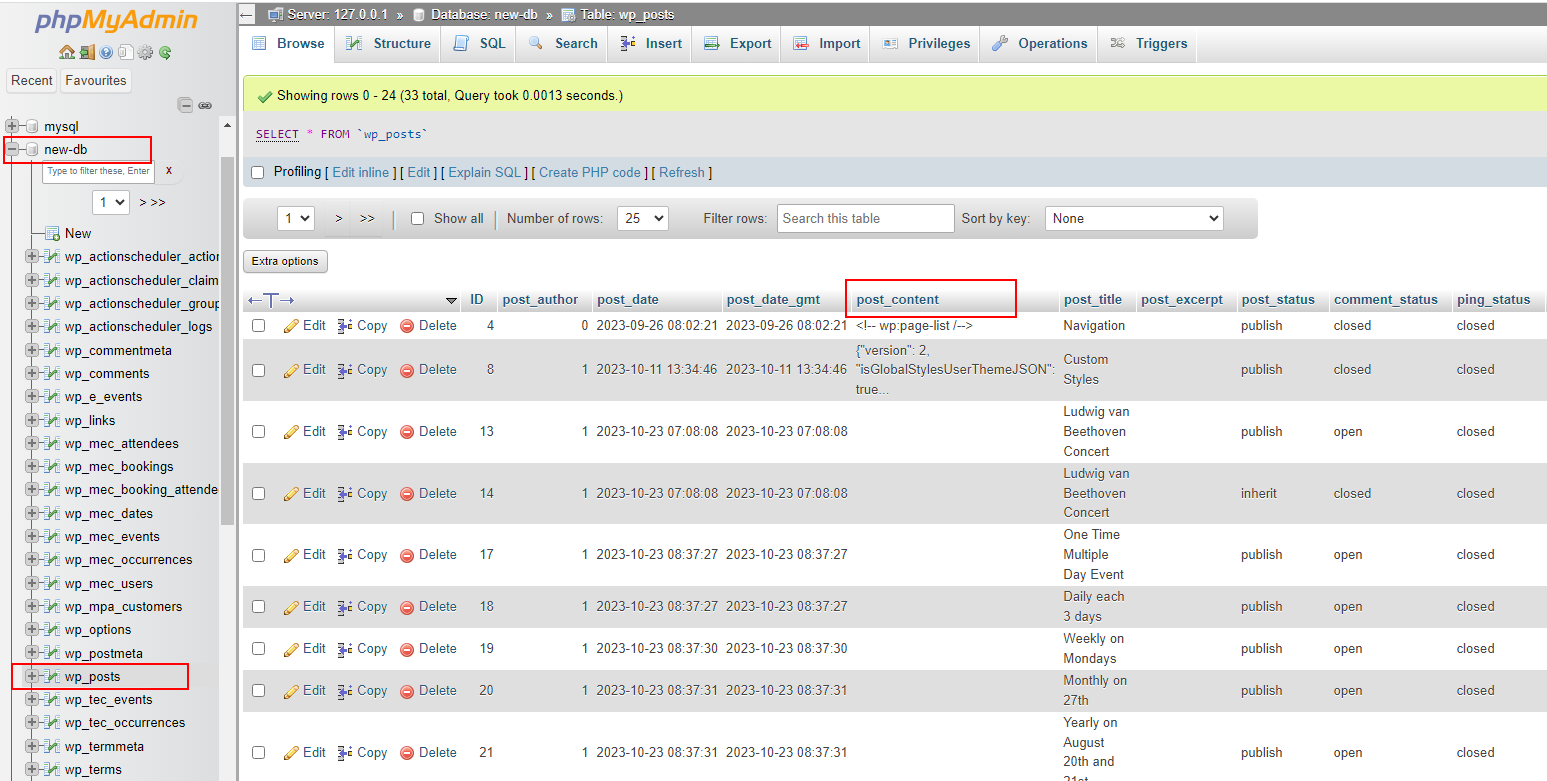
In “wp_posts”, URLs can be found in the “post_content” (for links within your posts/pages) and “guid” columns (used for media attachments). The “wp_postmeta” table can contain URLs in meta values. Other tables like “wp_options” might also have URLs, especially in the “siteurl” and “home” rows.
The search and replace operation can be performed via an SQL request. However, we will use a more comfortable and reliable approach: the built-in search and replace functionality of PHPMyAdmin.
For this, first, make the table where you will perform the replacement active; in our example, it will be “wp_posts”. Then, go to the “Search” tab, and on this tab, click the “Find and Replace” button:
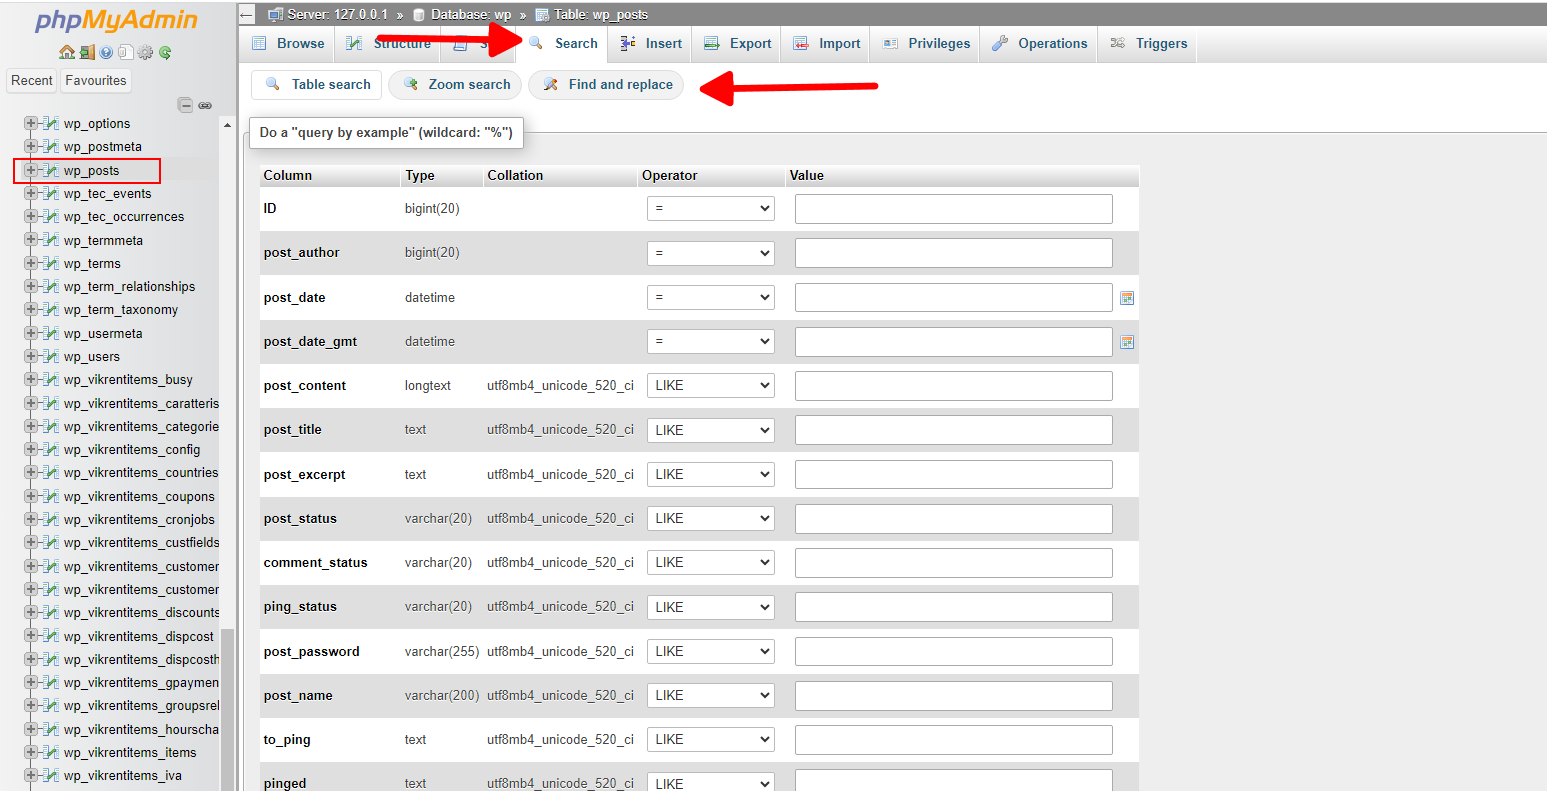
On the “Find and Replace” page, enter “old-domain-name.com” in the “Find:” field, and “new-domain-name.com” in the “Replace with:” field. Ensure that the exact column where the search will be performed is selected in the “Column:” field. In our example, this should be “post_content”:
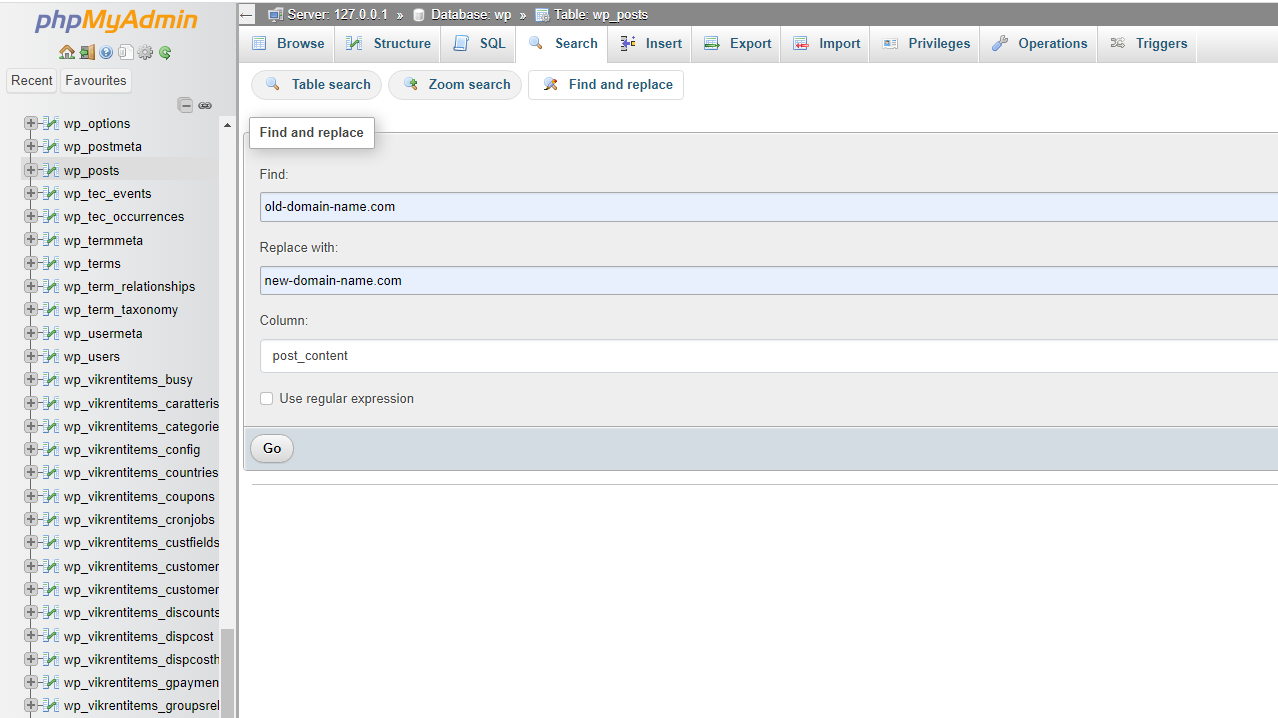
Press the “Go” button to see the preview of all mentions that were found:
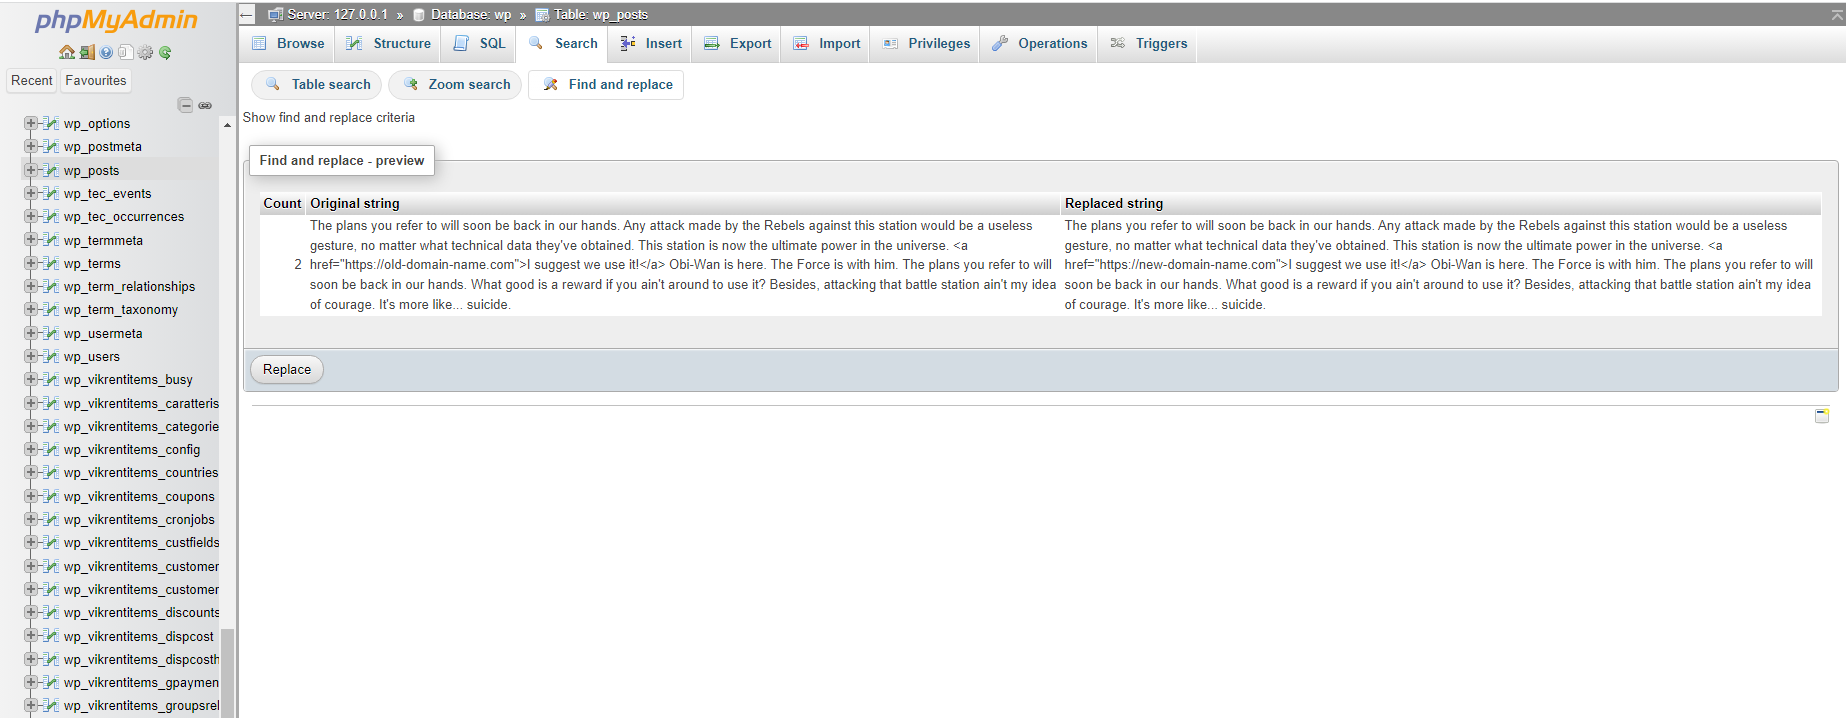
As soon as you press the “Replace” button, the replacement will be performed, and you may check the result.
Repeat this step for all tables and their corresponding columns where the old domain name might appear. These include:
- “wp_options”
- “option_name”: Look for “siteurl” and “home”.
- “option_value”: The URL entries corresponding to “siteurl” and “home”.
- “wp_posts”
- column “guid”: Contains the URL for media attachments.
- column “post_content”: Can have links to other posts or images.
- “wp_postmeta”
- “meta_value”: Might contain URLs for images or linked content within post metadata.
- “wp_usermeta”
- “meta_value”: In some configurations, user-related URLs might be stored.
- “wp_links”
- “link_url”: Contains URLs for blogroll links or similar link lists.
- “wp_comments”
- “comment_author_url”: The URL provided by users who leave comments.
- “comment_content”: URLs within the comment body.
That’s it. The bulk of the work involved in changing a domain name has been completed at this stage. However, there are additional considerations that should be taken into account when changing a domain name. These will be discussed in one of the following sections.

3. Migrating from the Old Domain Name to the New One Using Plugins
For the sake of brevity, we will not provide detailed instructions for each plugin’s usage. It is important to understand that these extensions primarily facilitate user-friendly versions of the operations we performed in the previous section: setting up redirects from the old website to the new one and searching and replacing mentions of the old domain name with the new one in the database.
Additionally, these plugins are often used to create database backups, which is a crucial step for any website, even without a domain name change. Having backups of the website is essential as a precaution.
So, without further ado, let’s review the most popular tools that can help in a website migration to a new domain name.
Redirection
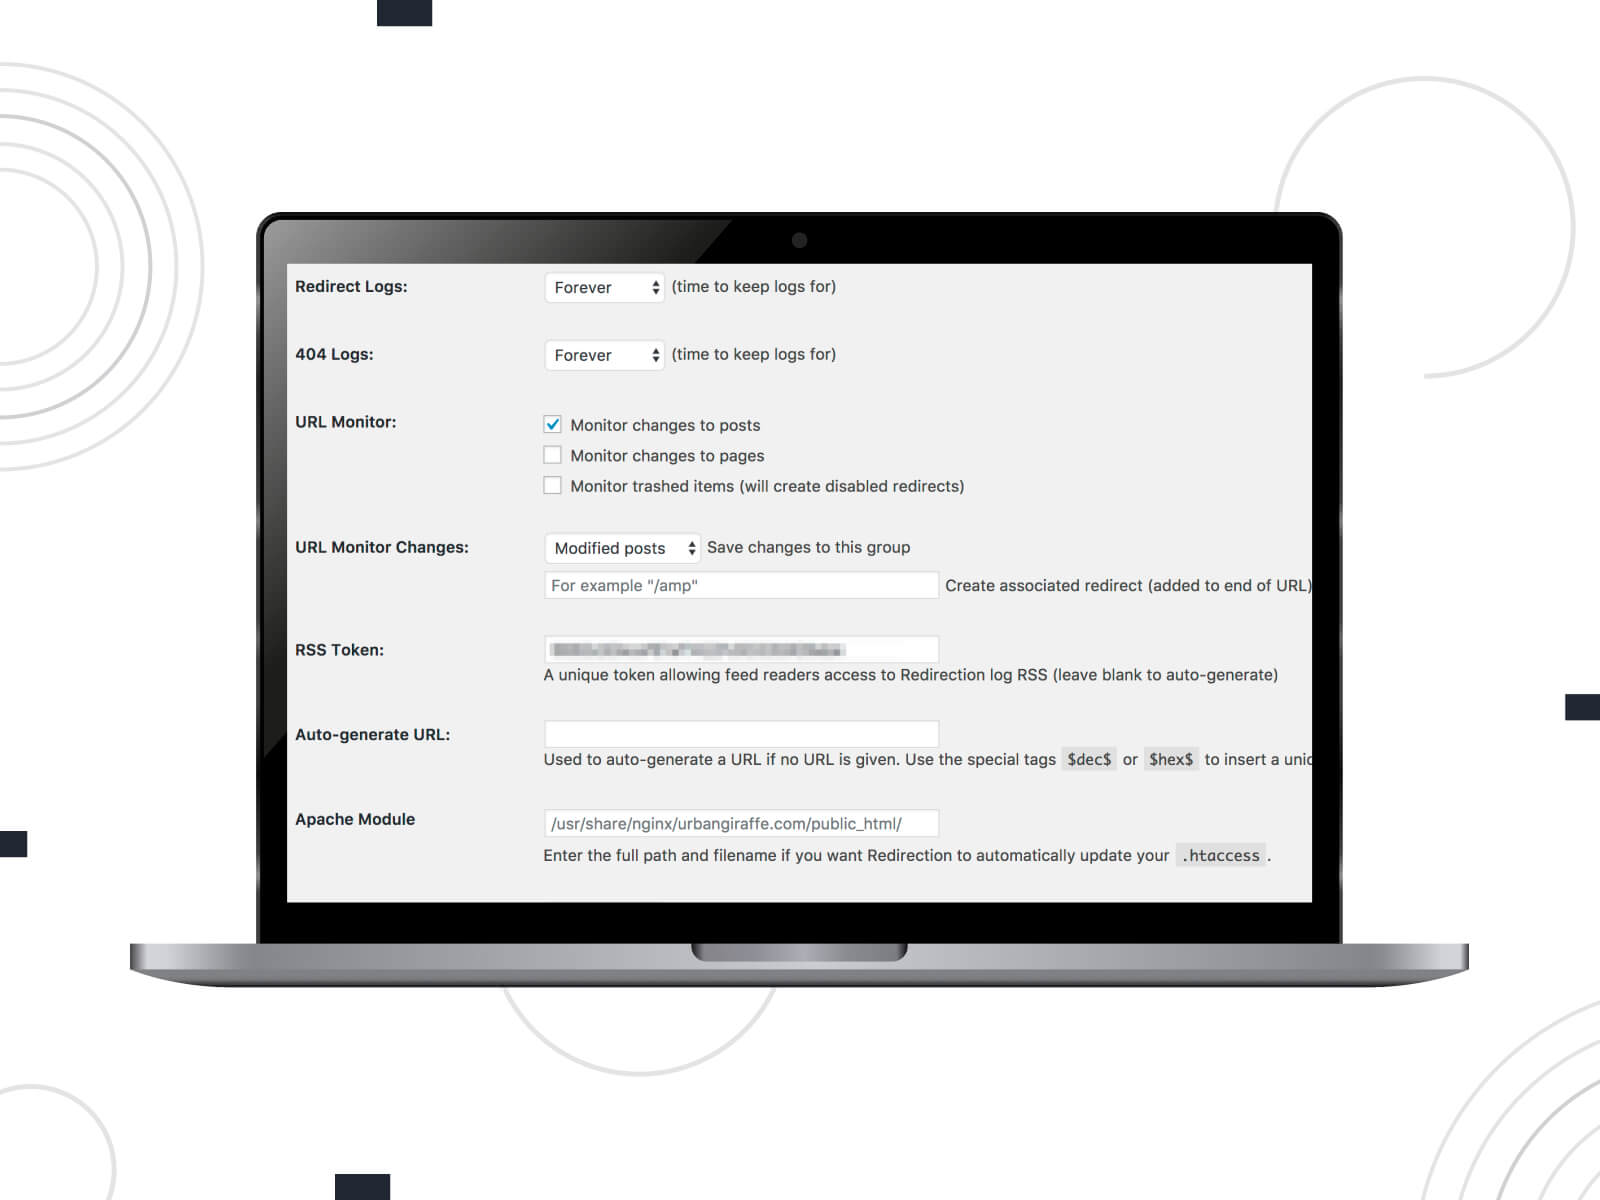
As one of the core aspects of migrating from one domain name to another, we highlighted the necessity of setting up all redirects correctly. We mentioned some approaches that involve hands-on experience with editing the .htaccess file. To address this need, a specialized WordPress plugin has been created. It performs the editing of the .htaccess file on the backend, while on the frontend, you can enjoy a user-friendly interface with lots of additional configuration options.
The plugin’s ease of use is one of its key strengths: it requires no deep knowledge of Apache or Nginx, making it accessible to a wide range of users. Whether your site has just a few redirects or thousands, Redirection can handle it with ease. Beyond basic URL redirection, this tool offers advanced features like conditional redirects based on login status, browser type, referrer, and more. This allows for a highly tailored approach to redirection, ensuring that specific user conditions or behaviors trigger the appropriate redirects.
UpdraftPlus: WordPress Backup & Migration Plugin
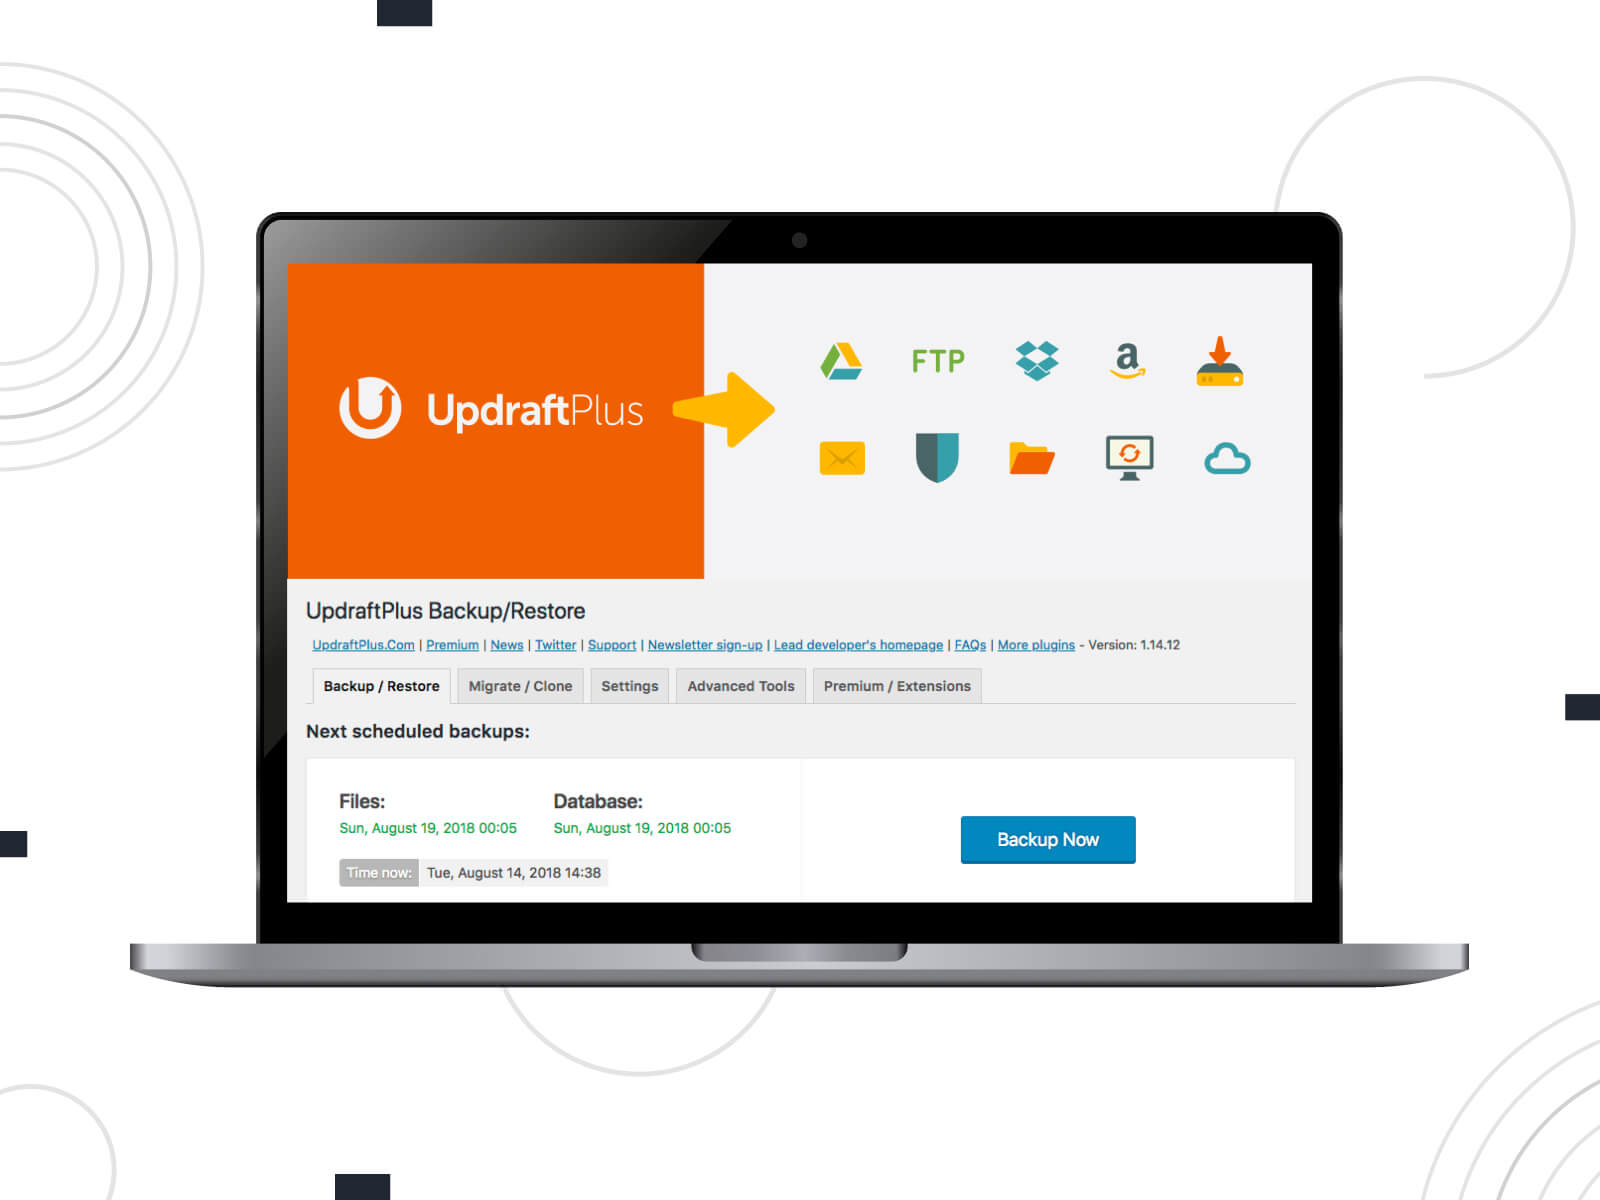
Moving on to the aspect of database transfer, we start our story with a well-known powerful tool for creating and storing backups in automated mode, UpdraftPlus. Apart from this, it also stands out as an invaluable extension for those undertaking the task of migrating their WordPress website to a new domain. Its basic feature set includes backing up your site database along with important folders to a variety of storage locations, such as Dropbox, Google Drive, Amazon S3, and many others.
The migration feature of UpdraftPlus is particularly noteworthy since the process simply involves downloading your database, plugins, themes, and other site components from your current site and uploading them to the new location. During this transfer, UpdraftPlus’s built-in search-and-replace engine skillfully identifies and updates old strings to match your new domain, significantly reducing the risk of broken links or missing files. This feature will be especially appreciated by those who may not be technically inclined.
Duplicator – WordPress Migration & Backup Plugin

Another interesting extension, particularly famed for its robust capabilities in migrating, copying, moving, or cloning a WordPress site from one location to another. This makes it an essential tool for those looking to shift their website to a new domain, ensuring a smooth and efficient transition. The extension stands out for its ability to handle both serialized and base64 serialized replacements, a feature that is critical for maintaining the integrity of your website data during the migration process.
The plugin’s functionality goes beyond mere migration. With Duplicator, you can pull down a live site to localhost for development, transfer a site from one host to another, backup parts of a site, or even duplicate a live site to a staging area and vice versa. It bundles up an entire WordPress site into a package — a zip file containing all site elements, from plugins and themes to the full database and WordPress files. This package can then be deployed to any location, be it on the same server, across servers, or any other WP-compatible environment.
All-in-One WP Migration
This plugin is tailored for users who may not possess extensive technical knowledge, offering a straightforward, user-friendly approach to migrating WordPress websites. The process is simple: install the extension, export your website’s database, media files, plugins, and themes into one compact file, and then use the intuitive “drag and drop” feature to deploy this file at the new location. This ease of migration is further complemented by the plugin’s compatibility with a wide range of WordPress and PHP versions.
The appeal of All-in-One WP Migration extends beyond its simplicity. Not just limited to personal or small-scale sites, the tool has earned the trust of substantial organizations and government entities, including Boeing, NASA, and Harvard University, underscoring its reliability and versatility for all kinds of website migration needs. Moreover, its compatibility with a range of hosting providers, and cloud storage services, and its ability to intelligently replace website URLs during import, makes it a highly sought-after solution for seamless domain transitions.
4. Additional Steps to Consider
We have discussed the main technical steps involved in moving a WordPress website from one domain to another. However, there are also additional activities that need to be considered to ensure that the new domain name preserves all the achievements accomplished by the old domain name. These activities include:
- Notifying Users: Inform your users, customers, and partners about the domain name change through emails, newsletters, or announcements on your website and social media.
- Updating Webmaster Tools and Analytics: Update your domain information in any webmaster tools (like Google Search Console) and analytics platforms (like Google Analytics) you use.
- Email Addresses: If you use email addresses linked to your domain (like [email protected]), you’ll need to create new email addresses associated with the new domain and ensure a smooth transition.
- Updating Backlinks: While you can’t change all backlinks, it’s advisable to reach out to major websites linking to you and request them to update the links to your new domain.
- SSL Certificate: You will need to obtain a new SSL certificate for the new domain name to ensure your website remains secure.
- Social Media and Online Profiles: Update your domain name on all your social media profiles, online directories, and anywhere else your website might be listed.
Key Takeaways
You were provided with a comprehensive review of the subject “How to register domain name for WordPress website”. Domain name registration is a pretty straightforward process. It essentially involves registering in the domain management panel of the registration service, choosing a name that fits your needs and brand identity, and linking it to your contact data. When creating a domain for blog or any other website, try to choose one that is easily memorable, relatively short, and has a domain zone corresponding to your business.
As for changing the domain, this process involves setting up redirects from the old website, which should remain active for some time. This is because people will initially visit your old website until search engines and your users become accustomed to the new domain name. The following step is to create a backup of your website and restore it on the new hosting account with the new name.
After restoring your backup at the new location, it’s necessary to find and replace all mentions of the old domain with the new one. This can be done either via PHPMyAdmin, which facilitates database management on PHP hosting, or with specialized plugins like UpdraftPlus, if that approach is preferred.
As soon as all technical aspects of the domain change are complete, ensure to notify search engines about the update. Additionally, inform your clients by sending emails detailing your new domain name. It’s also important to update your social media profiles and any online listings with the new URL. Ensuring all digital footprints reflect your new domain is crucial for maintaining consistency and visibility.
FAQ
How do I register a domain name for my website?
- Select a Trusted Registrar: look for a well-known and reputable company that handles domain registrations.
- Search for Availability: Use the search tool on the website of your chosen service to check if your desired name is available. When choosing the domain, consider key aspects such as ease of memorization, relatively short length, and ensuring it doesn’t resemble a well-known trademark to avoid potential legal issues.
- Purchase Your Domain: Once you find an available name, add it to the cart. Complete the registration process by providing your contact details and making the payment.
- Configure Your Domain: After registration, configure your domain settings, such as DNS servers, to point to your web hosting service.
Do I need to buy a domain for the WordPress site?
When setting up a website with WordPress.org, the first step is to purchase a name from a domain registrar. This will be your website’s internet address (for instance, “example.com”). Next, you need to select a hosting service where your website’s files will reside. Once you have your hosting account, you should connect the domain to it.
This is typically done by updating the DNS settings at your domain management panel with the nameservers provided by your hosting service. Finally, after your domain name is pointing to your hosting server, you can proceed to install WordPress CMS on your hosting account. Many hosting providers offer easy “one-click installation” for WP, simplifying this process.