How to Create Tables in WordPress Post & Pages in 1 Minute! No HTML Required
Table of Contents
If you are asking yourself questions like “How do I create tables in WordPress?”, this post is for you. Since tables are great tools to structure the data on posts and pages, the article covers different ways to insert them without touching a code.
If you are eager to find a solution suitable for your website, let’s get to the point and assess the details!
How to Create Tables in WordPress?
In this article, we are going to explore 3 of the most popular ways to insert tables to your website.
If you use the Gutenberg block-based editor, you don’t even need any extra plugins. Gutenberg offers a dedicated block with some basic functionalities that should suffice for building many types of tables.
It was not that easy to make a table in WordPress Classic Editor with a responsive and highly functional design. So if you still haven’t ditched the latter, it’s a great chance to start building your site in a more comfortable way with Gutenberg.
The table Gutenberg block: Pros and Cons
| Pros | Cons |
|---|---|
| Suitable for comparison and general data presentation tables. | Limited table options (e.g. you can’t merge/split cells). |
| Easy to add without needing to install extra plugins. | Limited styling options (colors, fonts). |
| Native WordPress editing experiences. | Hard to scale to more advanced tables. |
| A few styles. | |
| Distinguishing header and footer. |
How to Create a Table in WordPress Gutenberg?
In this WordPress table tutorial, we’re showing you an easy way to create a functional and good-looking table, with and without third-party blocks and plugins for the Gutenberg block editor. Watch this step-by-step tutorial to get about all the table blocks settings and get the most out of your table in WordPress Gutenberg (version 5.4.2)
Add the block
First of all, you should click on the “+” button, type ‘/Table’ and add it.
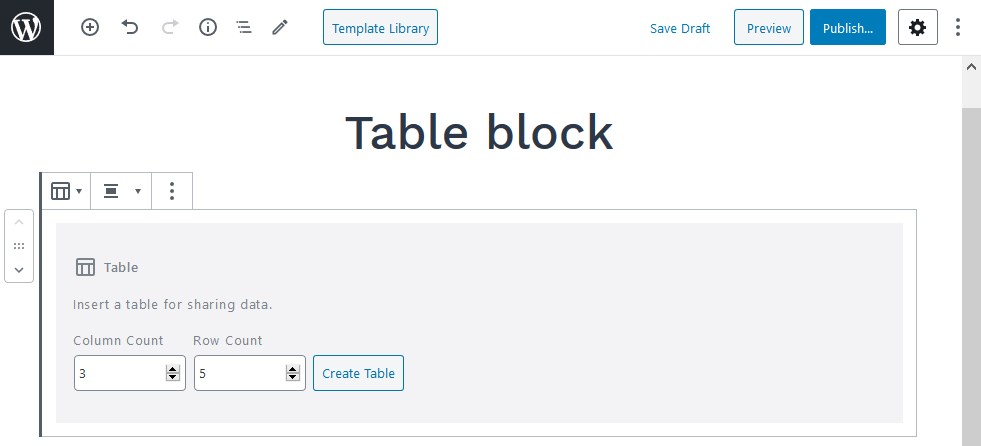
It will ask you to choose the number of rows and columns – don’t worry, you can update them later.

Configure Settings
Here are a few settings you can start with (editable via the right-hand block panel) –
- Fixed width cells (if turned off, browsers usually use the automatic layout algorithm);
- Optional header and footer.
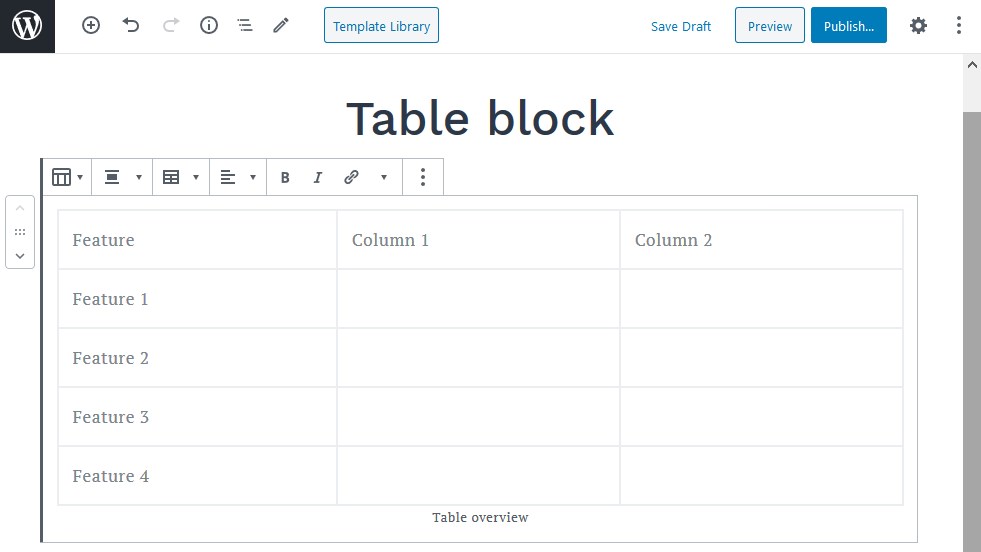
For example, let’s turn on the header and footer sections – two bold sections that definitely improve the look of the table will appear:
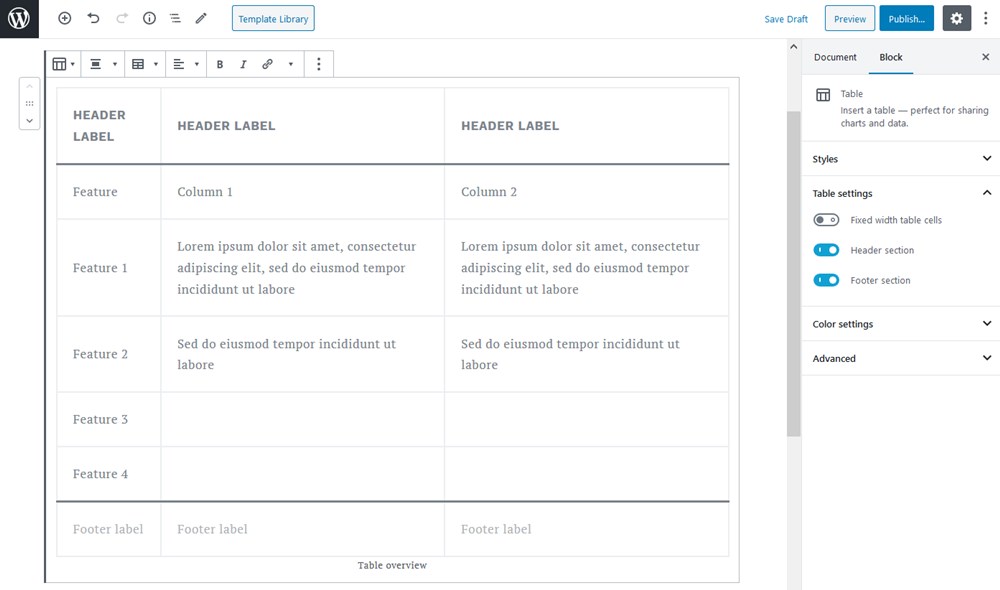
You may find them helpful depending on what type of table you need to build.
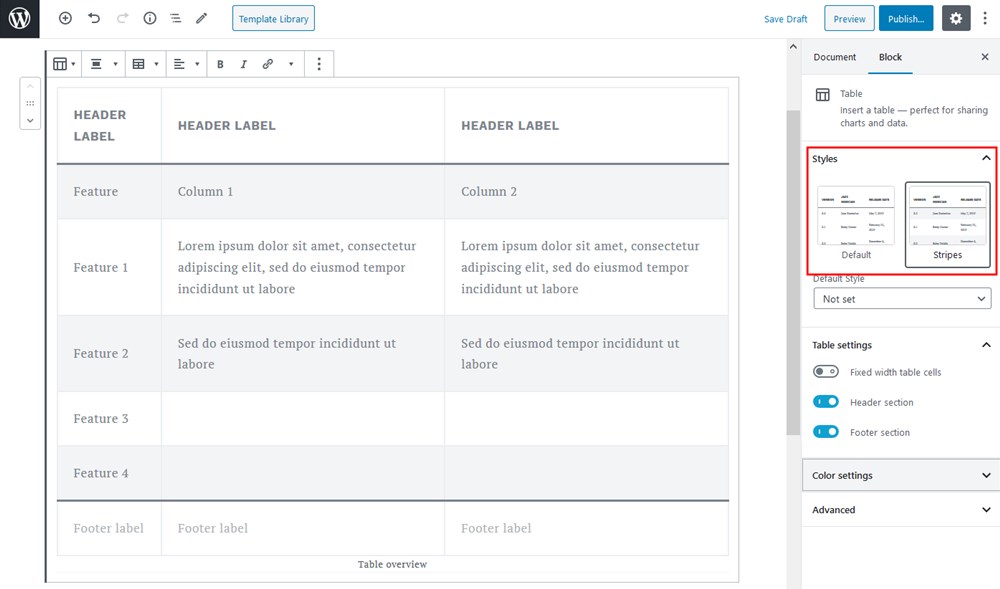
Styles
There are two styles – default (just like in our previous examples – inherited from your WP theme) and stripped.
Opting for the “Stripes” style, you’ll be able to add more visual hierarchy and create better comparison tables:
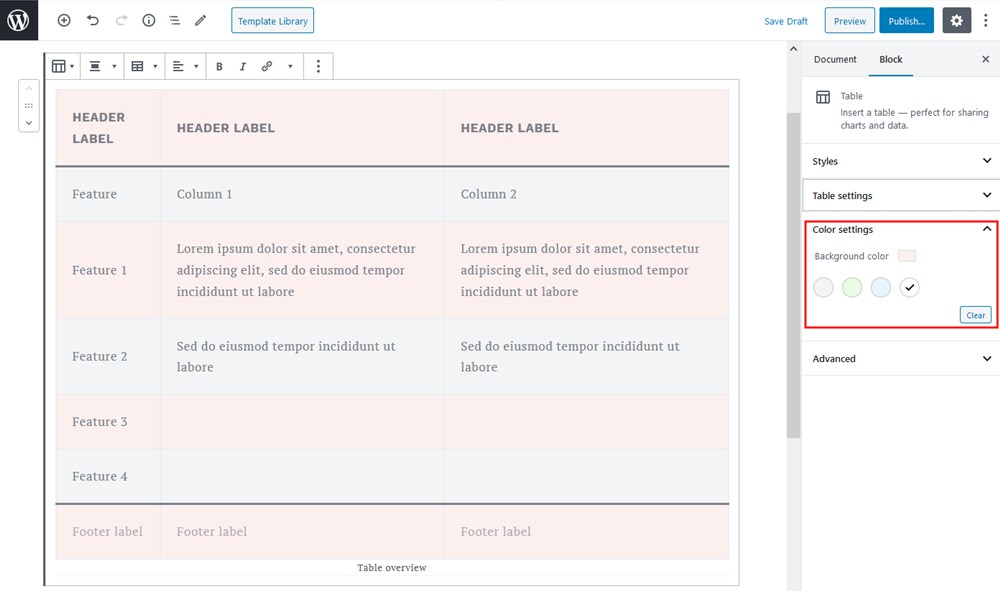
A color palette for the background colors is limited: there are just a few colors you can apply.
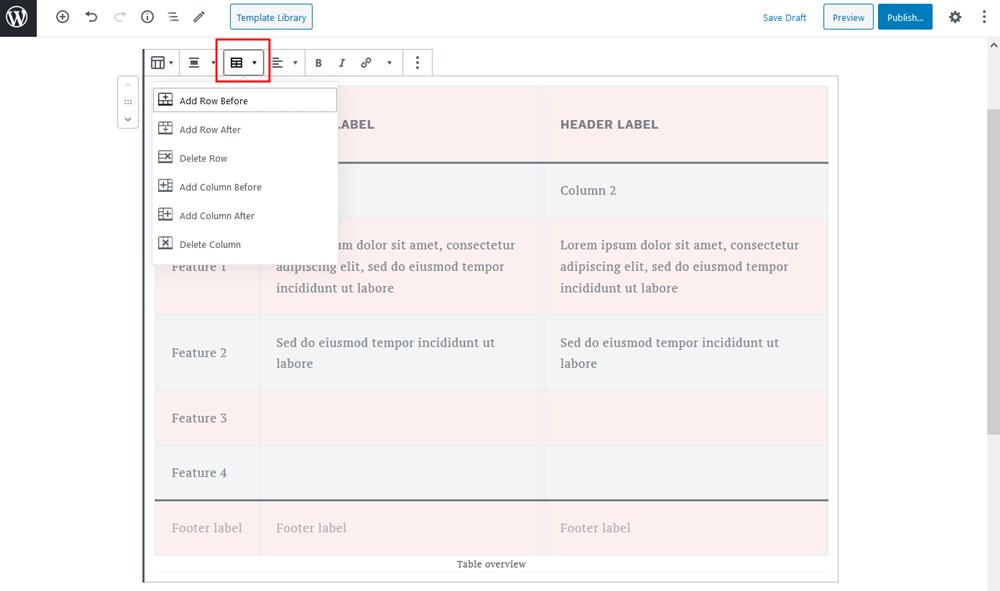
Row and column settings
You can easily manipulate rows and columns, e.g. add and delete them where needed.
How to add the Advanced Table block in Gutenberg?
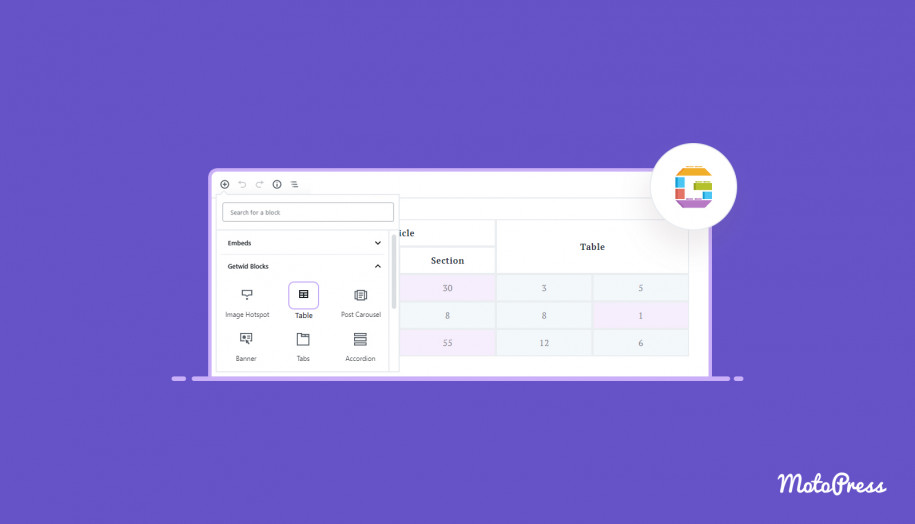
If you are, however, looking for more table options in Gutenberg, you might want to download free Getwid Gutenberg blocks.
What is Getwid?
Getwid is a free WordPress plugin, which expands the default capabilities of the Gutenberg editor. It includes 40+ different blocks for multipurpose use and 35+ pre-built templates for different website pages and their sections. But more importantly, it provides the Advanced Table block that gives you an idea on WordPress on how to create tables.
Main Features:
- The largest (40+) third-party collection of free blocks;
- Extensive attributes for blocks;
- Clean & lightweight code;
- Compatibility with core Gutenberg blocks;
- Compatible with all Gutenberg themes.
The Advanced Table block, among other features, allows you to merge cells, customize cell backgrounds with any color, tweak styling for borders, and more. It’s completely free so you can use it without limitations.
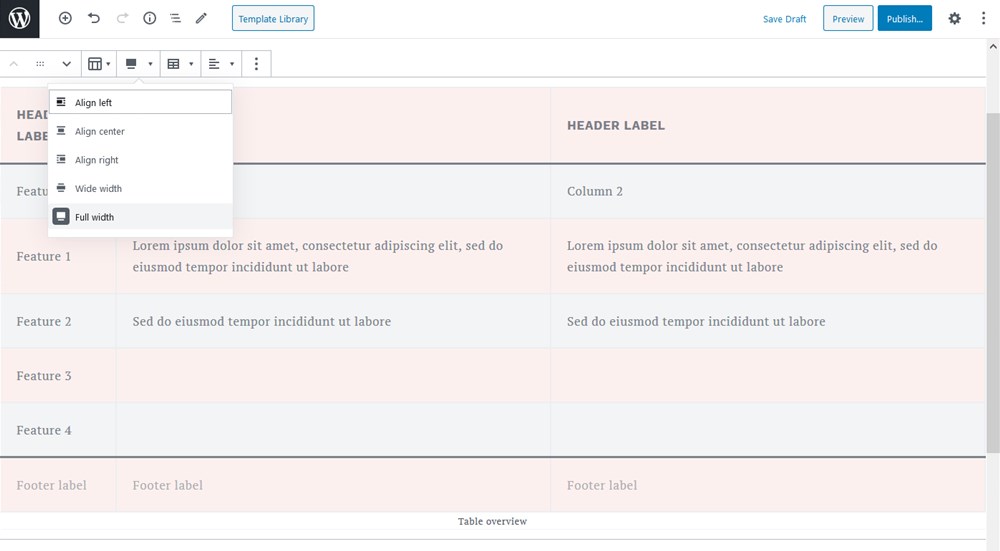
If your WP theme supports different layout widths, you can make your tables full-width as well (it will span the whole screen). My Getwid Base theme supports it so I can do it easily:
Creating Tables with Elementor
Elementor is one of the most popular page builders. It replaces a basic WordPress editor with a real-time frontend editor. So, you can visually edit the appearance of your website using its set of widgets and templates.
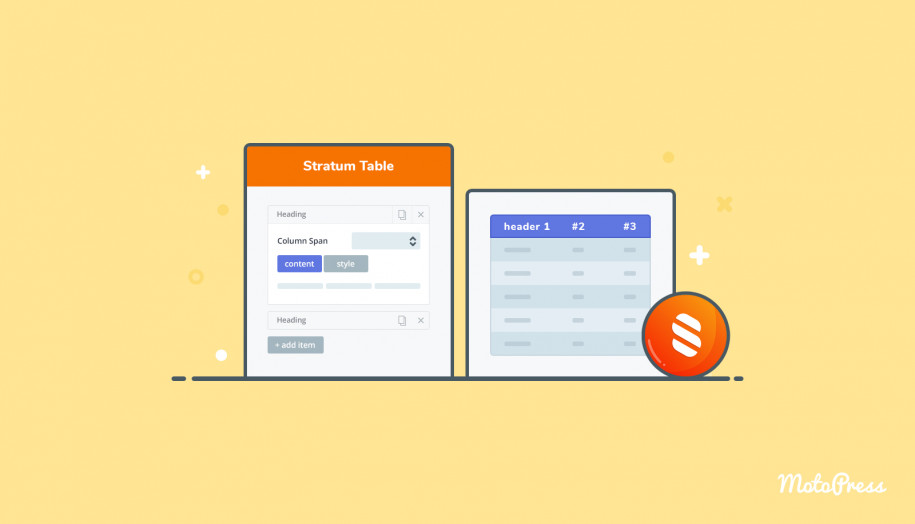
However, its widget collection includes only the Price Table and Table of Contents widgets. So, we’ll use the Stratum Elementor addon and its dedicated widget to add tables.
What is Stratum?
Stratum provides 20+ free Elementor widgets covering multiple needs. In terms of customization, you can style up the widgets to adjust them to your website’s design. Stratum inherits the style of your WP theme.
The premium version called Stratum Pro delivers priority support and more customization options for some widgets.
Main Features:
- Free Elementor widgets;
- Compatible with WP themes;
- Fast-loading modern design;
- Customization options;
- Stratum Pro advanced tools.
The Table Elementor widget by Stratum is flexible enough for you to customize colors, size, alignment, typography, and other settings.
So, once Elementor and Stratum are installed and activated on your admin dashboard, you can start.
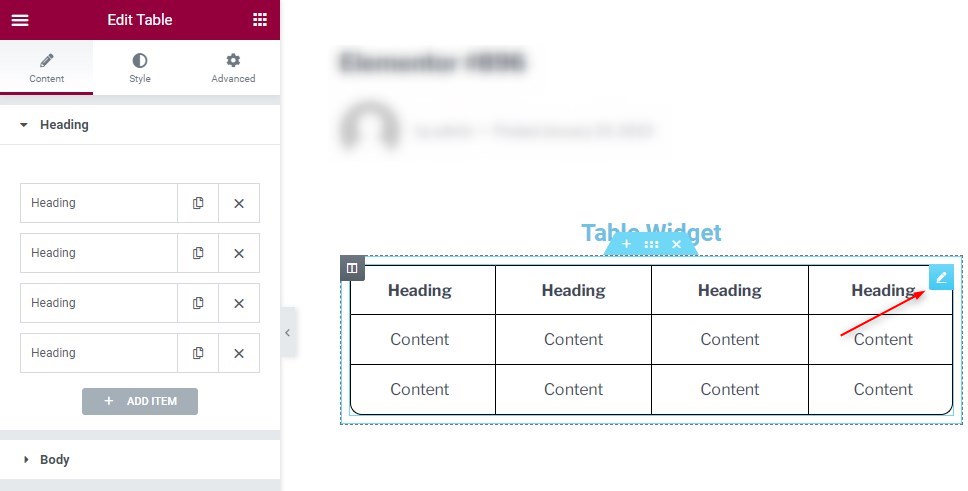
Add the widget
Type ‘Table’ in the Elementor menu and drag the widget to the dedicated area.

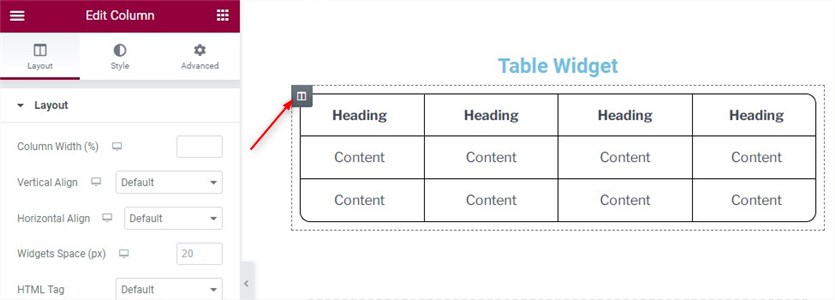
Layout settings
Set up layout options which include column width, alignment, space between widgets, and HTML tag.
Content settings
In this section, you can manage a heading and body.
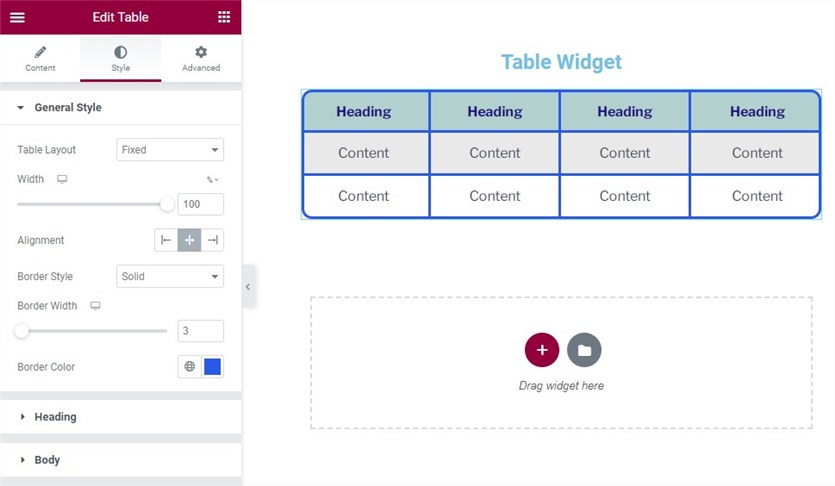
Style settings
This section involves setting up a general style. Moreover, you will be able to customize colors, typography, alignment, size, and more options for a heading and body.
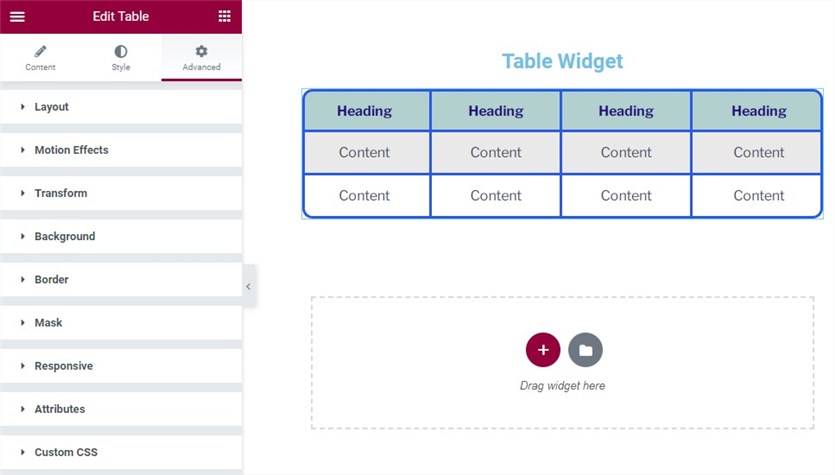
Advanced Tab
This section deals with other settings: advanced options, motion effects, responsiveness, and more.
Manually Curated Posts for You

Creating Tables with a WordPress Plugin
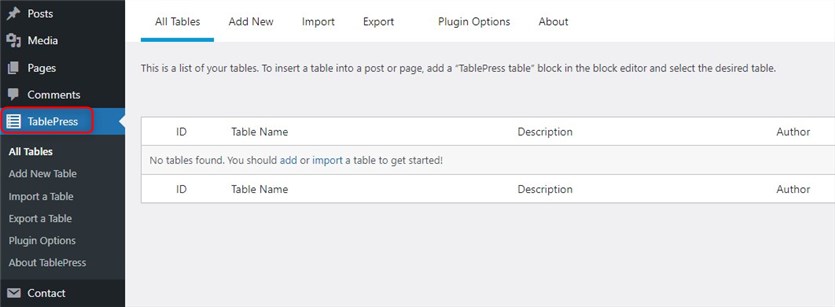
A third-party plugin is one more way to create tables in WordPress. We are going to use TablePress for our step-by-step guide. It’s the top free WordPress plugin for adding tables. Let’s get it started!
Step 1
Install and activate the plugin. The TablePress tab should appear on your dashboard.
Step 2
Navigate to TablePress > Add New to add a new table.
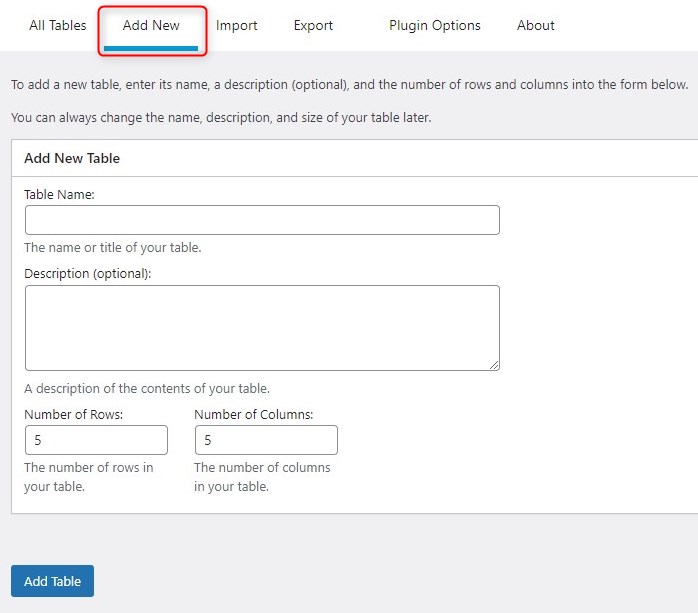
Step 3
You can add the name, description (optionally), and the number of rows and columns. Once that’s done, click on the ‘Add Table’ button.
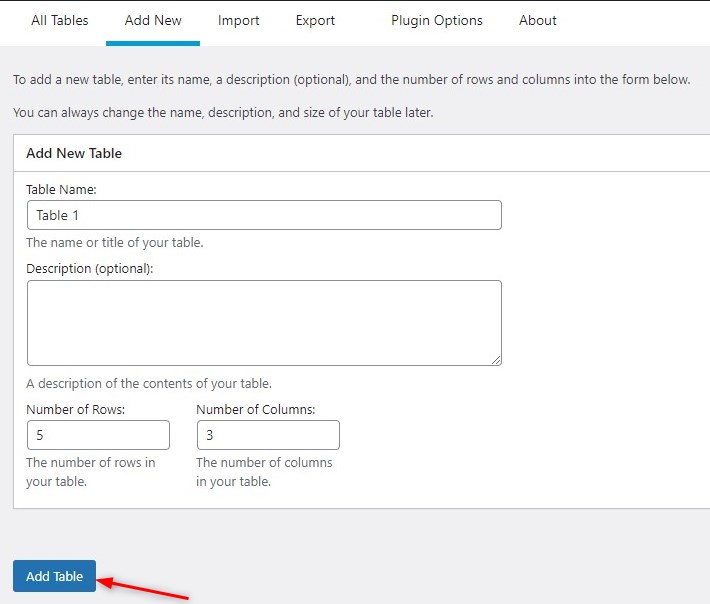
Note: if necessary, you will be able to change this information later.
Step 4
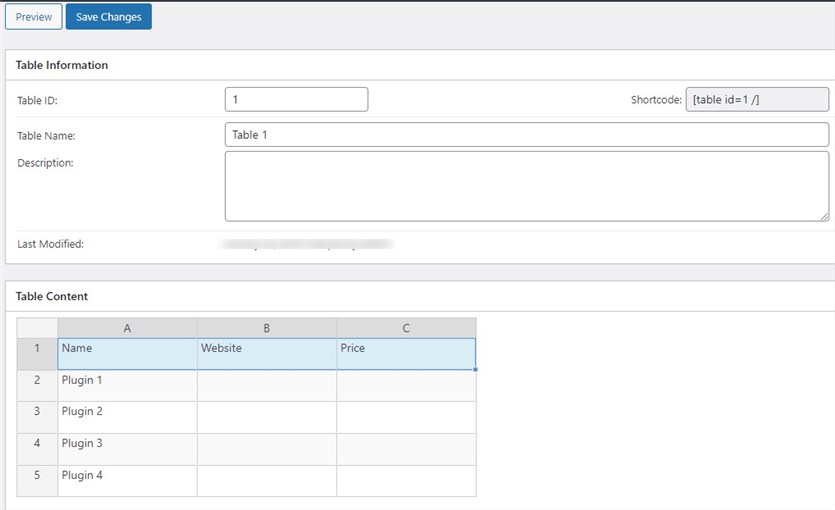
After that, you should enter the content in the relevant area.
Step 5
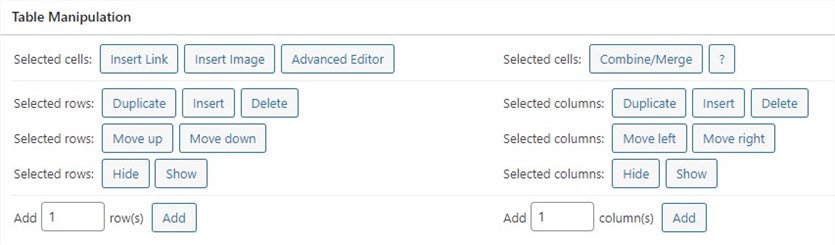
In the ‘Table Manipulation’ menu, you can add, delete, duplicate, show, and hide the specified rows/cells/columns.
Step 6
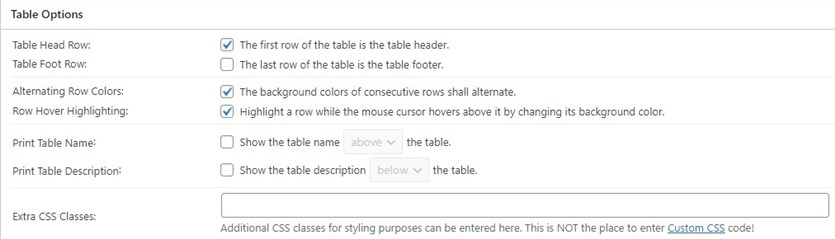
The ‘Table Options’ section enables you to insert a header and/or footer, set up alternating background row colors, etc.
Step 7
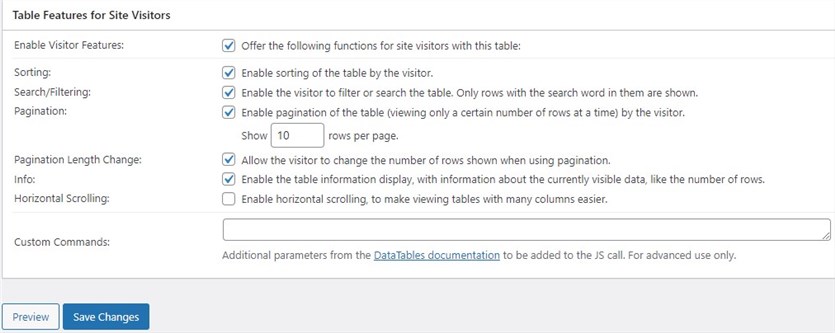
In the ‘Table Features for Site Visitors’ area, you can enable sorting, filtering, pagination, and more options.
Step 8
Once you are done with all the settings, click the ‘Save Changes’ button.
Step 9
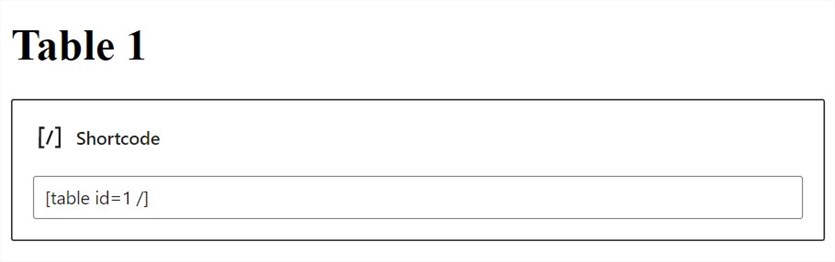
That’s it! Now, you can add your table to a post or page. Do it by adding the shortcode to a paragraph block or using the shortcode block.
How to Make Columns in WordPress Without Plugin?
If you want to insert columns into your WordPress website, you can do it even without writing code or turning to a third-party plugin.
Step 1
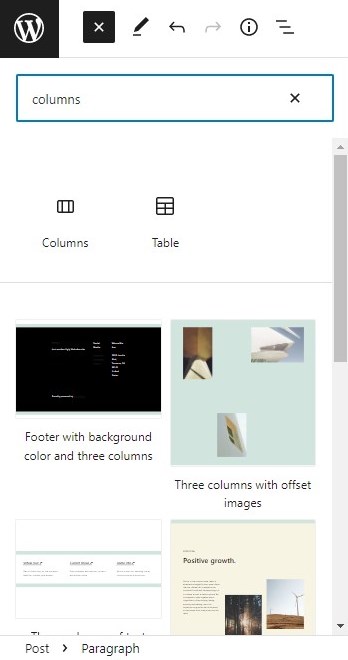
The Gutenberg block editor comes with a built-in Columns block. So, you just need to click ‘+’ on the top of the page, type ‘/columns’, and choose the block.
Step 2
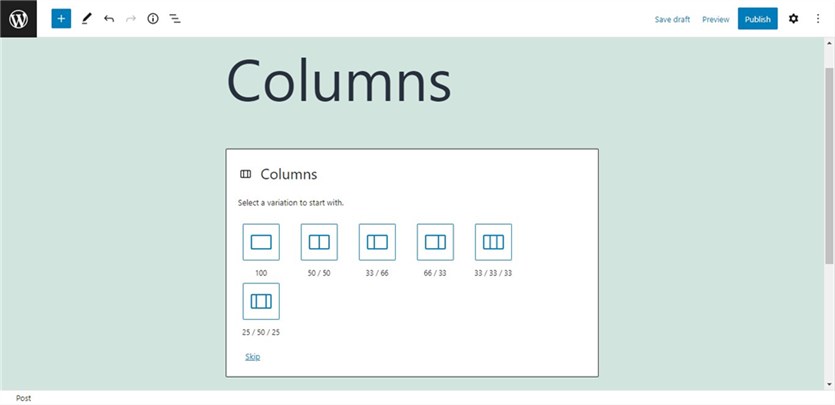
You will be able to select a preferred layout among predefined ones.
Step 3
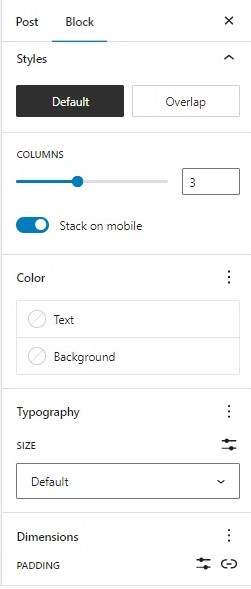
Block settings let you change the number of columns and choose the text and background colors.
Conclusion: How to Create Tables in WordPress in 60 Seconds?
So, Gutenberg fast-tracked all sorts of customization in WordPress, including such complex things as tables. Now you can with almost no effort create responsive tables with the default Gutenberg table block or install extra table blocks like Getwid for more advanced settings.
You should take a few steps to get started with it:
- Add the Gutenberg block: click\on the ‘+’ icon and type ‘Table’ using a slash.
- Choose the number of columns and rows.
- Go to table settings to turn on/off fixed-width cells and enable header and/or footer sections.
- Select between default and stripped styles.
- Apply one of the background colors.
- Navigate to the settings on the top of the block to manage rows and columns.
Despite Gutenberg being the most popular solution, this article tells about two other popular ways as well: Elementor and a dedicated plugin.
What is your favorite way to build tables in WordPress? Do you need an extra plugin?
FAQ
How do you create a table in a WordPress database?
global $wpdb;
$charset_collate = $wpdb->get_charset_collate();
$table_name = $wpdb->prefix . 'mytable';

$sql = "CREATE TABLE $table_name (
id mediumint(9) NOT NULL AUTO_INCREMENT,
name tinytext NOT NULL,
UNIQUE KEY id (id)
) $charset_collate;";

require_once( ABSPATH . 'wp-admin/includes/upgrade.php' );
dbDelta( $sql );
This code will create a table named wp_mytable with a unique ID and name column. The dbDelta() function will run the SQL statement and create the table if it does not already exist or update the table if it does exist but the columns or constraints are different.
It is important to note that you can use dbDelta only within the context of a plugin or theme, and also it is recommended to use this function only during plugin or theme installation or updates.
How do I create a WordPress table without plugins?
How do I create a dynamic table in WordPress?
For example, if you choose the wpDataTables plugin, you need to install and activate the plugin and navigate to its dashboard. Then, add a new table and set up its basic features. The next step is to upload your Excel table prepared in advance to your WordPress dashboard.
Now, you are free to customize other settings to make the most out of the created dynamic table. Once all the changes are saved, copy the shortcode and paste it into the corresponding page or post.
How do I copy a table in WordPress?
First, select the table by clicking on it. This will bring up the table toolbar. Next, click on the “Copy” button in the toolbar. The table will be copied to your clipboard.
You can then paste the table into another page or post by using the keyboard shortcut “Ctrl+V” (Windows) or “Cmd+V” (Mac) or by right-clicking and selecting “Paste” in the context menu.
Another option is to use the “Duplicate” button in the WordPress block editor, which will create a copy of the entire post or page, including the table.
I’m using Blocksy with Gutenberg, but finding the Getwid table block to be very buggy. Some cell data just doesn’t publish. It seems to just get dropped. It’s there in the editor, but not the published page. When I look at the published page in the browser’s developer inspector, the data is missing…
Hi Donald,
Perhaps there is a conflict with a third-party plugin that is installed on your site. You may try disabling the plugin one by one to find the one that causes an issue.
Hi
Can I build this table in Gutenberg and use it with elementor?
Hi Ivars, Gutenberg and Elementor are different editors and there is no possibility to use the Gutenberg table in Elementor.