Table of Contents
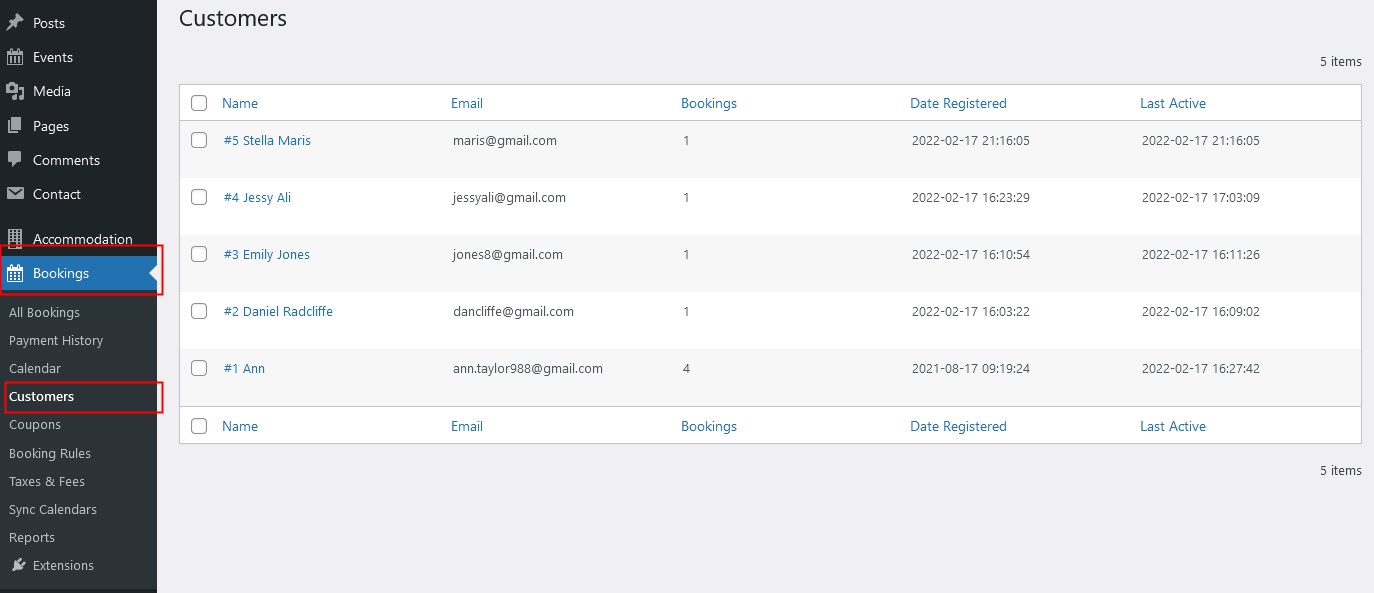
You can see the database of all of your customers via Bookings > Customers.
Here you will see a list of all customers whether they have an account on your site or not.
Customers are added to the list when a guest made a booking on your site or when a booking was added by hand by the site admins.
In the database table, you can see a user’s name, current email, the number of bookings they made, the date of registration and last activity.
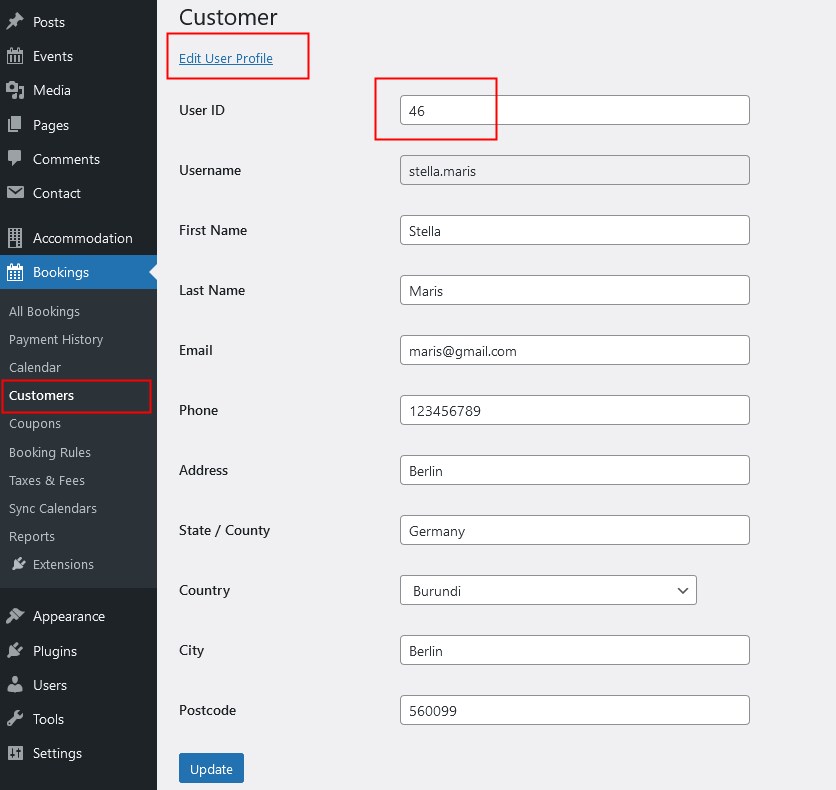
Note: A user ID is automatically generated when a user account is created – that is, if there is no user ID (the respective field is empty), it means that a customer doesn’t have an account.
If there is a user ID, it becomes a key point for assigning all further bookings to the particular customer.
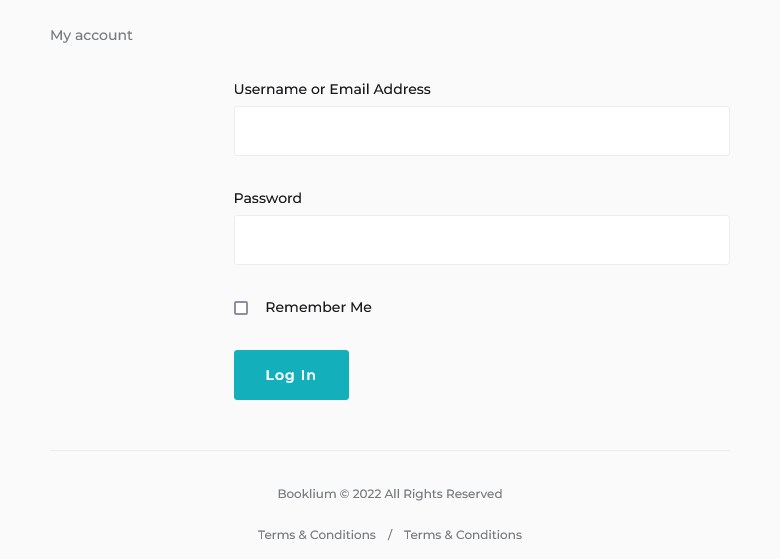
A customer can access their account via a public/hidden login area on your site, where guests can view their bookings or update the information they provided.
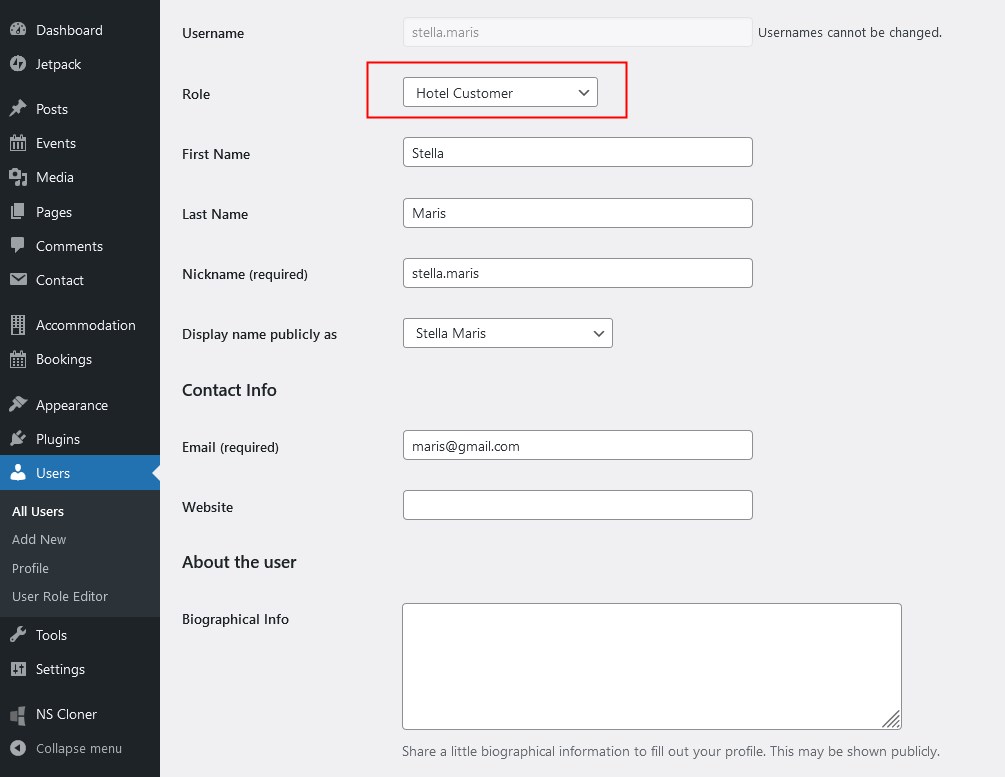
By clicking on the “Edit user profile” button, you can view and change customer details as well, e.g. update their name or see a user role. You can update different information about a user, but their username stays intact.
User dashboard settings
If a customer has an account on your website, this will help them view their bookings at any time and speed up the booking process for all future reservation for logged-in users.
If you want customers to have their personal dashboards on your site that will allow them to view their booking details, there are several options you can do that.
To enable the ability to register customer accounts on your site and set up your preferences for this process, go to Accommodation > Settings (General tab) > Accounts.
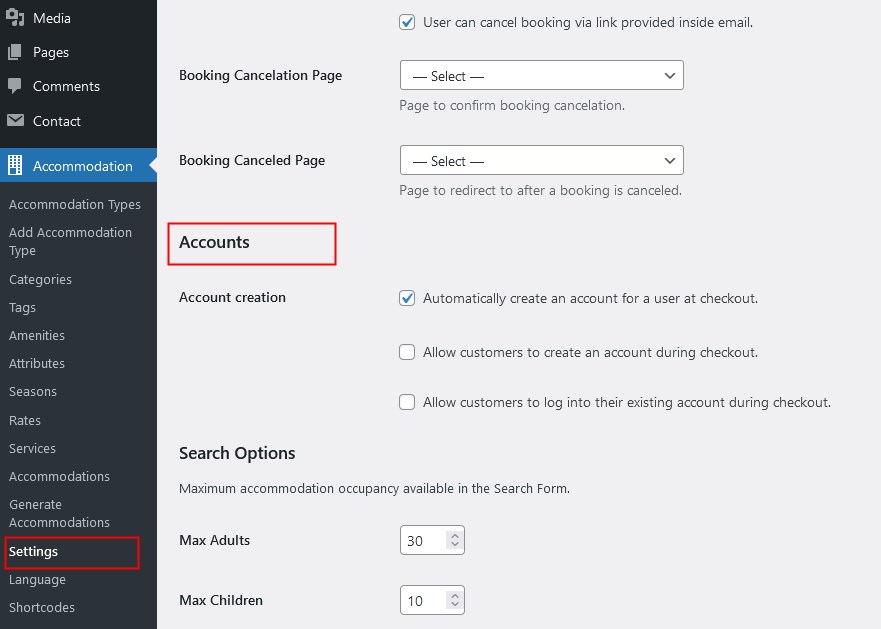
Tick the option that suits your needs:
- Automatically create an account for a user at checkout: to force a user account creation for everyone making a booking on your website.
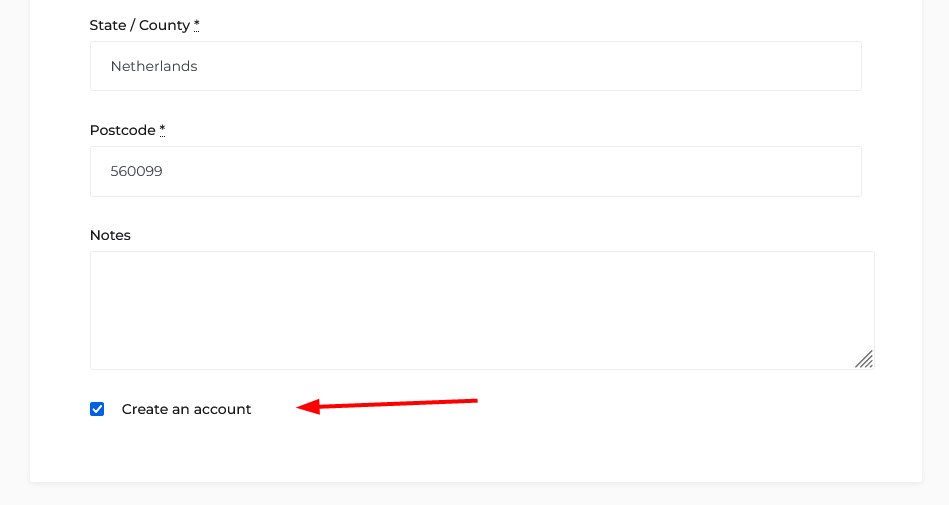
- Allow customers to create an account during checkout: make it up to a customer. When making a booking, they will notice an optional checkbox at checkout.
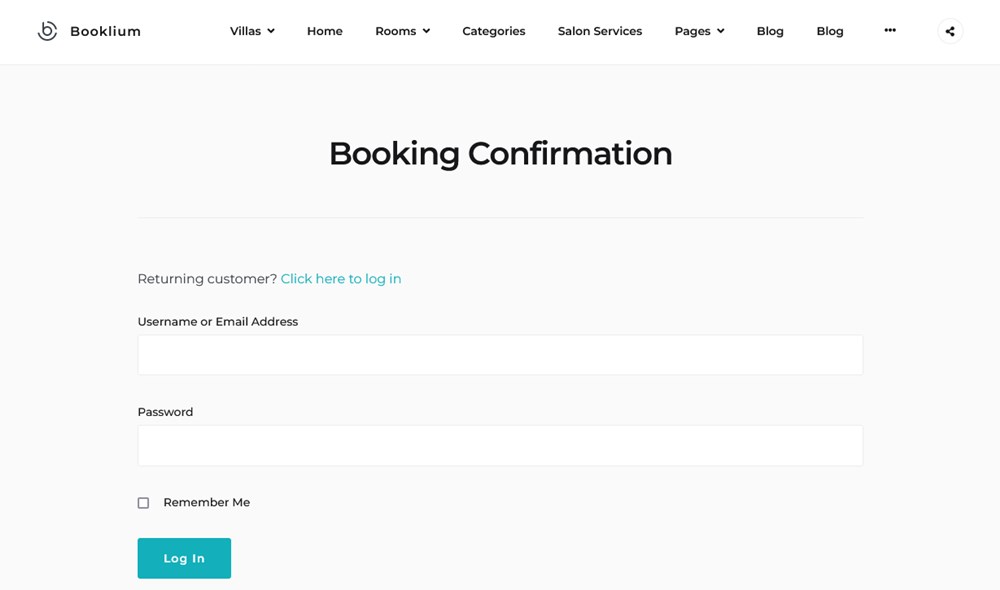
- Allow customers to log into their existing account during checkout: despite the option you chose from the above ones, ticking this box will output the following box at checkout:
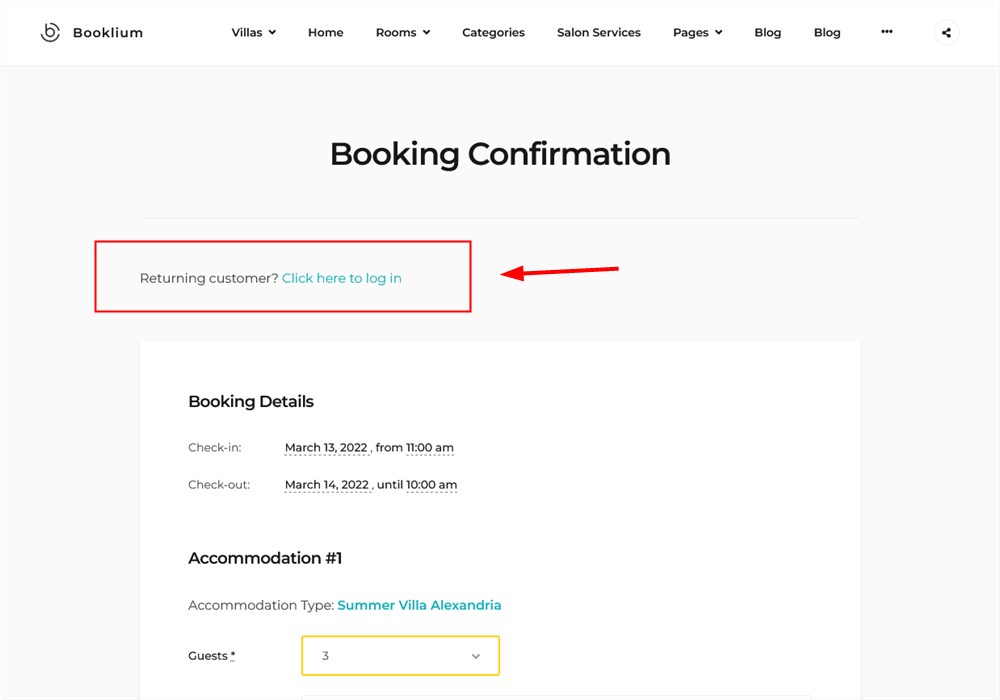
If they have an account, they can log in using their account details from the email:
If a customer logs into their account, it’ll speed up the booking process for them since all the major fields will already be pre-populated with the info they submitted earlier.
At the same time, if a logged-in existing customer is making a booking for someone else, they can change the email address or the guest name. In this case, you’ll get a new booking with the new details, but the Customers list will stay the same, a new booking assigned to the existing user id.
For example, an existing logged-in customer Anna Hemm made a booking for Ben Hemm. In this case, you get a new booking for Ben Hemm:

But this booking is still assigned to Anna in the list of customers:
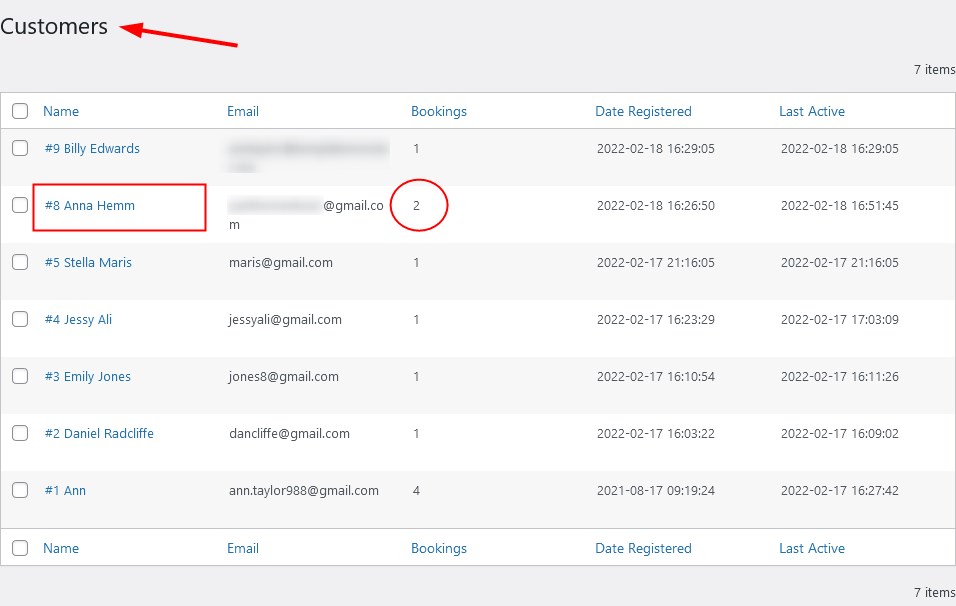
So in result, you get a new booking but don’t get a new customer.
How customers can interact with their accounts
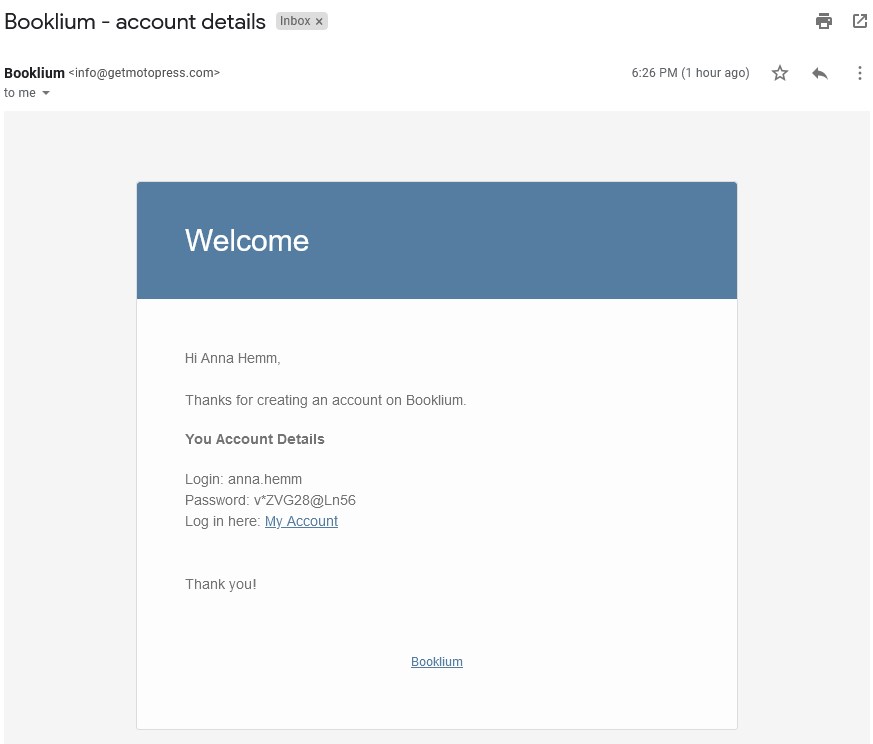
If the account creation process takes places (either automatic or by user’s intent), the account details are sent to the customer in an individual email:
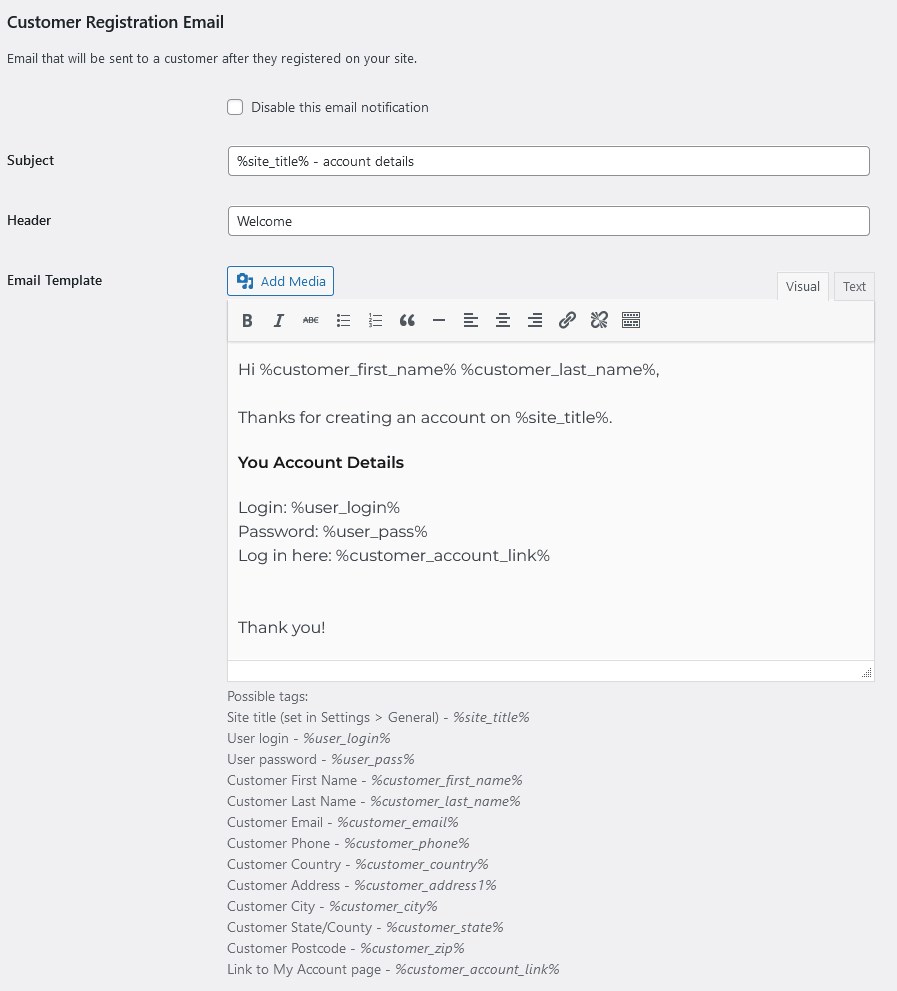
You can update content of the email template via Accommodation > Settings > Customer Emails.
Once they’re logged in, they see a welcome section with quick links:
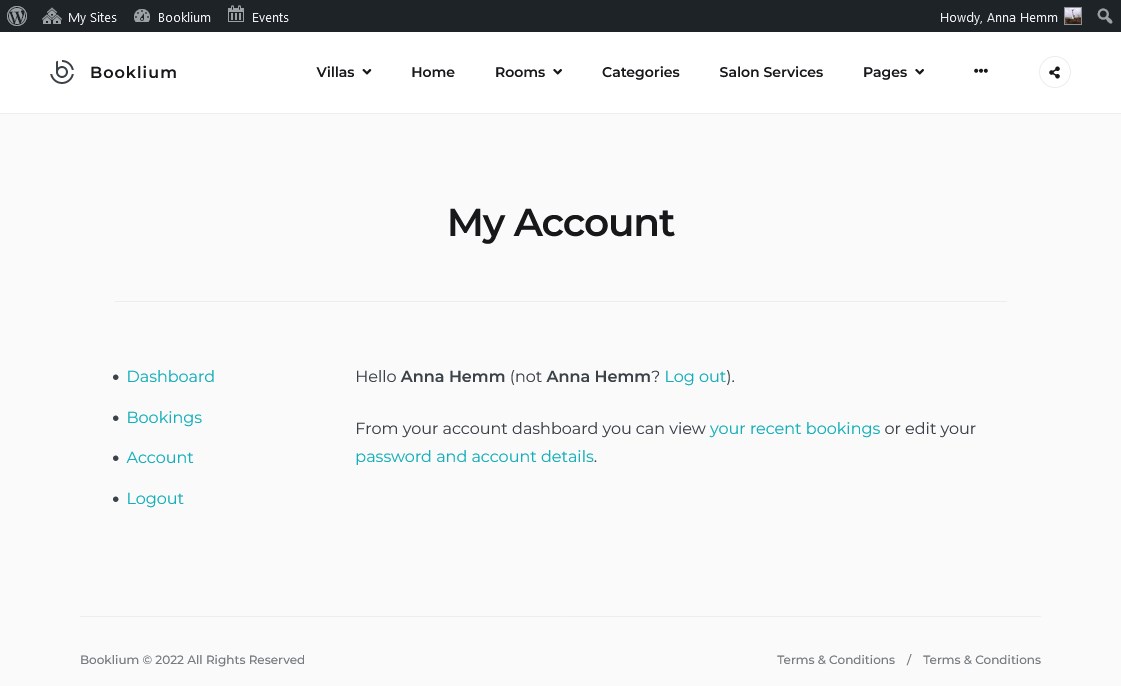
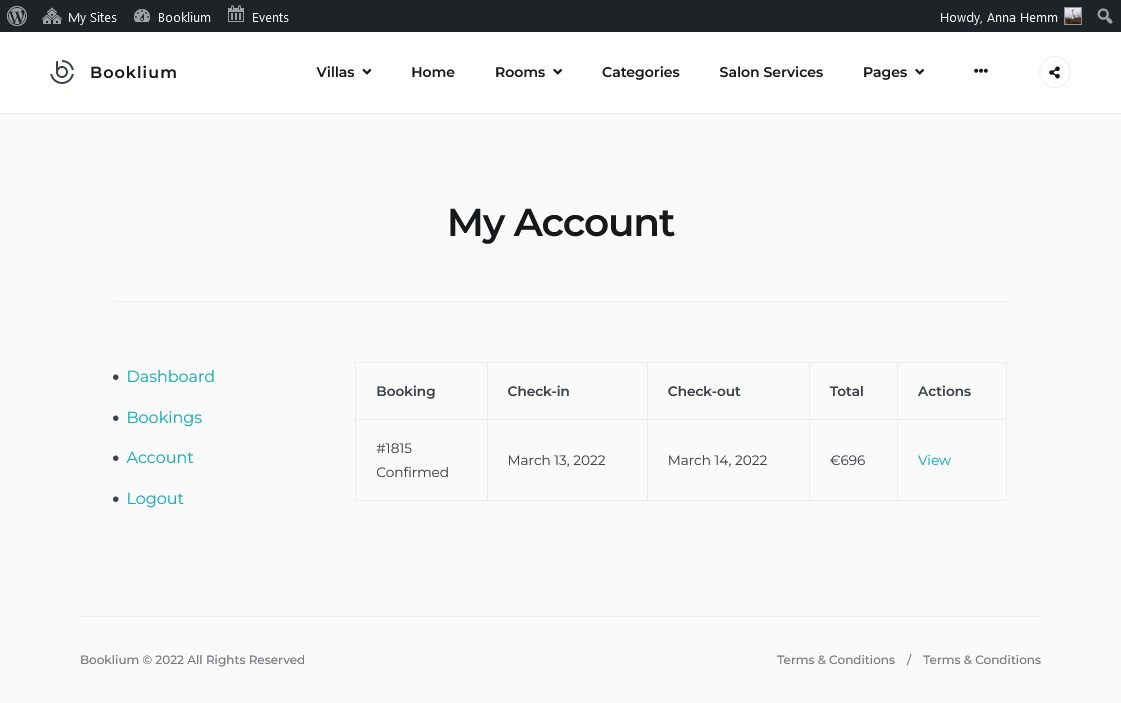
The ‘Bookings’ menu allows travelers to see all their reservations:
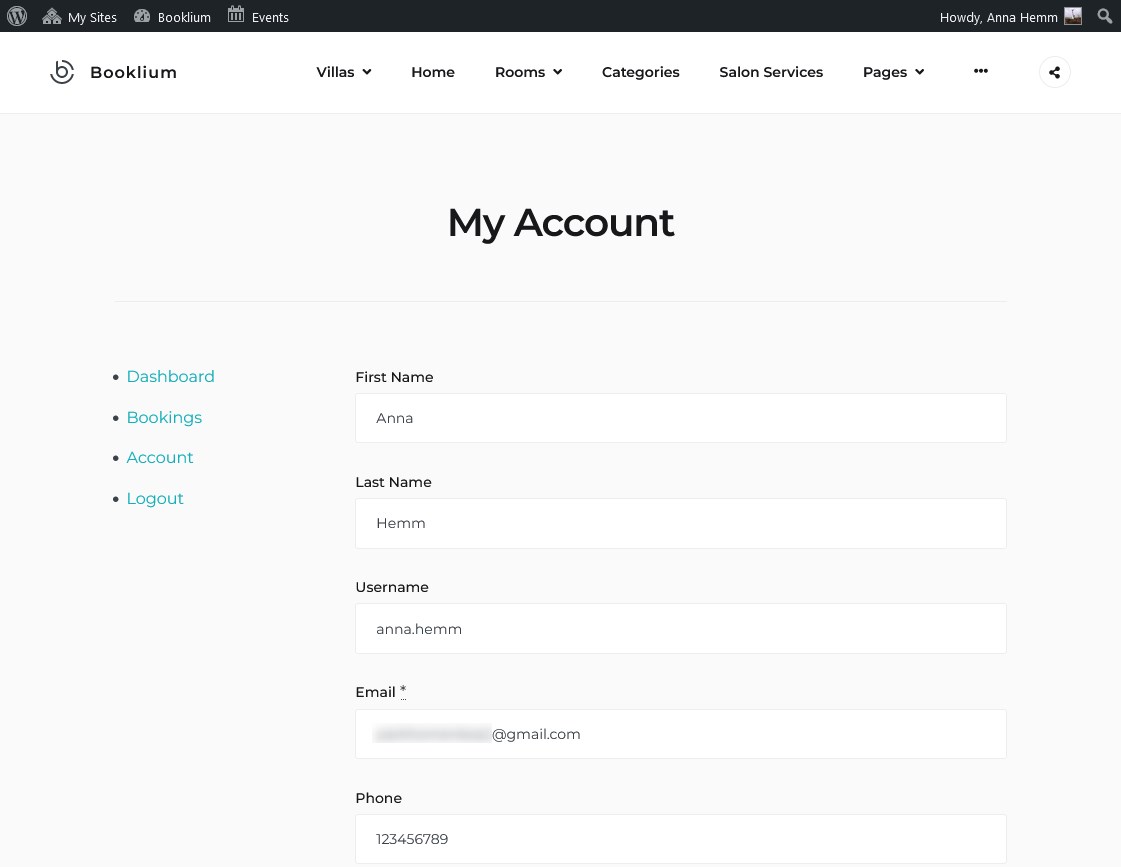
They can also update their personal details or change a password:
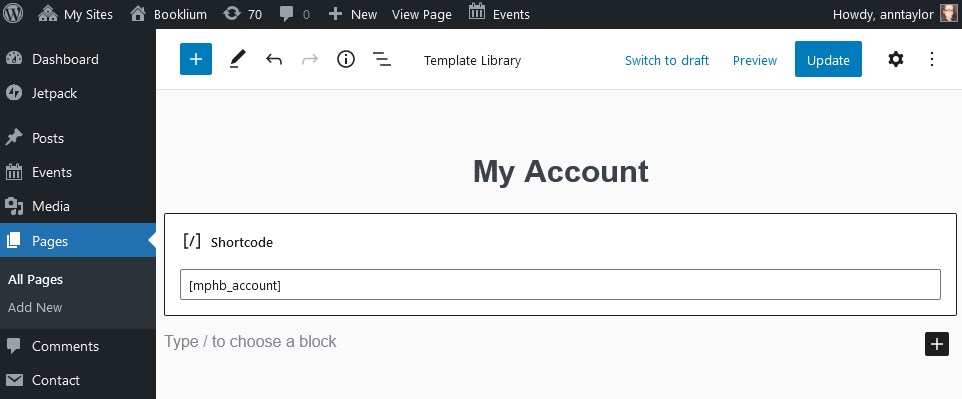
Account page setup: the ‘My account’ shortcode
Since Hotel Booking version 4.2.0, the Account page is added automatically to the site. You can see it in the Settings:
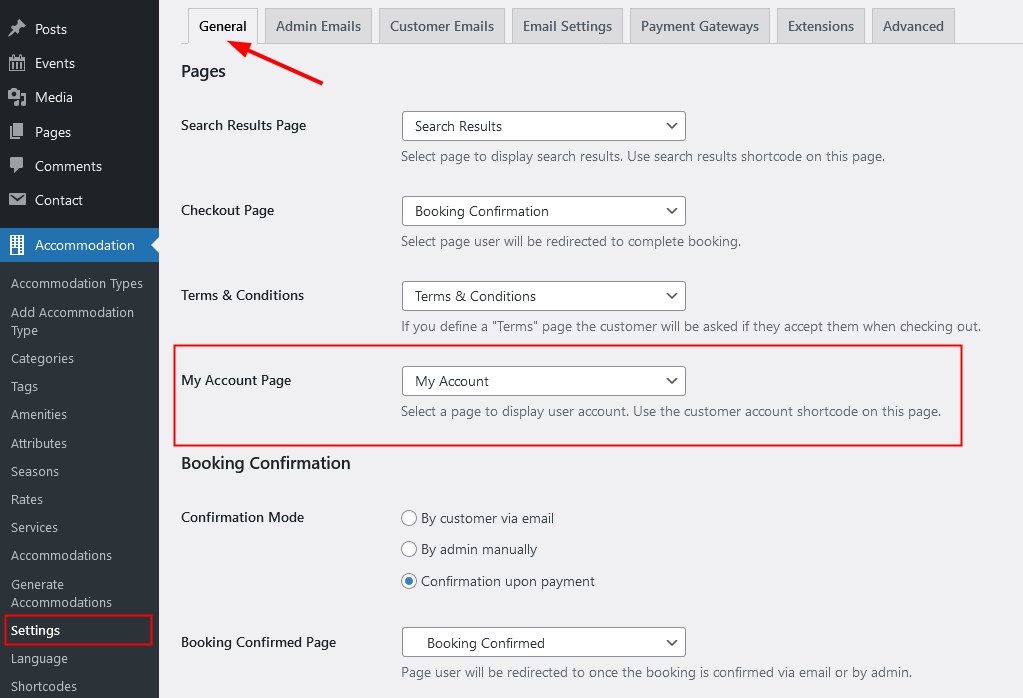
This page by default contains a dedicated shortcode that triggers the creation of the My Account page.
If you don’t have this page for some reason, make sure to create one, paste the [mphb_account] shortcode into it, and then choose this page in the ‘My Account Page’ settings mentioned above.
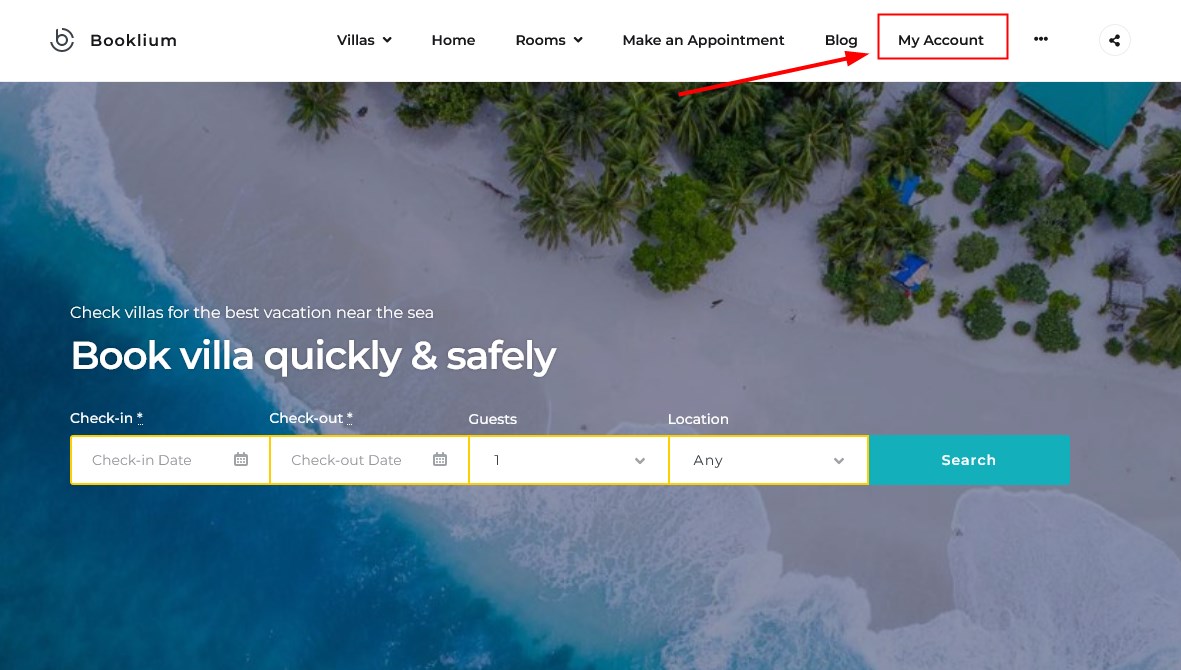
If you want to make the user login area public on the site, you can also add the My Account page to other different site pages or sections, for example:
- Navigation menus – just add the My Account page to the site navigation menu via the WordPress menu settings.
- Widgets – optionally add a shortcode to any available widget area of your theme.