Table of Contents
This tutorial guides you through syncing your booking information between the MotoPress Hotel Booking plugin with Google Calendar and Apple Calendar using iCal.
Note the information is accurate as of January, 2024.
What is iCal?
iCal (iCalendar) is a widely used format for storing and sharing calendar events, including bookings of vacation rentals. Many popular platforms, including OTAs (Booking.com, Airbnb, Vrbo), personal calendars (Google Calendar, Apple Calendar, Outlook), and property management systems, support iCal synchronization.
How to sync bookings with Google Calendar
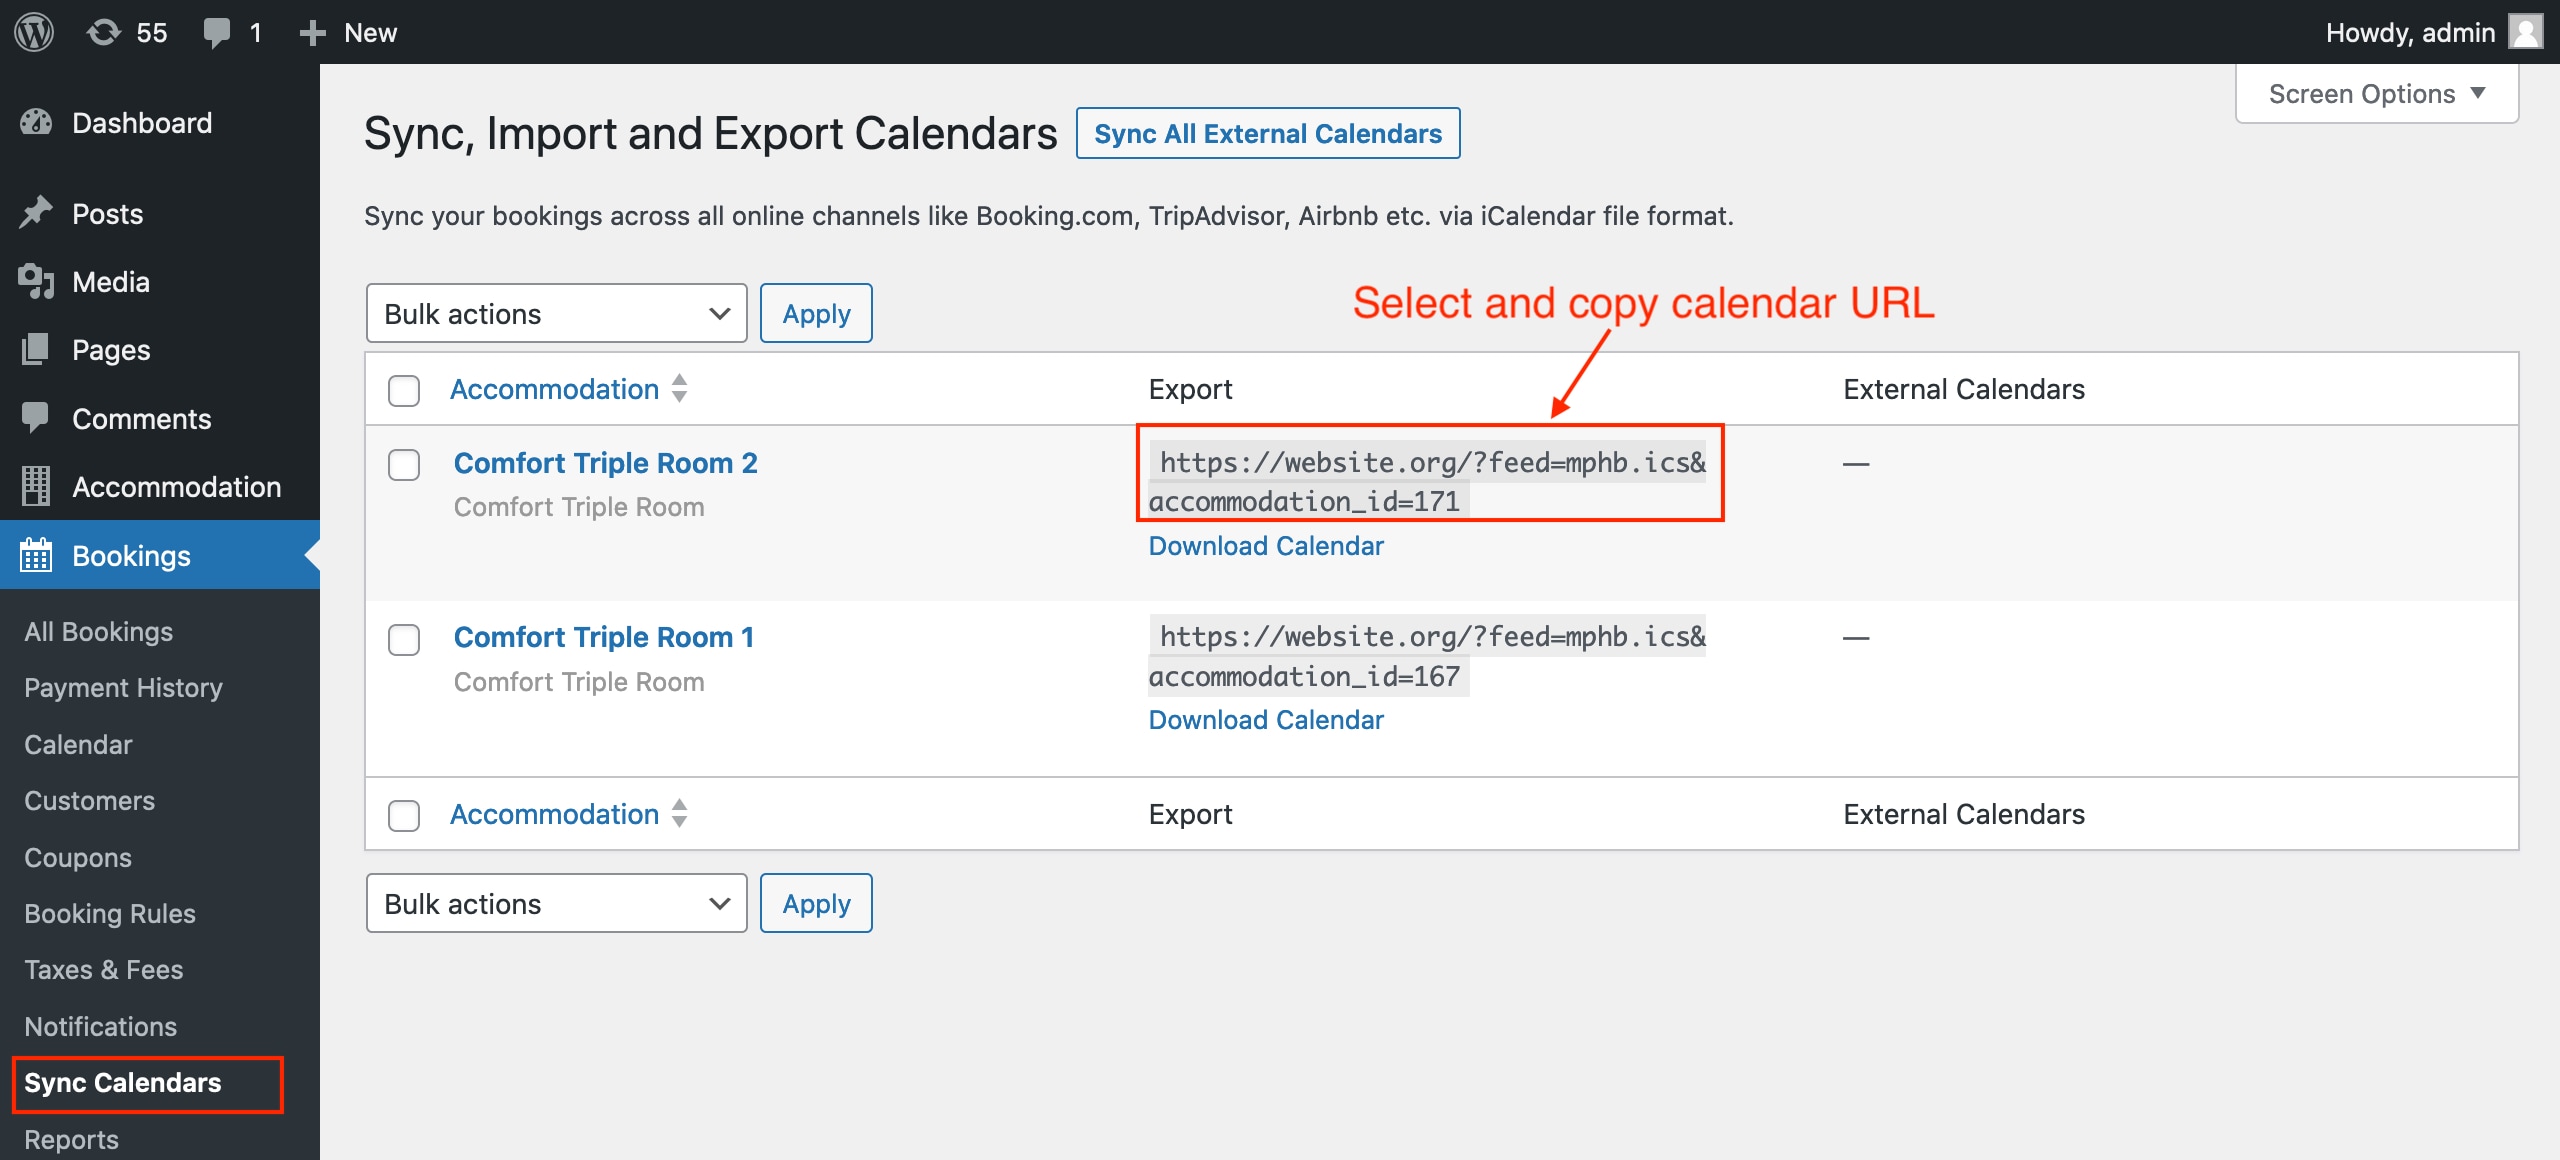
1. Access your calendar URLs.
All calendar links for every accommodation can be found via WordPress Dashboard > Bookings > Sync Calendars.
2. Copy your calendar URL.
Retrieve the URL for your calendar from the “Export” column and copy it.
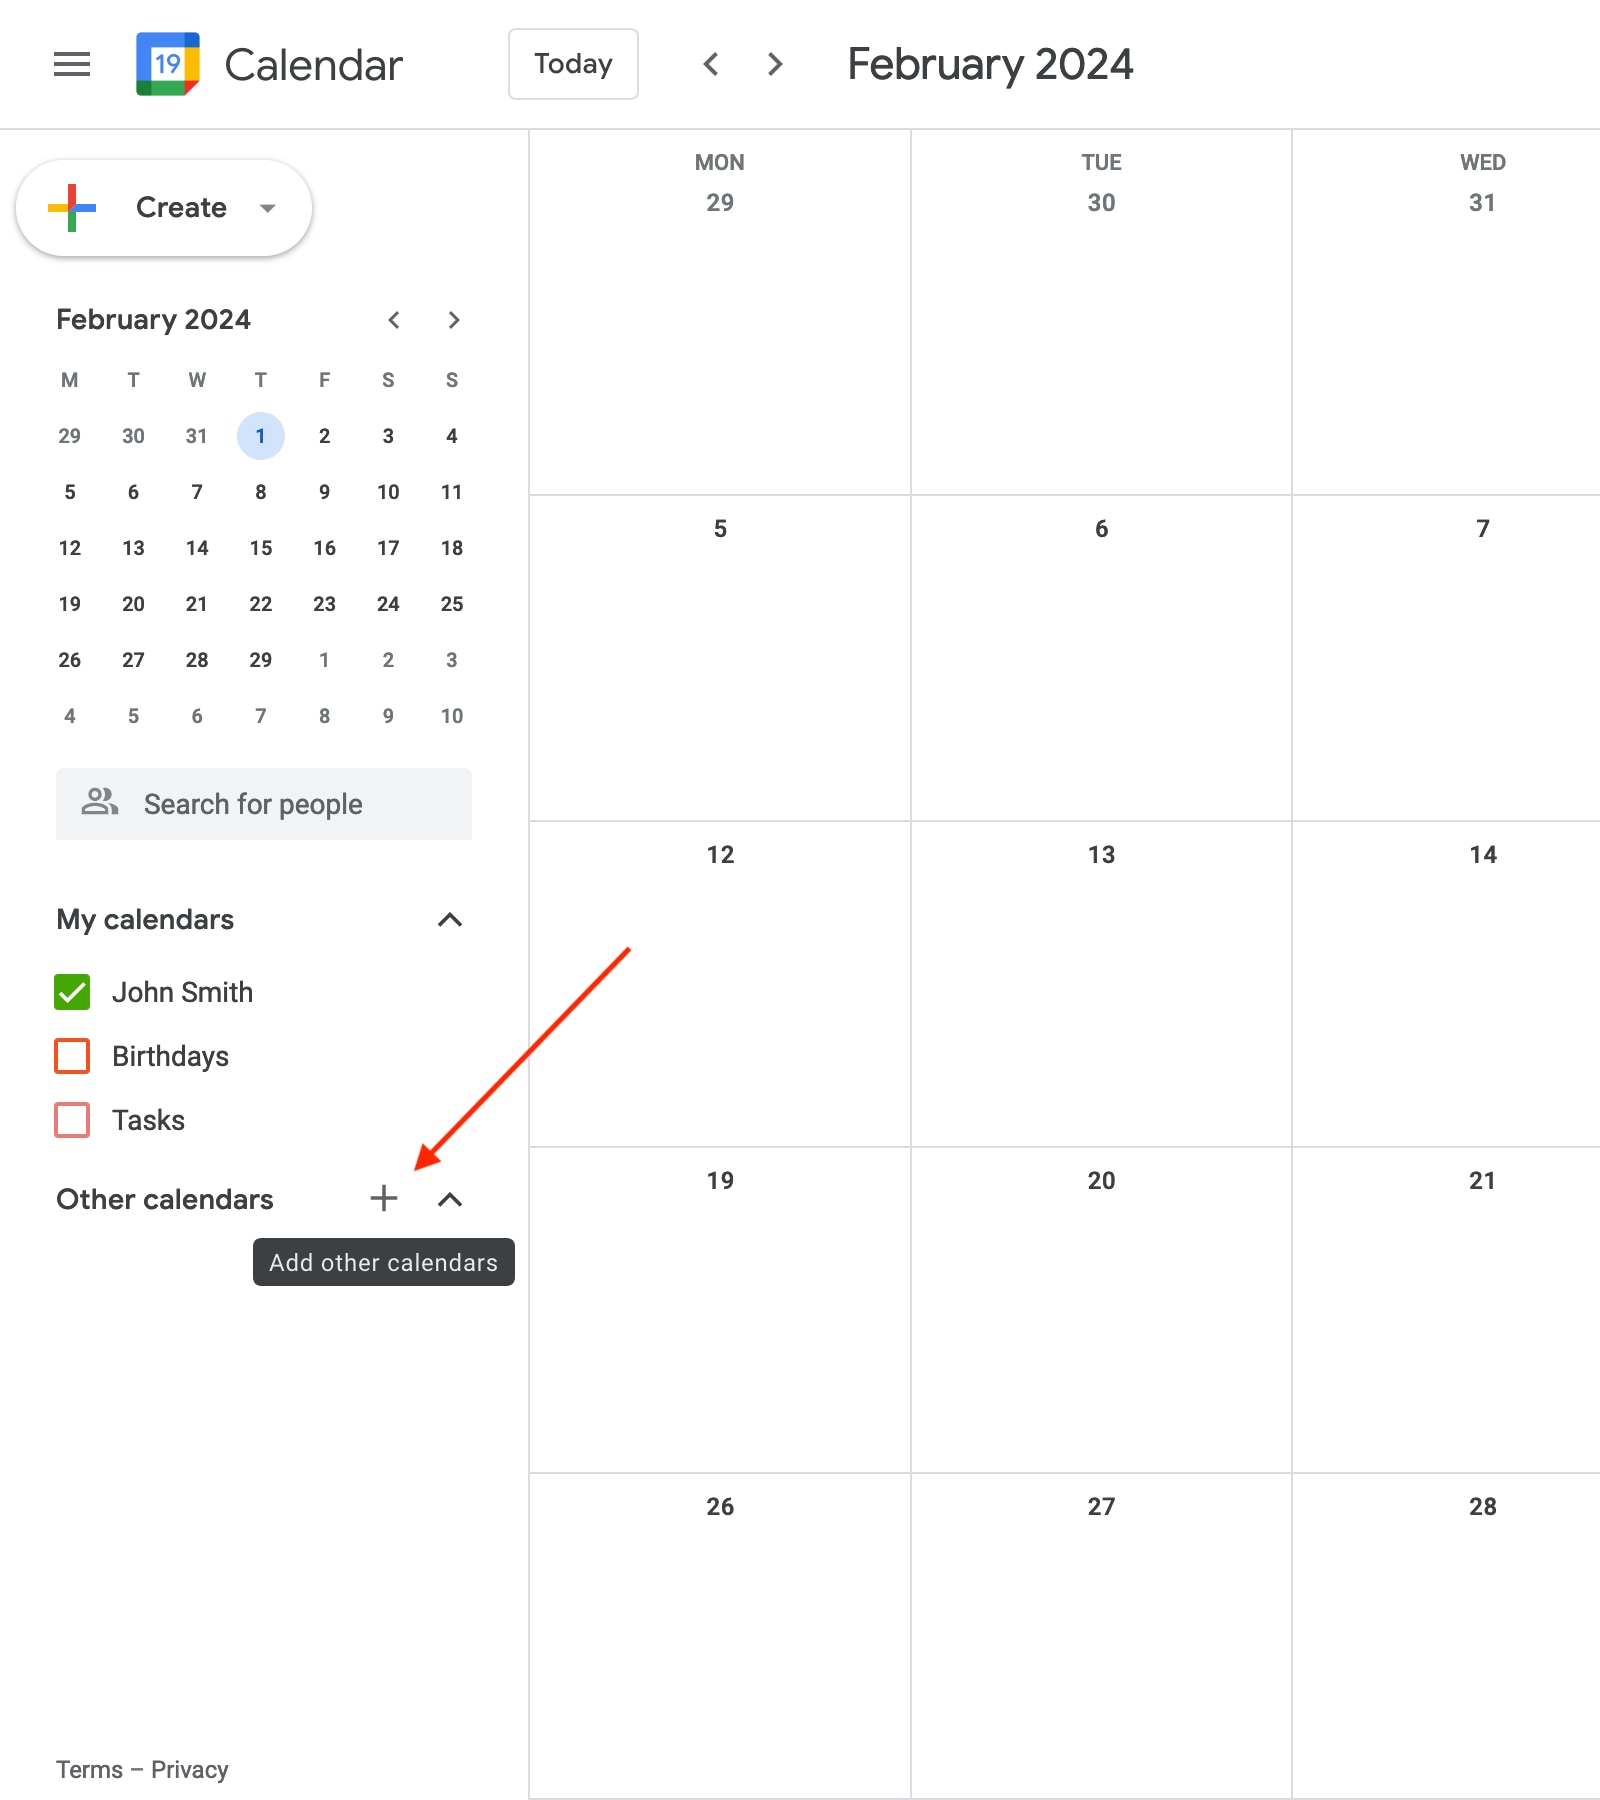
3. Open your Google Calendar.
Open this link https://calendar.google.com/ in your browser.
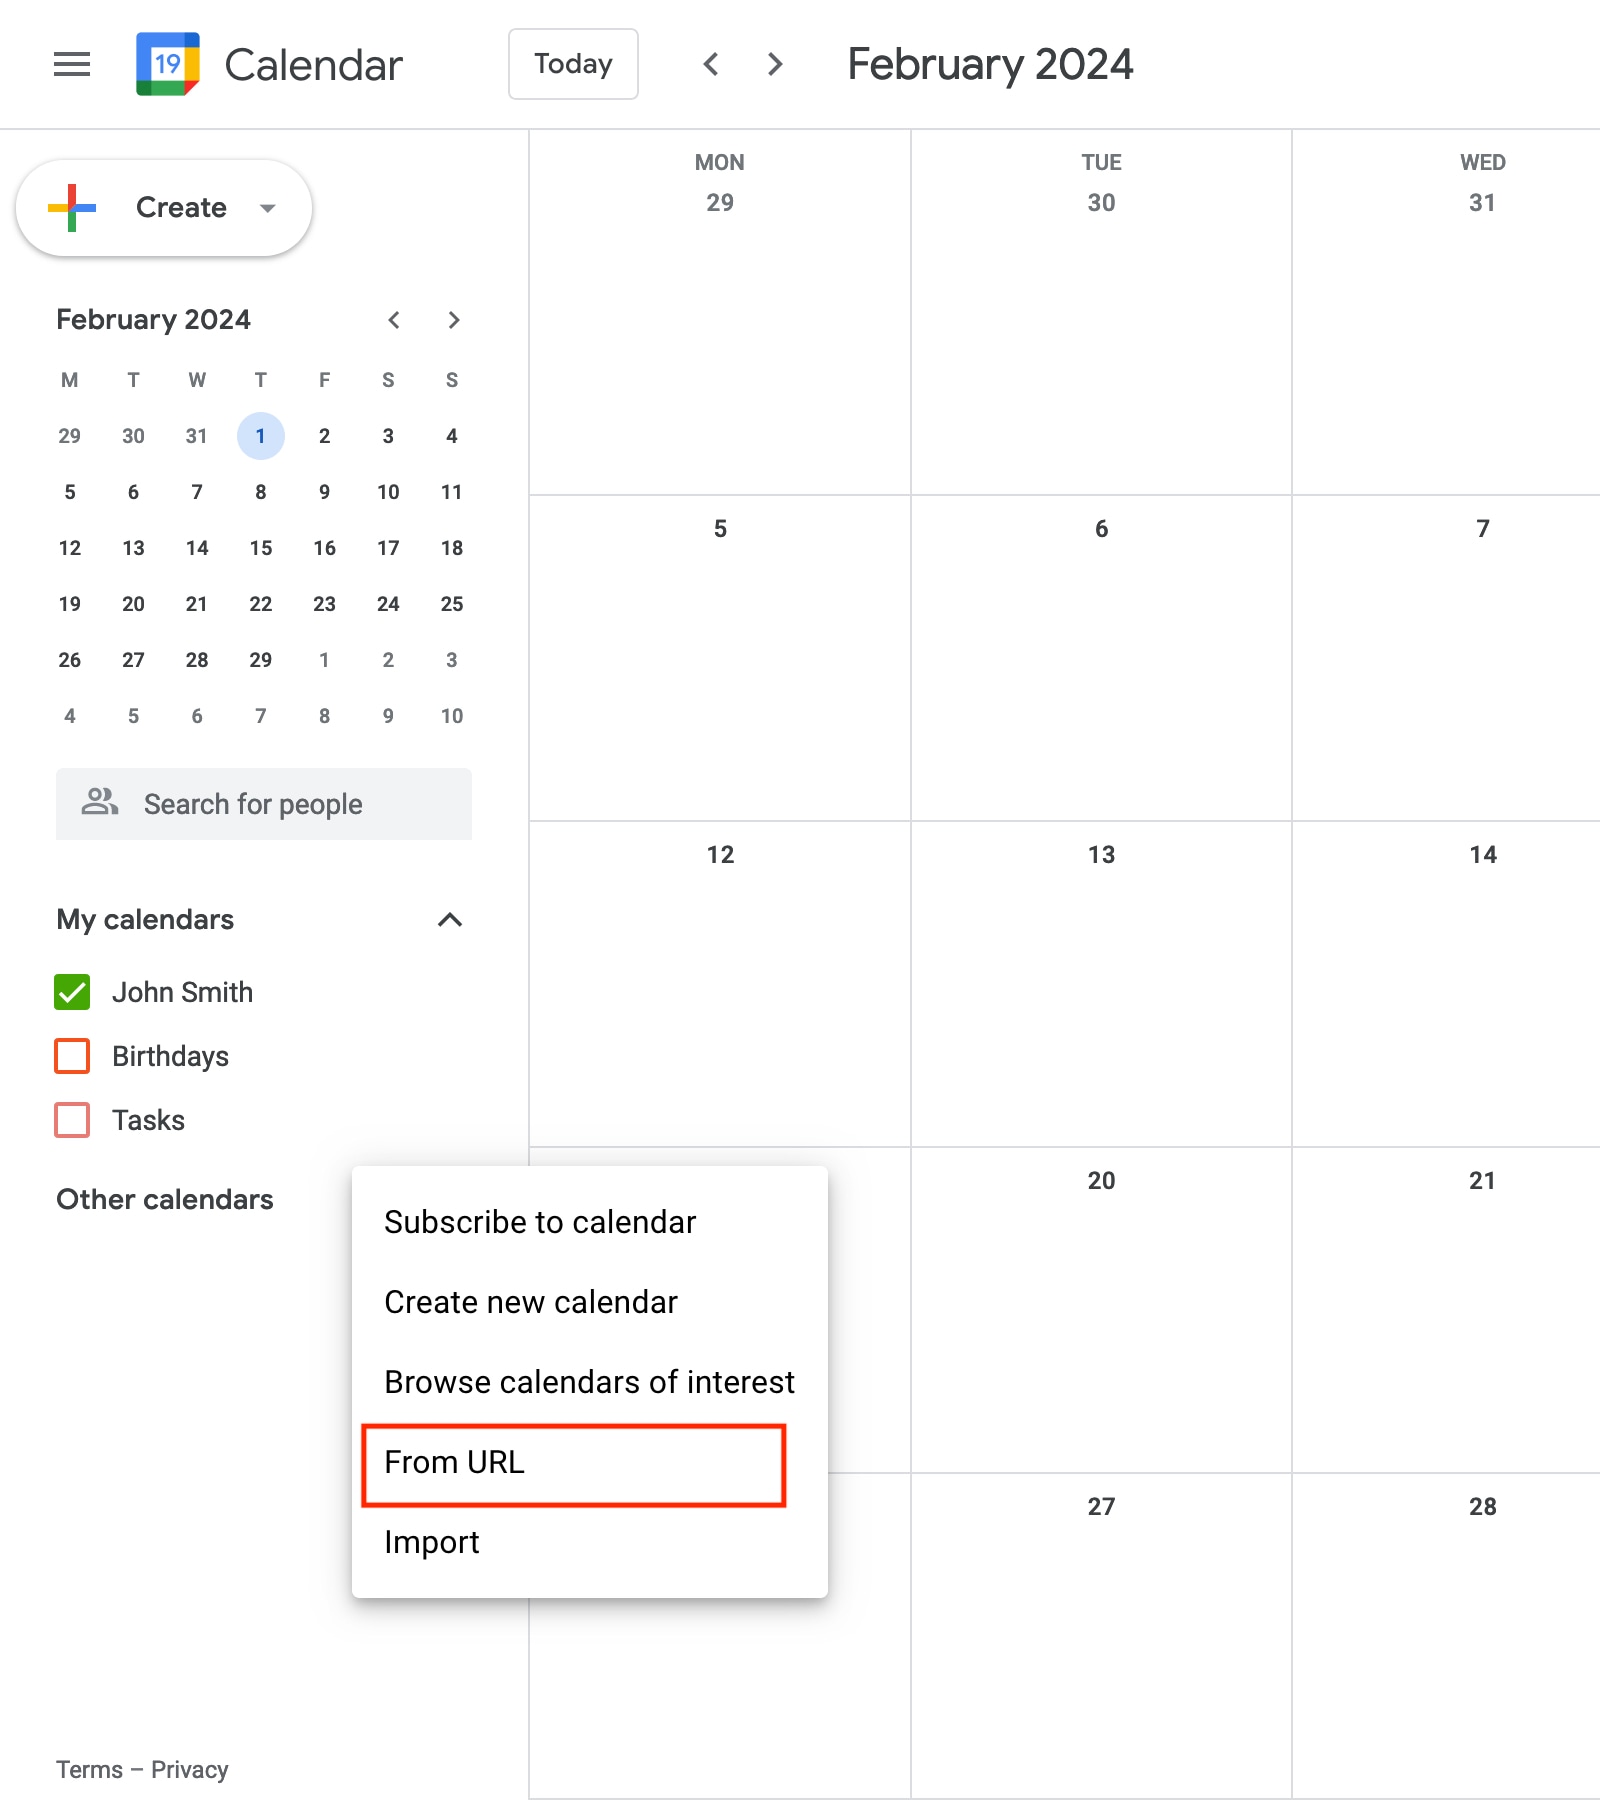
4. Within the Other Calendars menu, click on the plus icon and select ‘From URL’.
5. Paste the link of your accommodation calendar that you previously copied into the field, then click ‘Add calendar’.
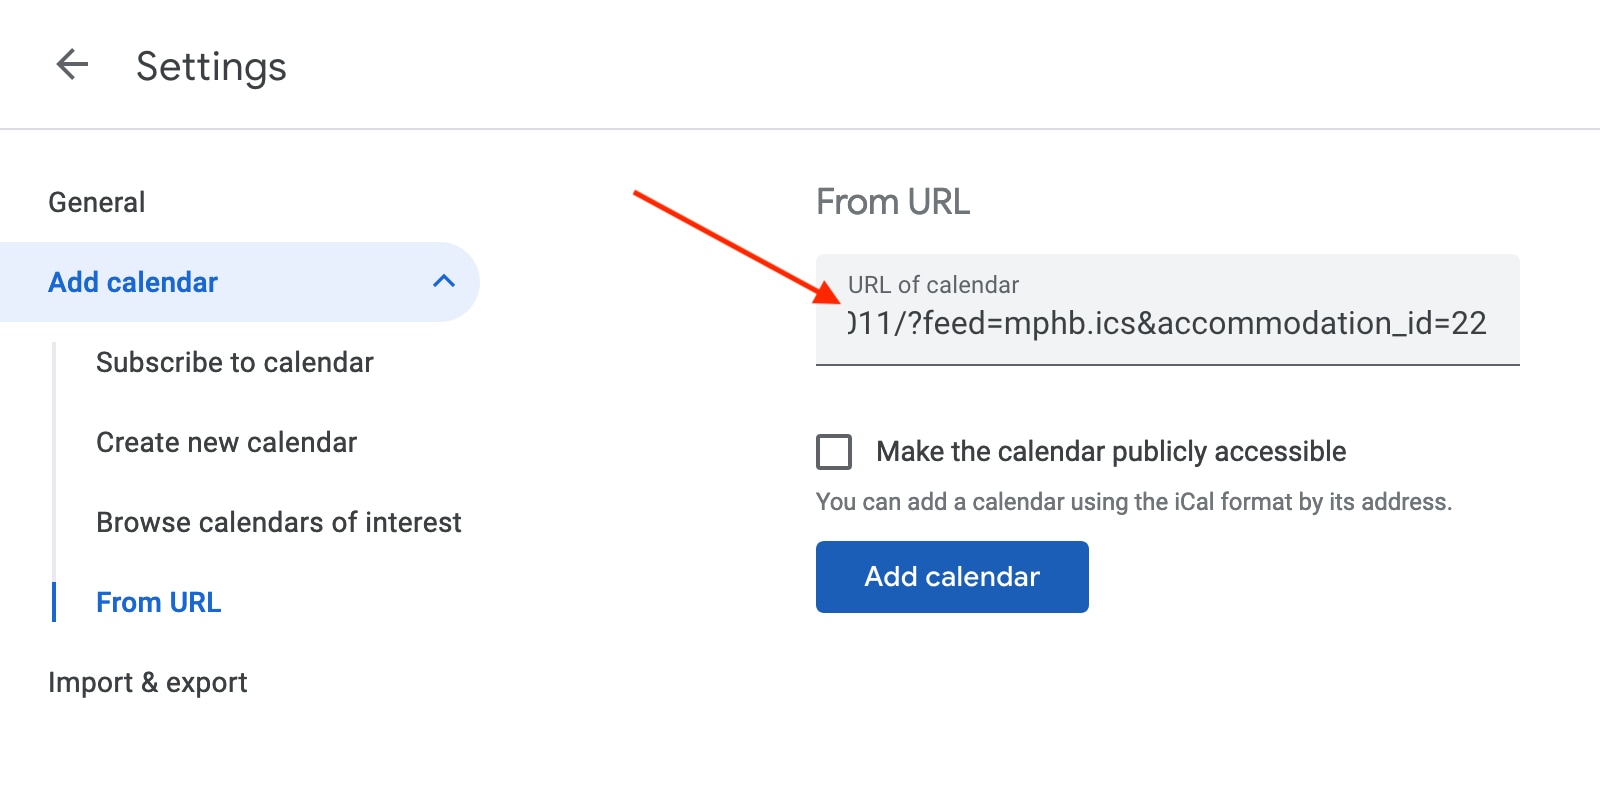
The calendar will be visible in the list on the left, and Google will attempt to retrieve all bookings associated with this property from your website. We recommend clicking on the calendar and assigning it a descriptive custom name.
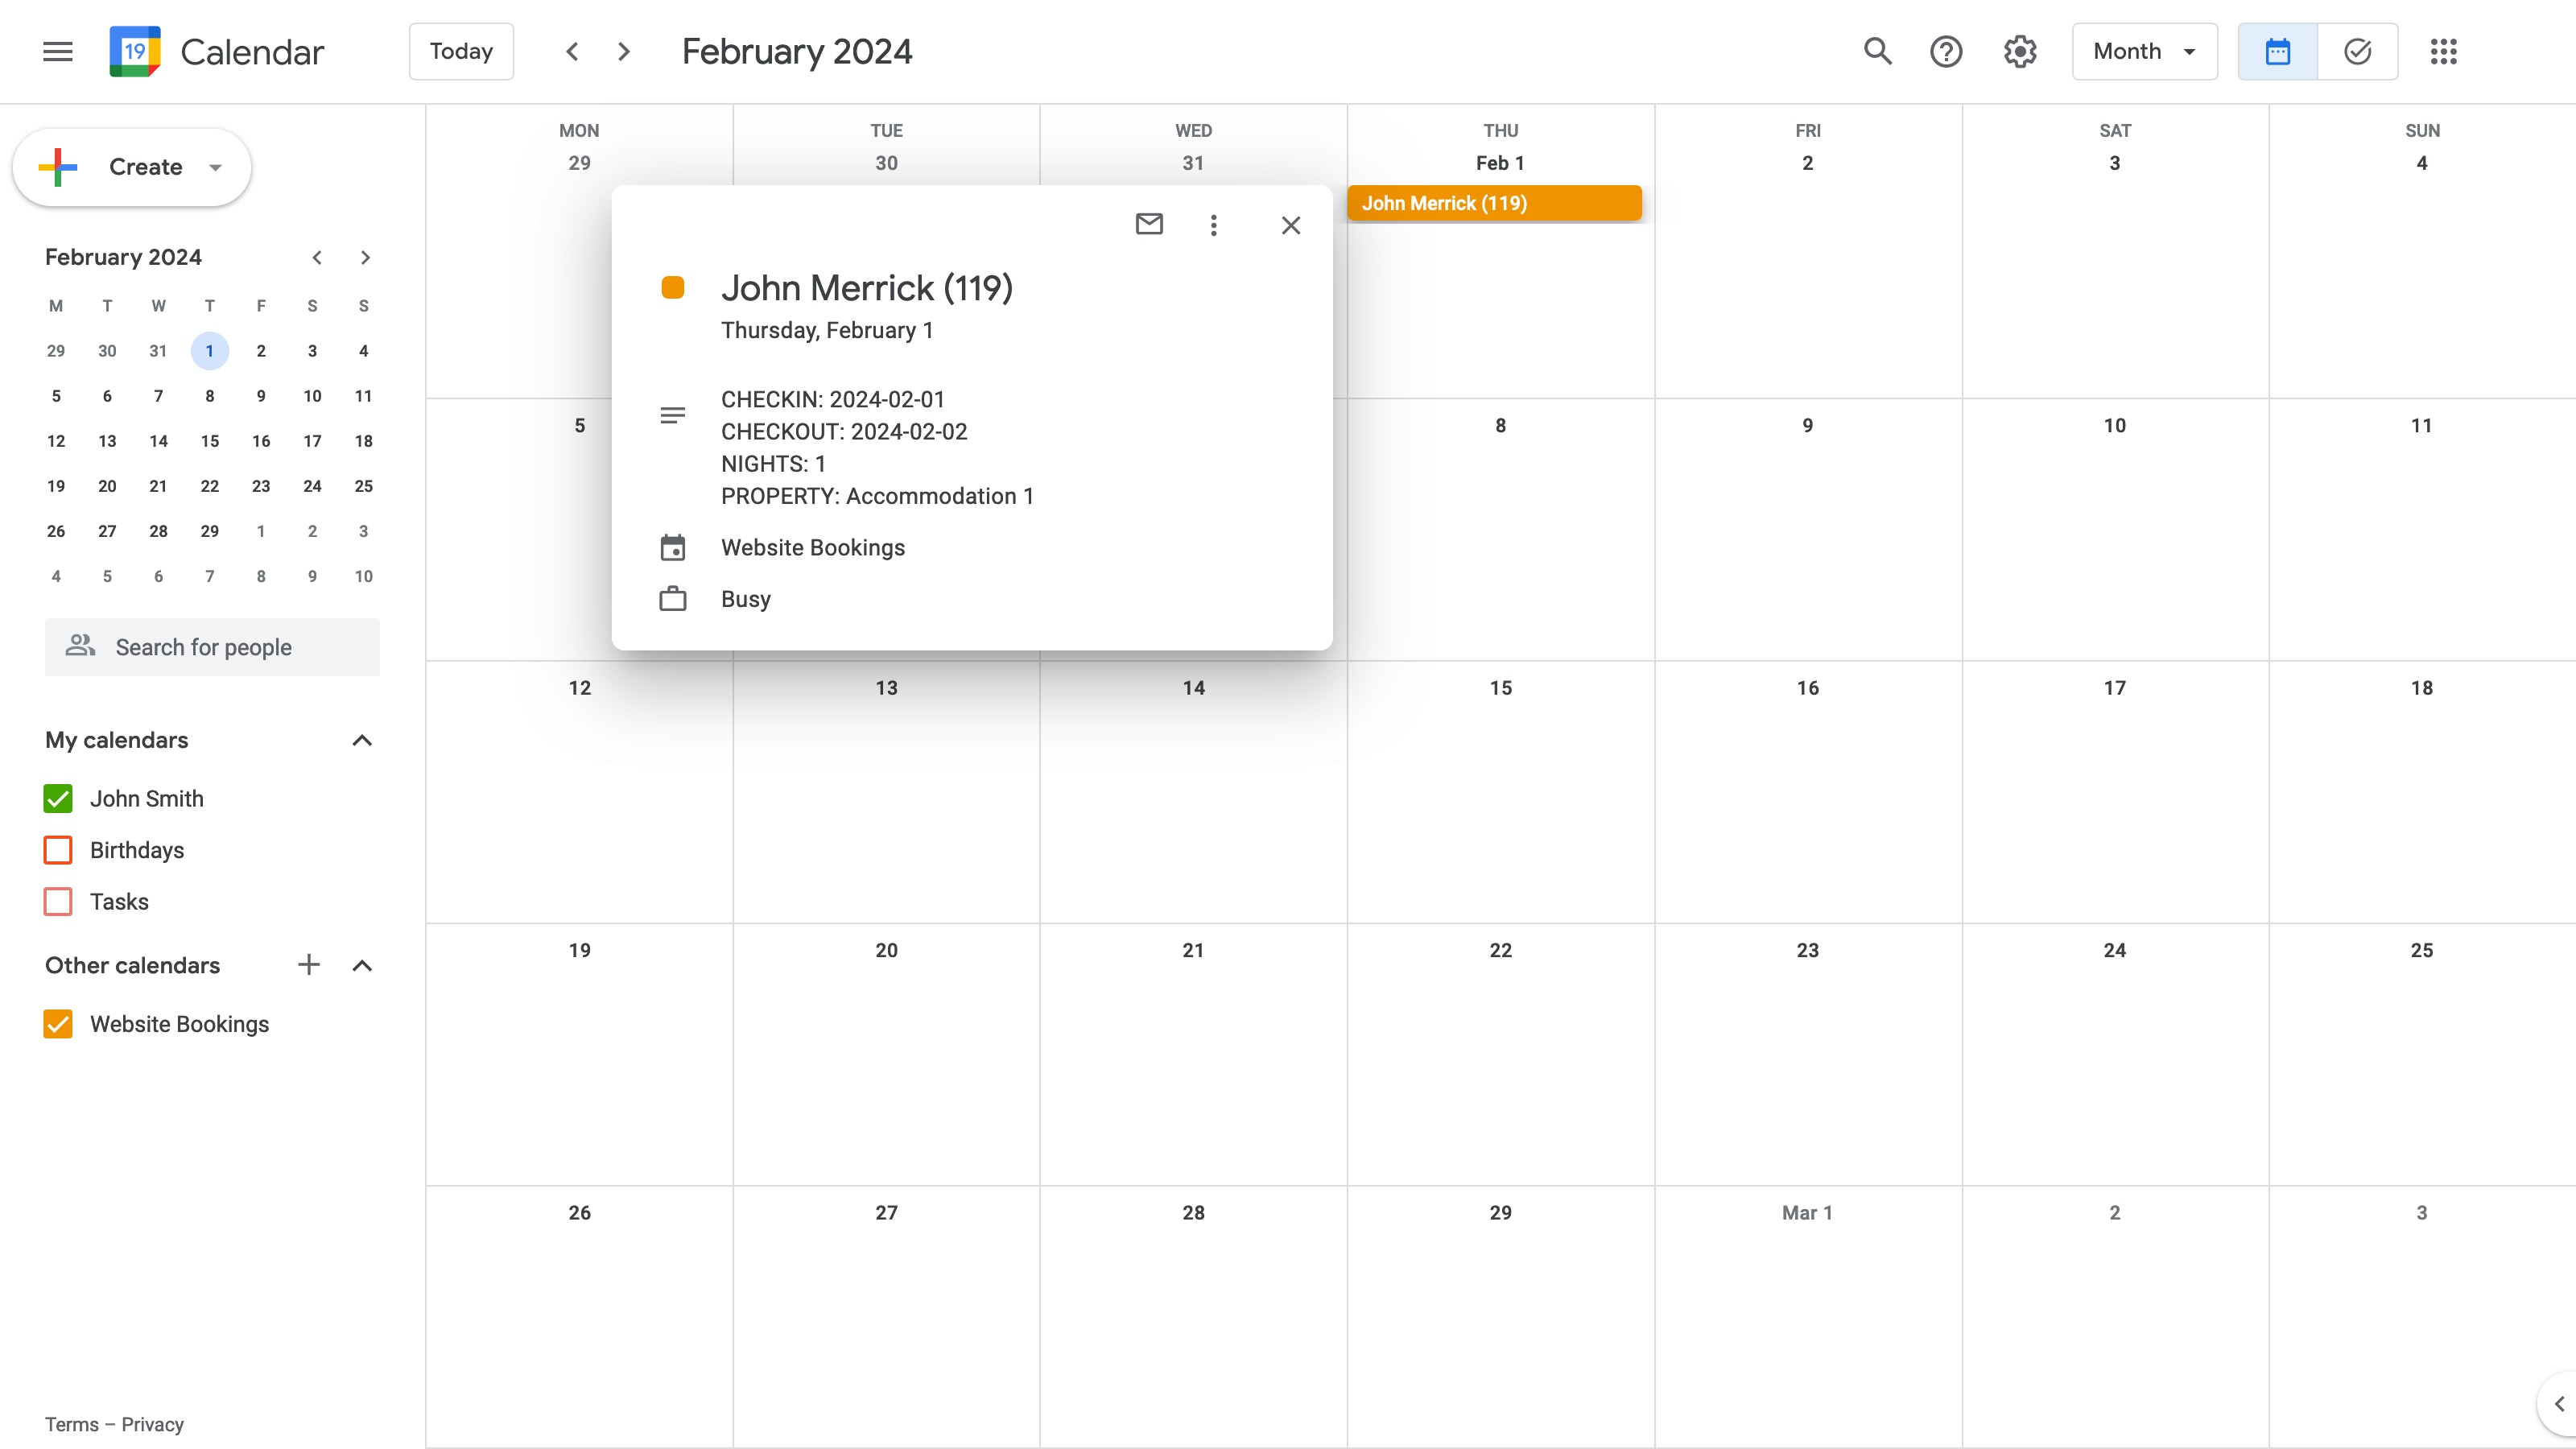
6. View all imported bookings by going back to the main calendar screen.
You can click on a booking to view additional information.
7. Create a new calendar to export bookings to WordPress.
The “From URL” calendar is read-only, which means you can only import bookings from your website. However, if you want to create new bookings in Google Calendar and export them back to your WordPress website, you must create a new calendar.
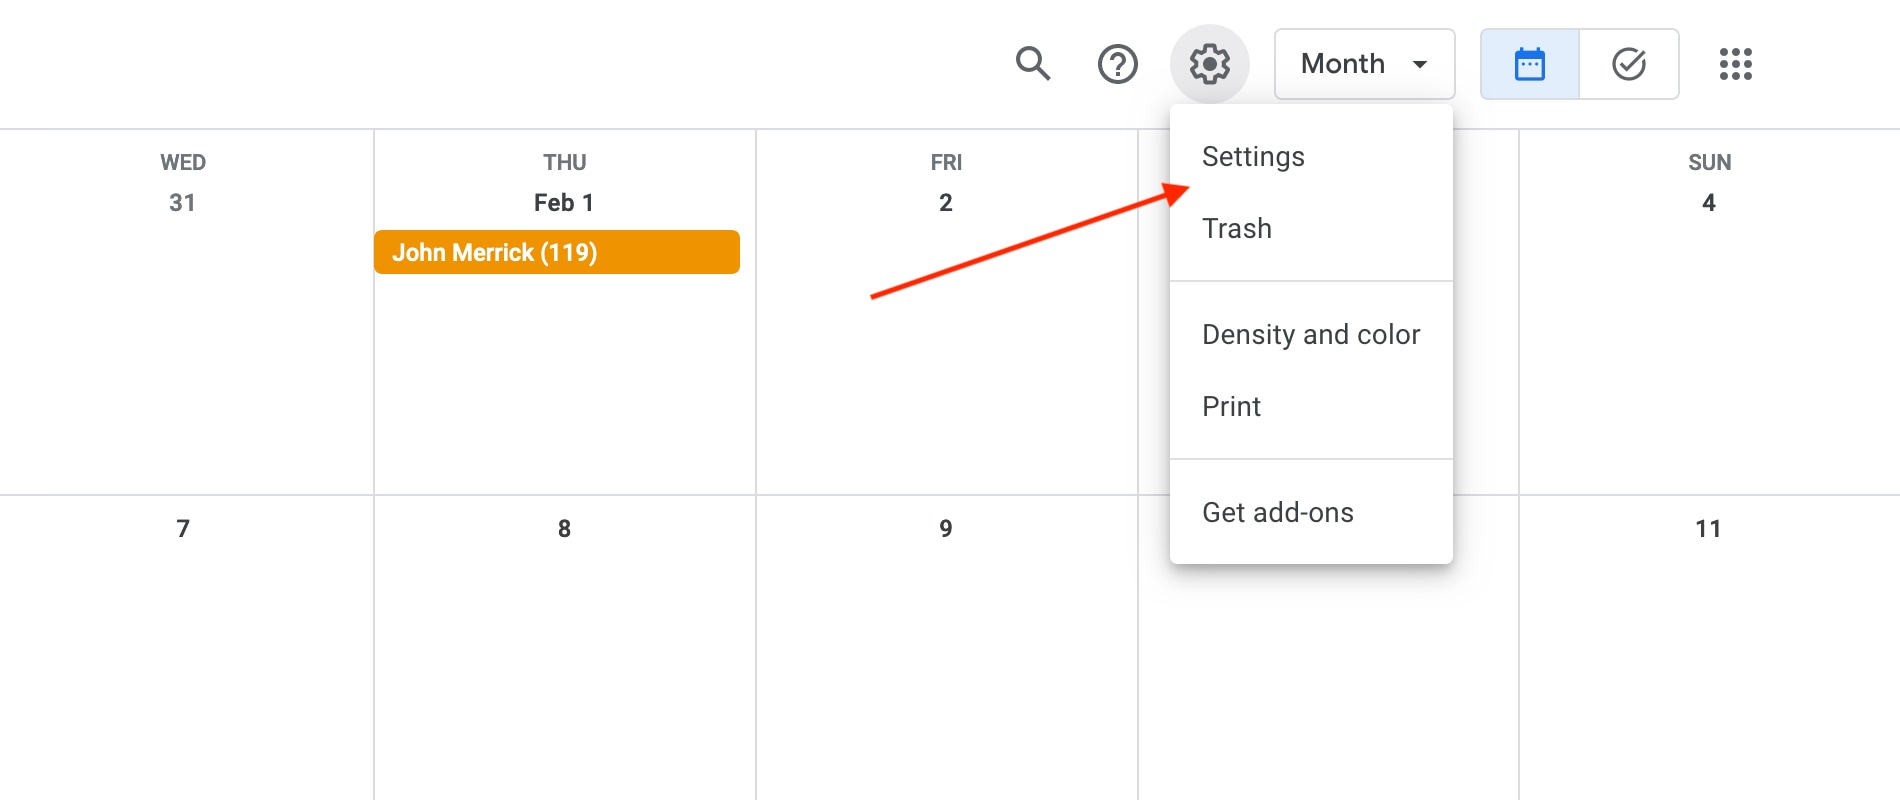
8. Choose Settings in the calendar by clicking on the gear icon.
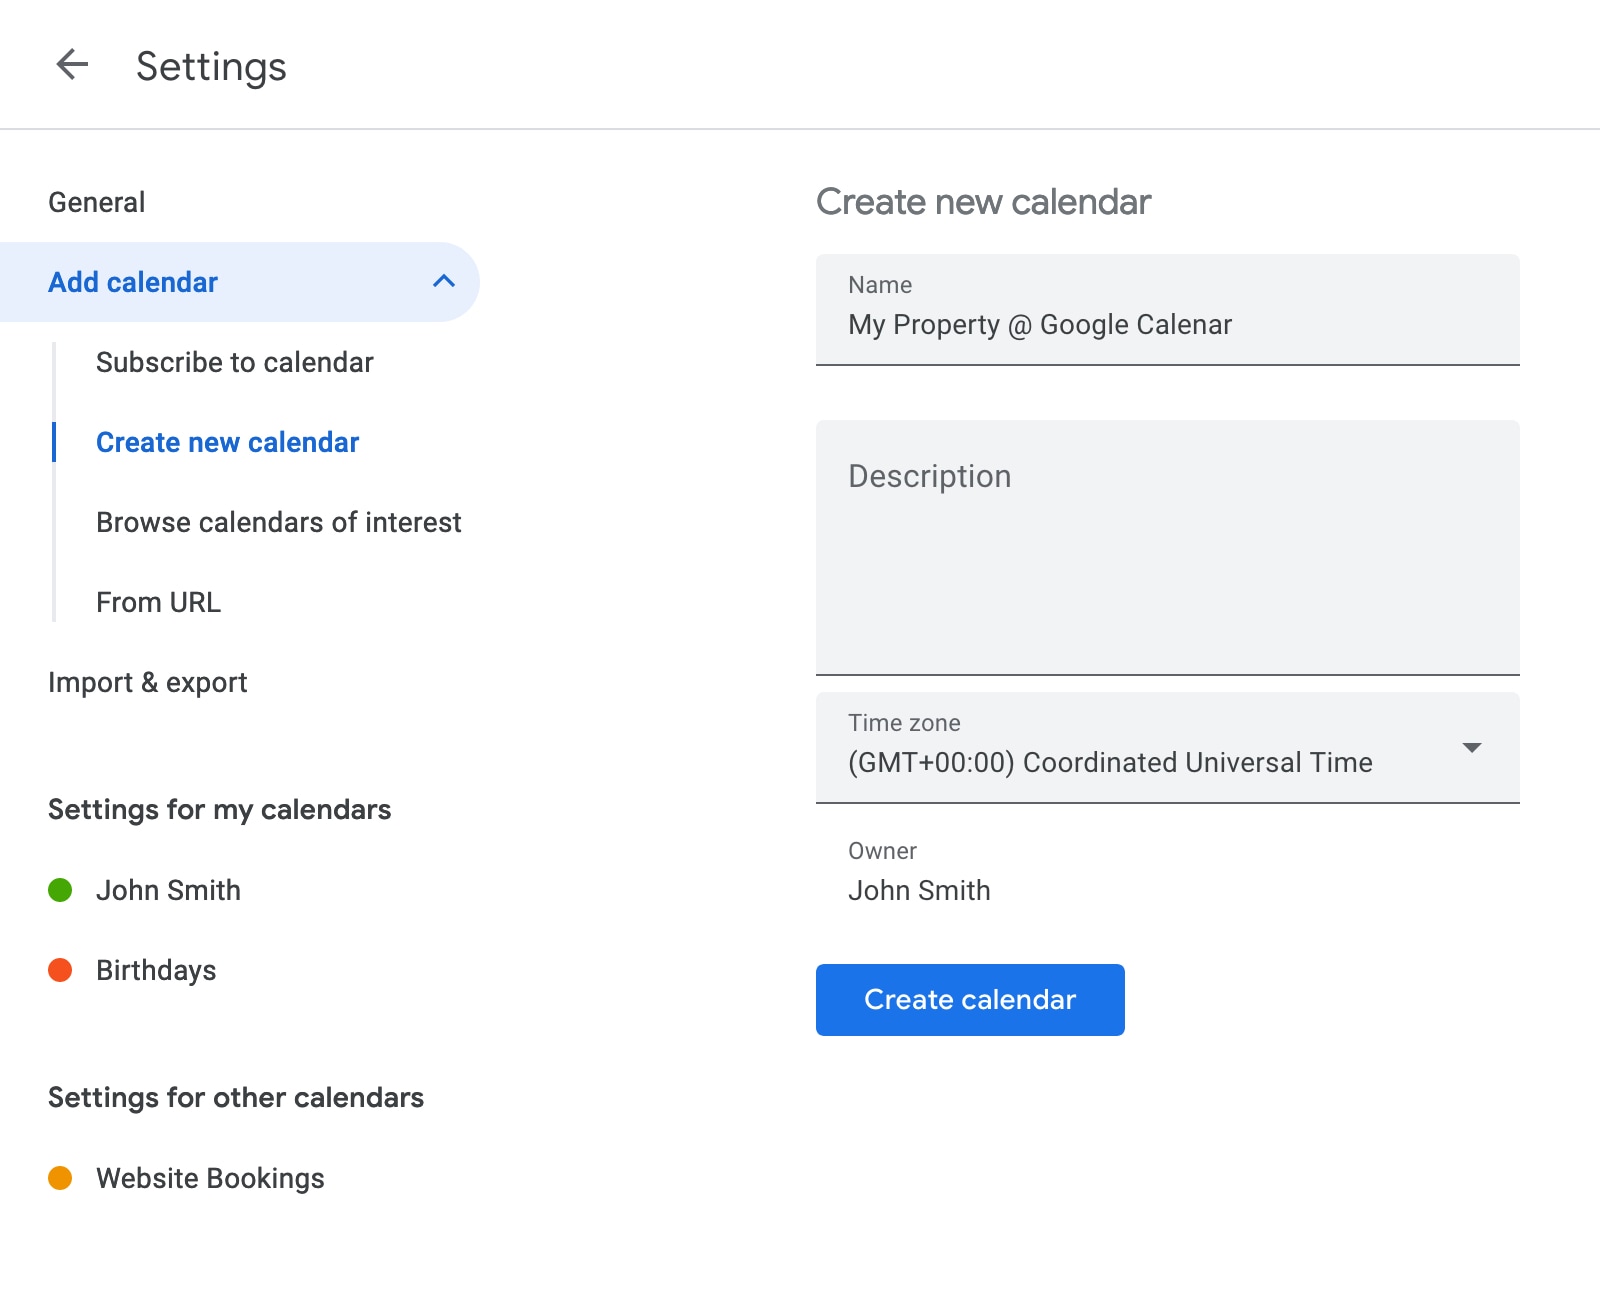
9. Within the Settings menu, go to ‘Add calendar’, then select ‘Create new calendar’. Enter a name for your calendar, select the time zone, and then click the ‘Create calendar’ button.
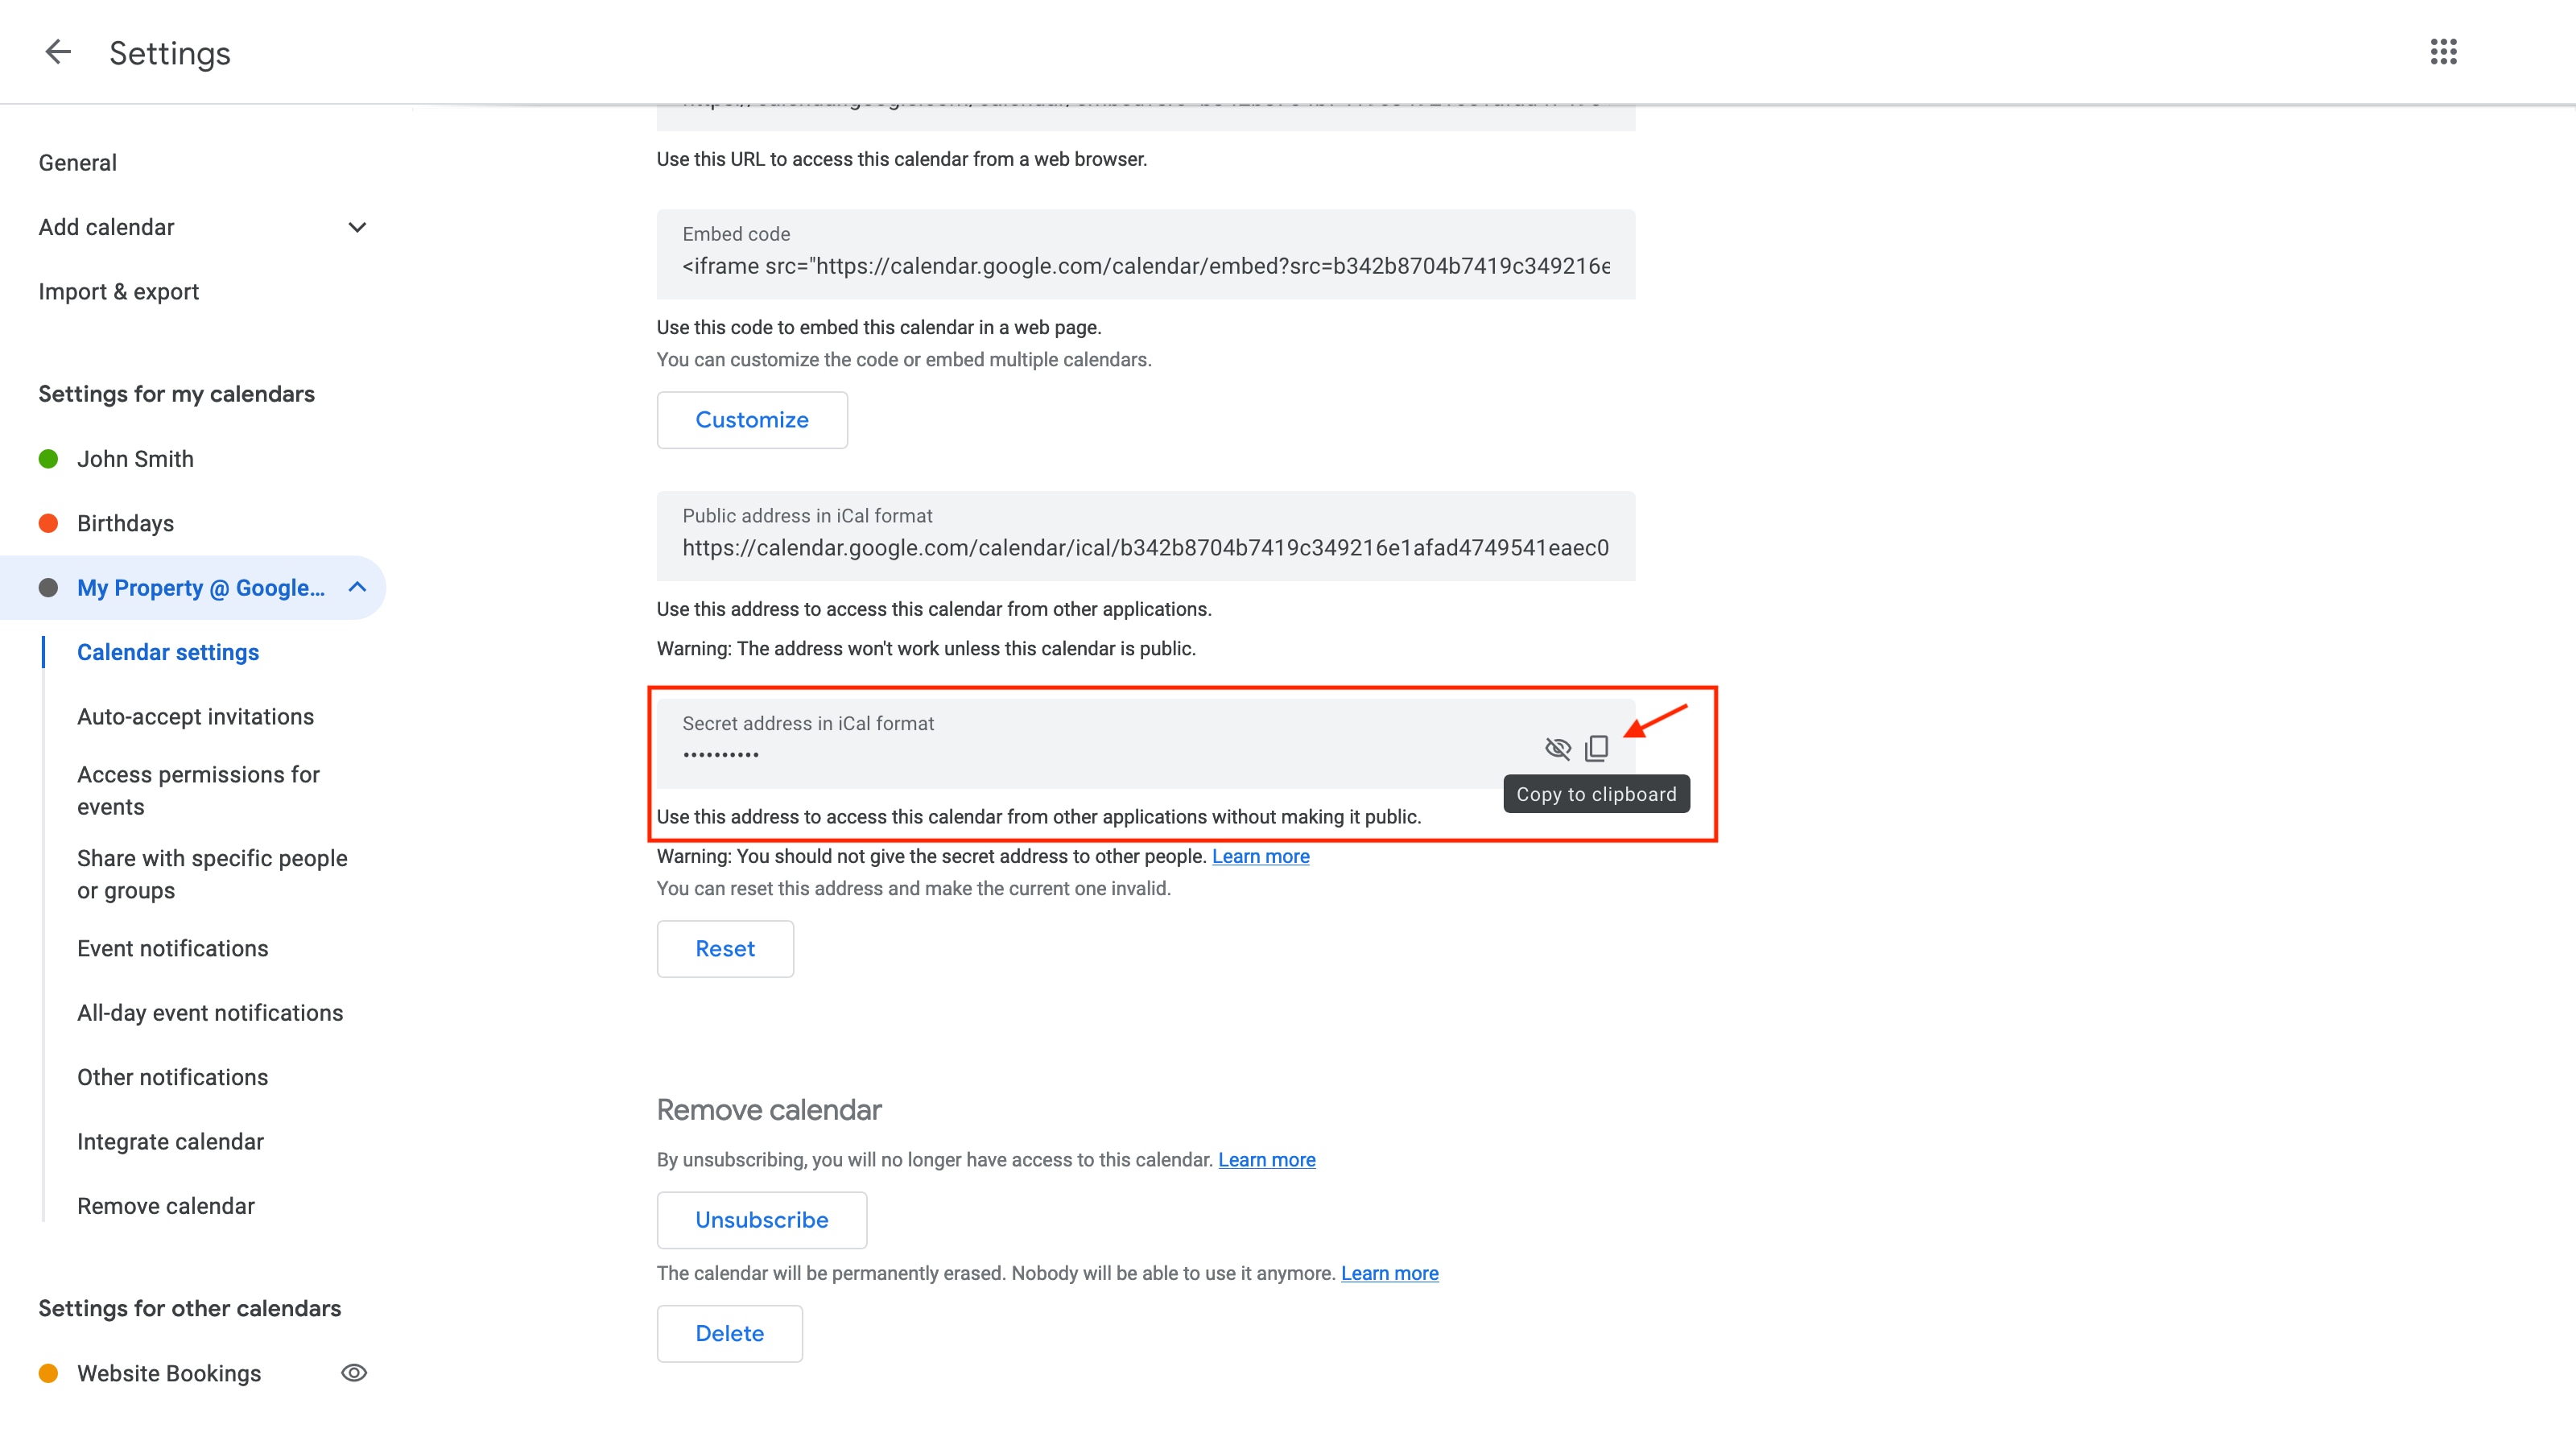
10. Select the calendar, scroll down to the bottom of the page, and copy the Secret address.
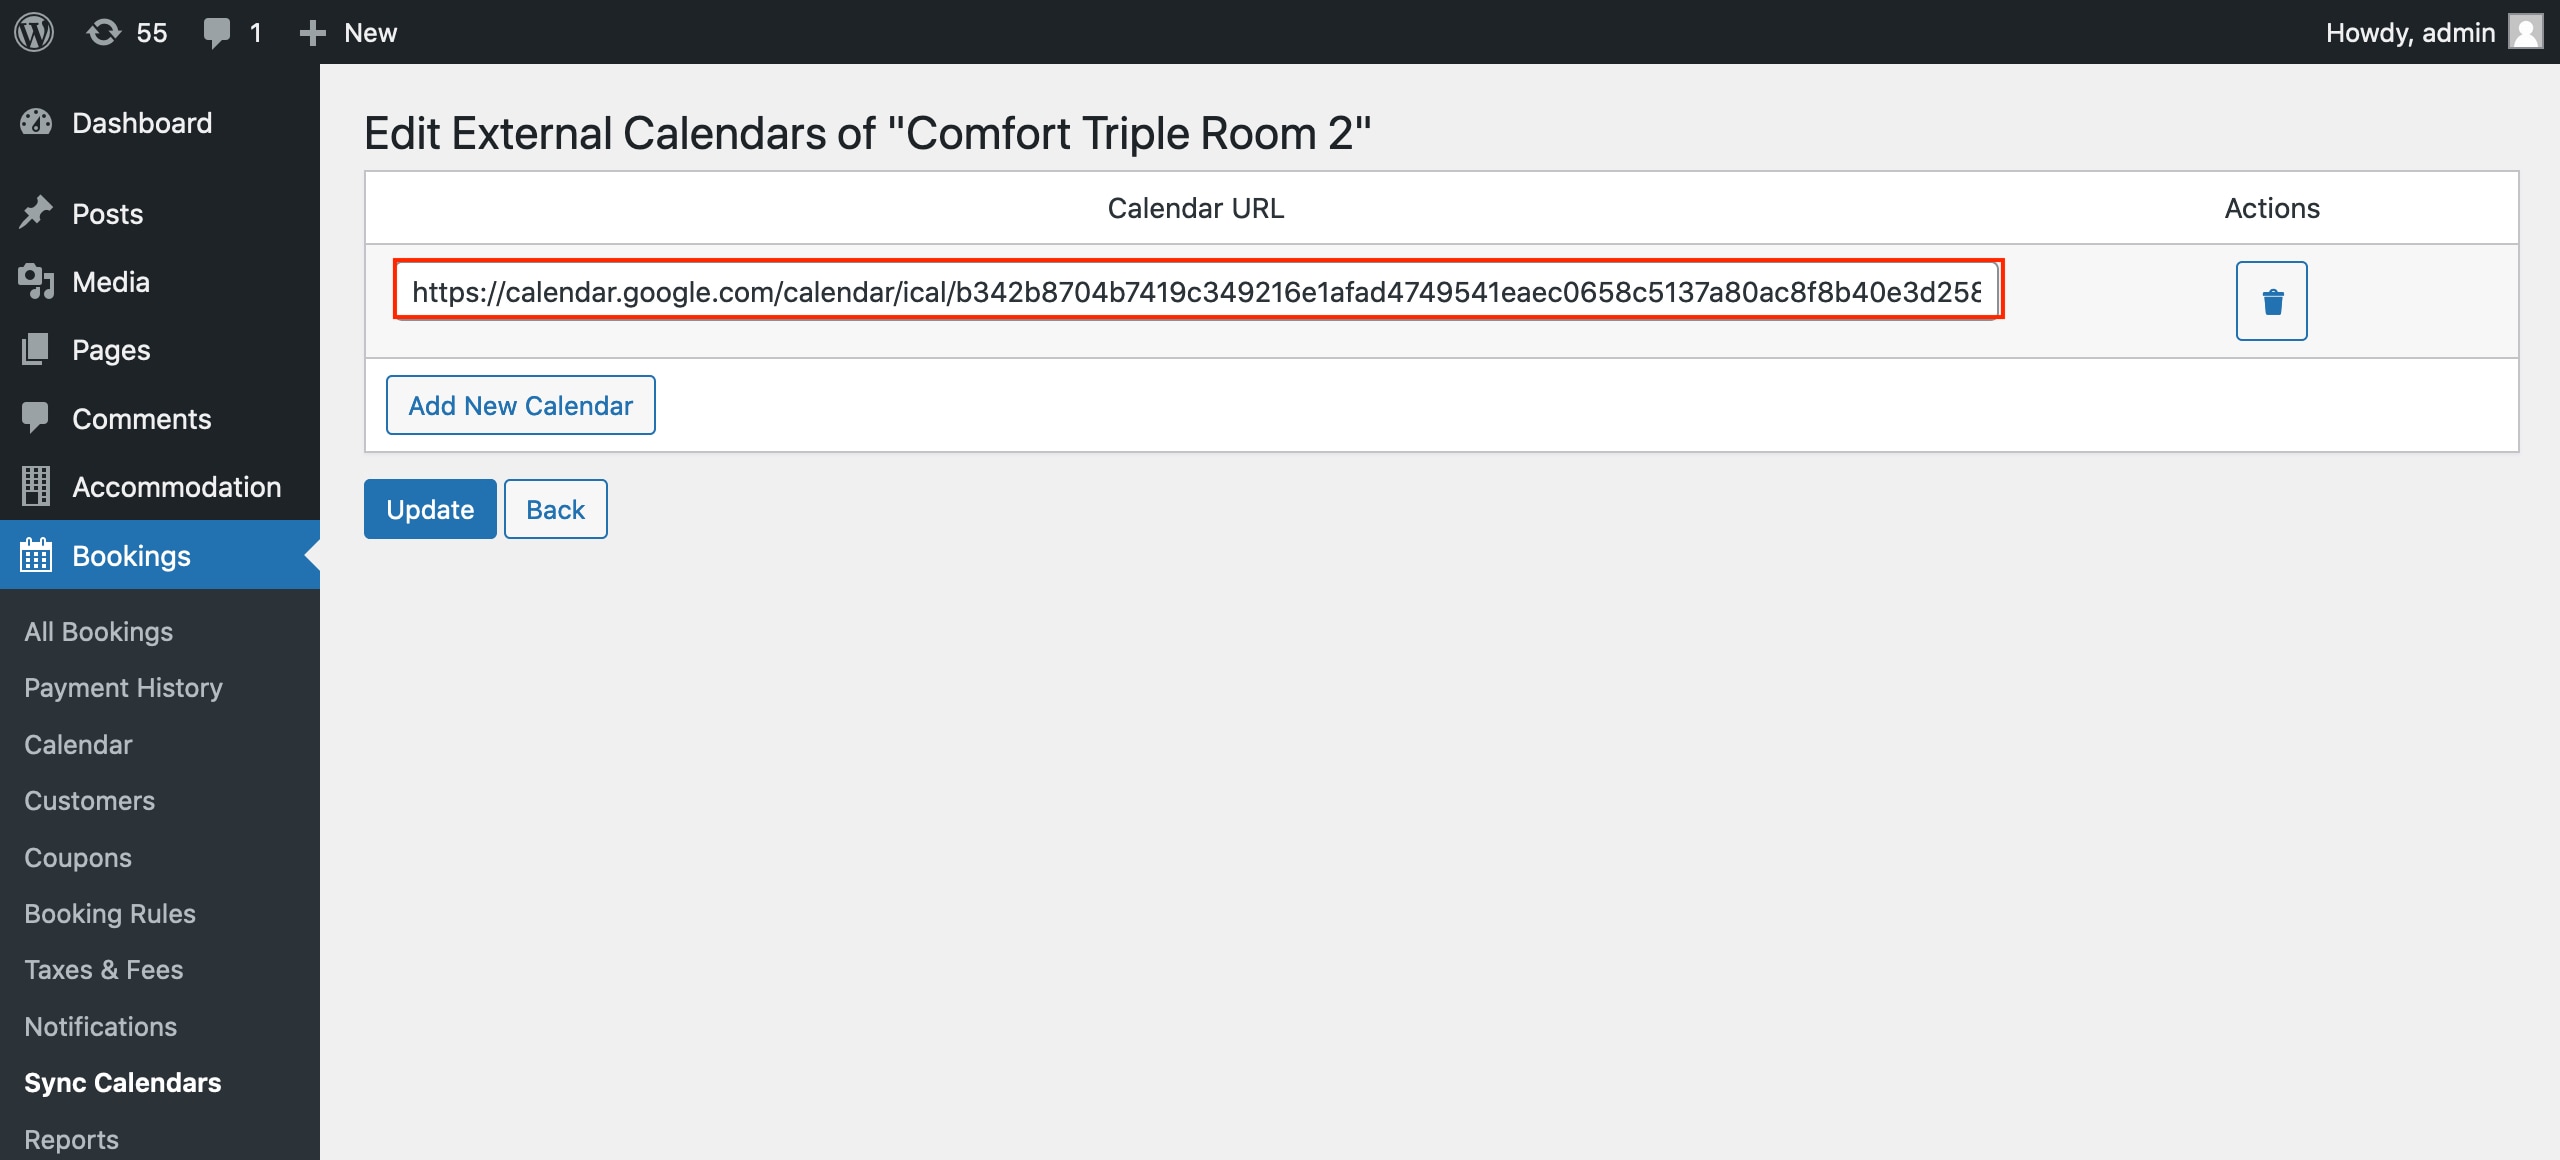
11. Go to your WordPress site > Bookings > Sync Calendars > hover over the accommodation > click ‘Edit button’ under the accommodation title.

12. Click the ‘Add New Calendar’ button and then paste the copied Secret address of your Google Calendar. Click ‘Update’.
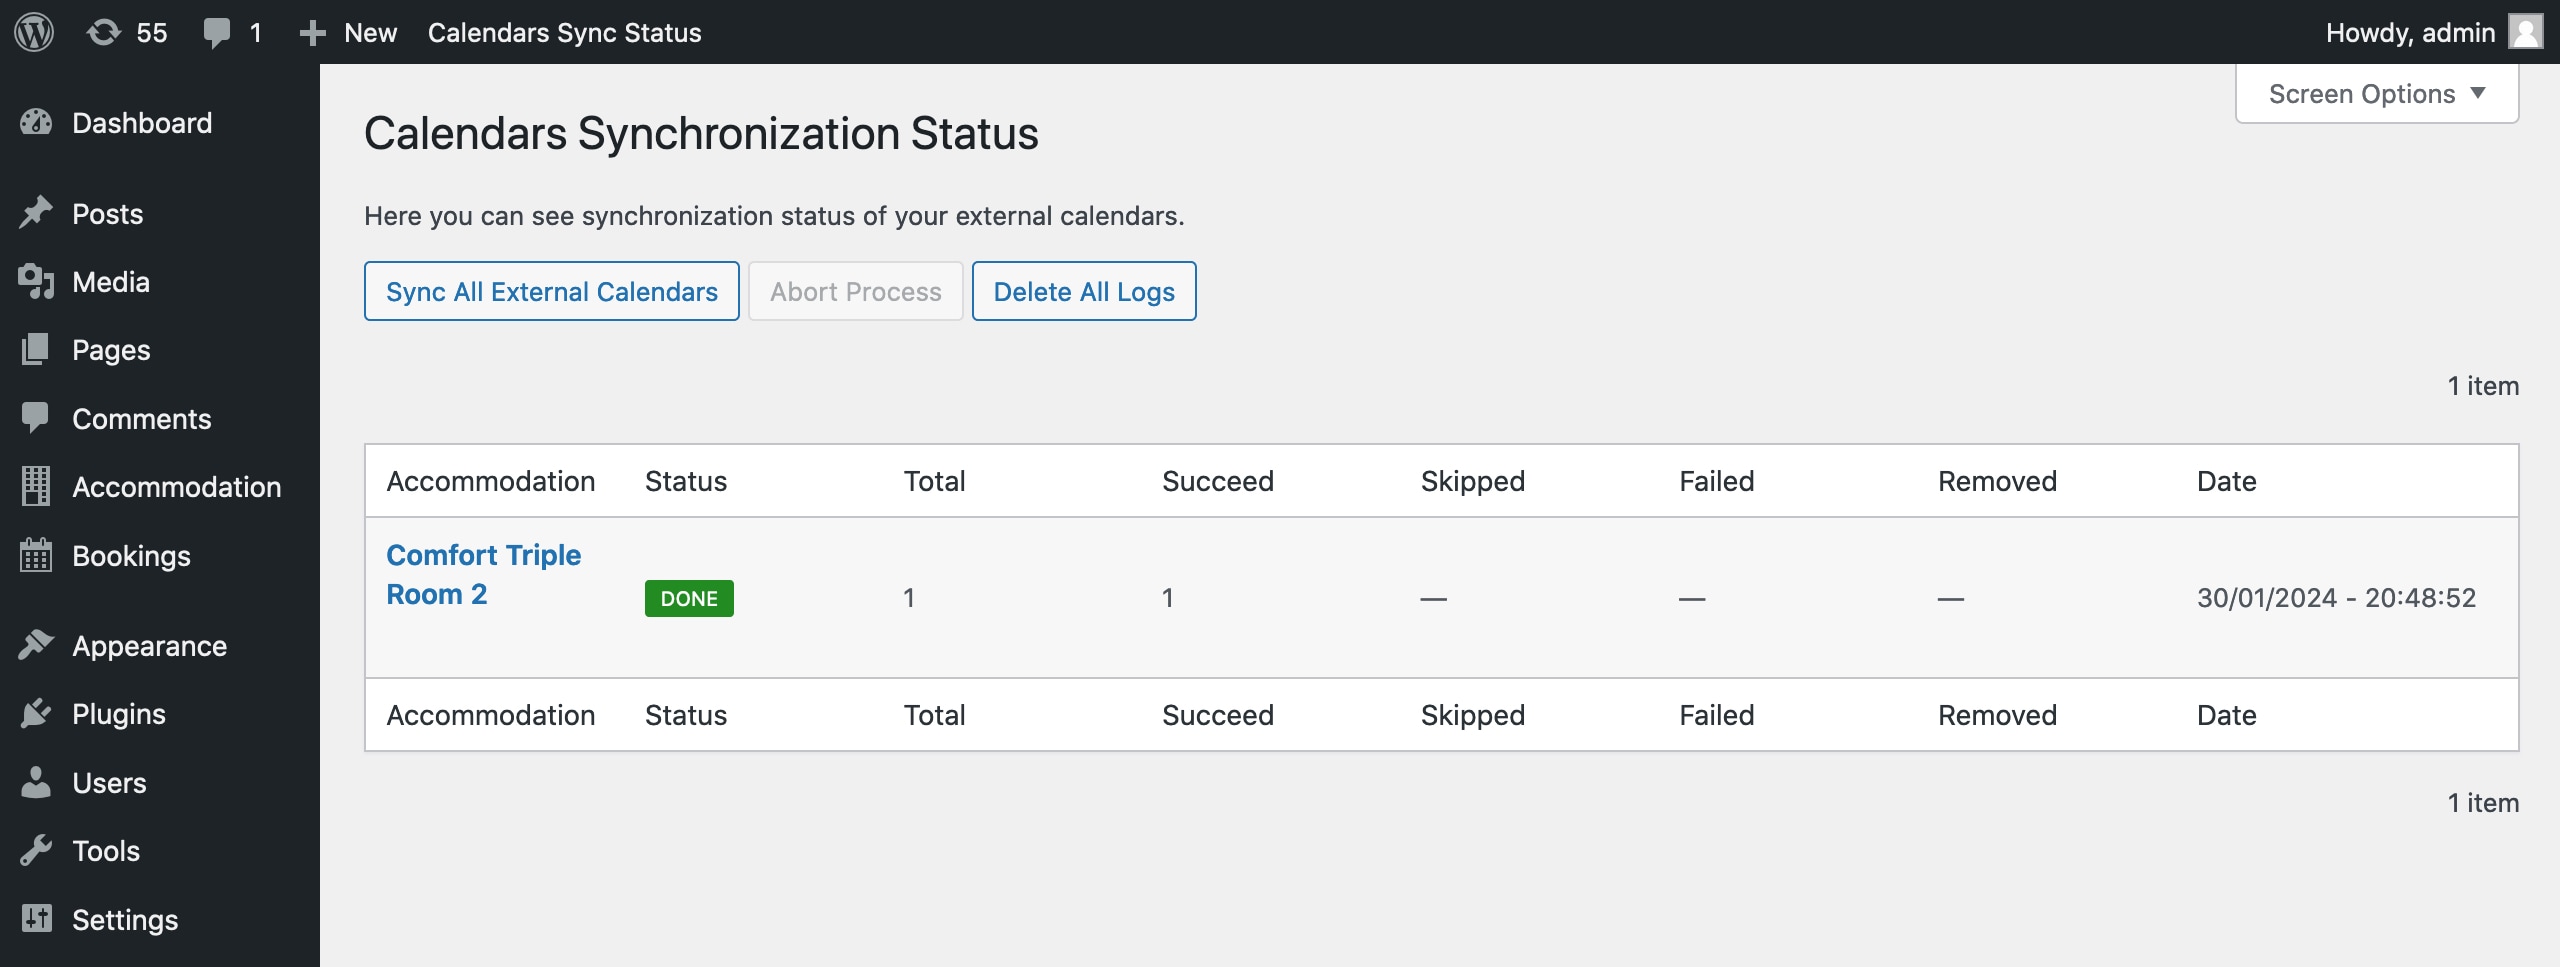
13. Go to WordPress > Bookings > Sync Calendars > select ‘Sync All External Calendars’.
After clicking, you’ll see the Calendars Synchronization Status page, which logs the synchronization process and shows the number of created bookings.
You can find imported bookings on both the Bookings and Calendar pages.
14. Enable automatic synchronization with external calendars.
Go to WordPress > Accommodation > Settings > scroll to the ‘Calendars Synchronization Scheduler’ section.
Check “Enable automatic external calendars synchronization” to activate automatic synchronization with external calendars.
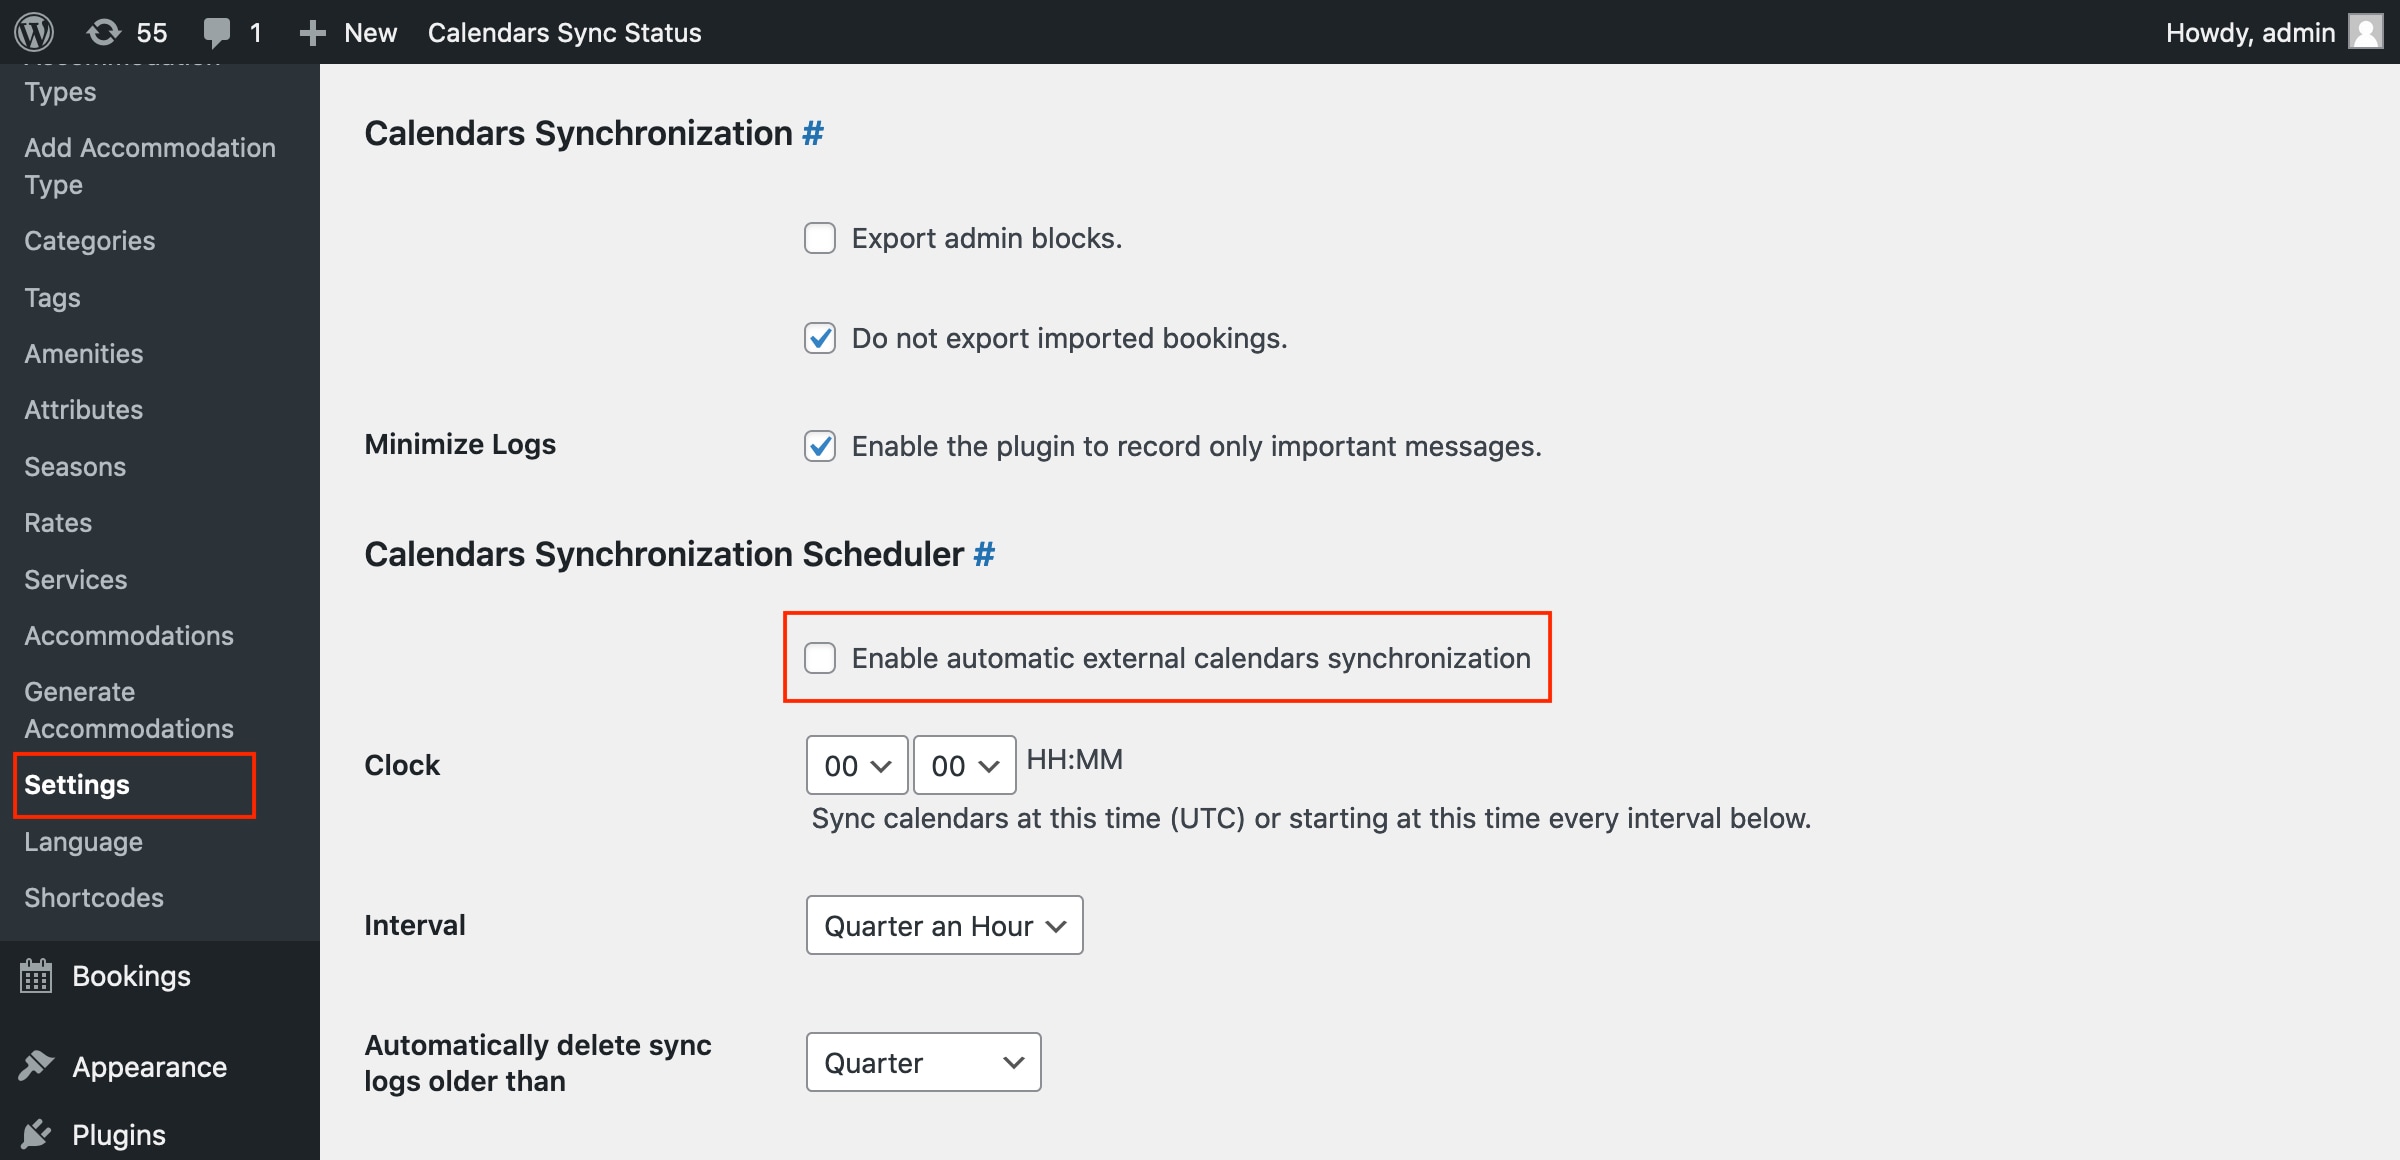
This option allows your WordPress site to load external calendars on a scheduled basis. But note that it doesn’t determine how often external platforms will load calendars from your WordPress.
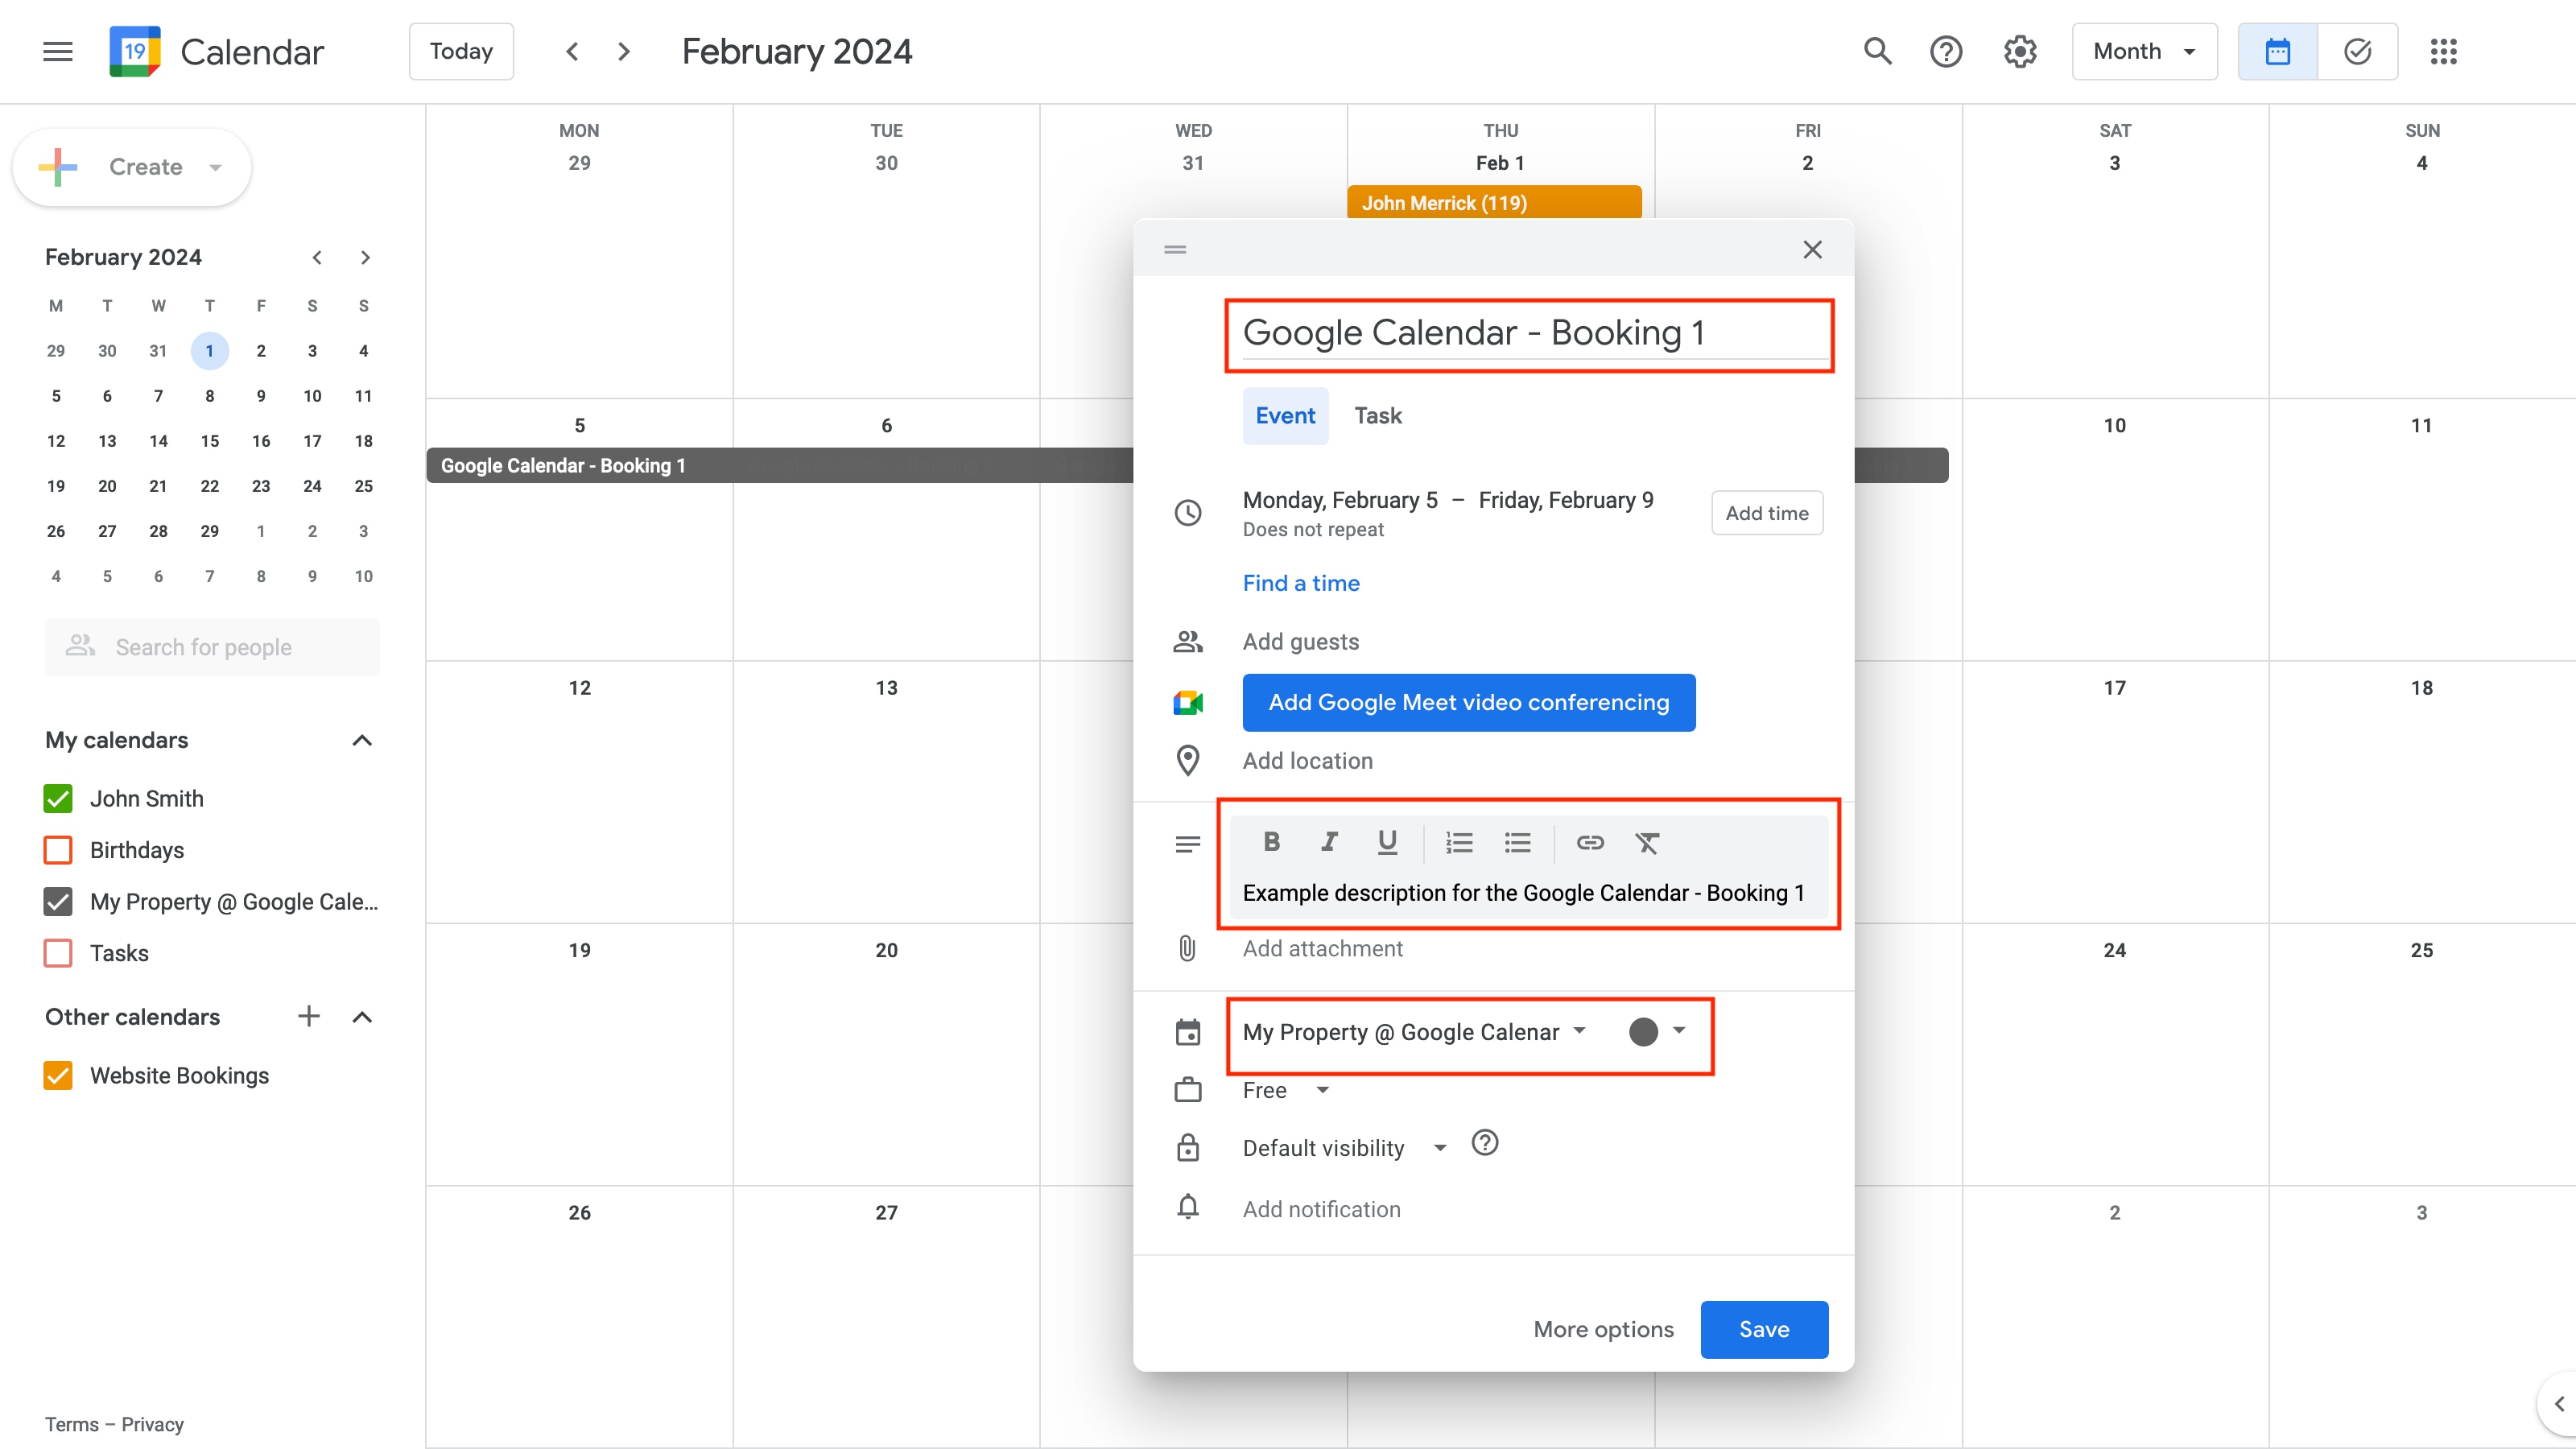
15. Create a booking or block time in your Google Calendar.
In Google Calendar, go to the Month view and choose the dates you want to mark as booked or blocked.
In the prompted popup, add the title, description and choose a calendar associated with your accommodation (it’s described earlier in this tutorial). Save the changes.
If automatic calendar synchronization is on, you can wait for it to sync automatically. Alternatively, go to Dashboard > Bookings > Sync Calendars, and click ‘Sync All External Calendars’ to synchronize calendars right away.
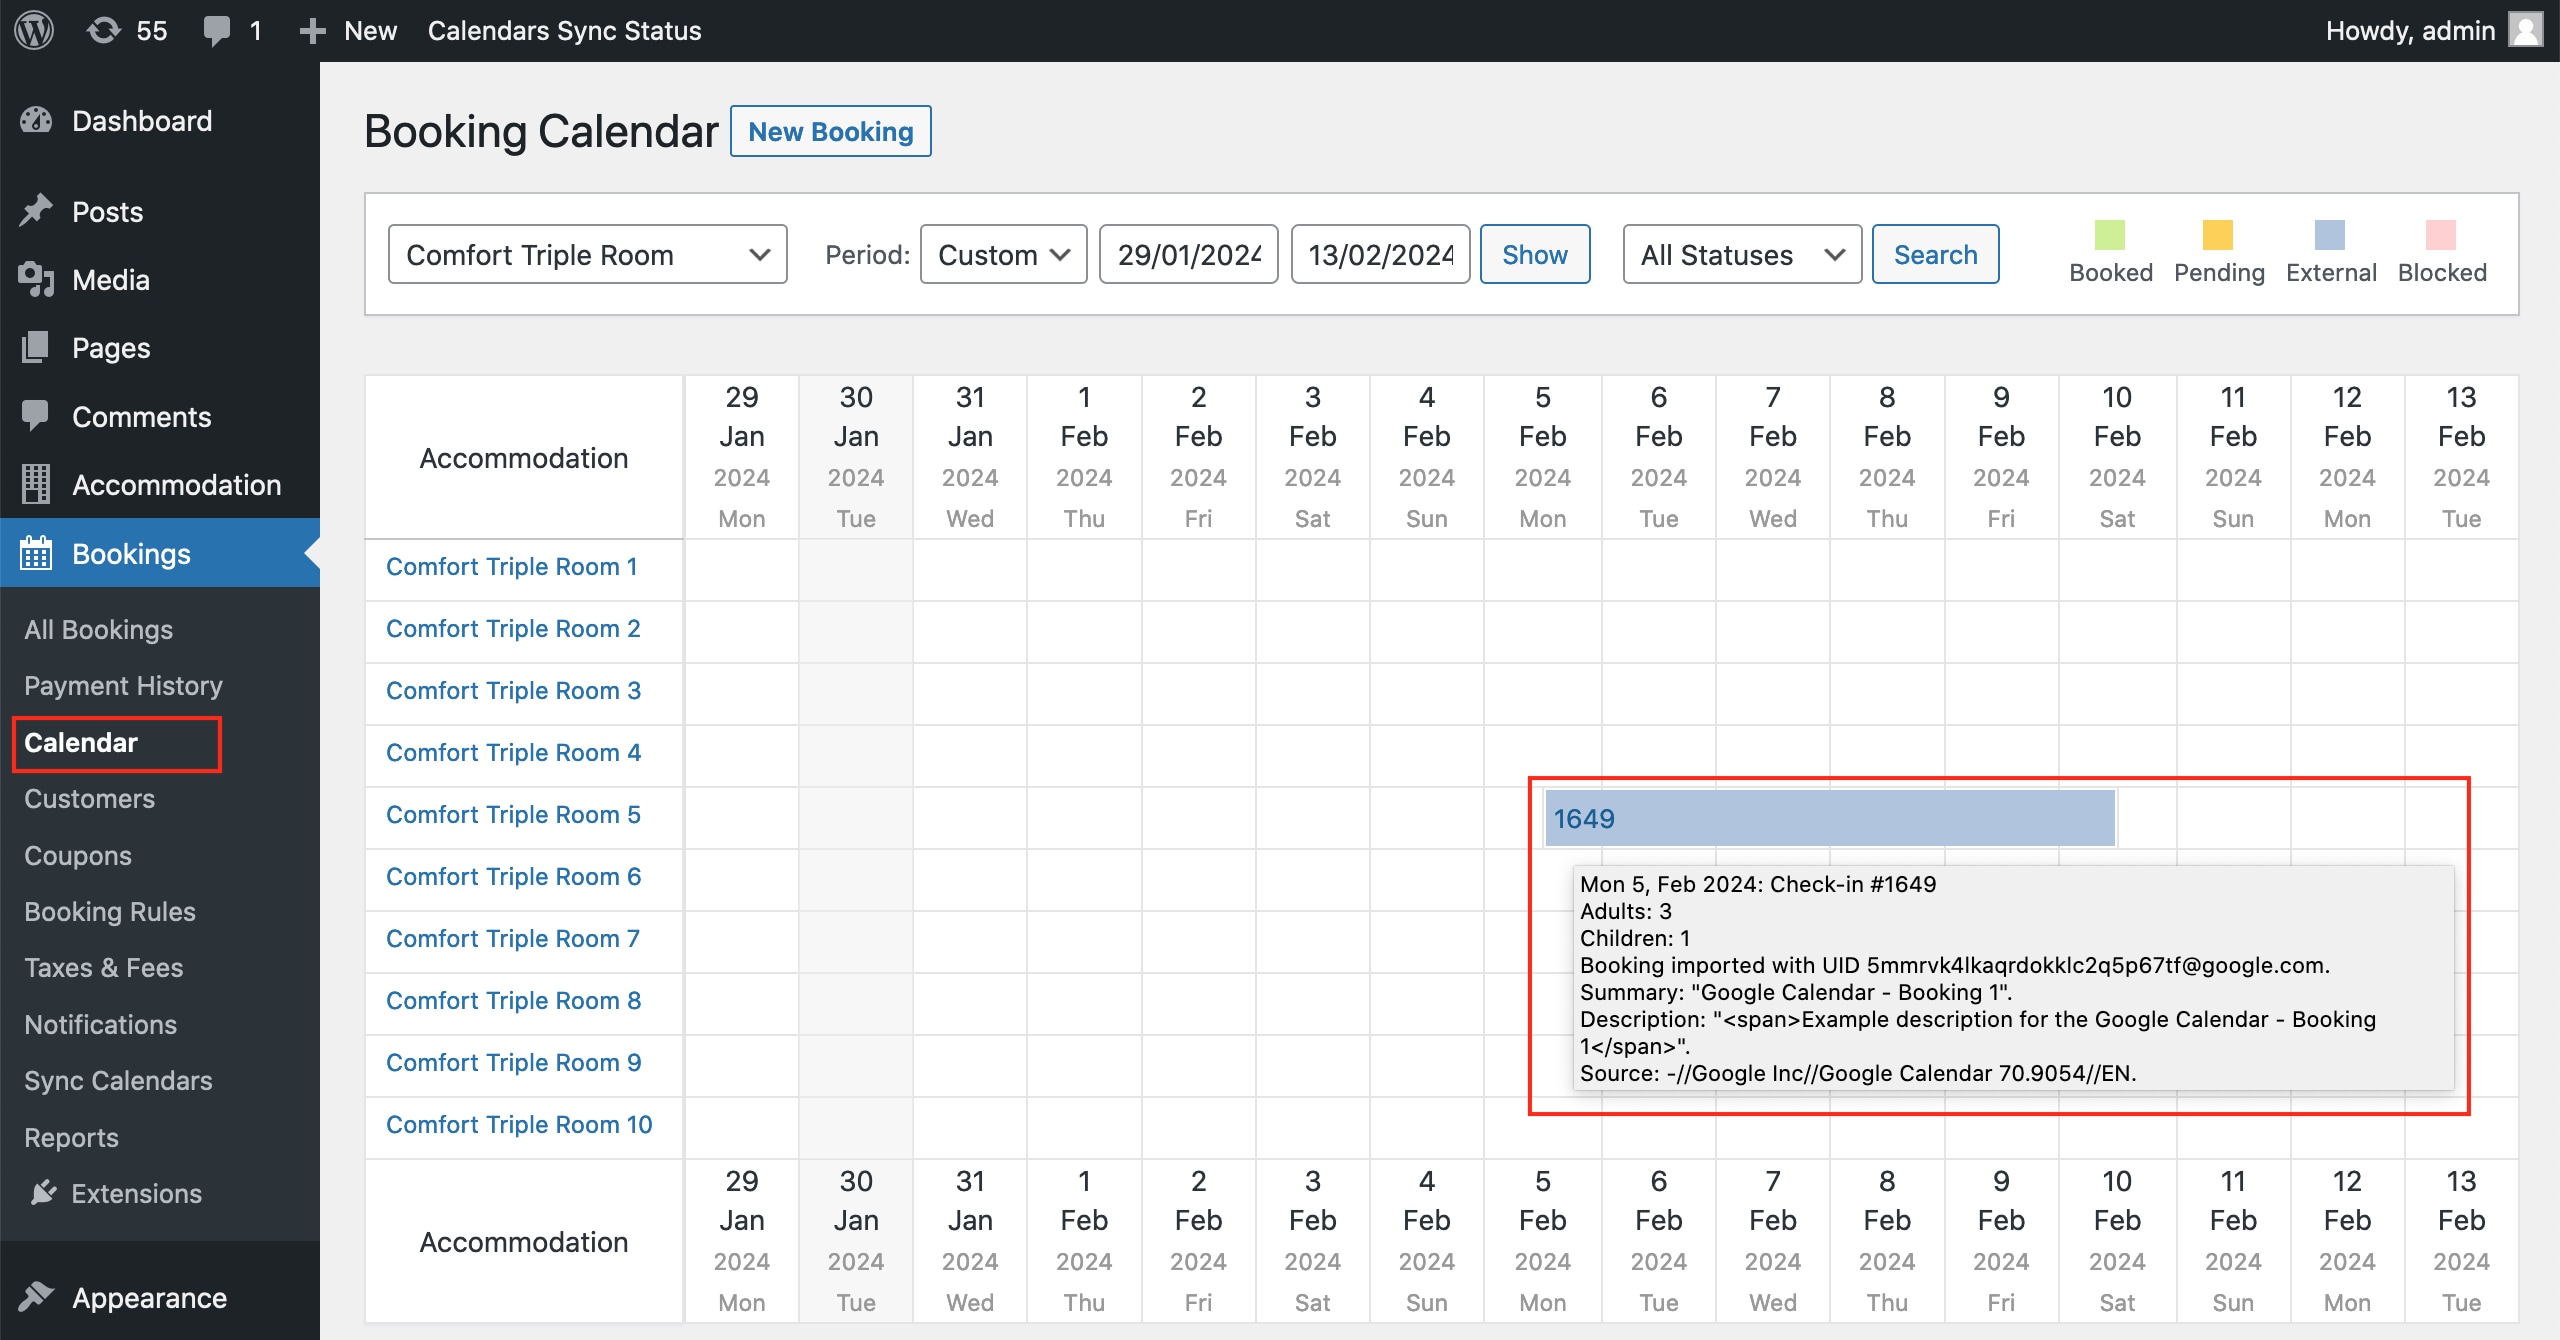
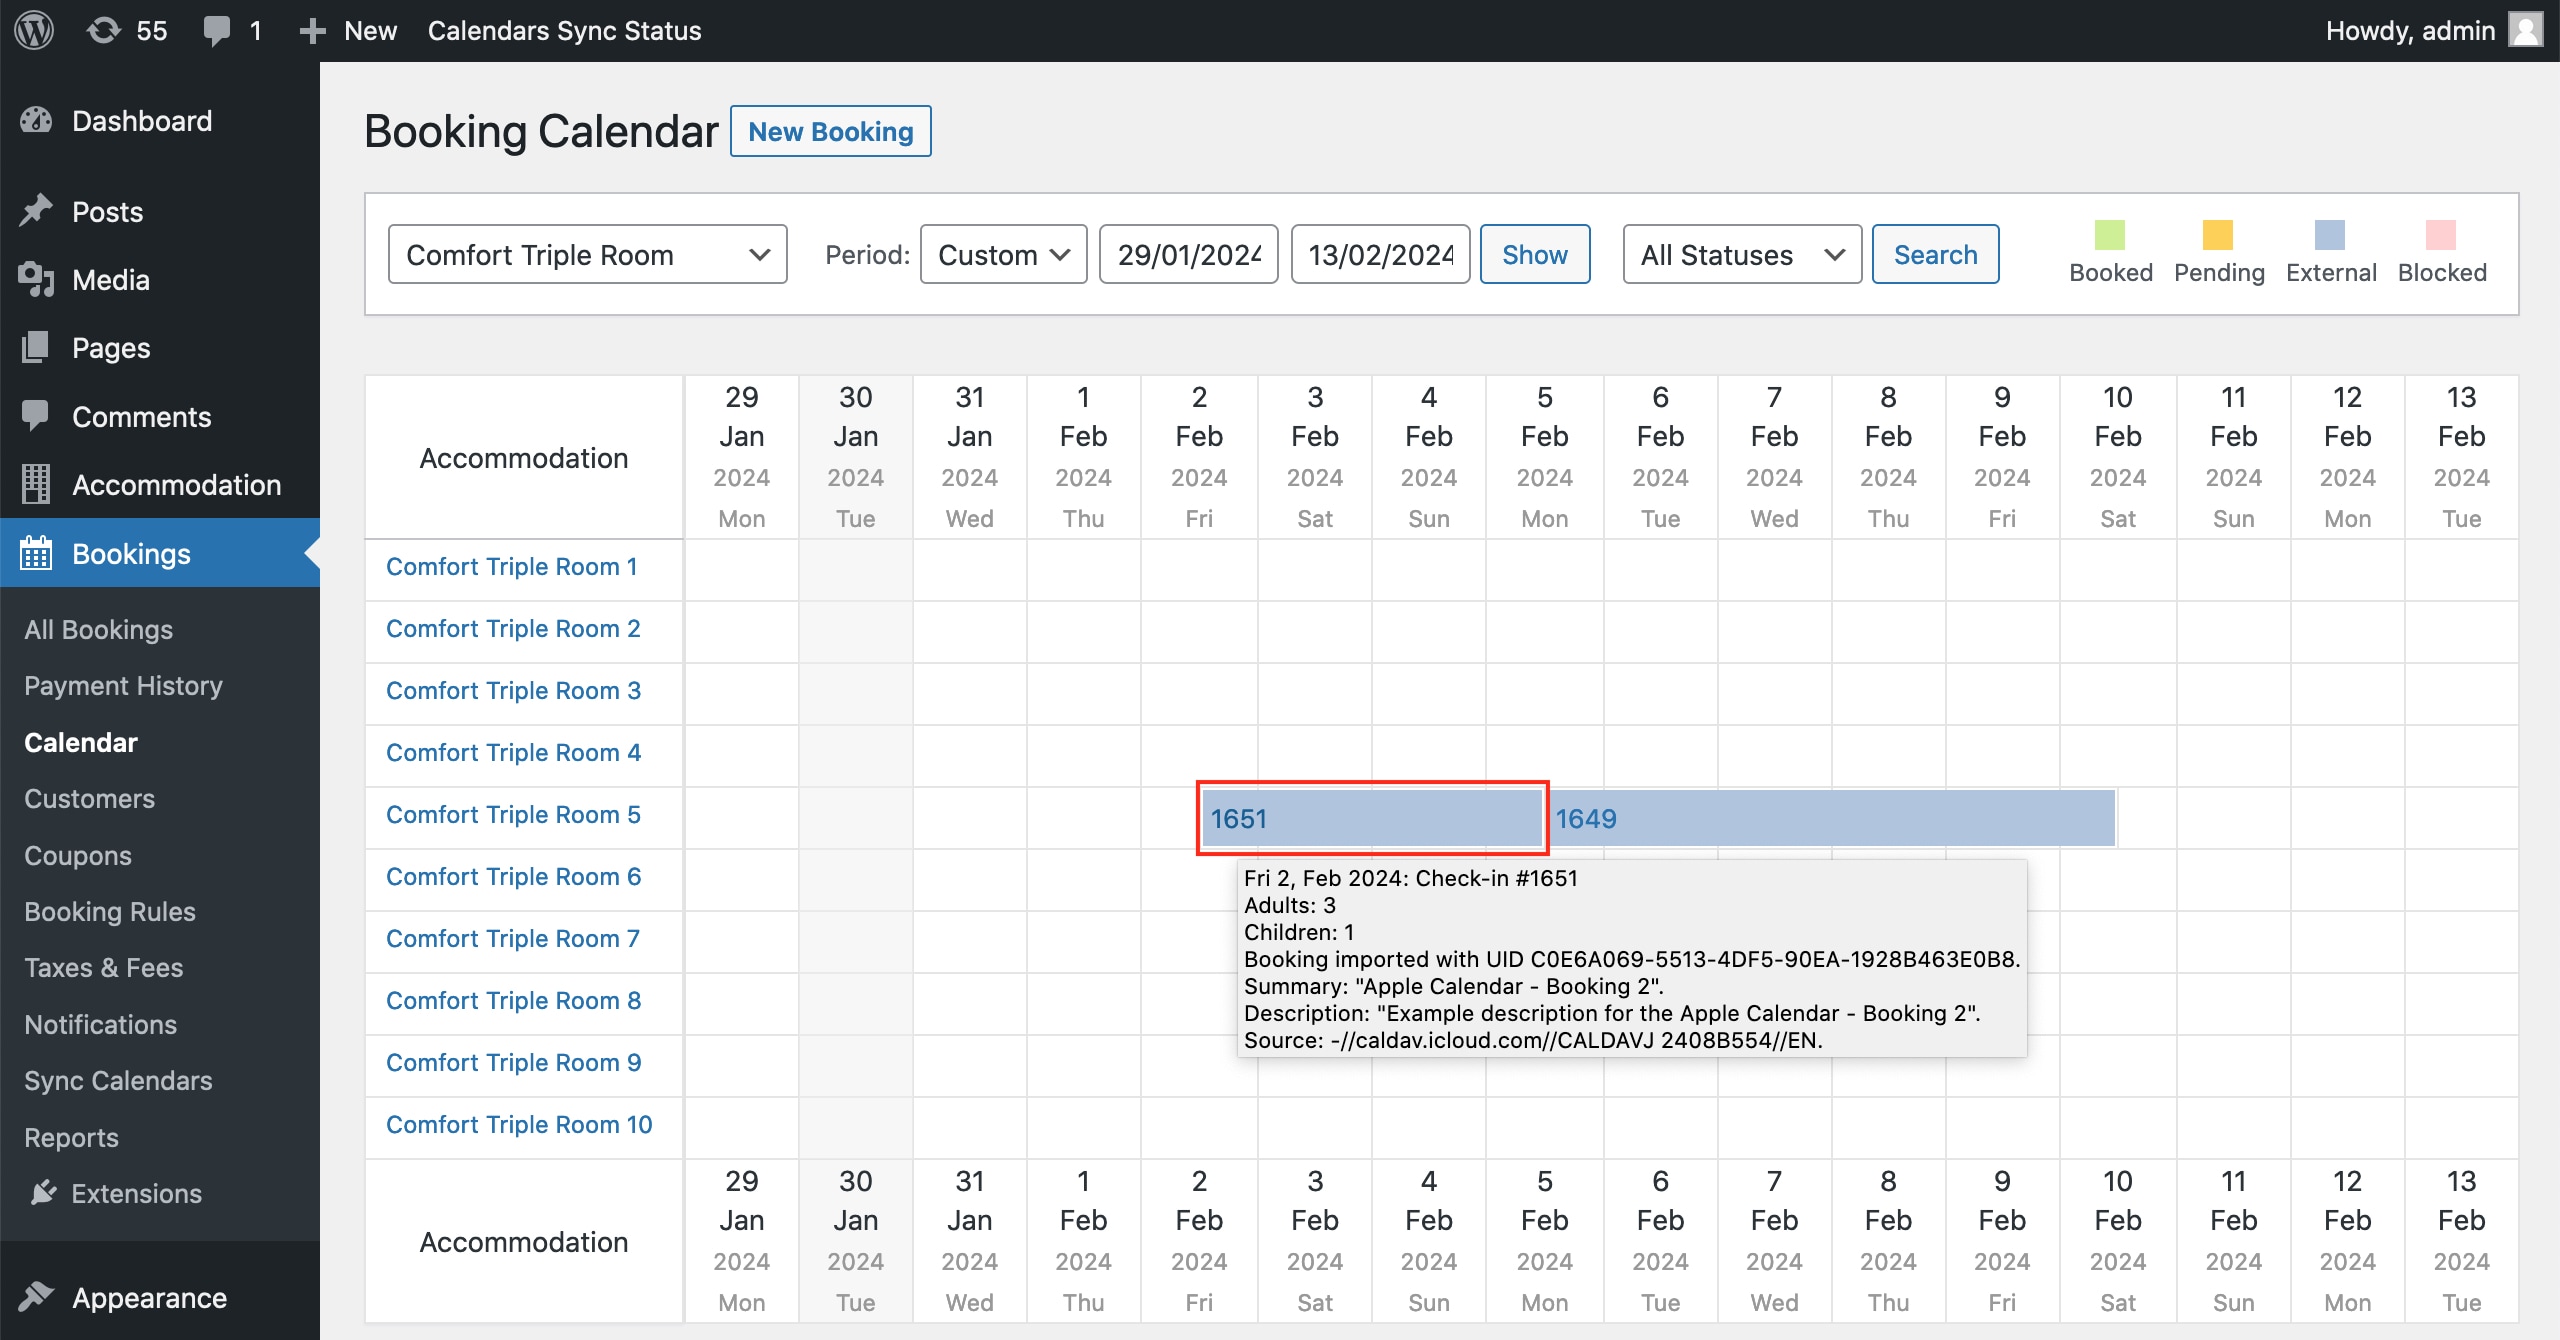
Go to WordPress > Bookings > Calendar. If sync was successful, you’ll see a new booking imported from Google Calendar. Hover or click to view details.
How to sync bookings with Apple Calendar
1. Access your calendar URLs.
You can find all calendar links for each accommodation at WordPress Dashboard > Bookings > Sync Calendars.
2. Copy your calendar URL.
Find the URL for your calendar in the “Export” column and copy it.
3. Launch Apple Calendar on your MacBook.
We’ll give you examples from Calendar version 11.0.
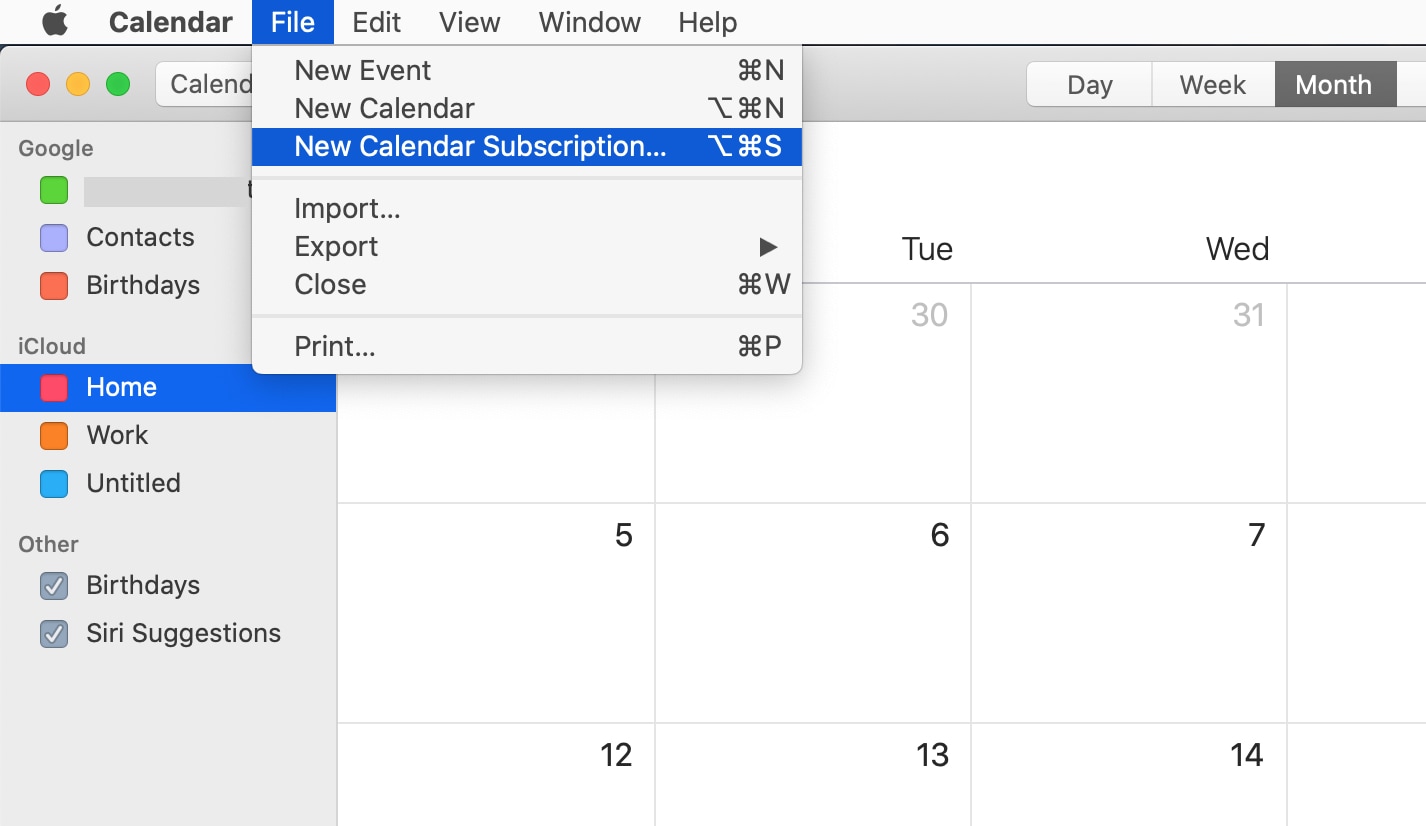
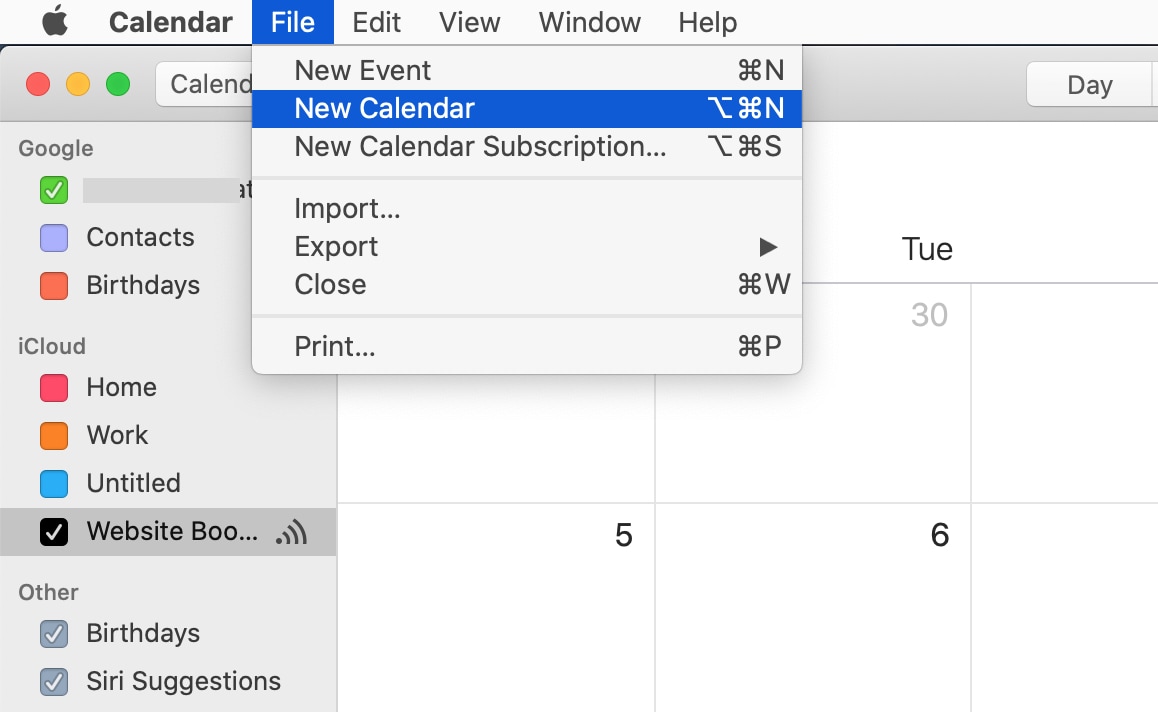
4. Go to File > New Calendar Subscription.
5. Paste the calendar link and click ‘Subscribe’.

6. Name the calendar and select how frequently it should refresh.
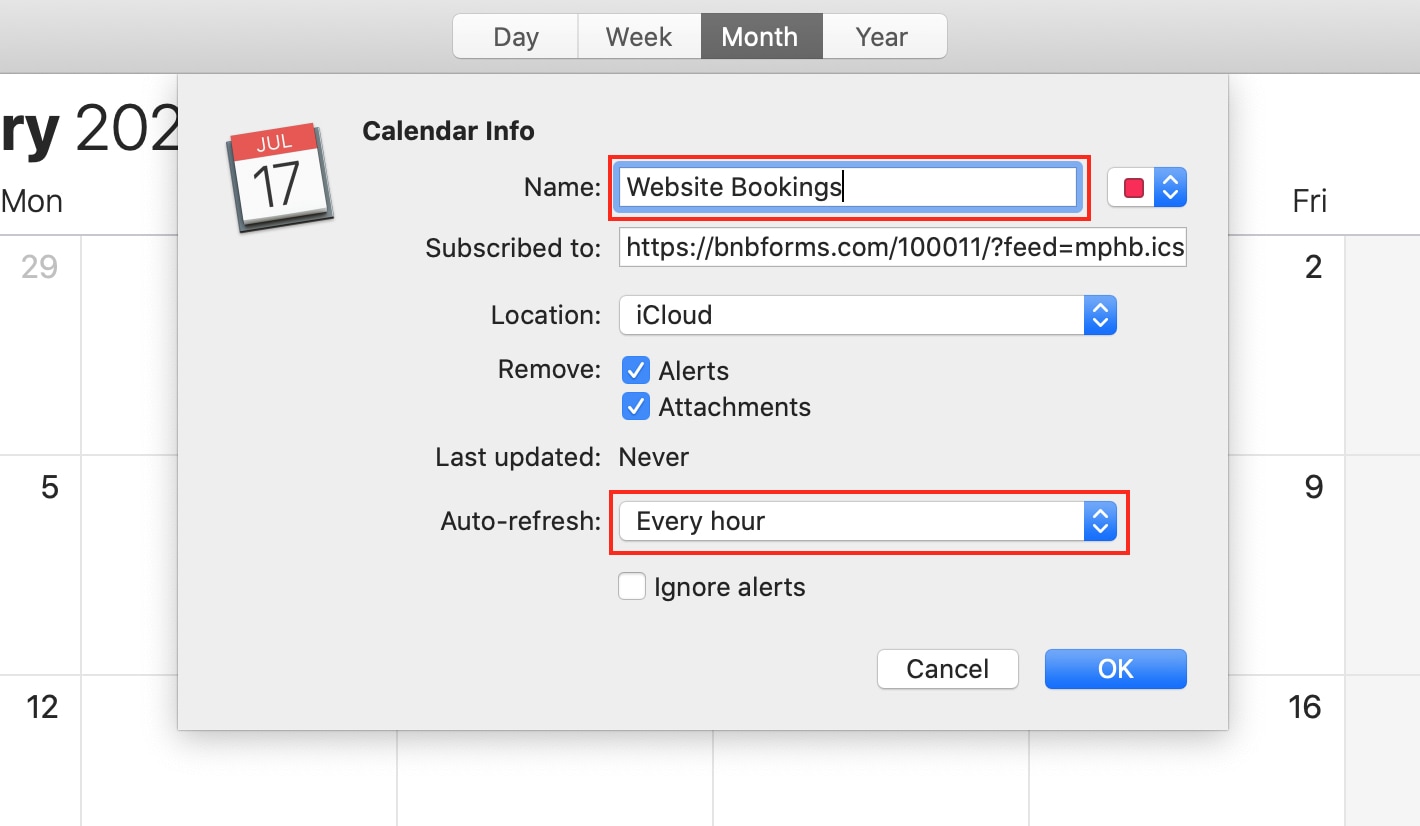
You can adjust synchronization intervals.
If your bookings aren’t syncing with Apple Calendar, try changing the calendar’s location from “iCloud” to “On My Mac” on your laptop.
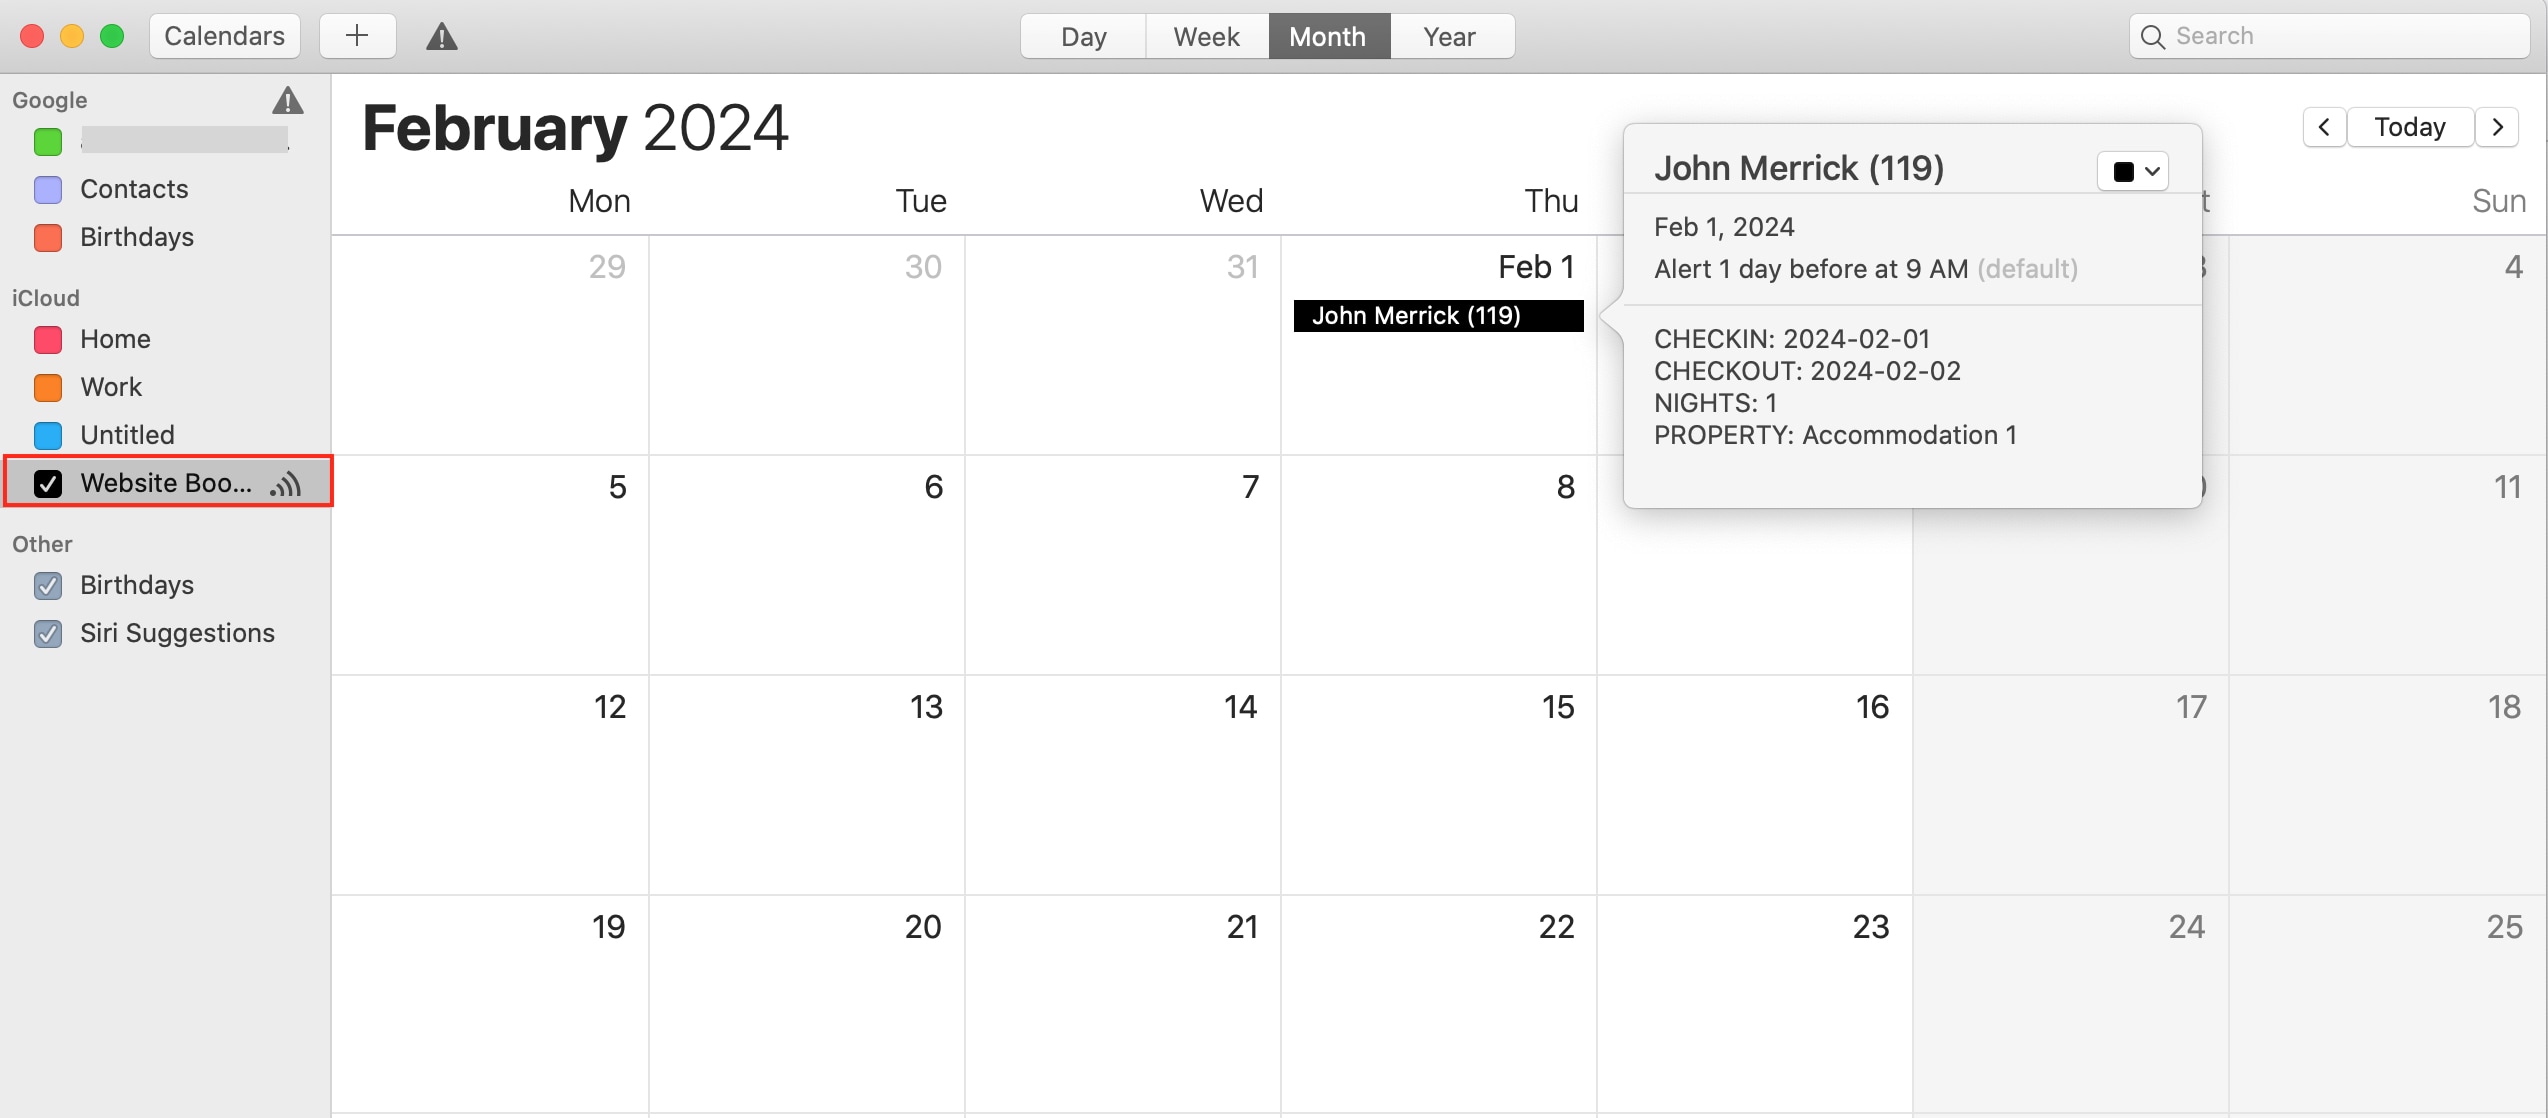
7. Apple Calendar will retrieve all bookings made for the accommodation on your WordPress site and display them. Details can be seen if you click on a booking.
You can click on a booking to view its details.
8. Create another calendar to export bookings to WordPress.
The “Calendar Subscription” lets you import bookings from your website only (‘read-only’). To create and export new bookings to your WordPress website using Apple Calendar, you’ll need to make a new calendar.
9. Go to File > New Calendar. Name the new calendar that appears on the left side of the screen.
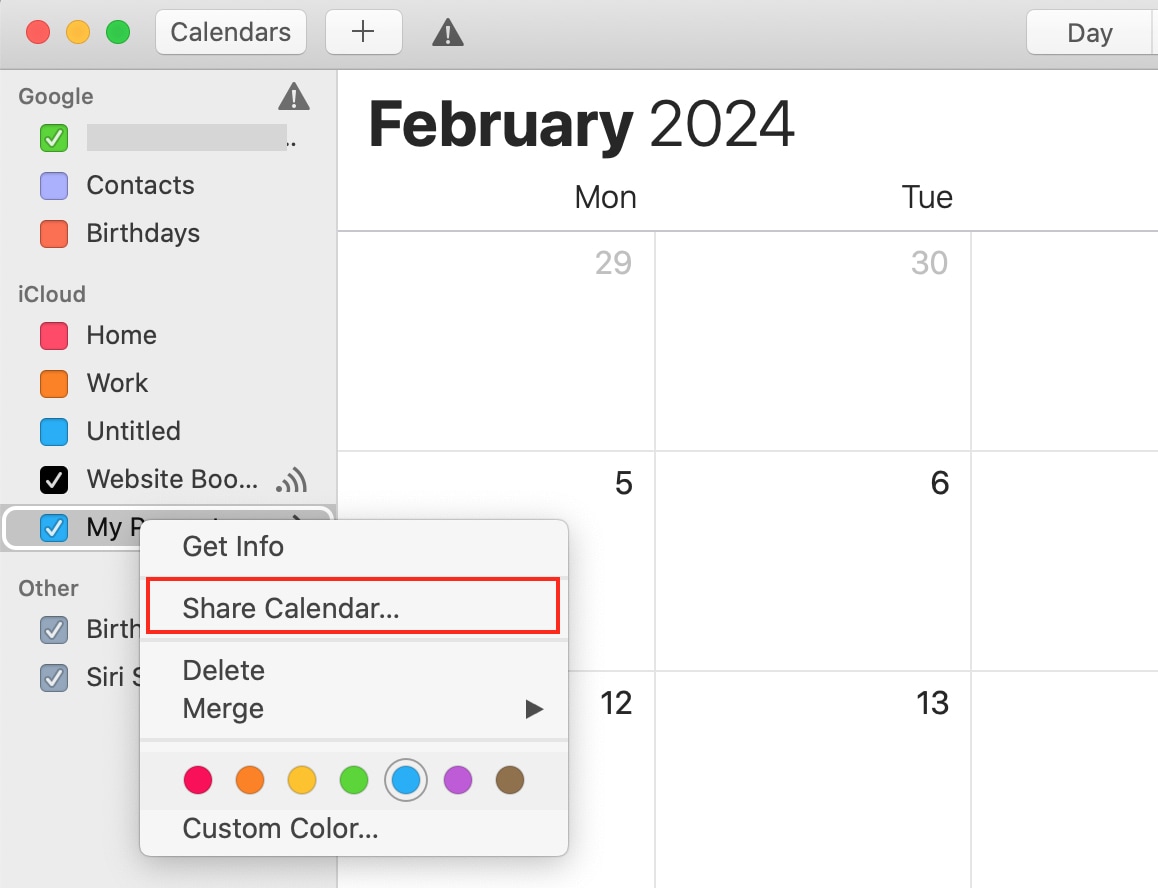
10. Right-click on the created calendar and select ‘Share Calendar’.
11. Сhoose ‘Public Calendar’ > ‘Done’.
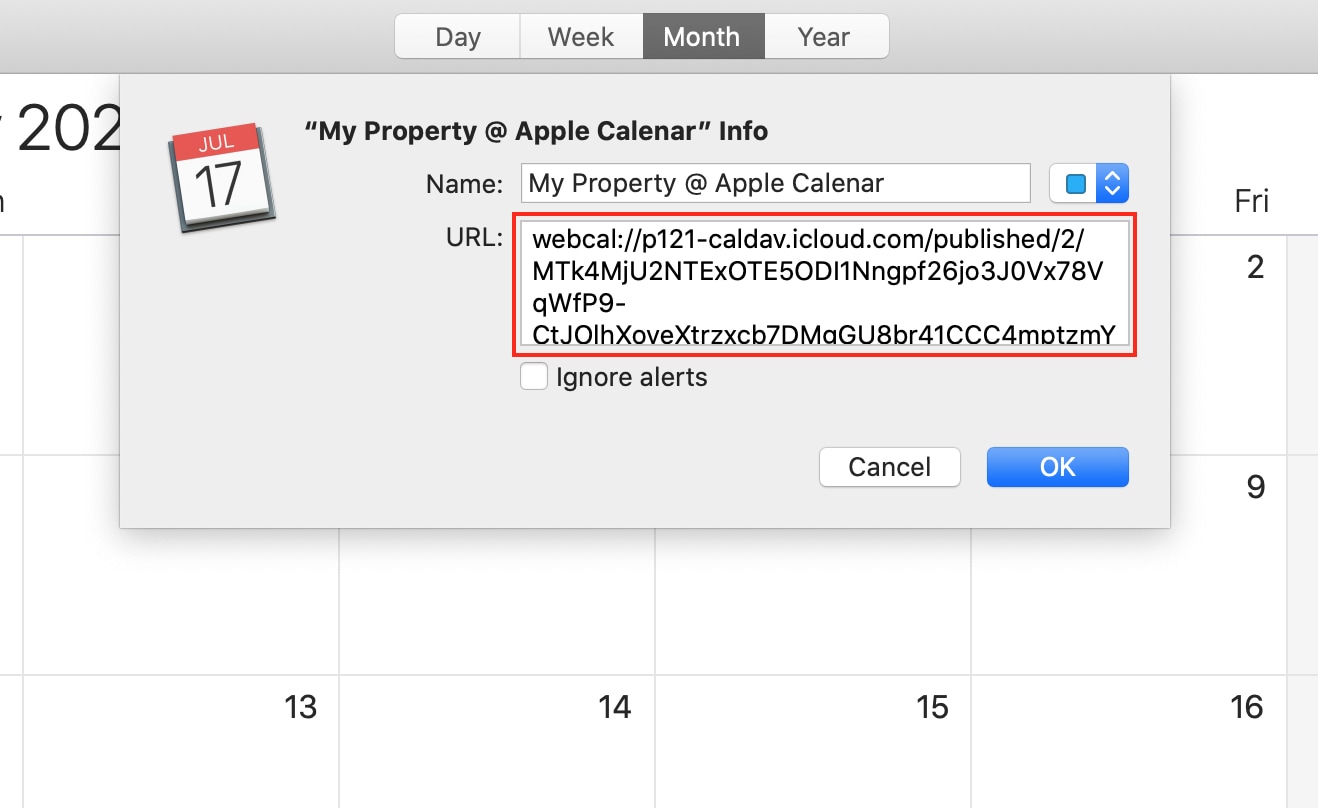
12. Right-click on the created calendar > ‘Get Info’.
13. Copy the calendar URL.
14. Go to WordPress > Bookings > Sync Calendars and click the ‘Edit’ button for the selected accommodation.
Click ‘Add New Calendar’ and paste your Apple Calendar’s URL. Remember to manually change the link protocol from webcal to https.

Click the ‘Update’ button.
15. Create a booking or time blocking in your Apple Calendar.
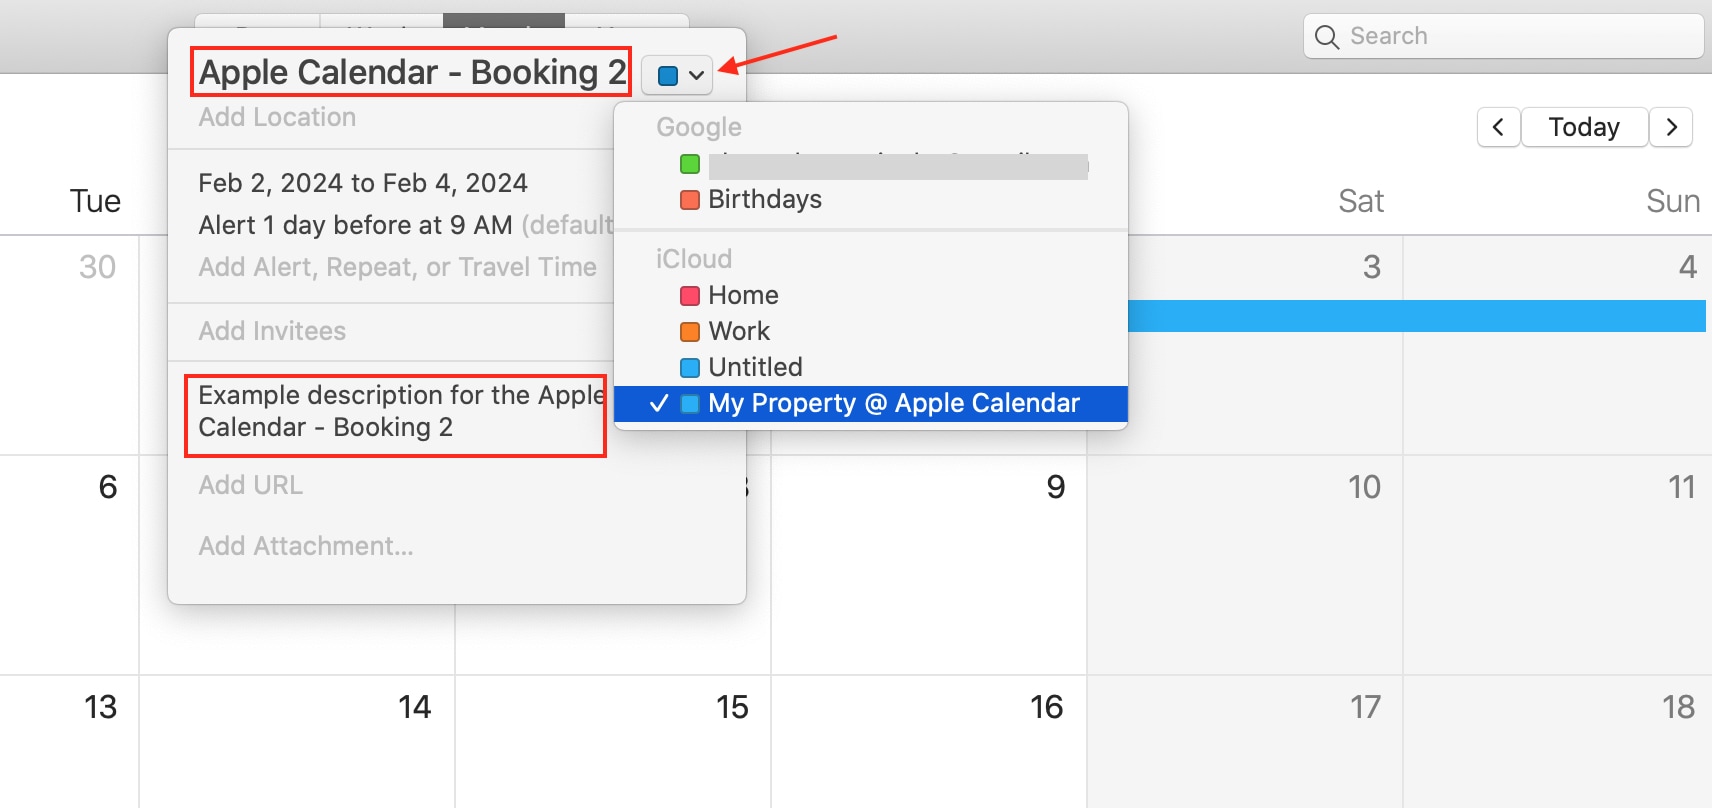
In Apple Calendar, switch to Month view and choose dates to mark as booked or blocked.
Then add the title, description, and choose a calendar associated with your accommodation. We created this calendar earlier in this tutorial.
If automatic calendar sync is on, you can wait or go to WordPress > Bookings > Sync Calendars and click ‘Sync All External Calendars’ to sync immediately.
Go to Dashboard > Bookings > Calendar. If sync was successful, you’ll see a new booking from your Apple Calendar. Hover or click to see details.
To enable automatic external calendar sync, go to WordPress > Accommodation > Settings > Calendars Synchronization Scheduler.
Keeping Google Calendar up-to-date (force Google Calendar to update a subscribed сalendar).
Google Calendar’s iCal sync can be slow, with updates taking up to 48 hours, according to their documentation. For faster refreshes, consider Google Apps Script (by @derekantrican) which allows automatic sync every N minutes for any given subscribed calendar.
https://github.com/derekantrican/GAS-ICS-Sync
Here is how to run the script:
1. Open this URL
2. Go to Overview.
3. Click “Copy”.
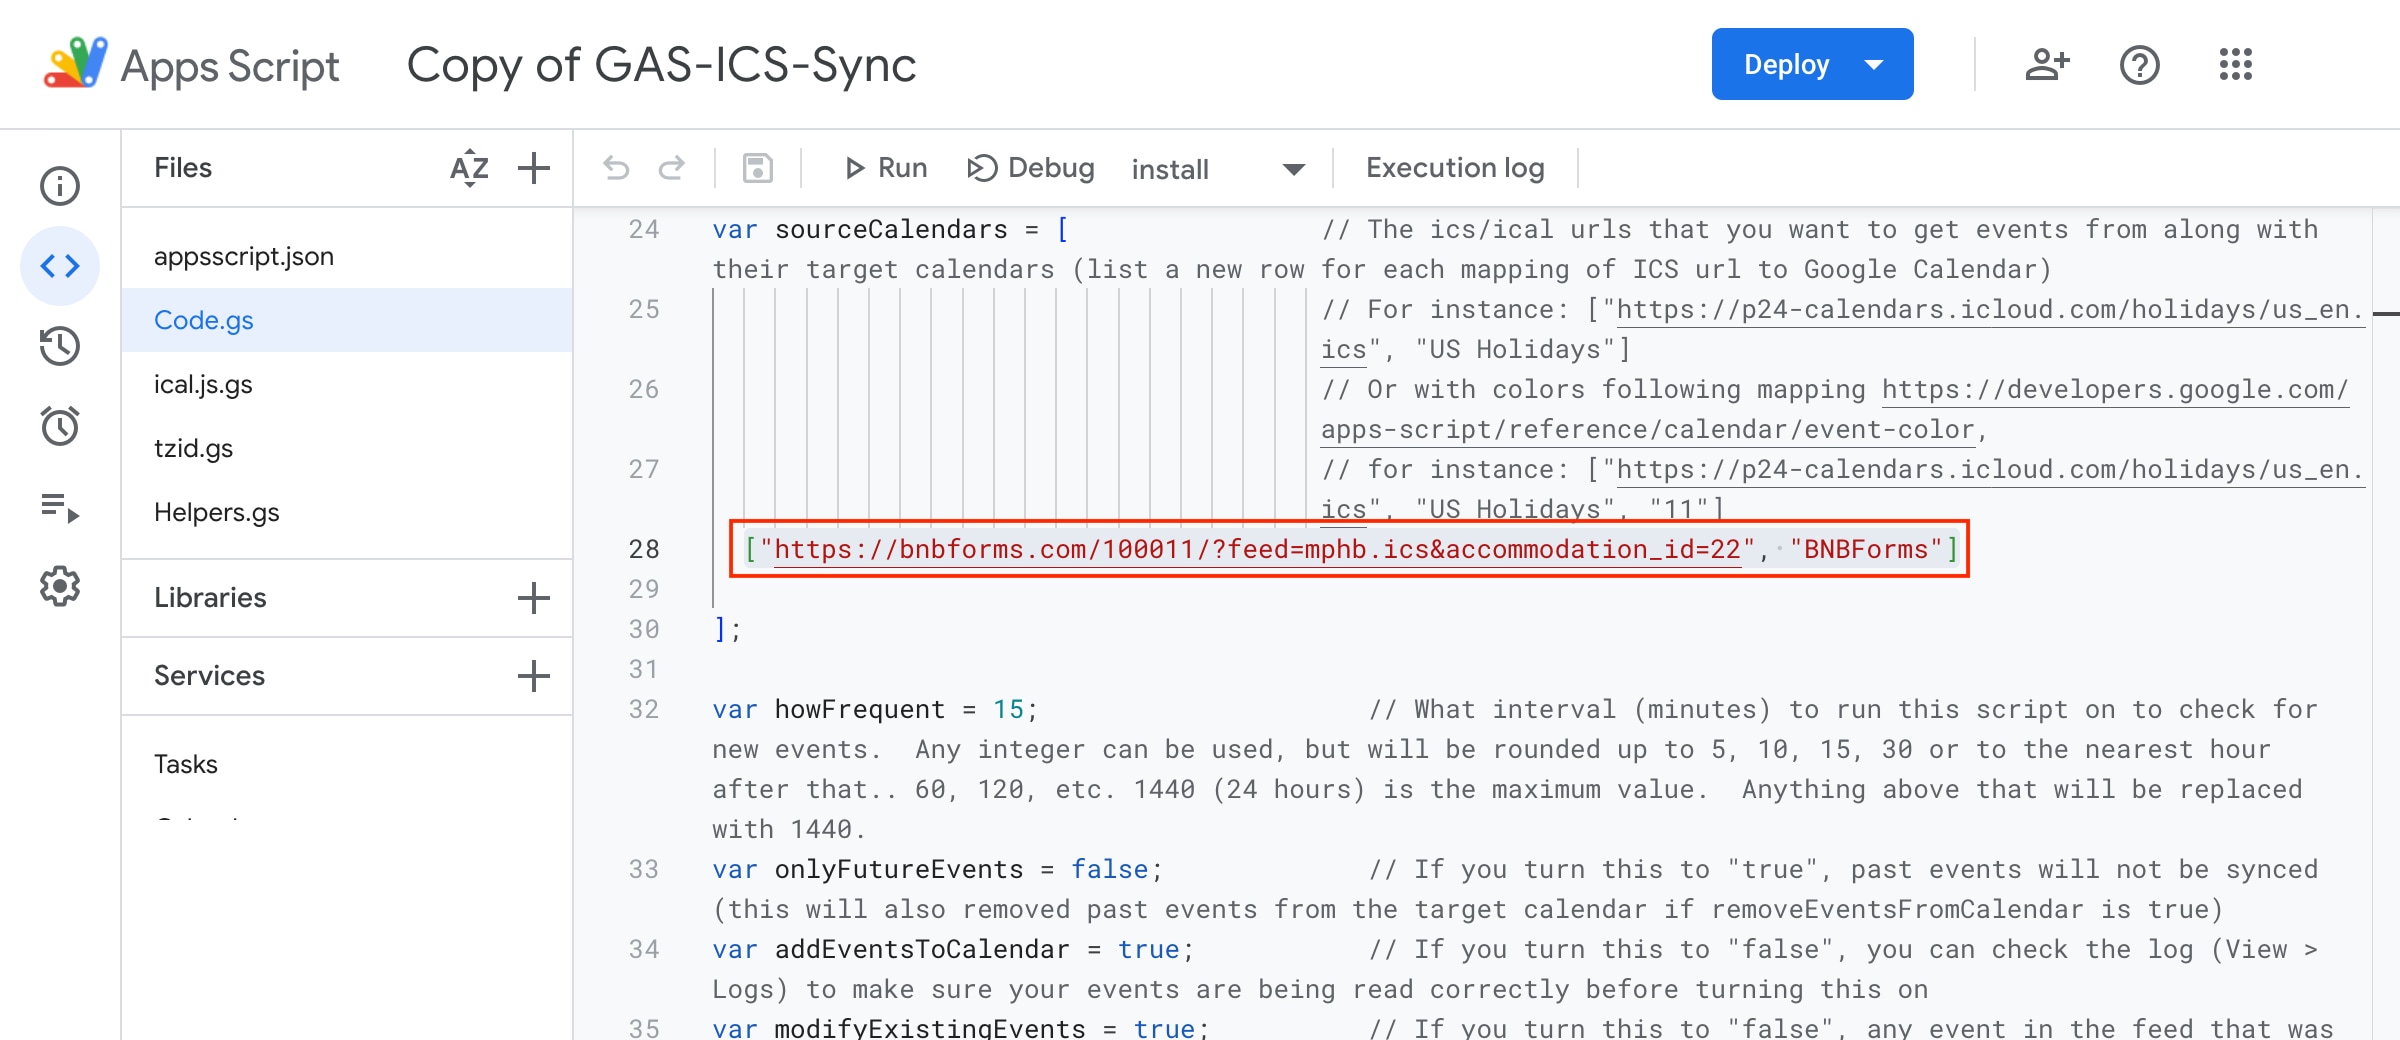
4. Find line #28 and replace iCal URLs with your data.
Example:
[
    "https://hotel.com/?feed=mphb.ics&accommodation_id=22",
    "My Hotel"
]
, where
https://hotel.com/?feed=mphb.ics&accommodation_id=22– is the iCal URL of a calendar;My Hotel– is the name of a calendar in Google Calendar.
5. Click ‘Save’.
6. Ensure that your toolbar displays “Install” to the right of “Debug”, then proceed to click “Run”.
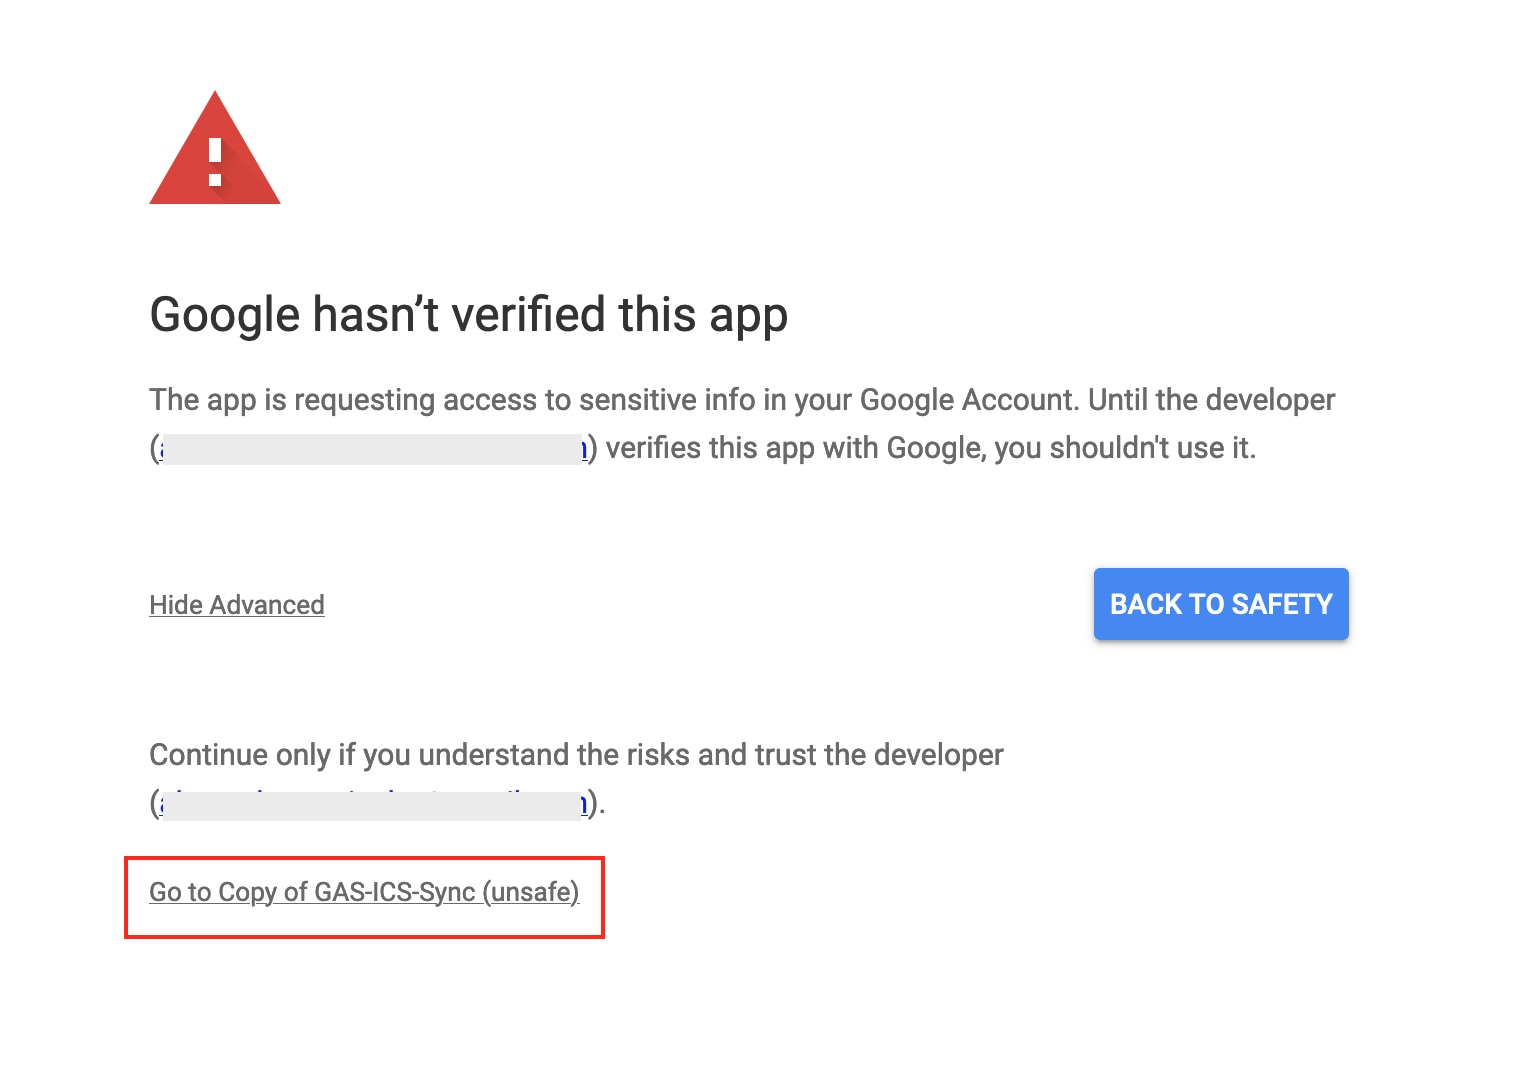
7. Click “Advanced” when prompted with the authorization screen. > “Go to GAS-ICS-Sync (unsafe)”.
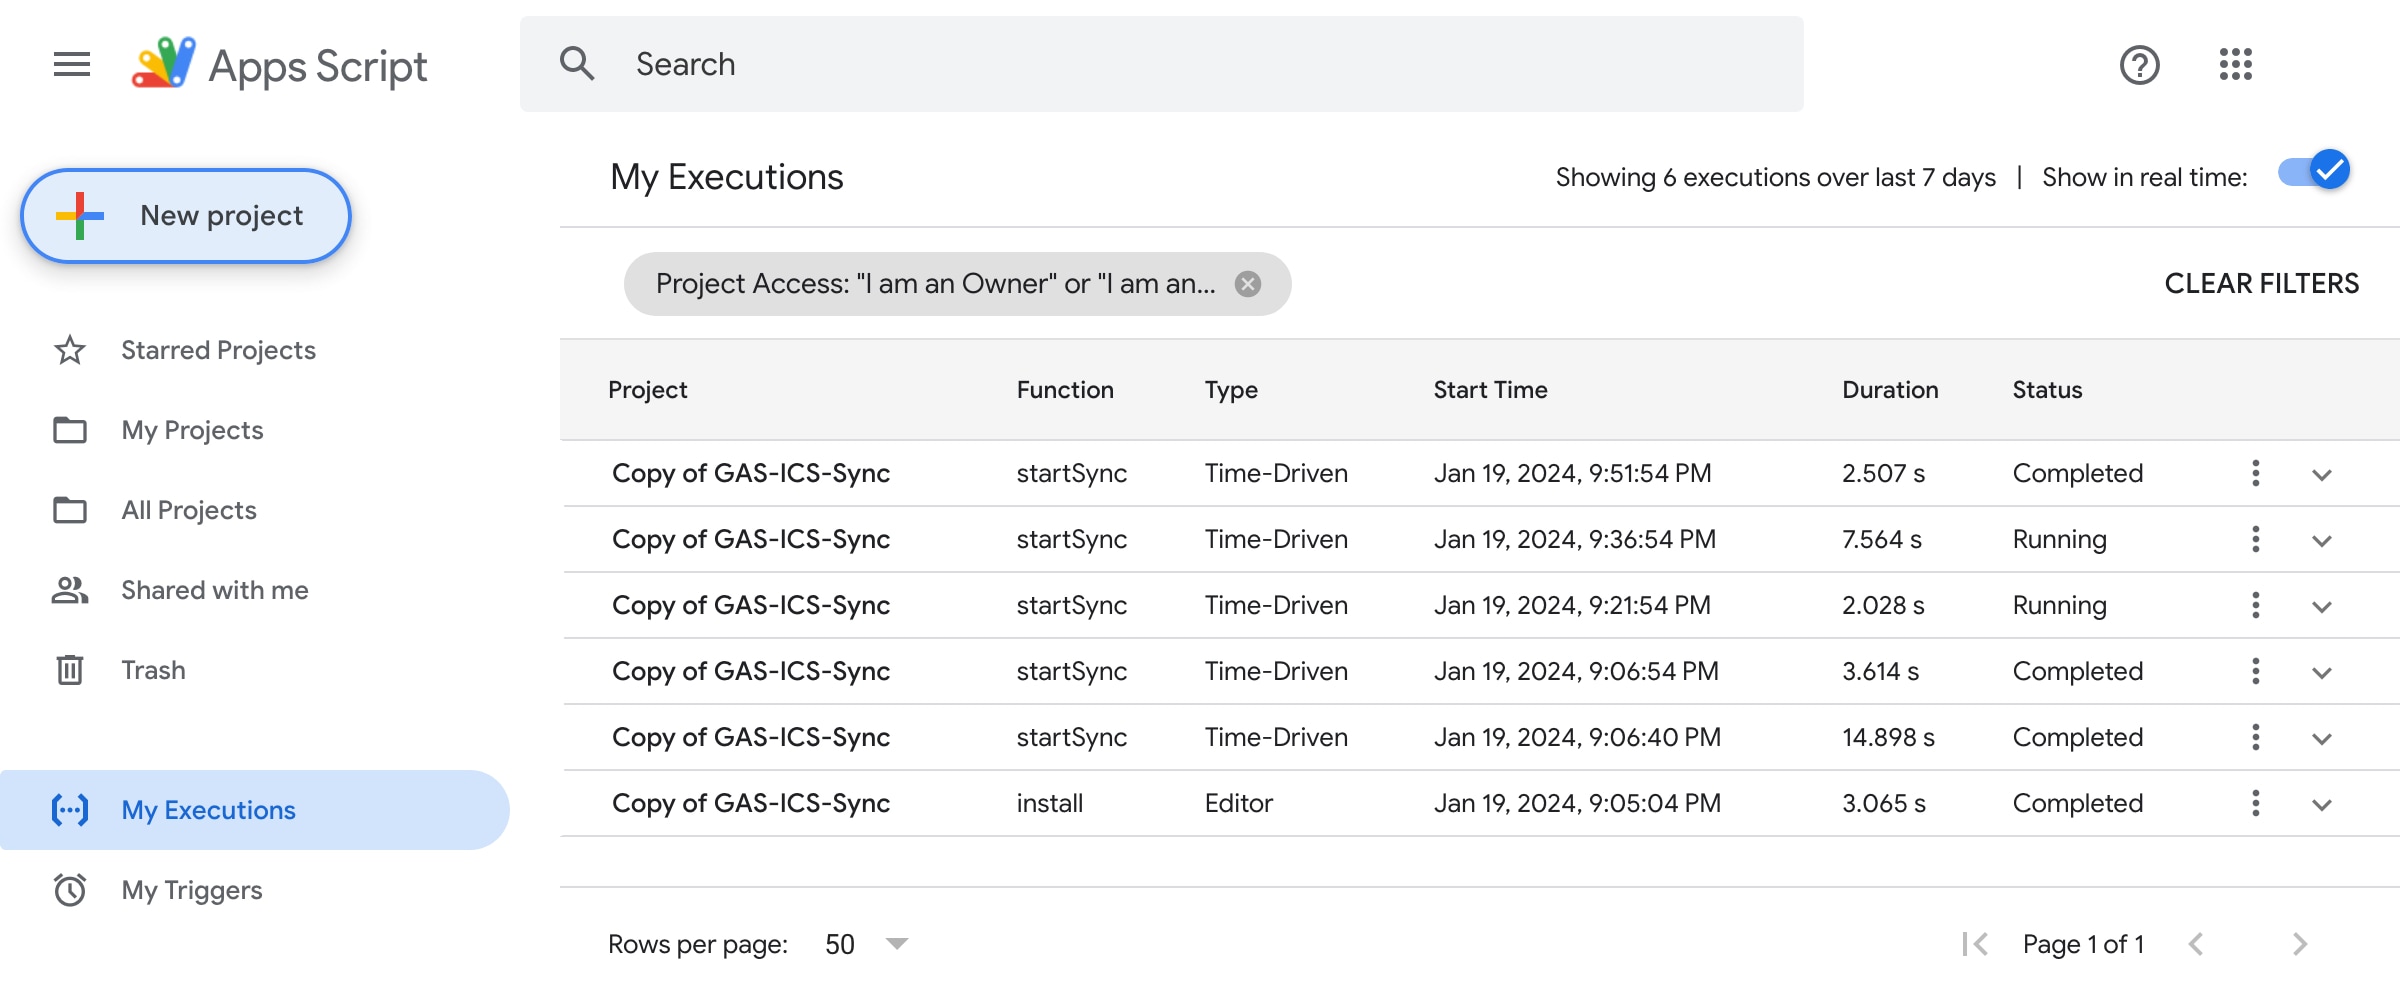
8. Check script executions and synchronization logs at this URL:
https://script.google.com/home/executions
In the image below, you’ll see the script runs every 15 minutes by default.
9. To halt the script (optional).
To stop the script, switch the dropdown next to “Debug” from “Install” to “Uninstall” after accessing it from your account at https://script.google.com/home/, and then click Run.
10. Result.
After the script runs, you’ll notice two calendars in your Google Calendar. This happens because the script doesn’t directly update your external calendar as shown in this tutorial, but it generates a new calendar and handles the calendar feed separately.