Table of Contents
Rows and columns in MotoPress page builder
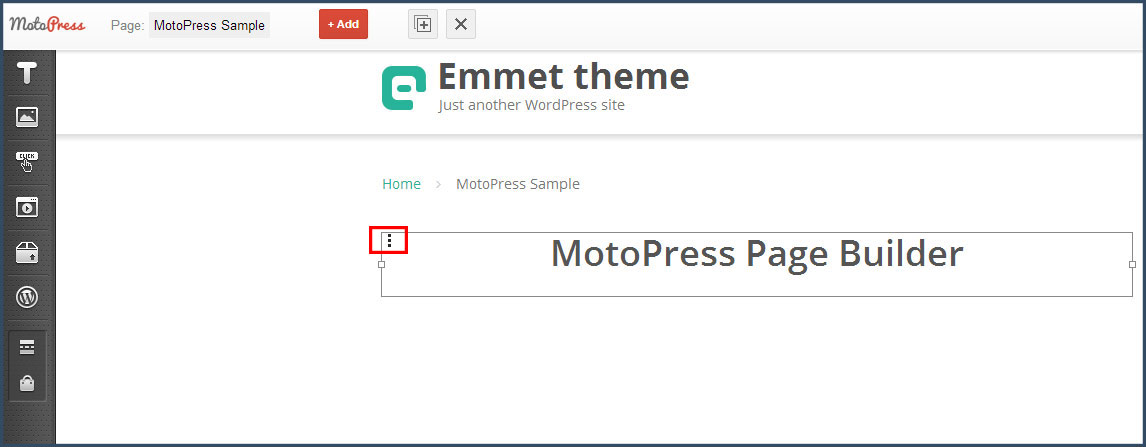
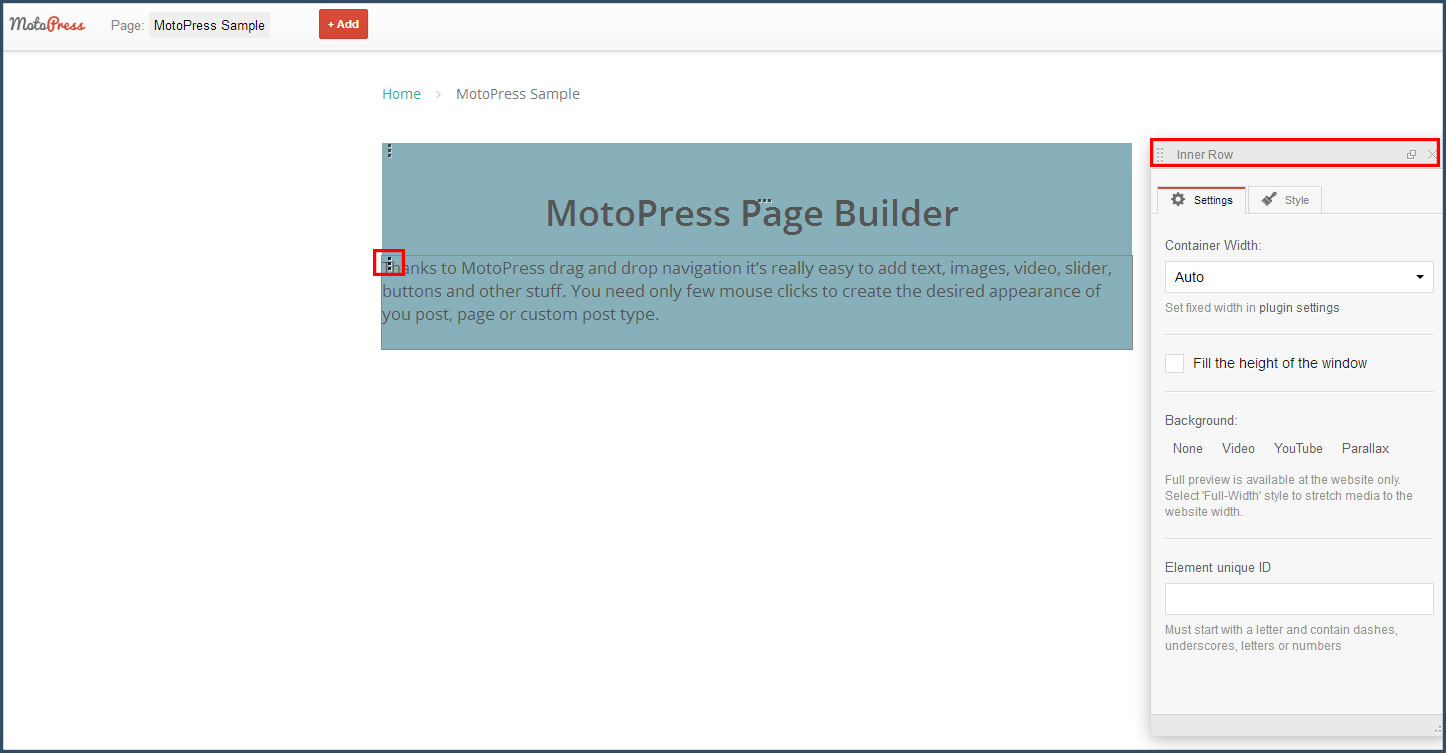
When you put any object into WordPress Page Builder content area it is placed to Row and Column. For example, when you put Text object to the page row and column are created automatically. In order to select a Row, you should hover over three vertical dots and click on them.
When you have selected a row you can see pop up with Row Settings Panel. It allows to:
- define Container Width. It is possible to stretch the row to the Full width
- fill the height of the window
- select backround type among:Video, Youtube Video and Parallax effet
- set unique ID to create anchor link right to certain row
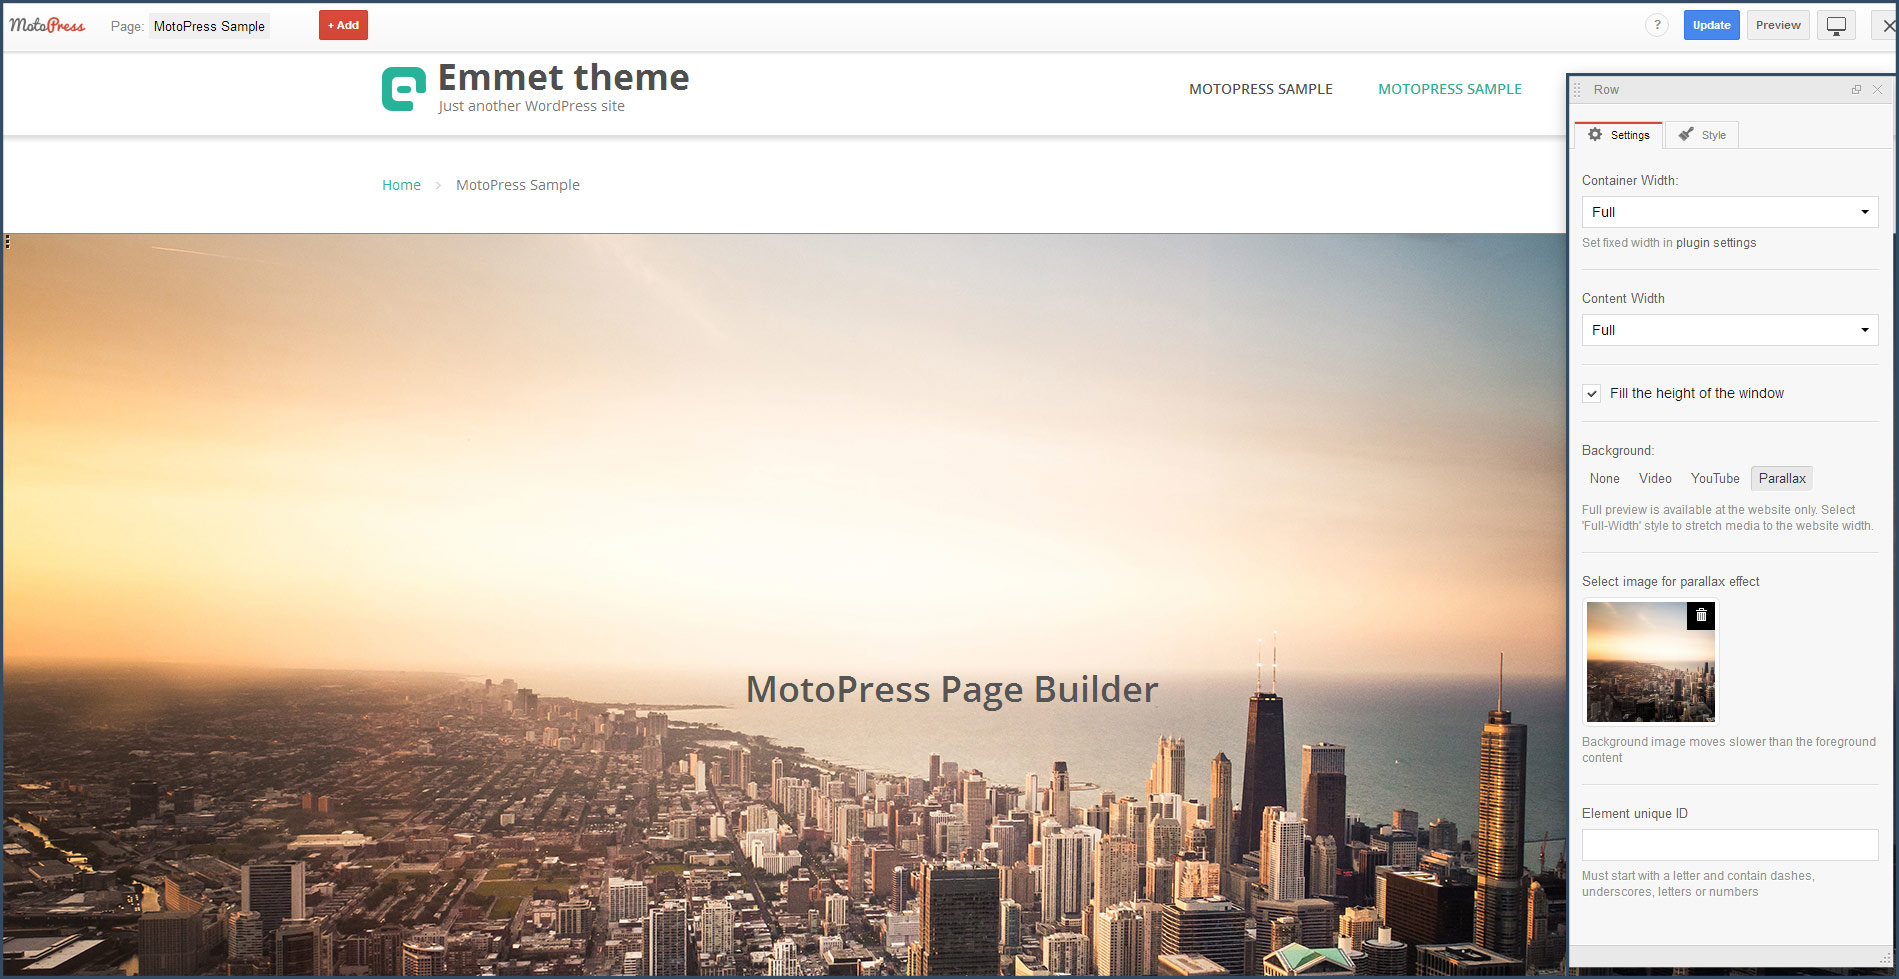
You can also find a Style tab at the Row Settings popup. There you can style your row visually like any other MotoPress object. You can learn how to style the objects and add your custom presets visually.
Inner Row
Inner Row allows you to combine several rows under single row. For example you add a Title and style its row with background color. Then you add a Paragraph as new row and we can see that style of the Title row is not applied.
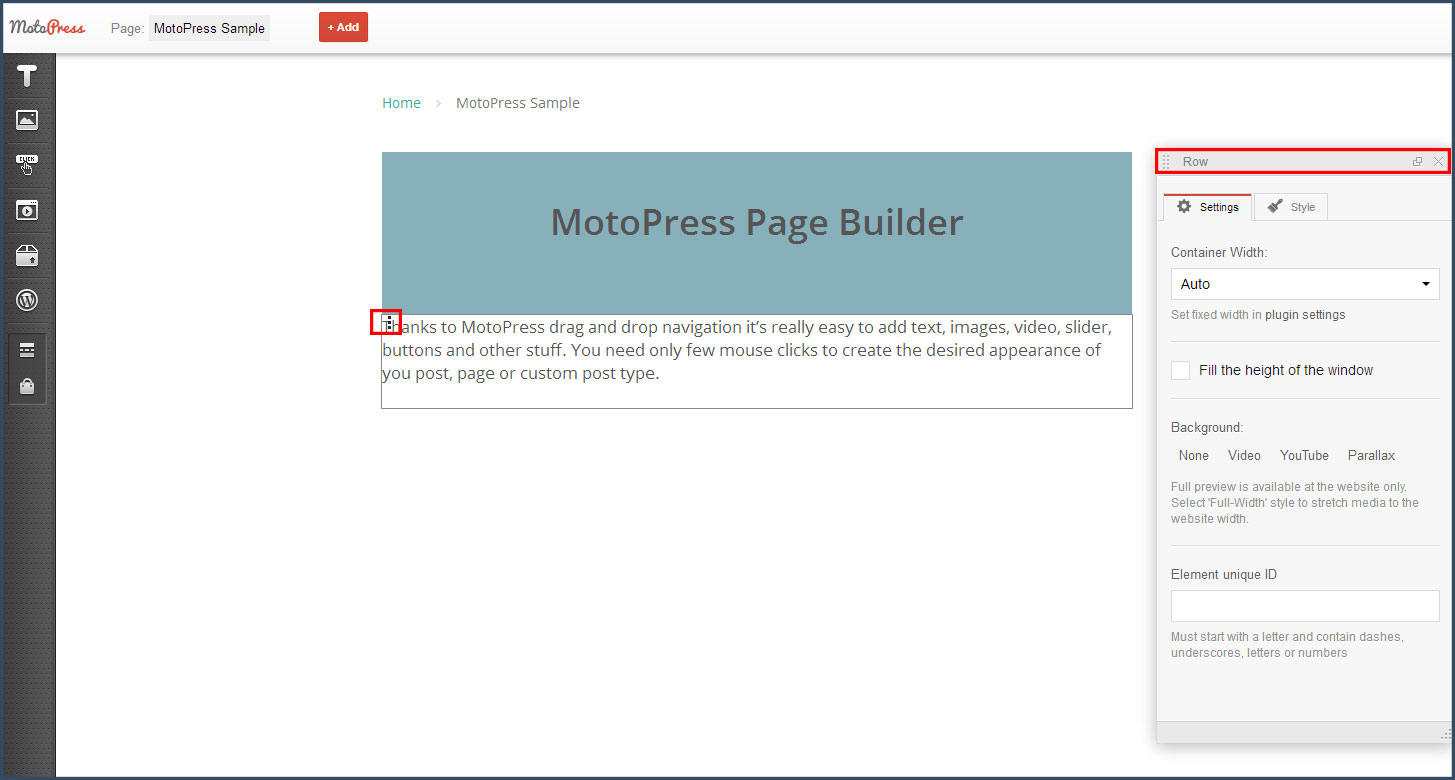
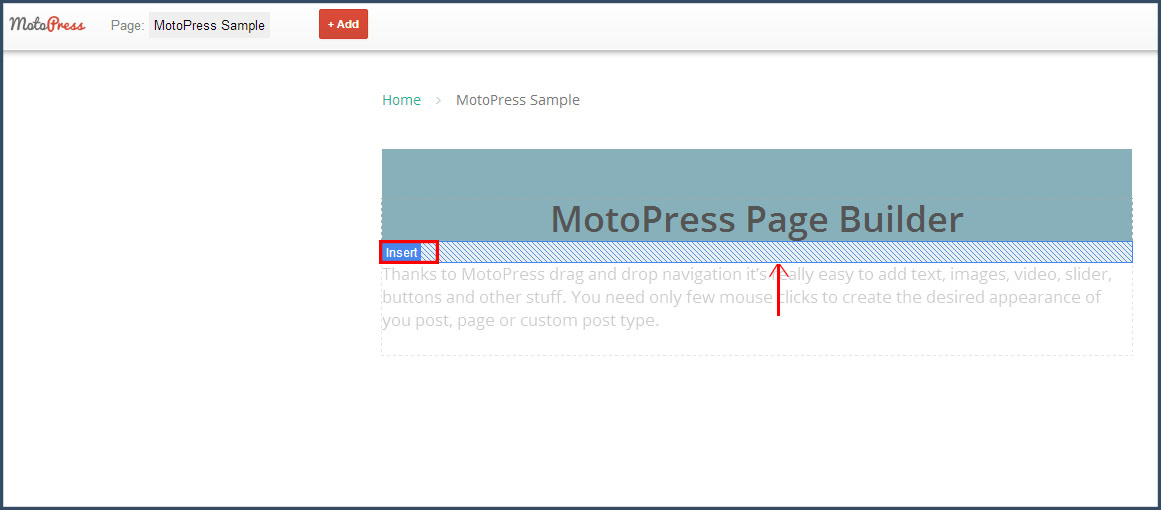
In order to place it as Inner Row you should drag the object (in our case it is paragraph) close up to the customized row till you see ‘Insert’. Then drop it.
Thus you have 1 common row and 2 inner rows.
If you inserted a new object as Inner row by mistake you can drag it back till you see ‘Row’ tip and drop it.
Column
Using MotoPress Content Editor you can form the content into responsive columns visually. In order to select a Column you should hover over tree horizontal dots and click.
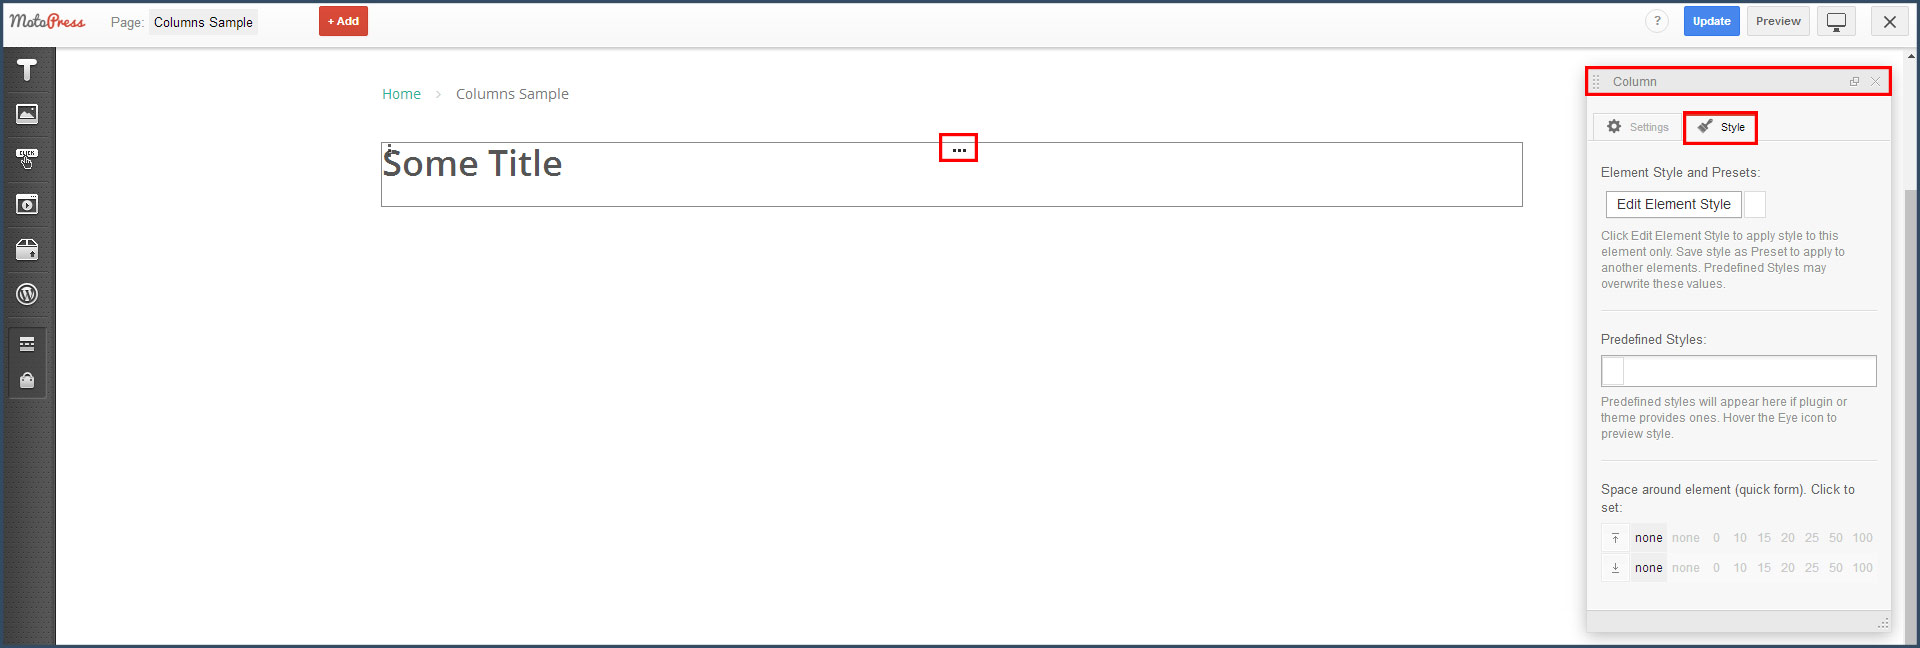
There is only Style tab available at Column Properties panel. It allows you to style each column individually.
While adding new object you can also define whether to form separate column or add it as Inner Column. In order to create new column you should drag new widget next to existing one till you see Column tip. Then drop it.
Inner Column
In order to add Inner Column you should drag new widget next to existing one till you see ‘Insert’ tip. Then drop it.
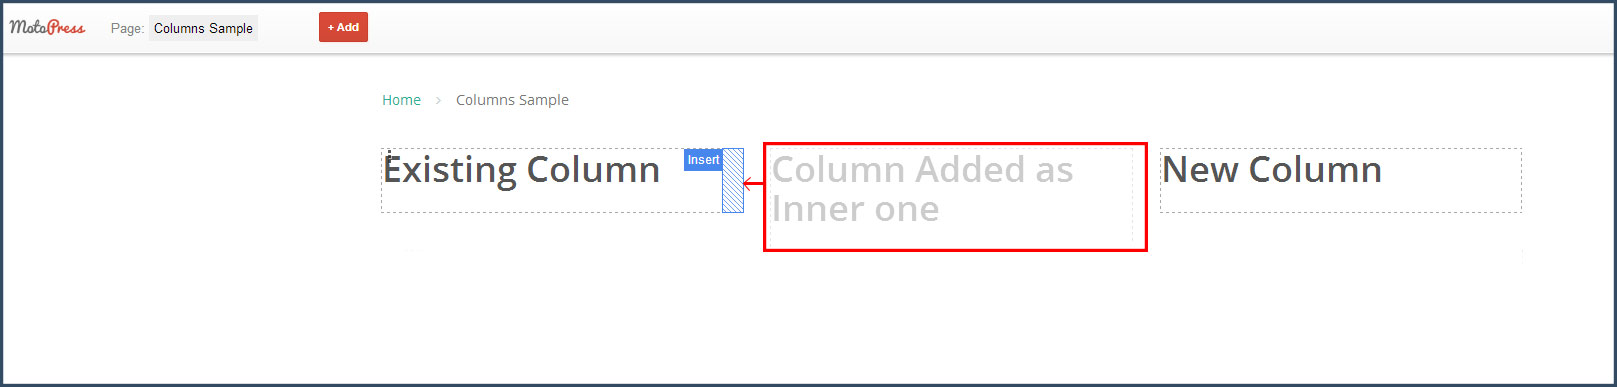
If you inserted a new object as Inner column by mistake you can drag it back till you see ‘Column’ tip and drop it.
Hello, I created two columns with three rows, for a total of six images with text underneath. It looks great on the computer, but on phones, it’s not responsive. Two of the pictures come first, then the two captions, etc. etc. instead of Picture Caption, Picture Caption. Is there a way to fix this? Thank you!
Hi Jill,
Thank you for your question. I’d recommend to watch the video at this page carefully and re-position the elements following the steps described there. Or you can email us the shortcodes from your page and we’ll take a look at it for you.
Anyway it would be much easier to manage the rows and columns structure with new version that will be released soon. Thank you.
How do you delete an entire row/section?
When I try to “place it as Inner Row you should drag the object (in our case it is
paragraph) close up to the customized row till you see ‘Insert’. Then
drop it.” It says ‘insert’ but once I drop it, it drops in a totally different, random location further up the page..
Hi Steph,
Check whether the row where you try to insert an object is not an inner one. I would recommend you to re-arrange the elements to make sure they are placed in a way you need. Or you can submit a request to our tech support team and we’ll have a look at your particular case.