Table of Contents
Learn how to build a schedule and feature your events in a calendar or list format using the MotoPress Events Calendar plugin for WordPress.
Create event
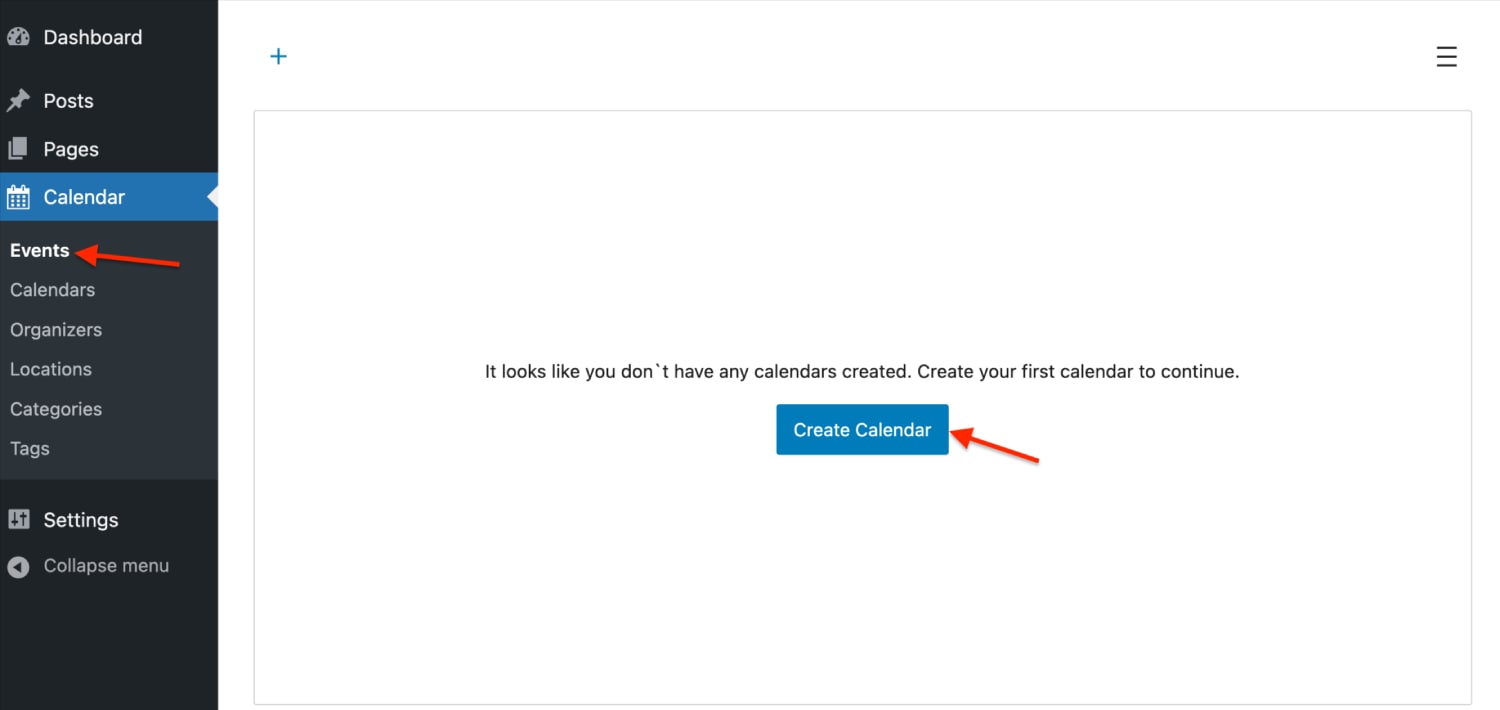
- Go to Calendar → Events.
- Click Create Calendar. You can’t create events without creating a calendar first.
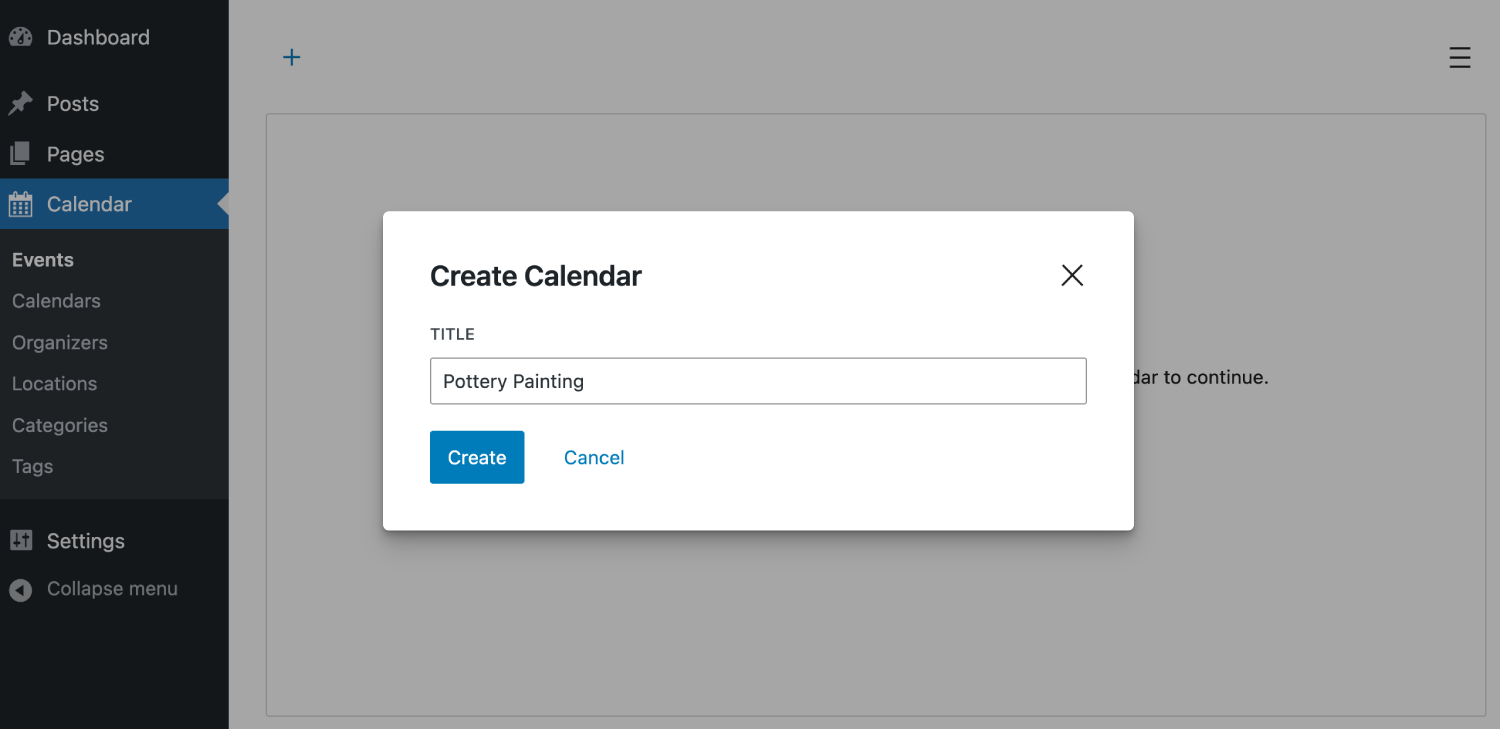
- In the pop-up window, type a Calendar Title → Create. This title is visible only on the admin dashboard.
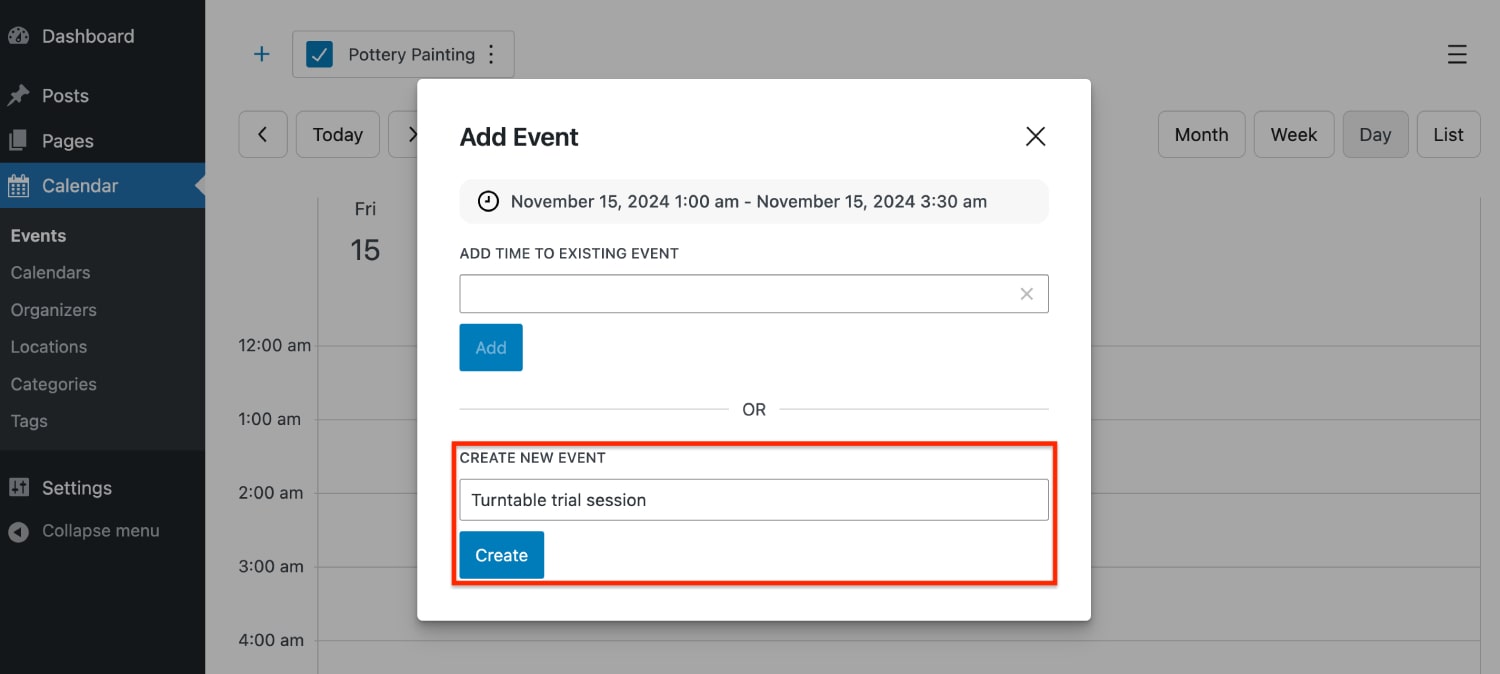
- To add an event, switch to the needed calendar view first.
- In the pop-up window, create a new event by typing its title → Create.
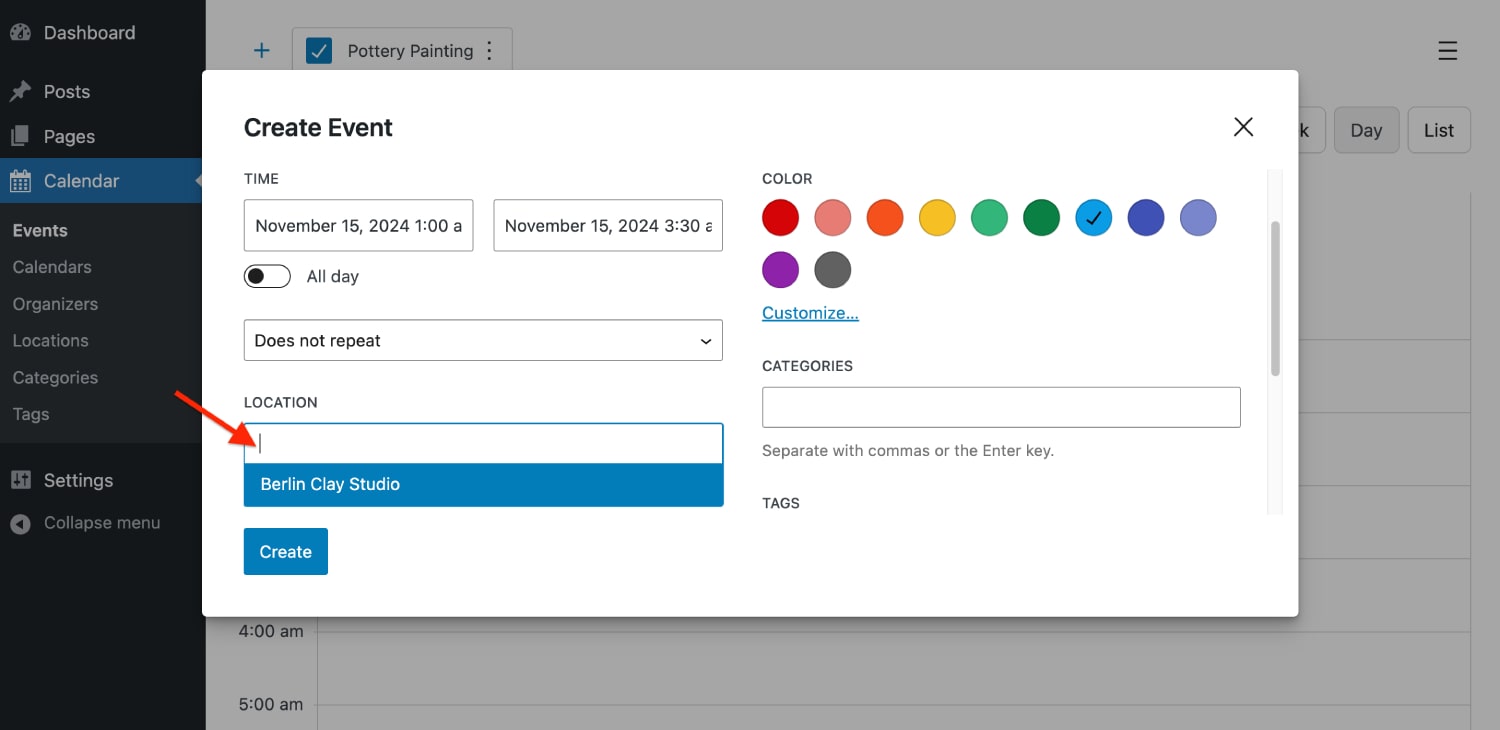
- Customize event details.
- Event title.
- Time (repeating/one-time).
- Event color.
- Event image.
- Text description.
- Location, organizer, tag, category.
- A custom page or URL for the event (‘Create a public page for this event’ toggle).
- Click Create to save an event.
– Month view
Click on a date or drag horizontally to add a multi-day event.

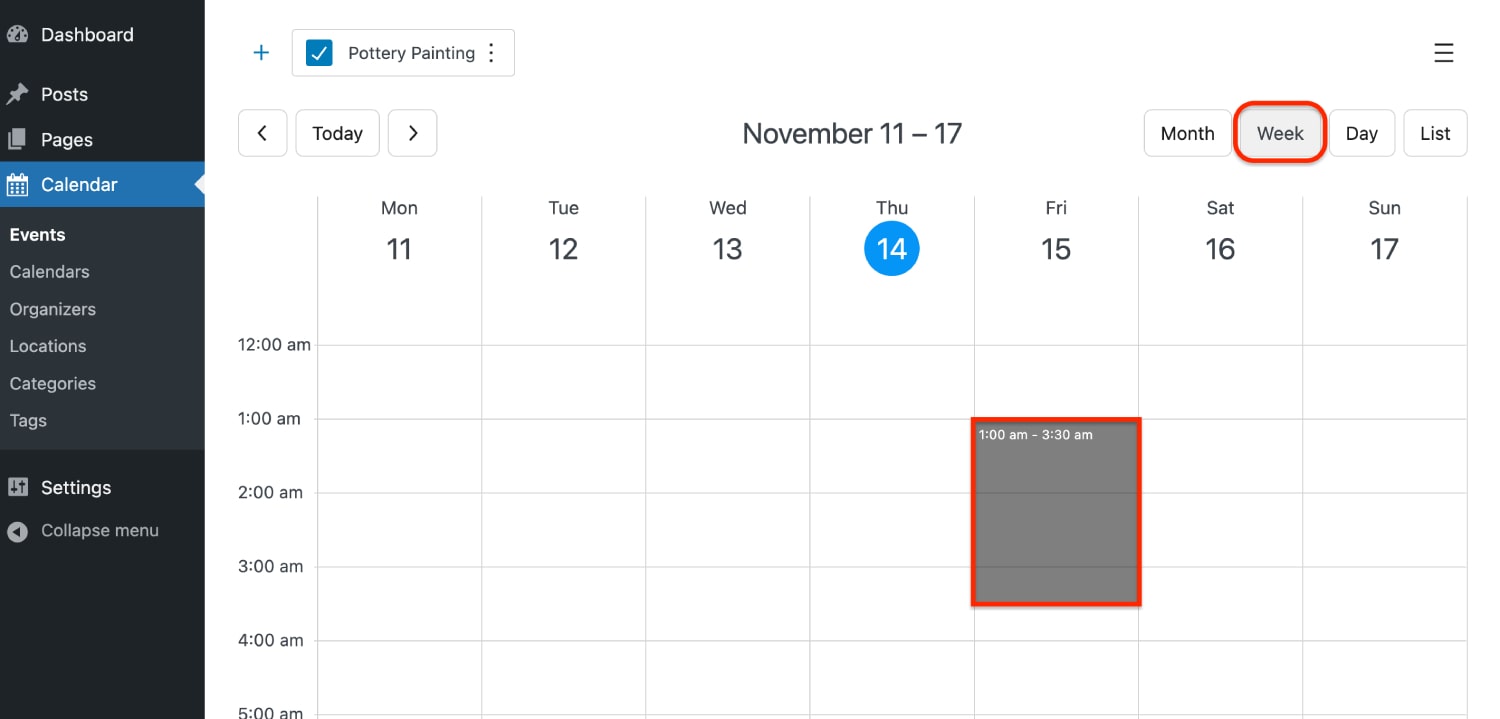
– Week view
Choose time and drag vertically.
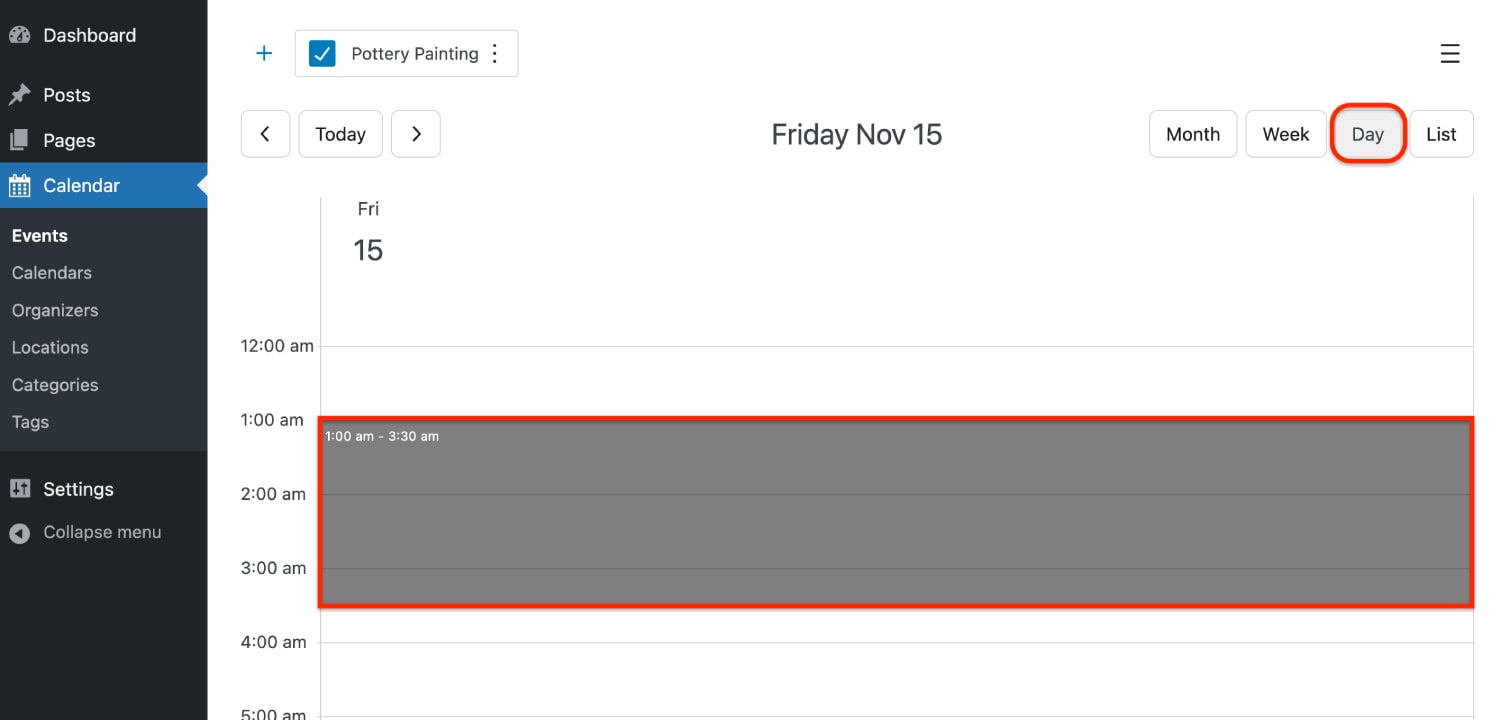
– Day view
Choose time and drag vertically.

Turn on the ‘All day’ toggle to display an event without any specific time frame. It will stick to the top in the Month and Week views:
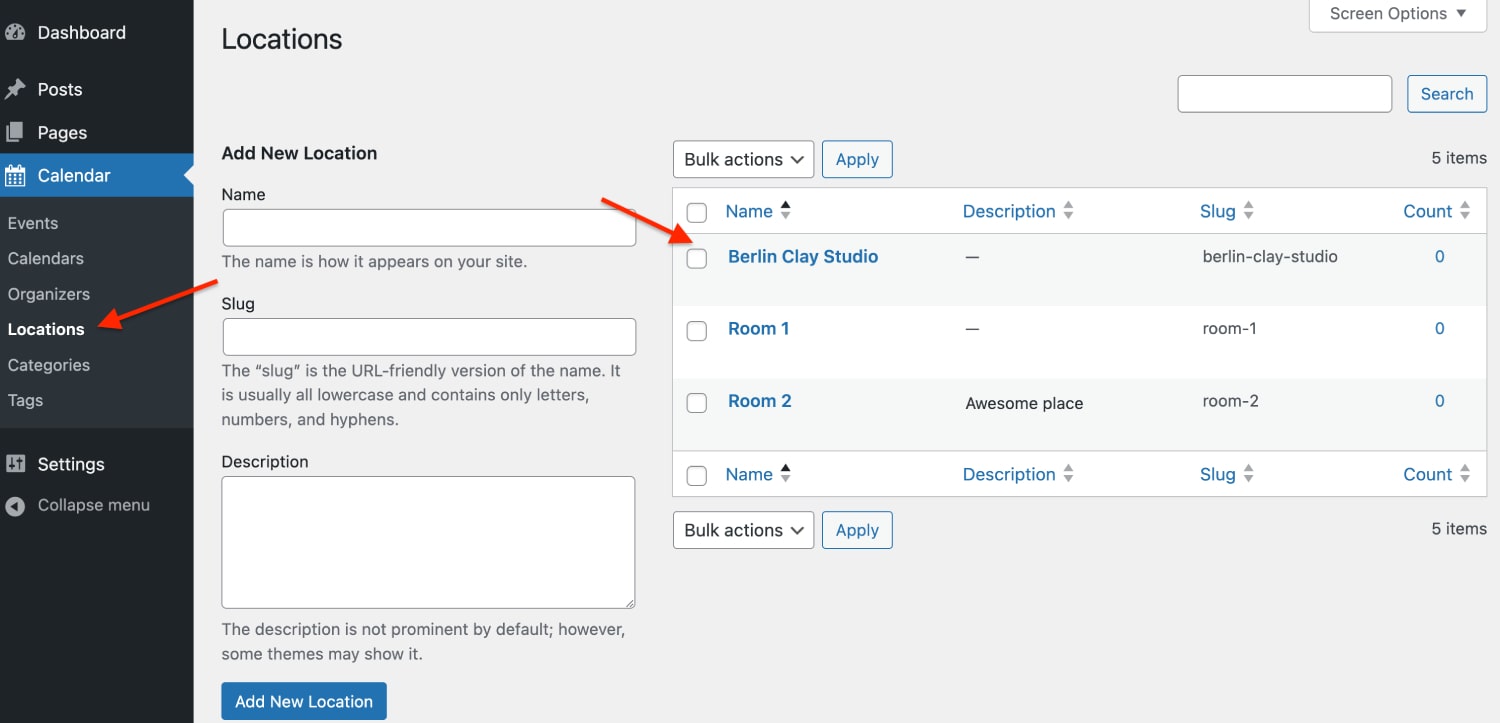
Locations, organizers, tags, and categories are so-called WordPress taxonomies.
To add any, you can choose from existing ones (those you might have added before via the respective menus) or add new ones right in this event creation window. To add a new one:
1) Type its name > press Enter.
2) Choose it right away for the event you’re editing.
This way you will add and save a new taxonomy, which you can further apply to any other event.
When you add taxonomies here, they are automatically saved to the list of respective taxonomies.
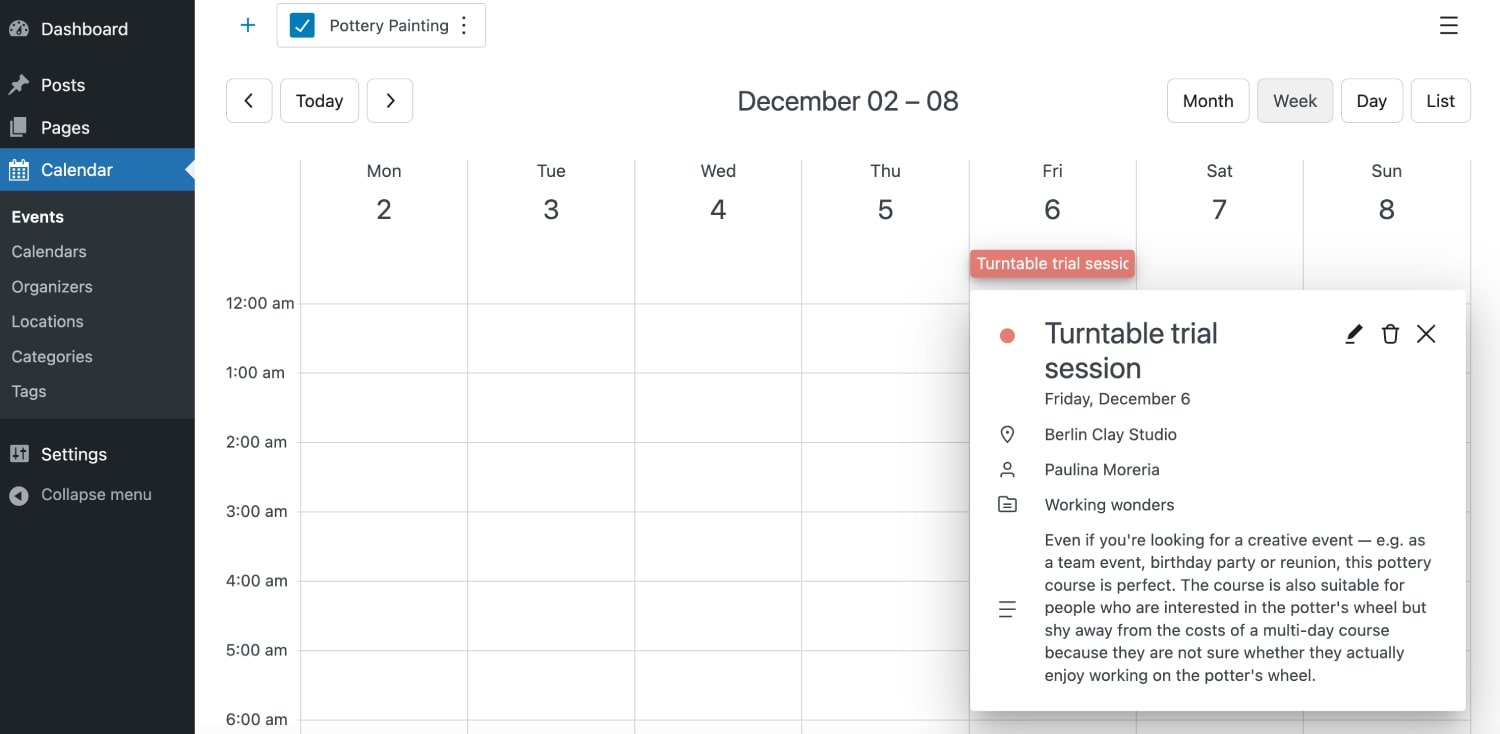
Taxonomies help you visually organize your content:

To publish events on the site, use the dedicated Events Calendar Block in the block editor.
Creating a public event page
When creating a new event in the calendar, you will see a toggle under the event description: Create a public page for this event.
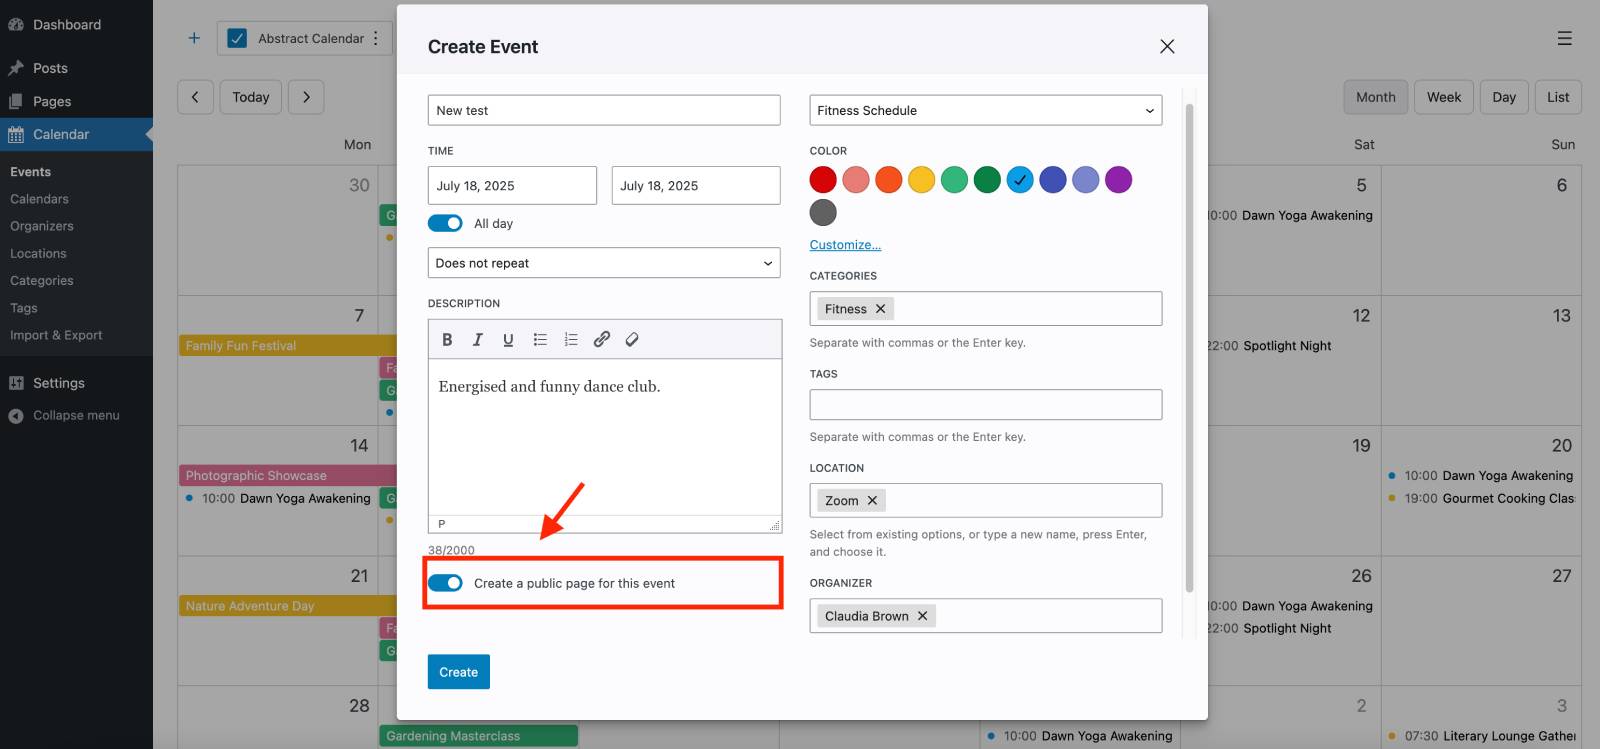
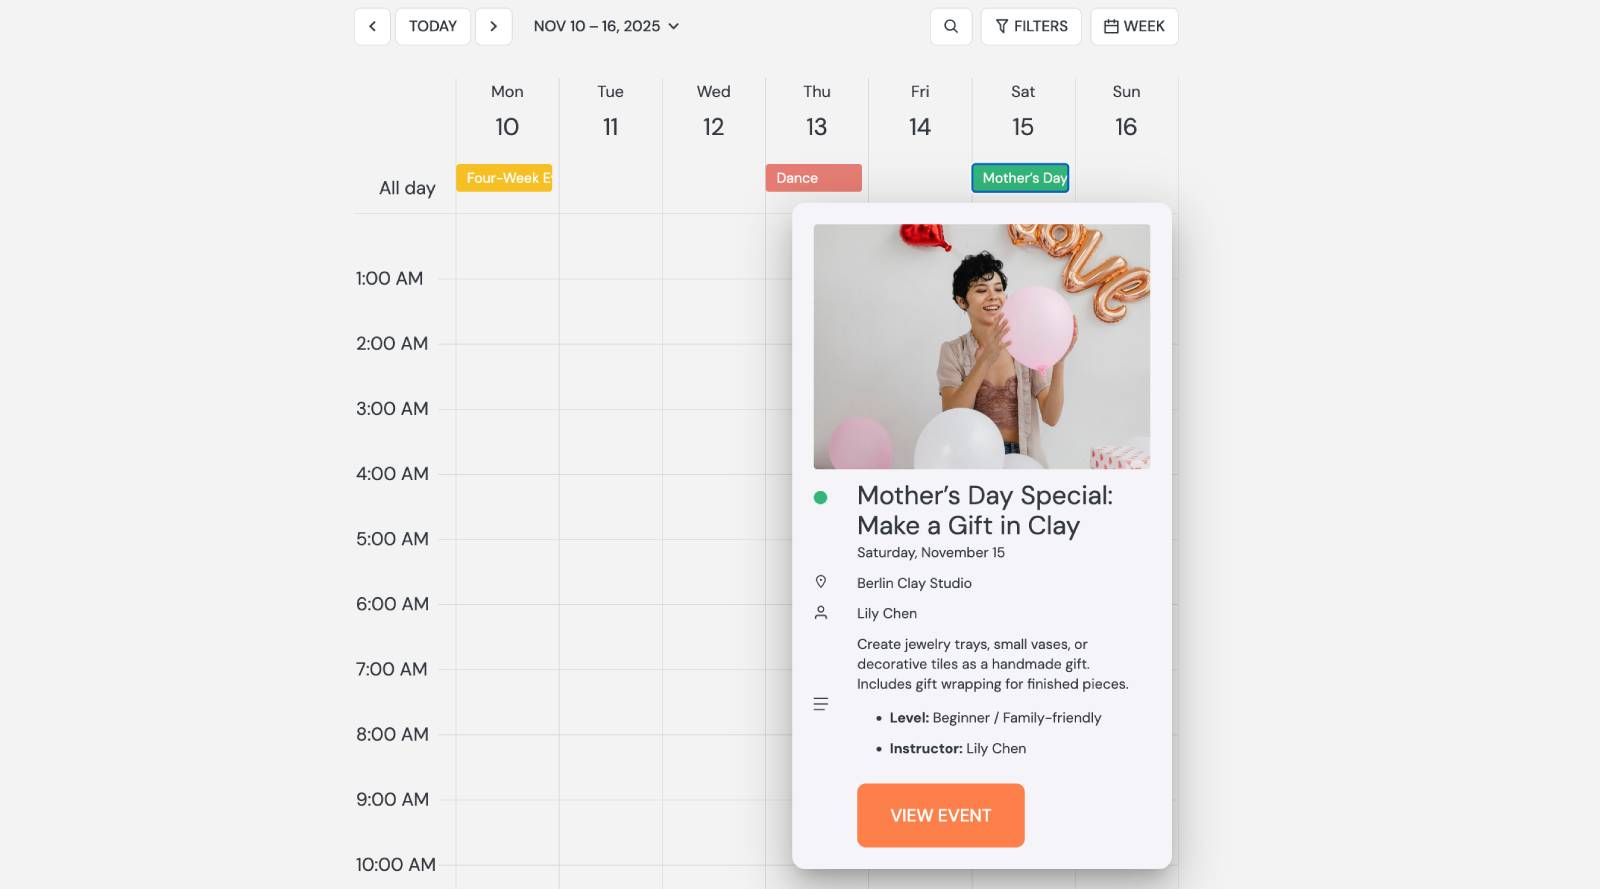
Enable the toggle and a new page for the event will be created automatically. In the website calendar, it will be displayed by the View Event link.
Configuring the Event Page or URL
To configure where View Event redirects:
- Click ‘Edit’ for the needed event in the calendar.
- Click ‘Edit Event’.
- Scroll down to the Links to section.
- Choose one of the following options:

– Event page (default): opens a dedicated event page on your site.
– Custom URL: redirects to any URL you specify.
If this is a repeating event, the same event display settings apply to all of them.
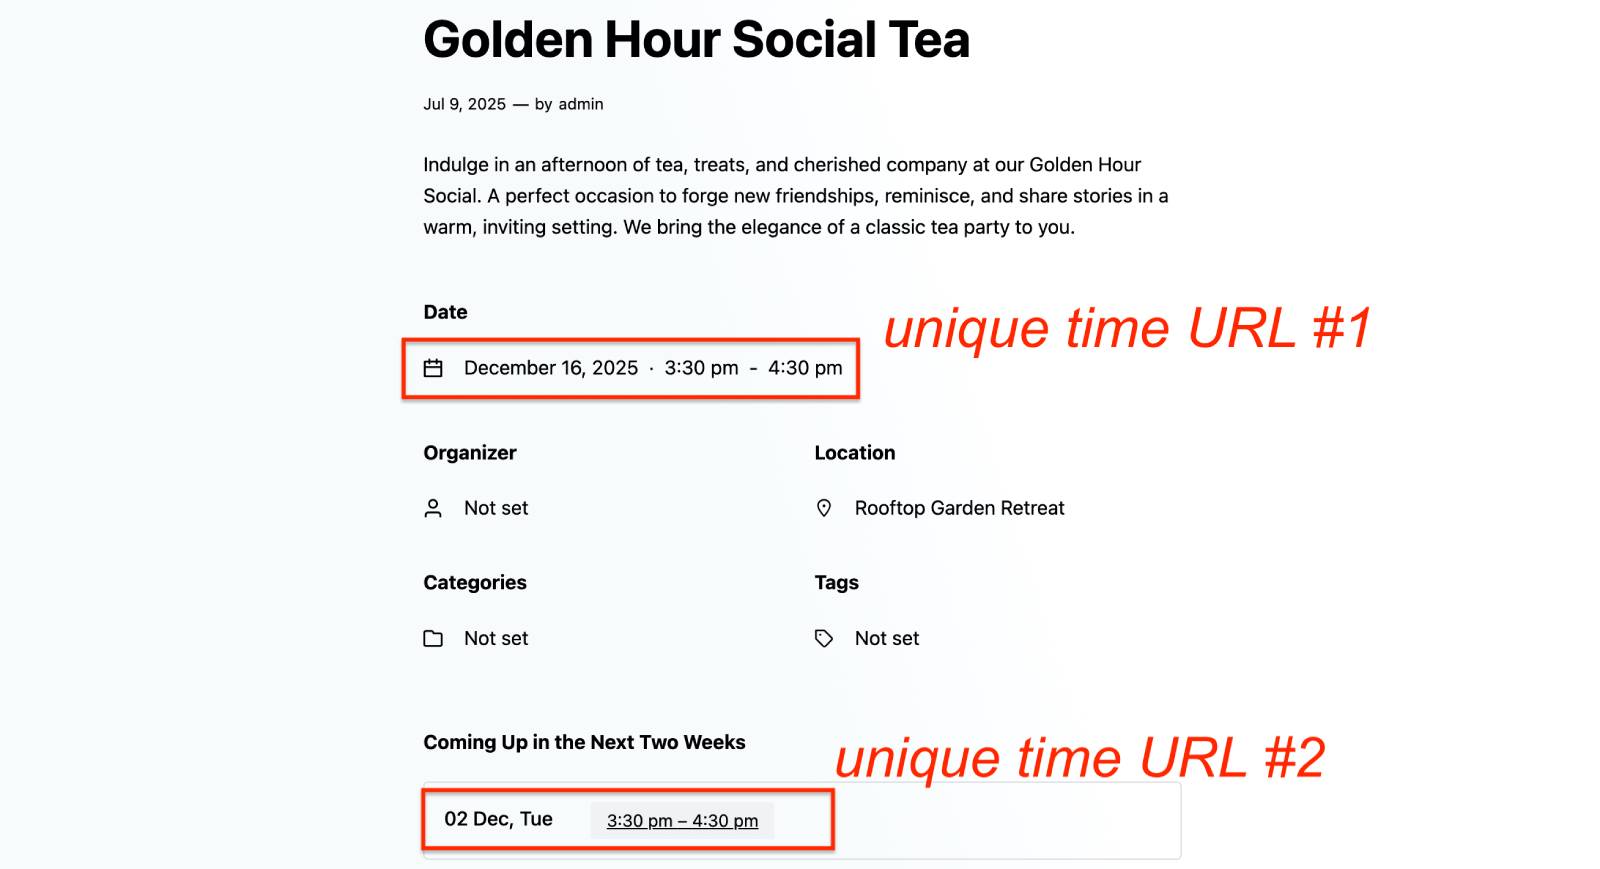
By default, the Single Event Schedule block from the MotoPress Events Calendar plugin is added automatically to the event page.
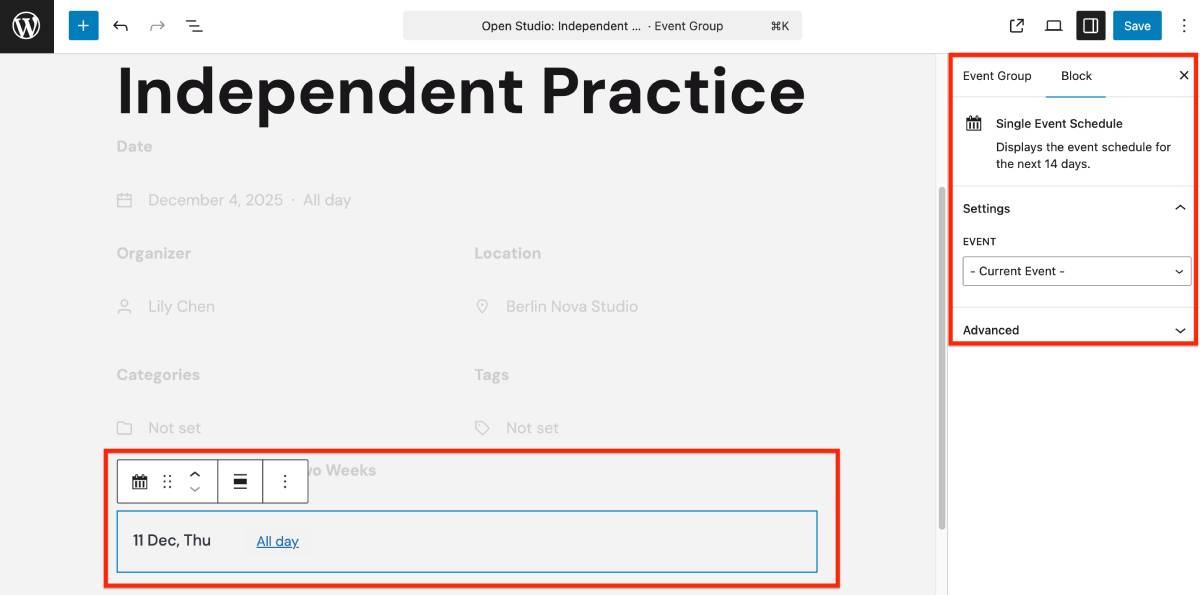
This block displays upcoming events of the selected event.
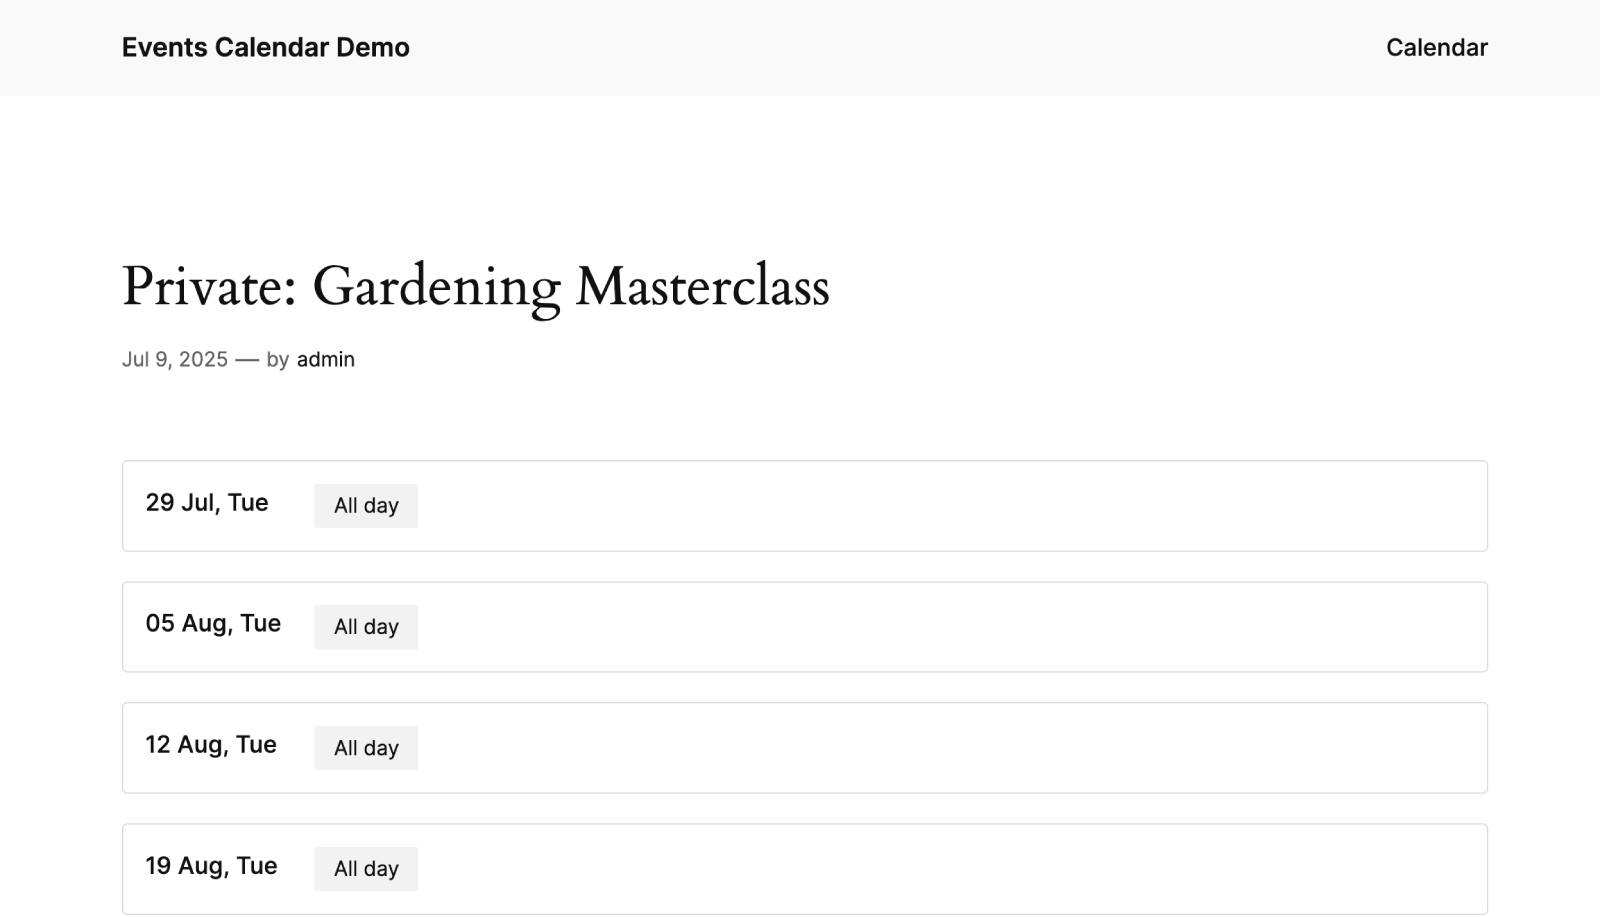
As for recurring events displayed on the event page, each time is clickable and has its unique URL.
Moreover, a single event page by default contains more info added via individual blocks:
- Event date via the Event Date block.
- Organizers via the Event Organizers block.
- Location via the Event Location block.
- Category via the Event Categories block.
- Tags via the Event Tags block.
- Upcoming events of the chosen one via the Single Events Schedule block.
Note: If you do not want to display any of the info, you can delete unneeded blocks and edit your event page as needed.
Use the WordPress block editor’s patterns, blocks, and design tools to customize the event page layout and presentation.
Repeating event options
Whether you’re adding a new event, editing an existing one, or adding time to an existing event, you can set its recurrence right under the event time/duration settings.
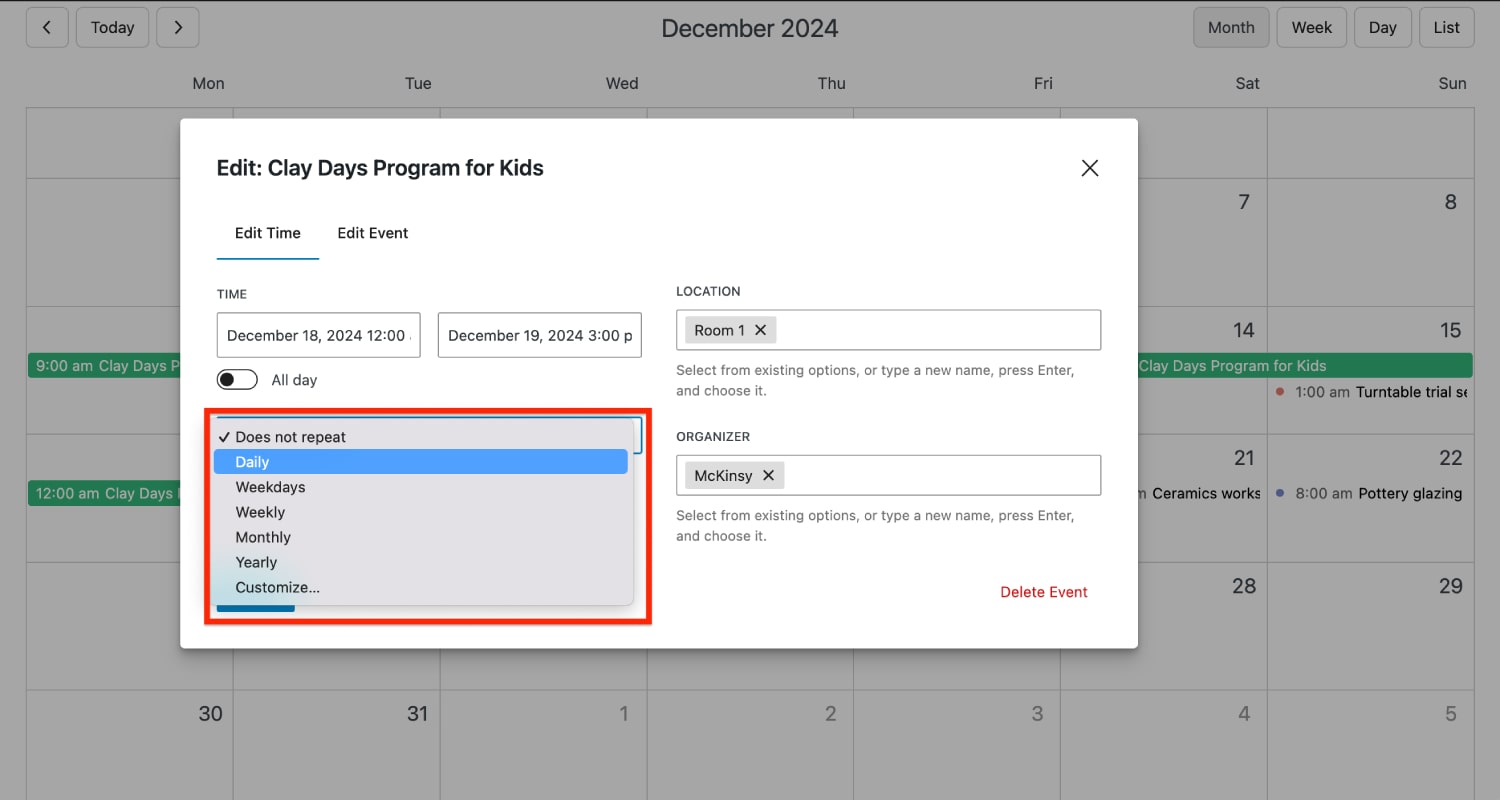
Supported repetition frequencies:
– Daily.
– Weekdays.
– Weekly.
– Monthly.
– Early.
– Custom.
In the ‘Customize…’ menu, you can:
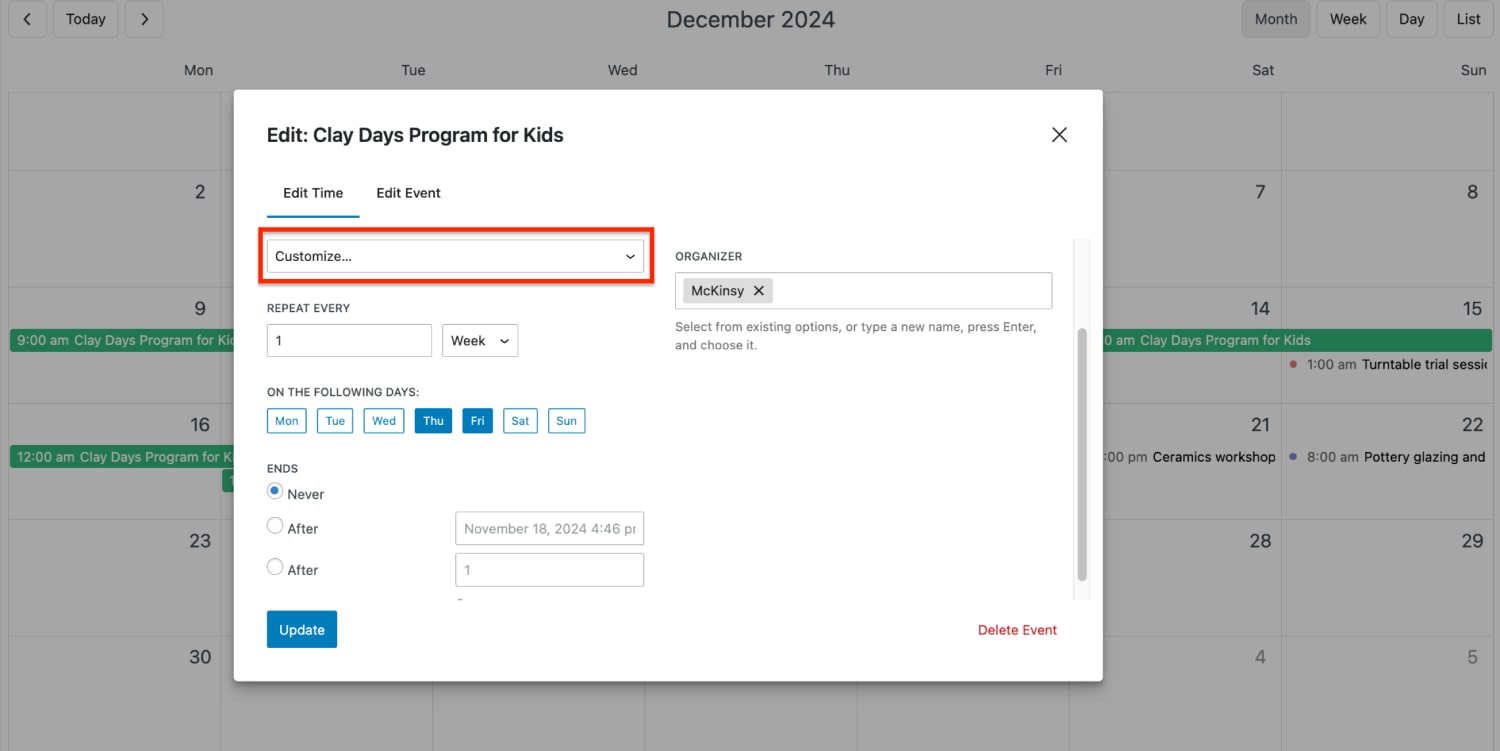
– add different repetition rules for daily, weekly, monthly, and yearly repetitions.
– set rules to end the repetition at the exact time.
If you’re updating the recurring event, you’ll have the following update options:
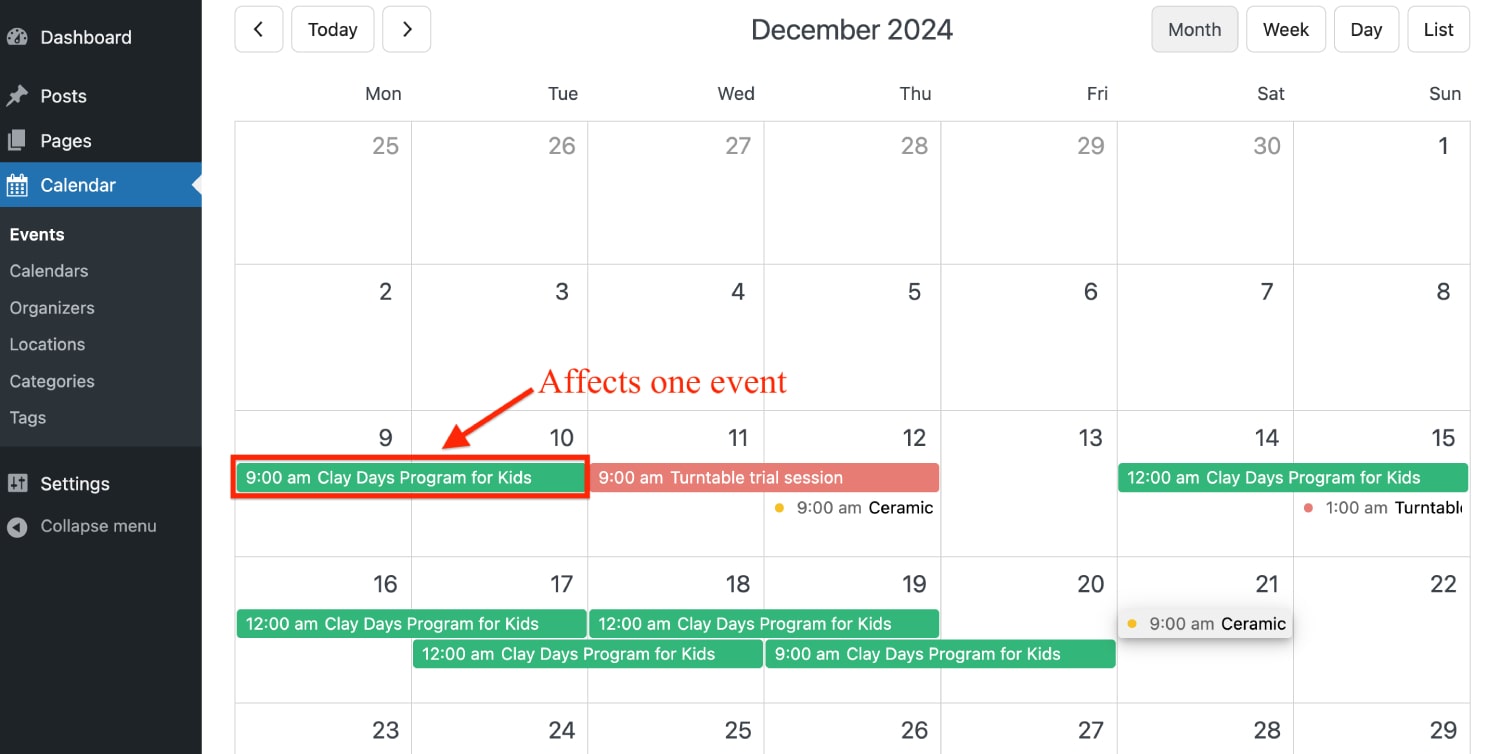
- This event: Change only this specific event.
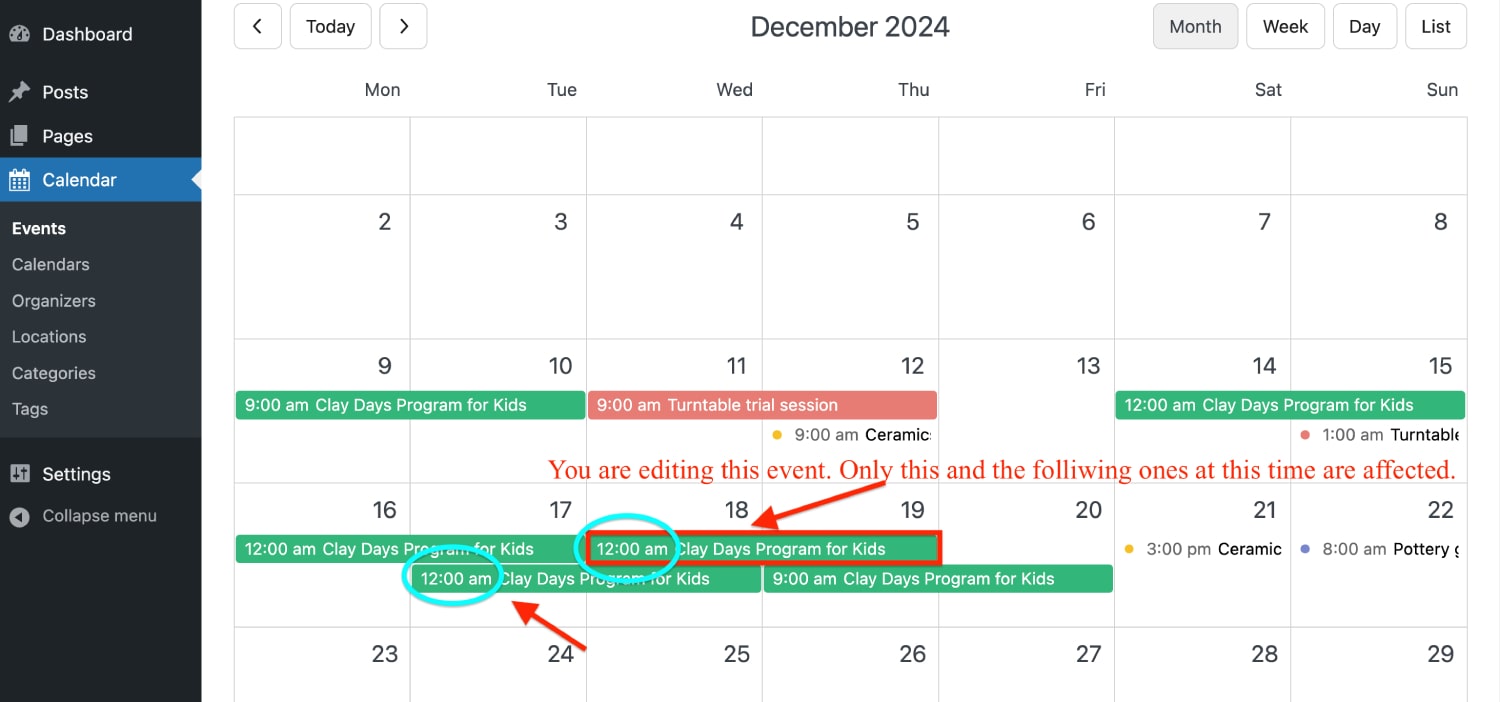
- This and following: Change this event and all future ones in the series (at the same time).
- All events: Change all events with the same name and time across the calendar.
If you’re deleting the recurring event, you’ll have the following delete options:
- This event: Change only this specific event.
- This and following: Change this event and all future ones in the series (at the same time).
- All events: Change all events with the same name and time across the calendar.
- All “event name” events in the calendar: Delete all events with the same name across all time slots in the calendar.
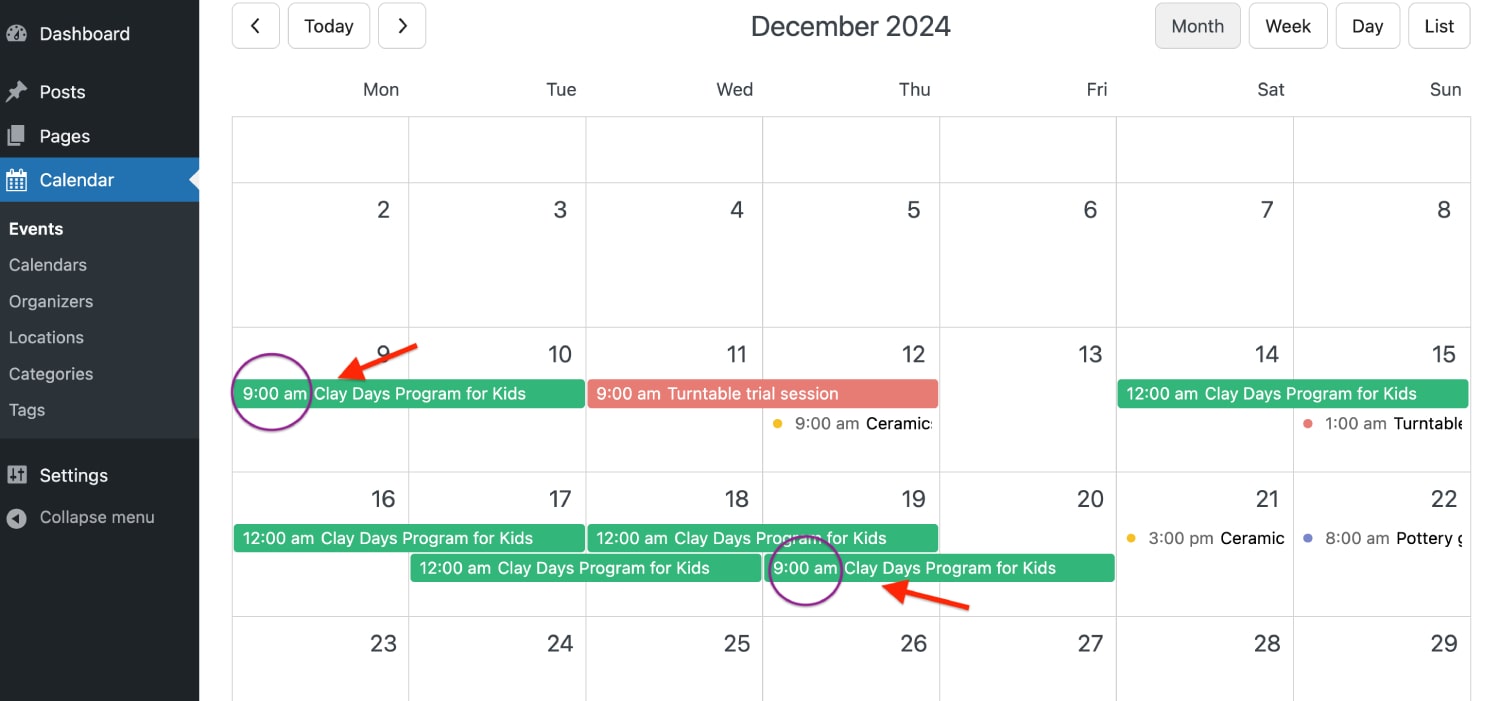
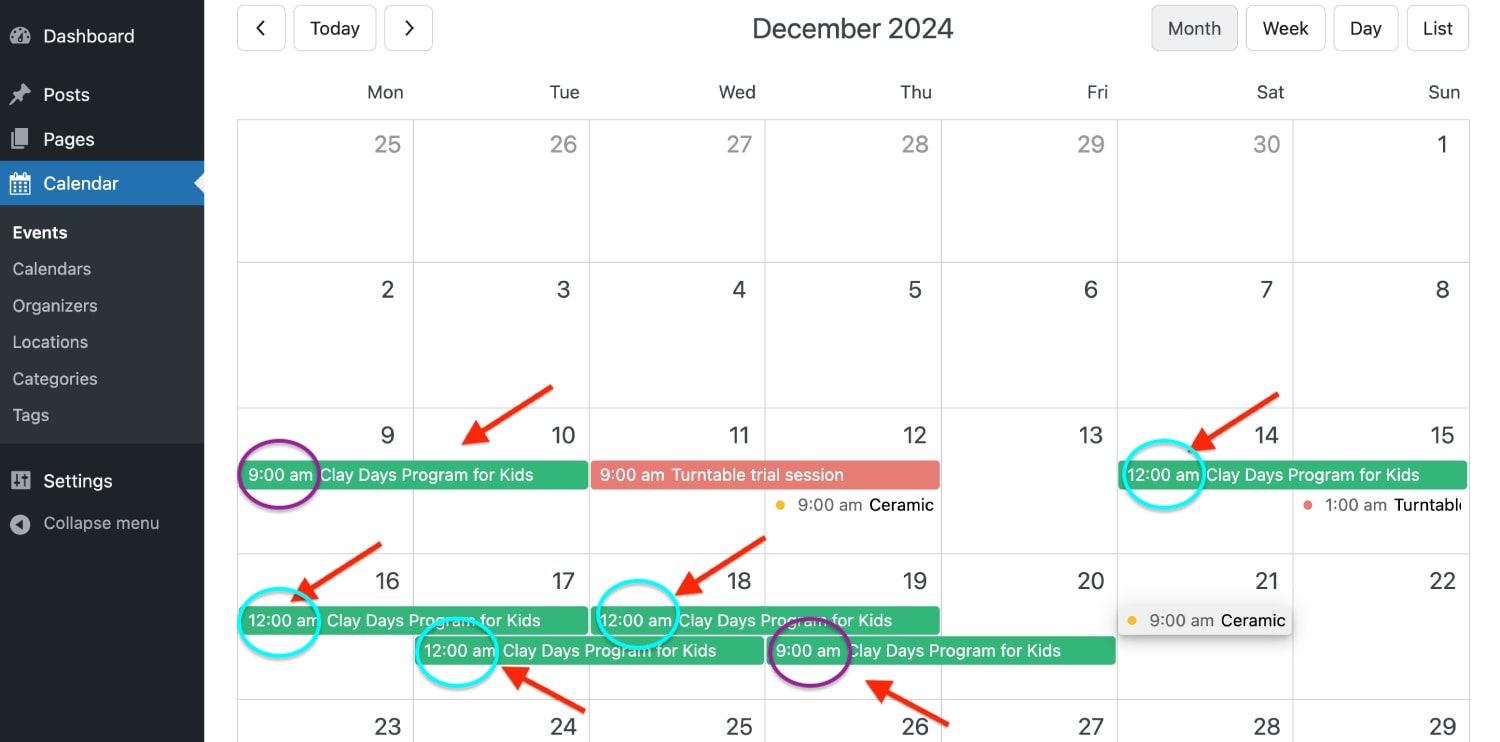
Add a different time to the same event
No need to recreate the event from scratch if you only want to display it at different times on your timetable/calendar.
To add a different time to the same event, follow these steps:
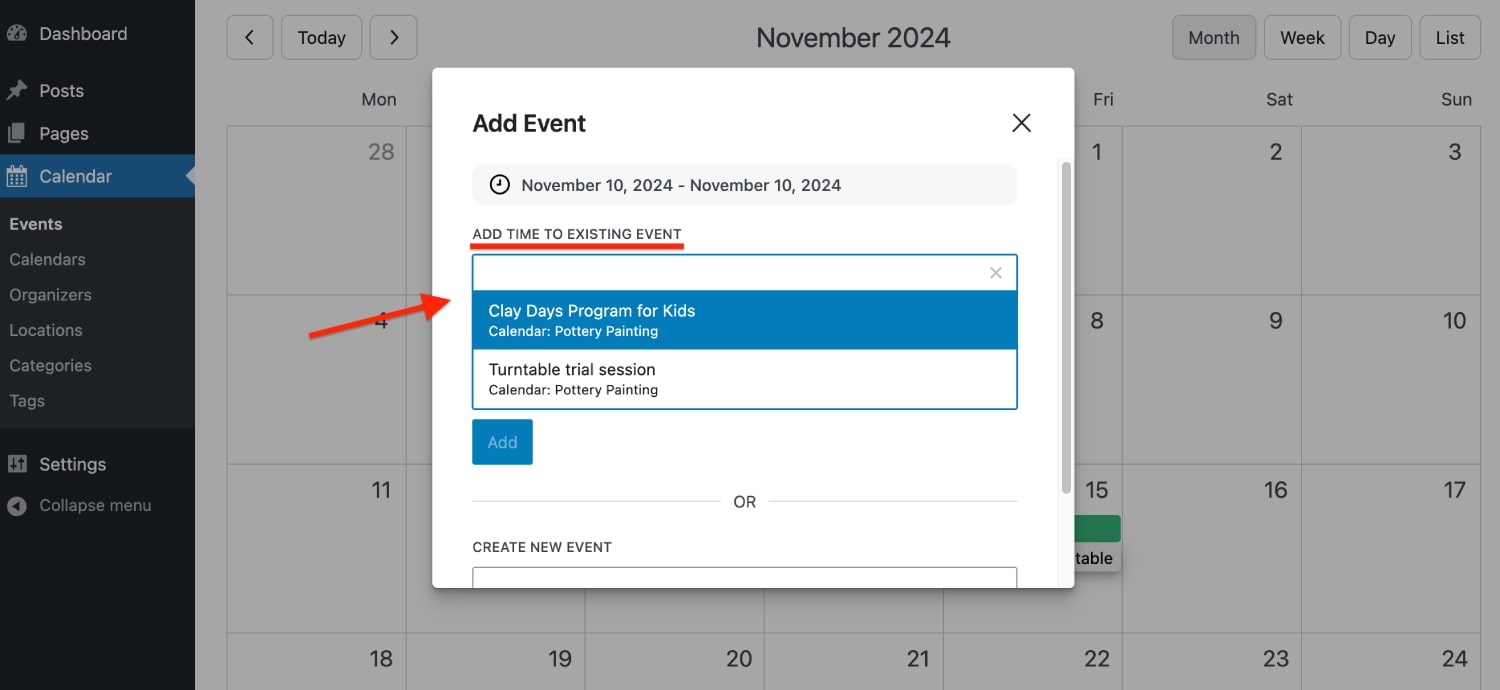
- Go to the desired calendar view (Month/Week/Day).
- Select the date or time when you want to add an event.
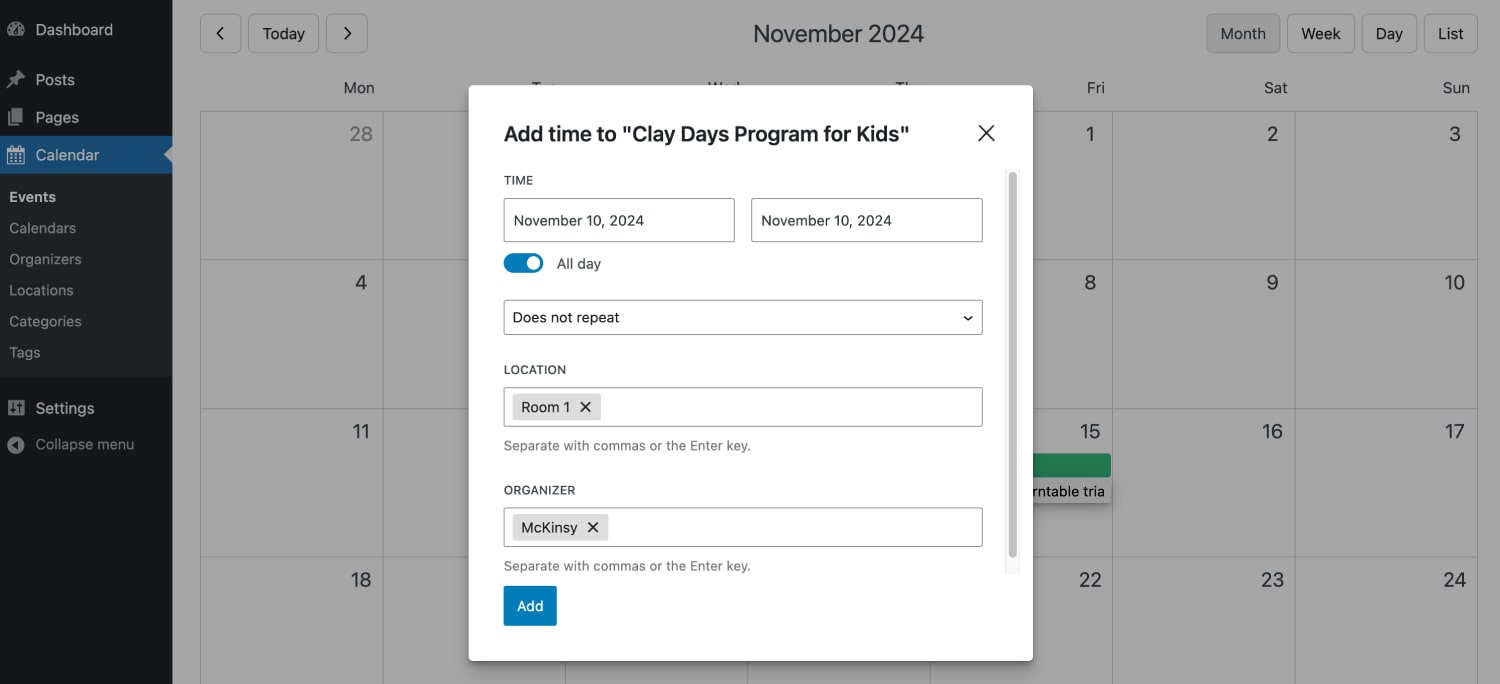
- In the pop-up window, choose Add Time to Existing Event.
- Select the appropriate event from the drop-down list.
- Click Add.
- Customize the time, recurrence, location, and organizer details.
If you want to customize additional event details (e.g., description, color, or move it to another calendar):
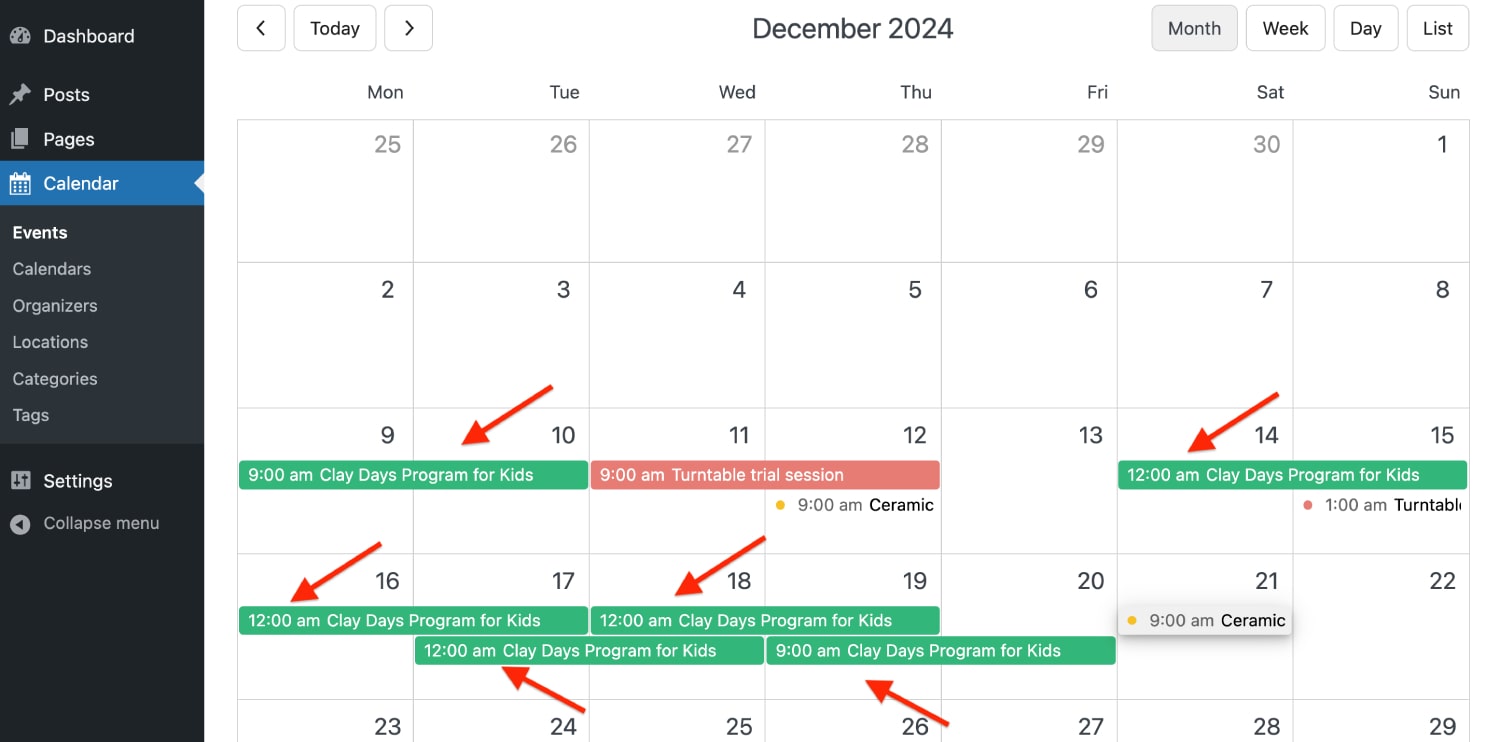
- Locate the event in the calendar and click on it.
- Click the Edit button (pencil icon).
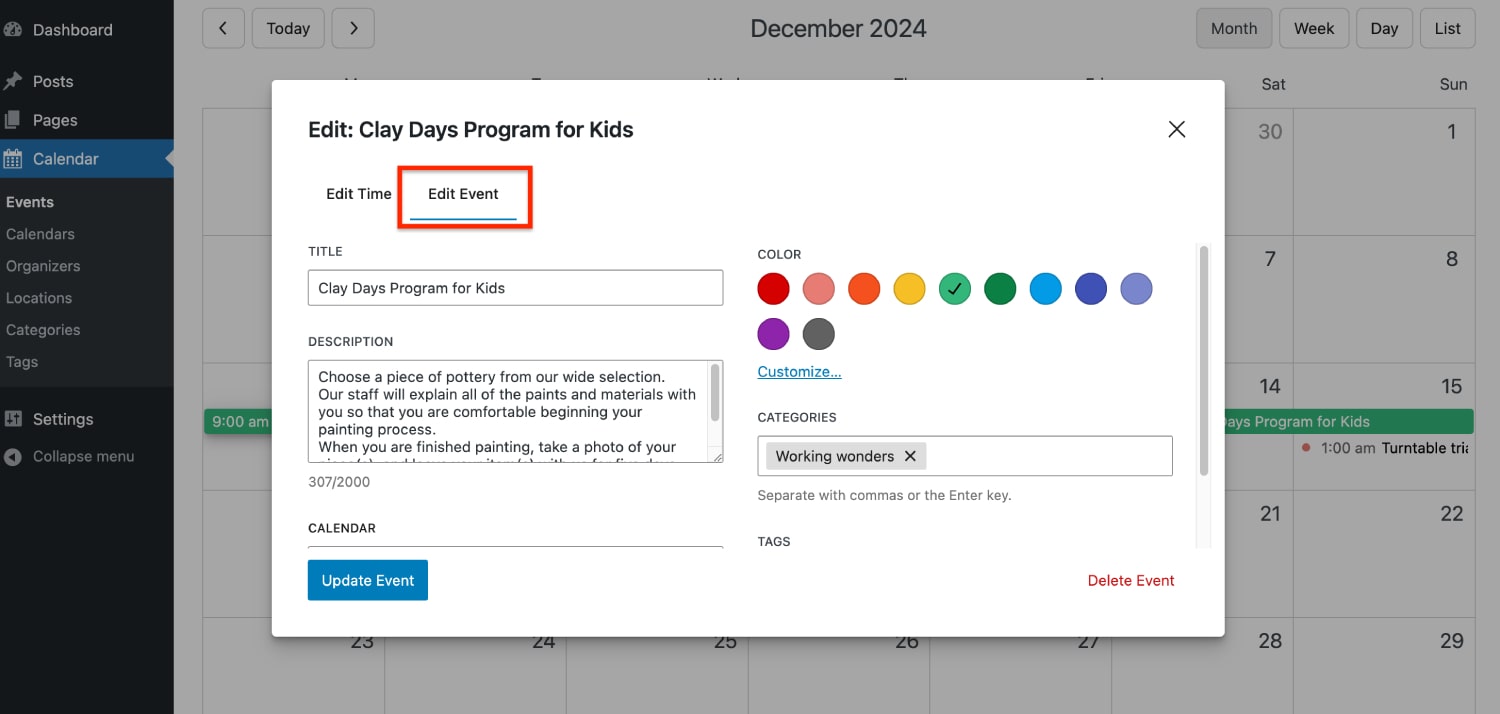
- Switch to the Edit Event tab.
Note: Any changes made in the Edit Event tab will apply globally, affecting all events with the same name across all time slots.
Edit event
- Locate the event in the calendar and click on it.
- Click the Edit button (pencil icon).
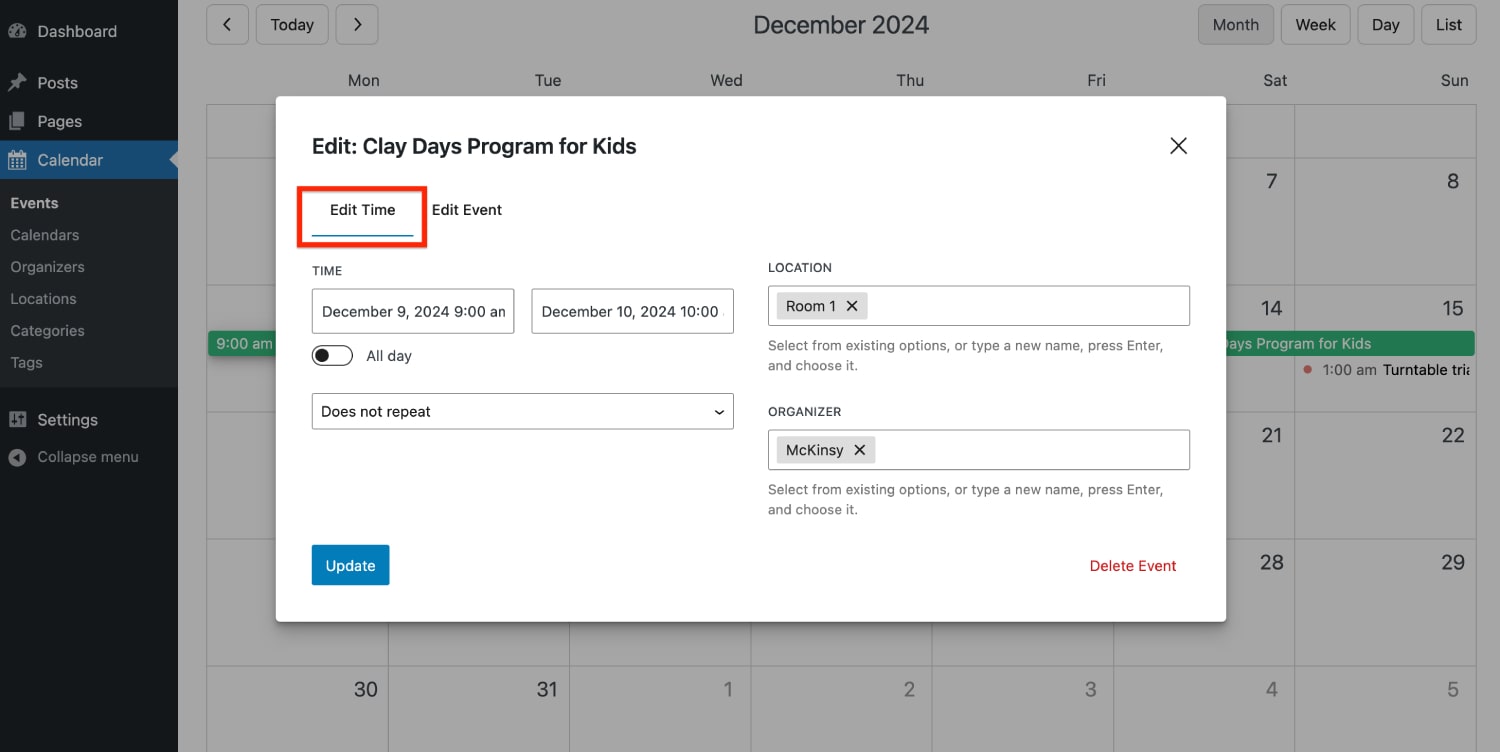
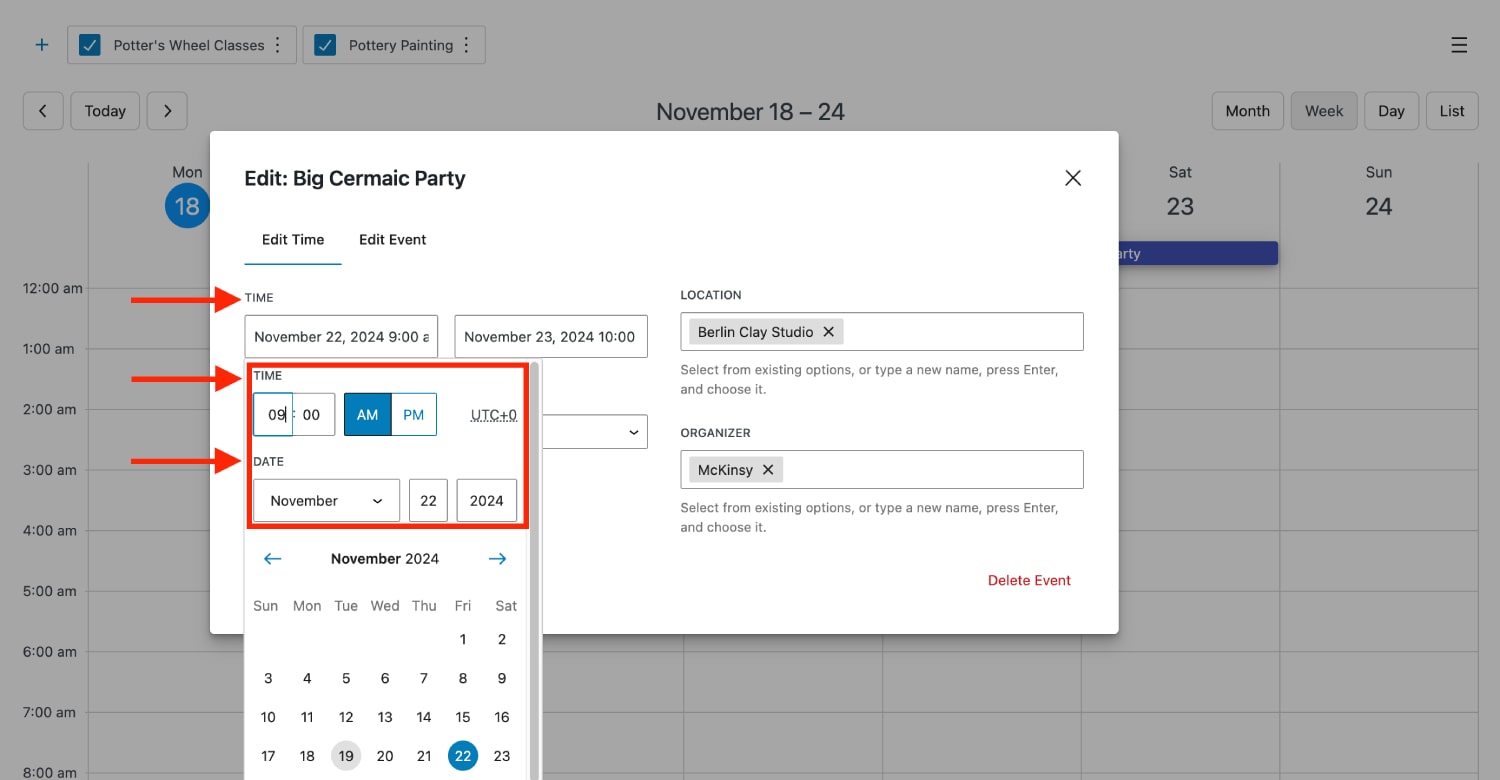
Edit Time tab
Here you will customize the time, as well as optionally location and organizer, for the specific event you’ve chosen.
If the event you are editing is recurring, you’ll have the following update options:
- This event: Change only this specific event.
- This and following: Change this event and all future ones in the series.
- All events: Change all events with the same name and time across the calendar.
Edit Event tab
Here you will customize the rest of the settings for events with the same name across all time slots.
Delete event
- Locate the event in the calendar and click on it.
- Click the Delete button (bin icon).
If the event you are editing is one-time, you’ll have the following delete options:
- This event: Delete only this specific event.
- All “event name” events in the calendar: Delete all events with the same name across all time slots in the calendar.
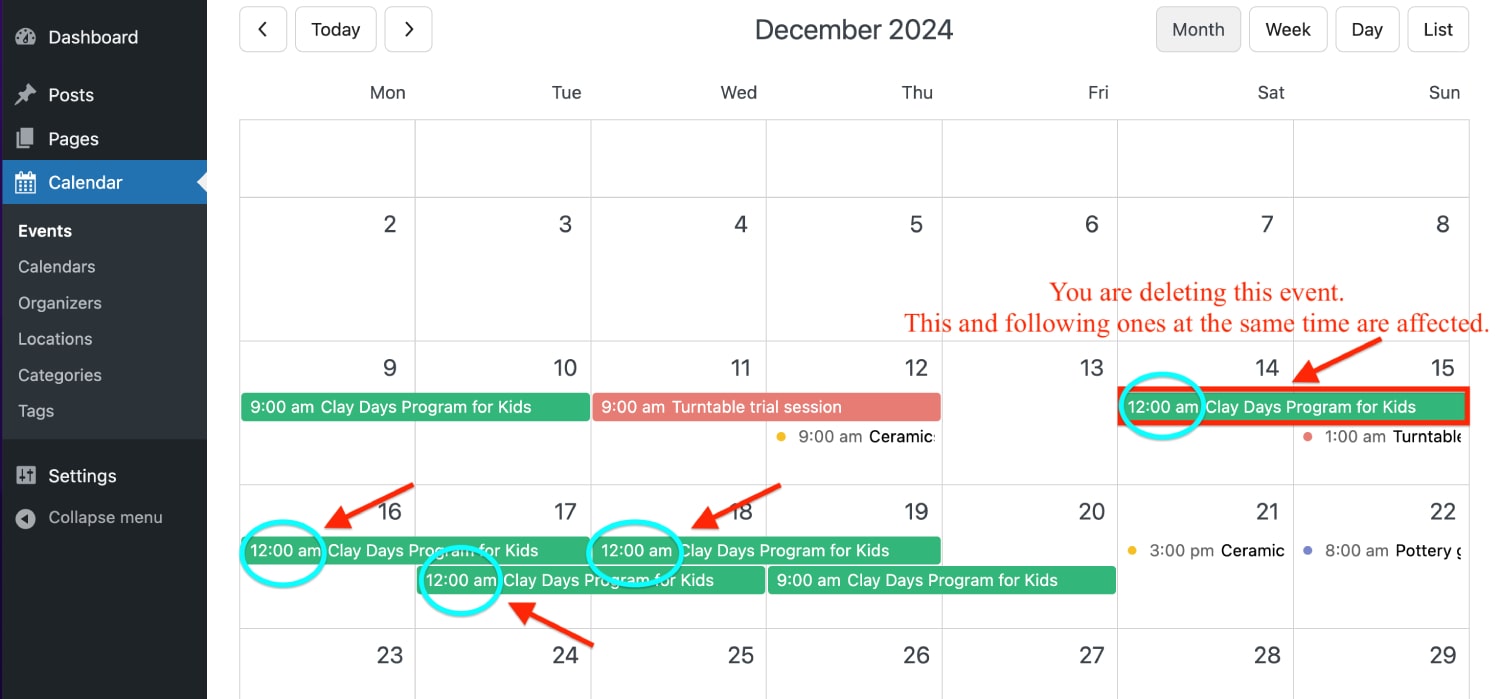
If the event you are editing is recurring, you’ll have the following delete options:
- This event: Delete only this specific event.
- This and following events: Delete this event and all future ones at this time.
- All events: Delete all events with the same name and time across the calendar.
- All “event name” events in the calendar: Delete all events with the same name across all time slots in the calendar.
Multi-day events
Our WordPress calendar plugin supports multi-day events, allowing you to schedule events that span across multiple days seamlessly. To create a multi-day event:
1. Create a new event or edit an existing one.
2. Go to edit the time of the event.
3. Manually select time and day for the event.
Note: If the calendar is published, all events you add to it via the Events menu instantly become public.