Table of Contents
Use the WordPress block editor
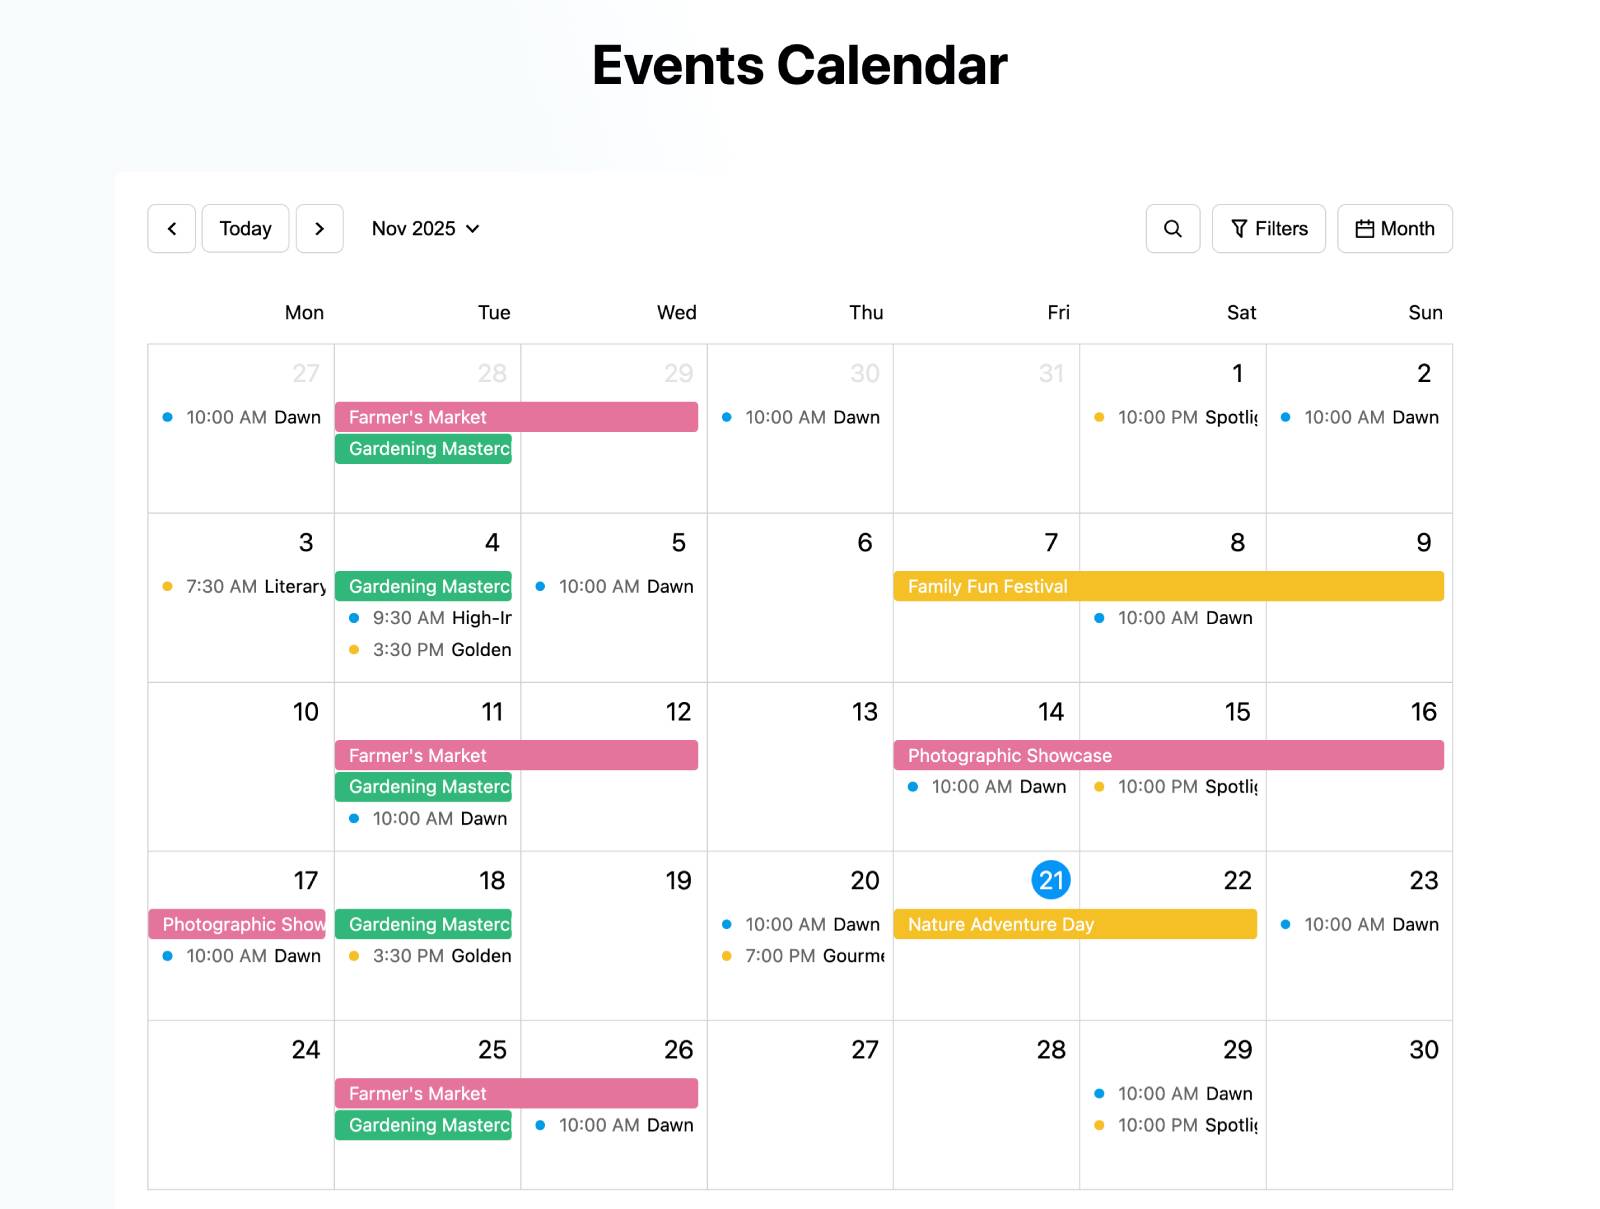
The MotoPress Events Calendar plugin offers multiple blocks to help you create event schedules or single event pages using different layouts.
Add Events Calendar
Use WordPress Block: Events Calendar
1. Open the needed page or post.
Go to the page or post where you want to display the events calendar and open it in the WordPress block editor.
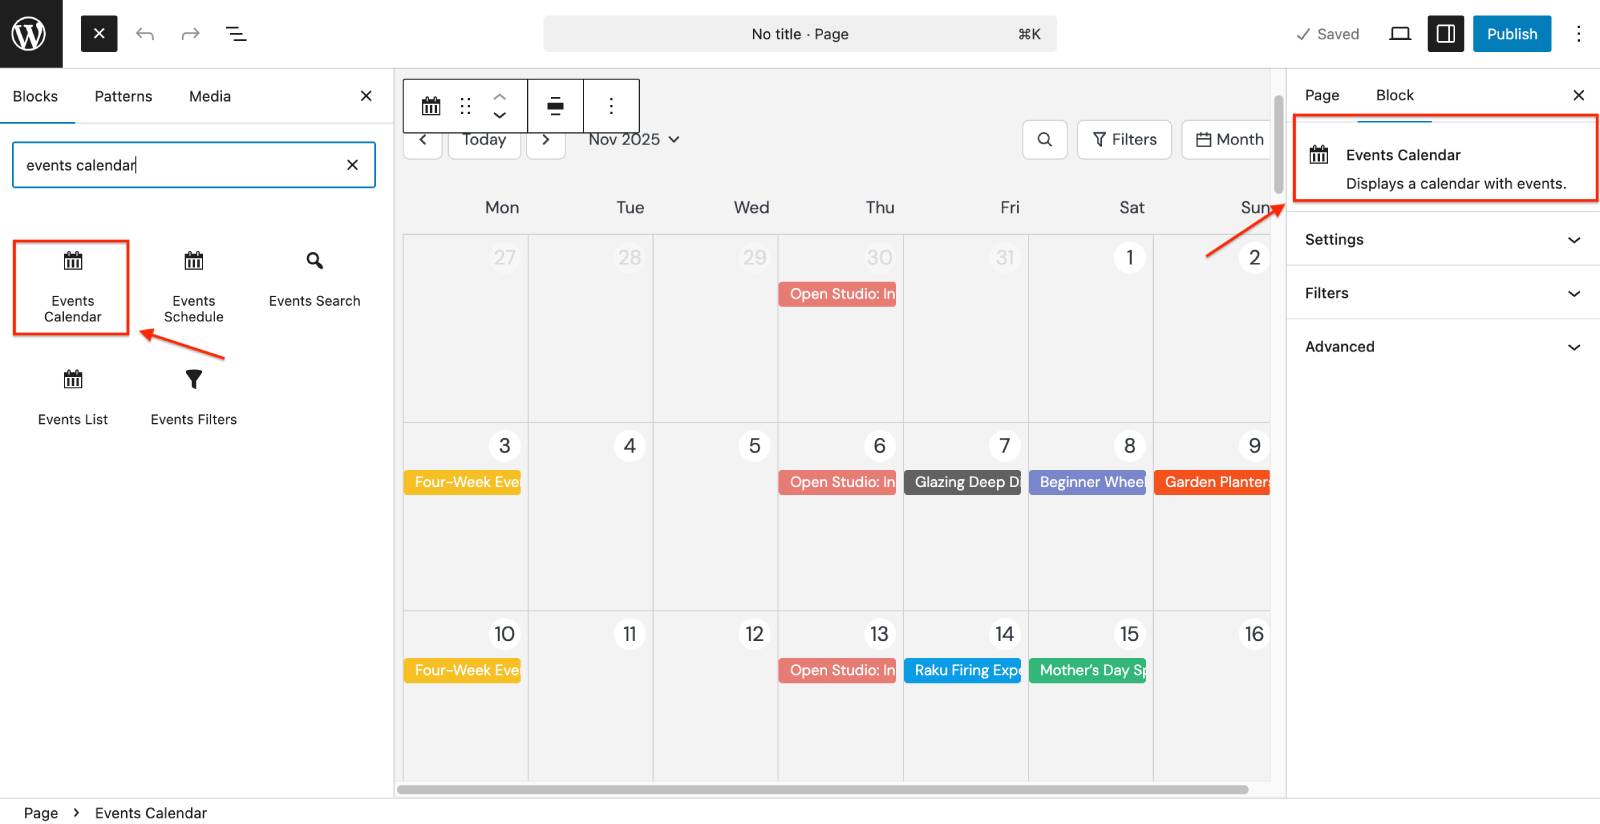
2. Insert the Events Calendar block.
Drag and drop the Events Calendar block onto your page.
3. Configure the Events Calendar block settings.
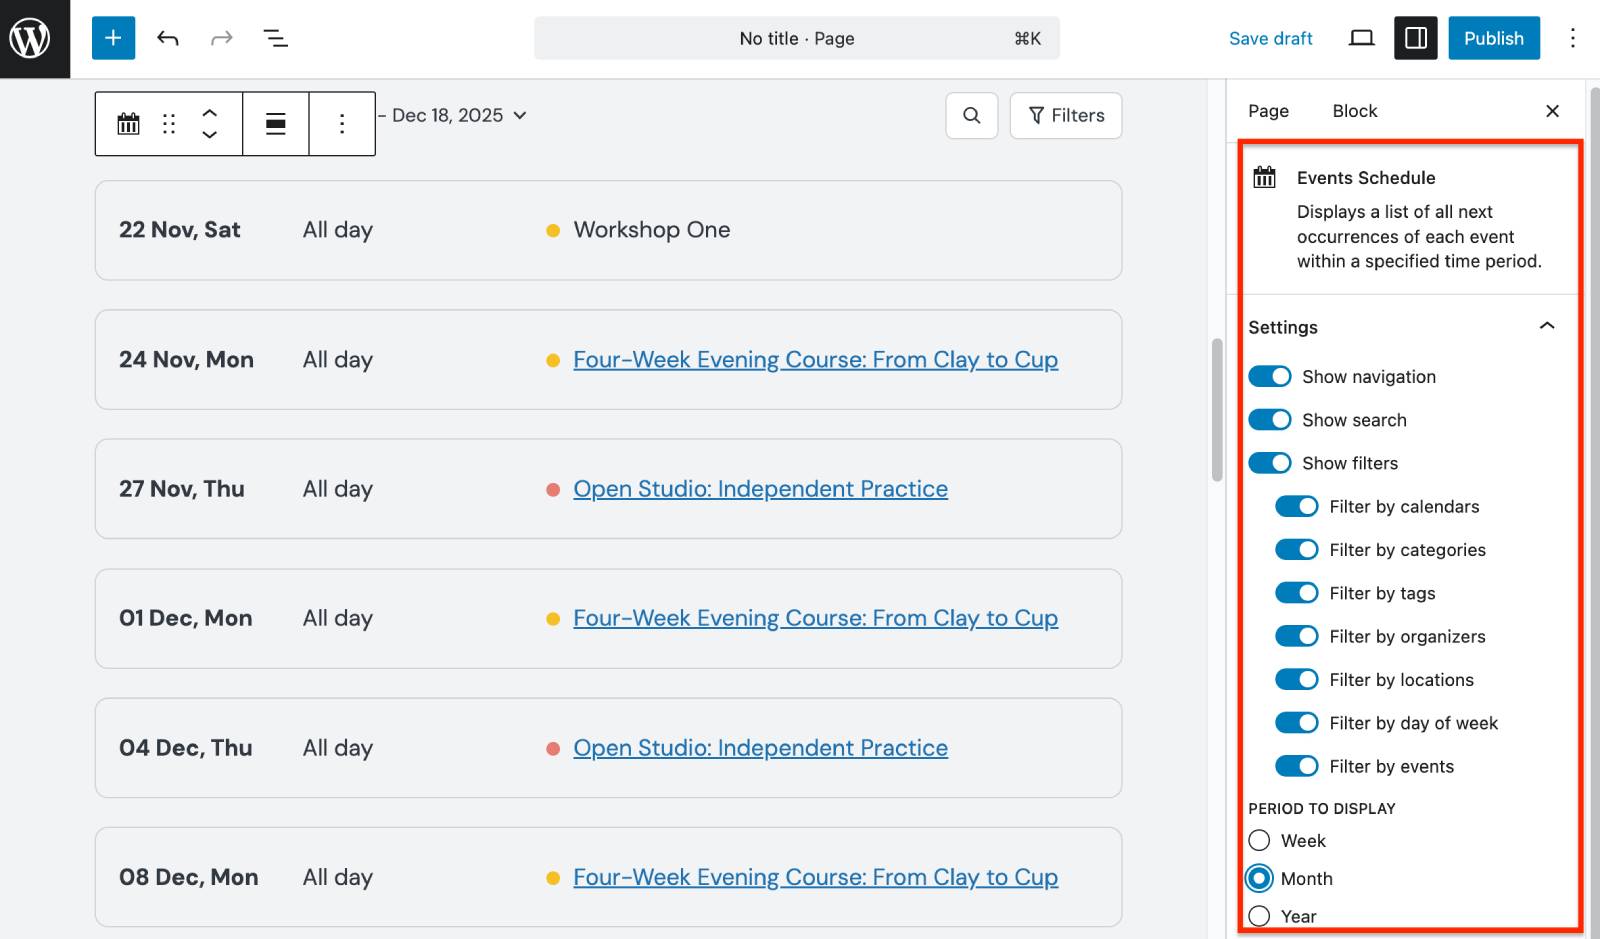
Click on the calendar and open the block settings from the right.
These settings allow you to customize the interface of the schedule as well as which events must be displayed.
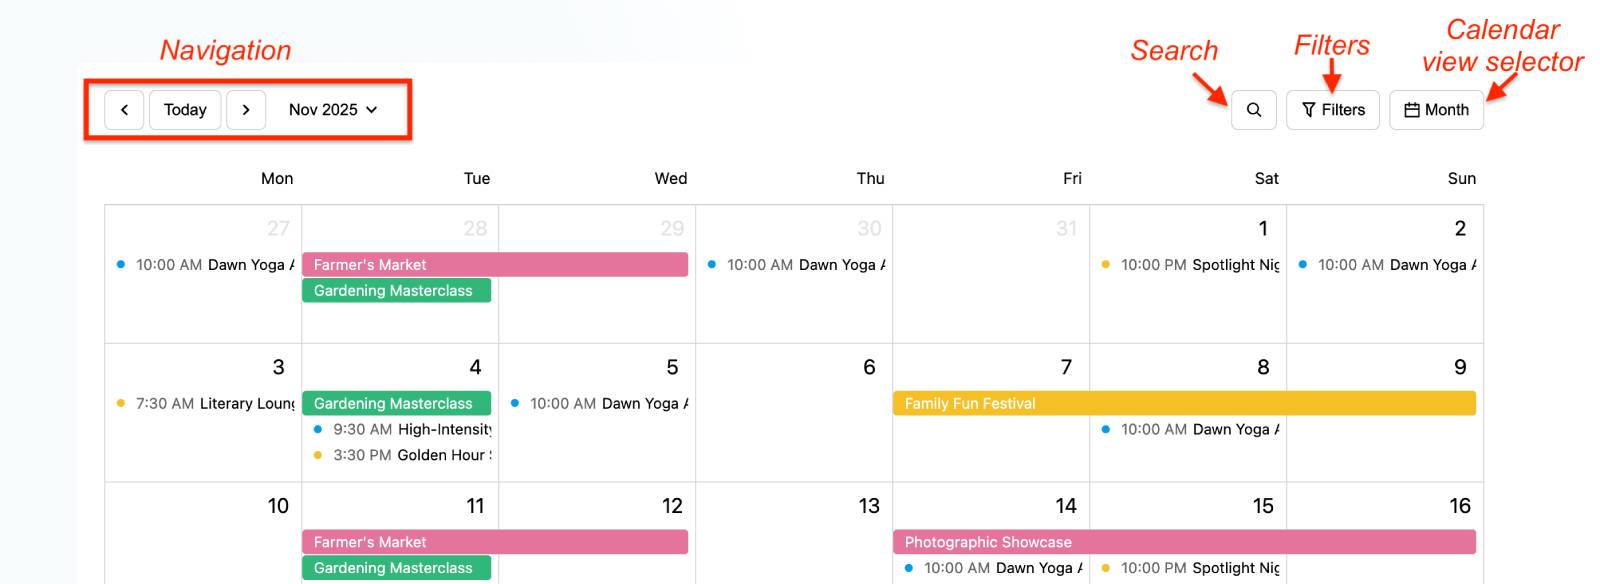
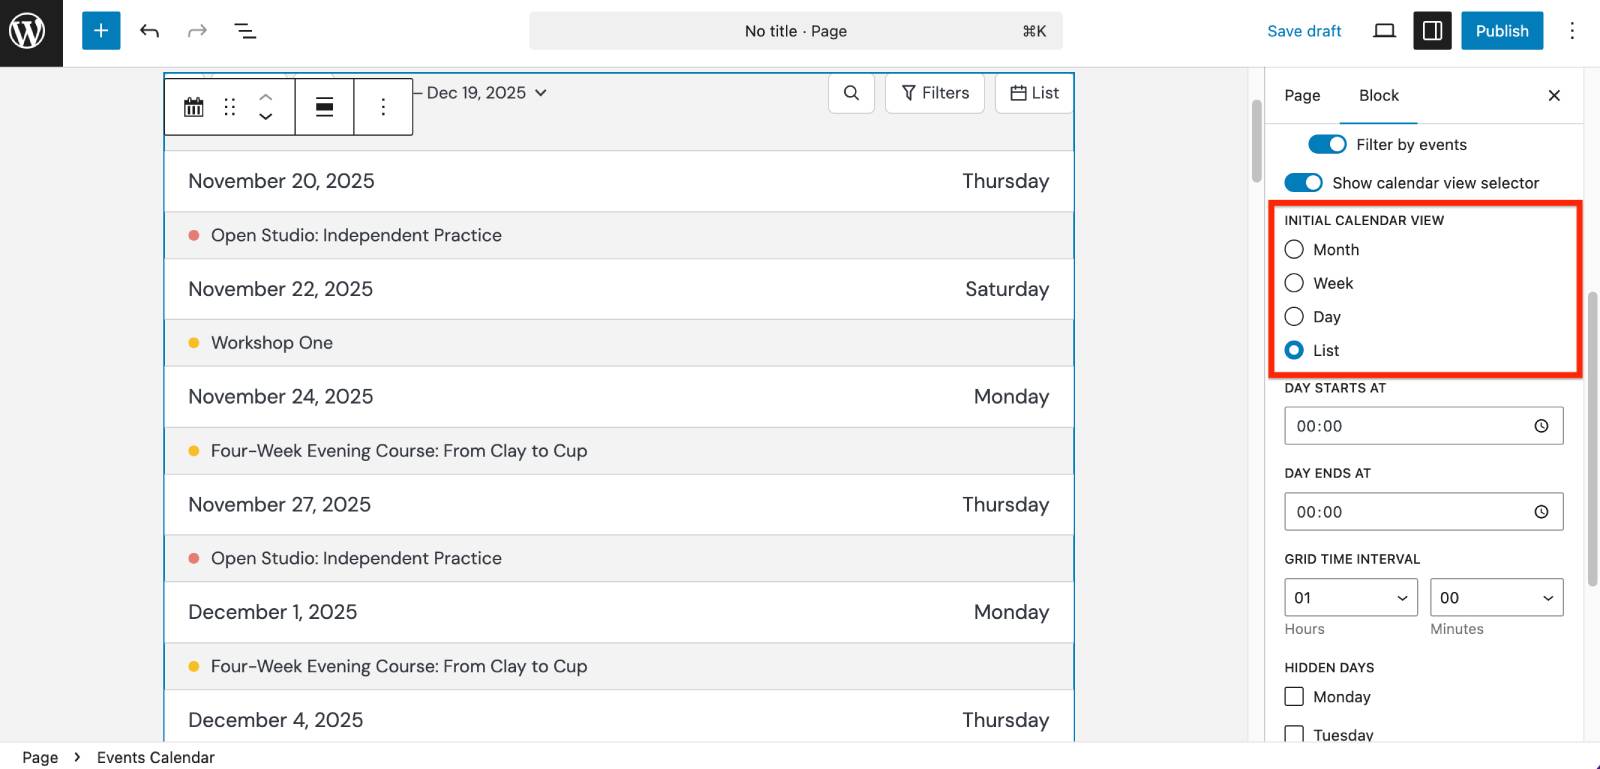
The ‘Settings’ menu allows you to customize the interface of the schedule. It allows you to decide how calendar looks and works — for example, whether visitors see navigation, search, and filter buttons, which view it opens in (month, week, day, list), what time the day starts/ends, and which weekdays (if any) are hidden.
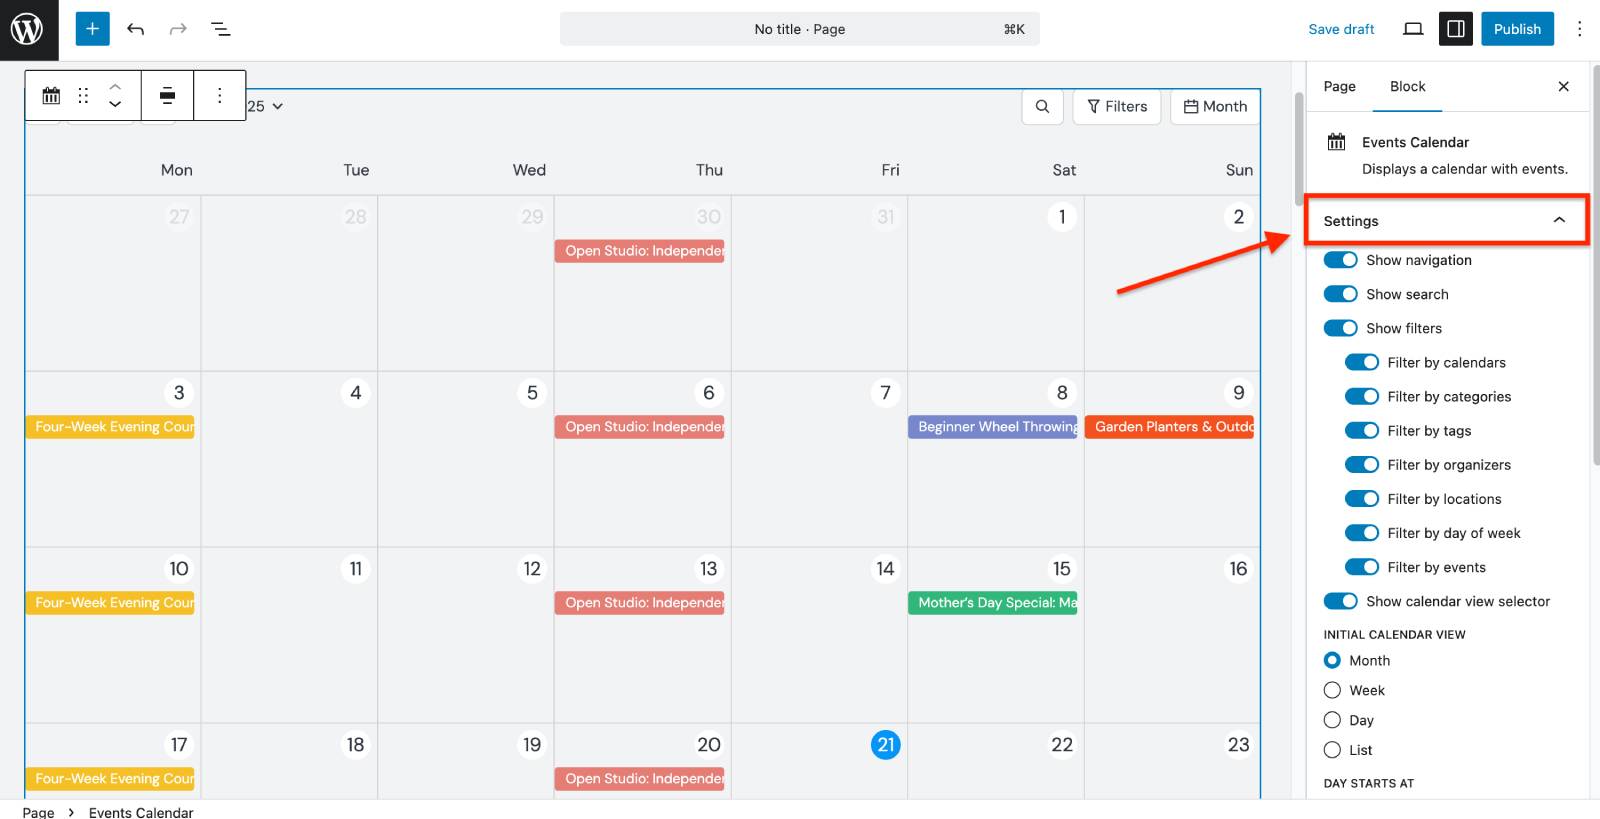
- Enable or disable calendar navigation, search bar (by event names), filters selector, and a calendar view selector.
- Specify the default schedule appearance (‘Initial calendar view’) – month, week, day, or list.
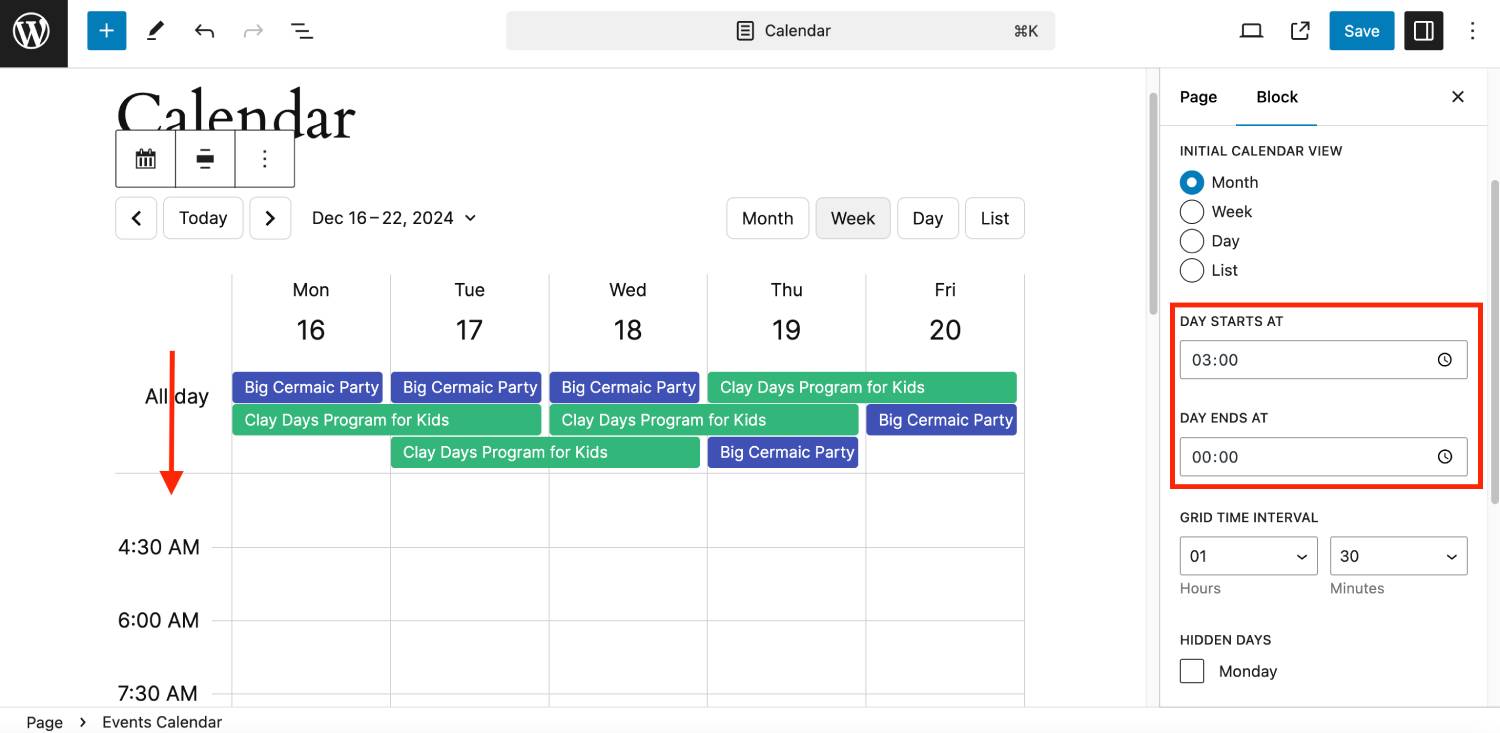
- Specify the Start and End Times for events to display in the timetable.
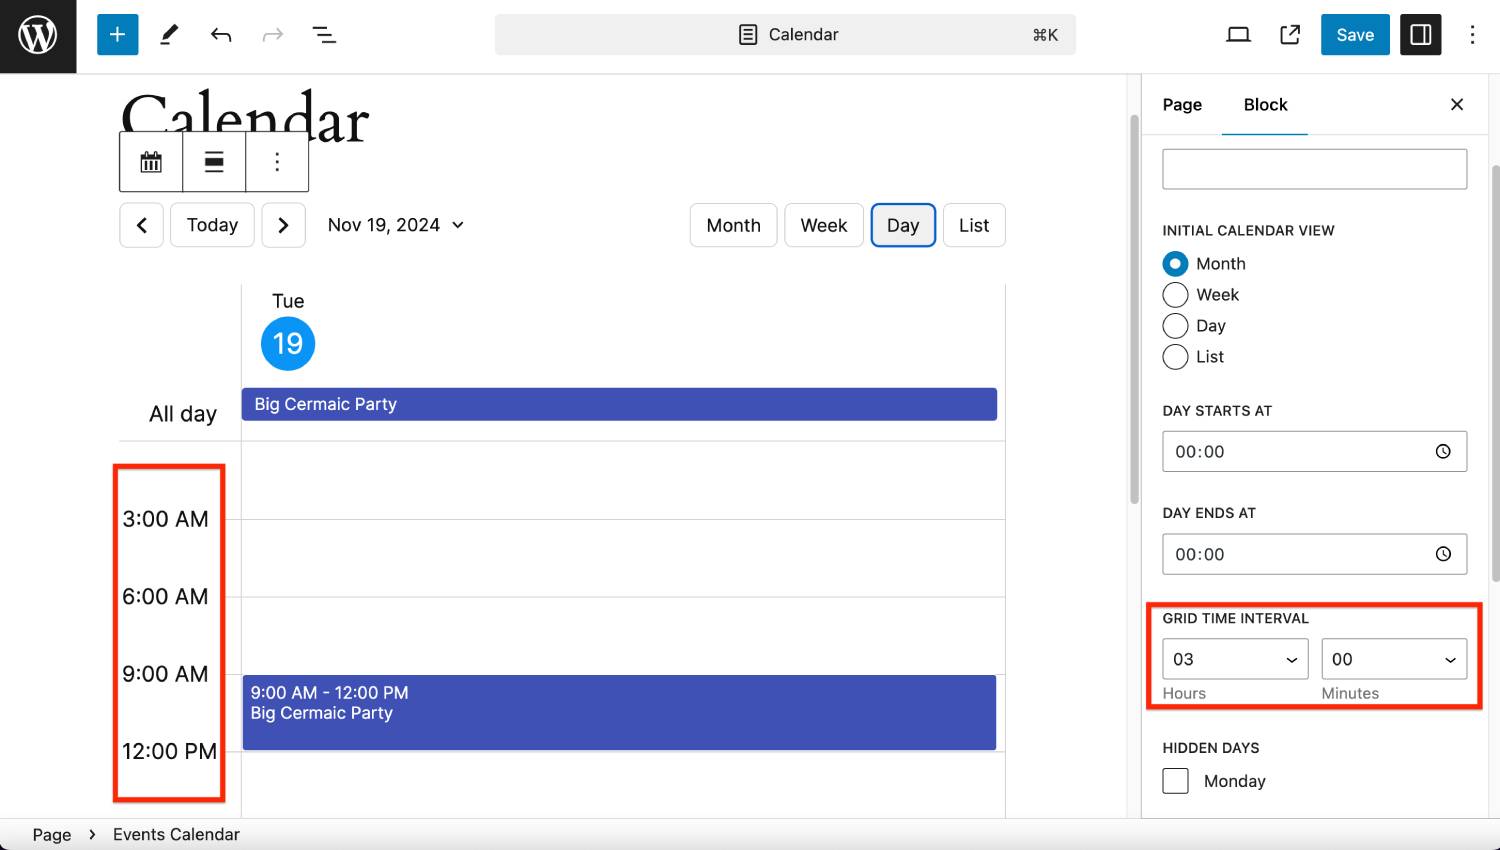
- Define the Time Interval for monthly and daily views in the timetable.
- Optionally select days of the week to hide in the calendar.

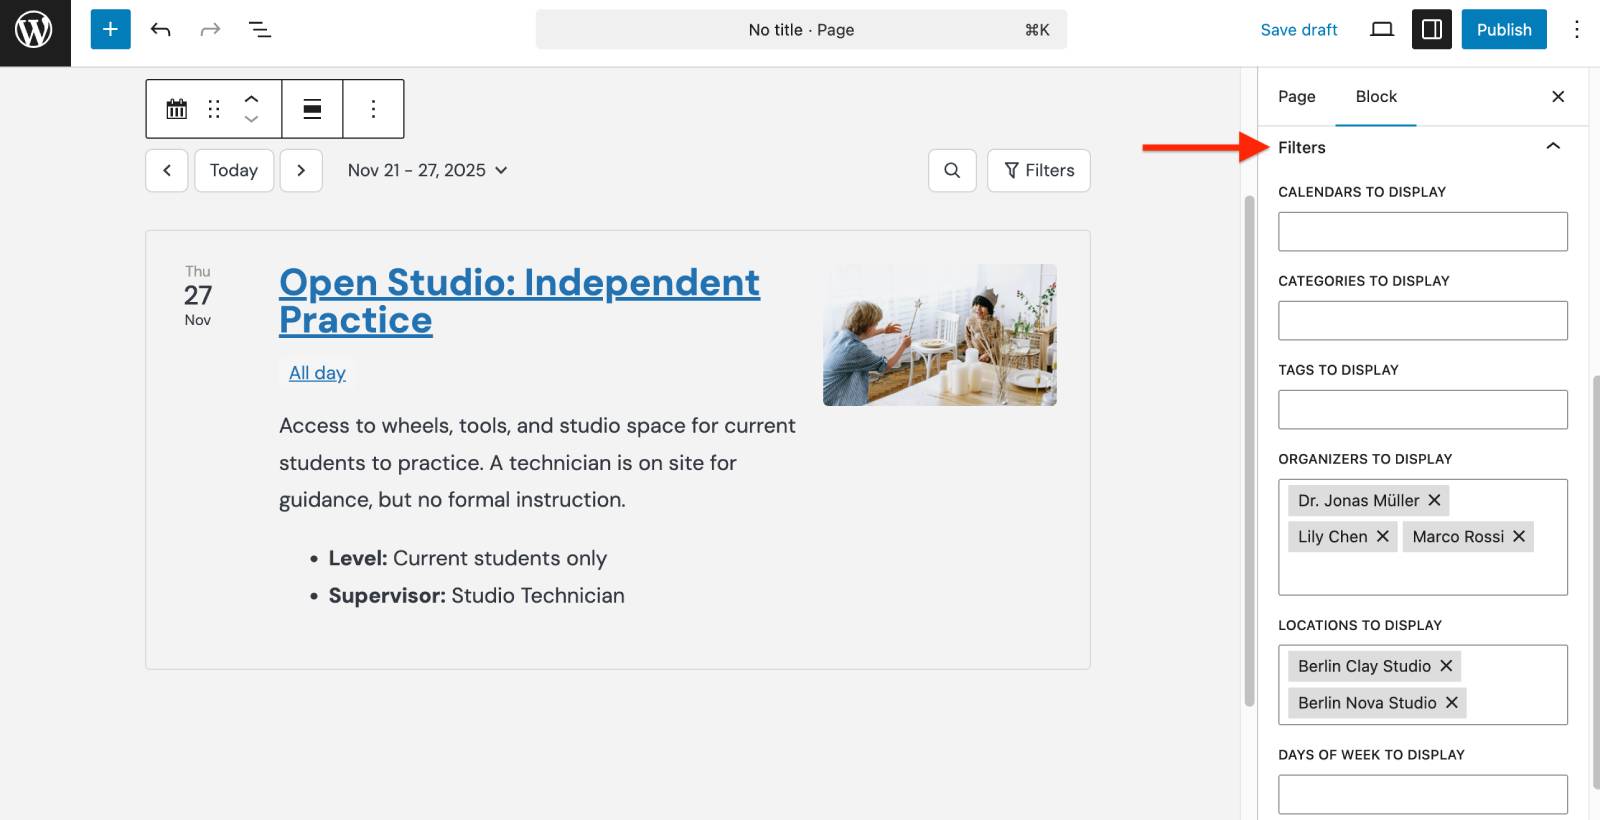
The ‘Filters’ menu lets you limit which events show in the calendar (by calendar, category, tag, organizer, location, day of week, or specific events).
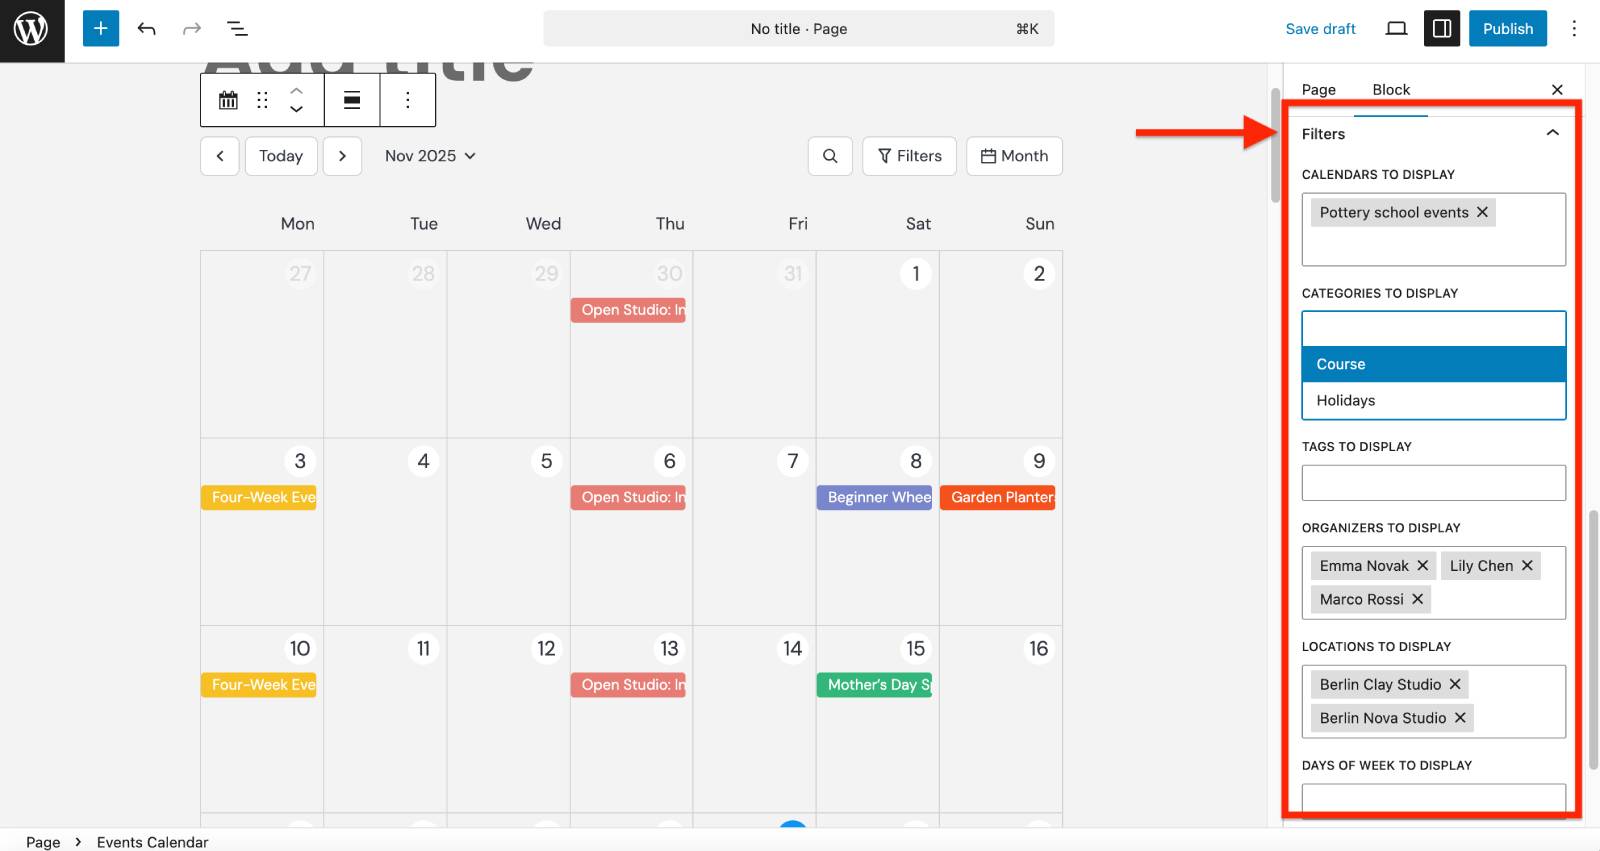
You can select multiple calendars – in this case, events from all calendars will be shown in one single calendar.
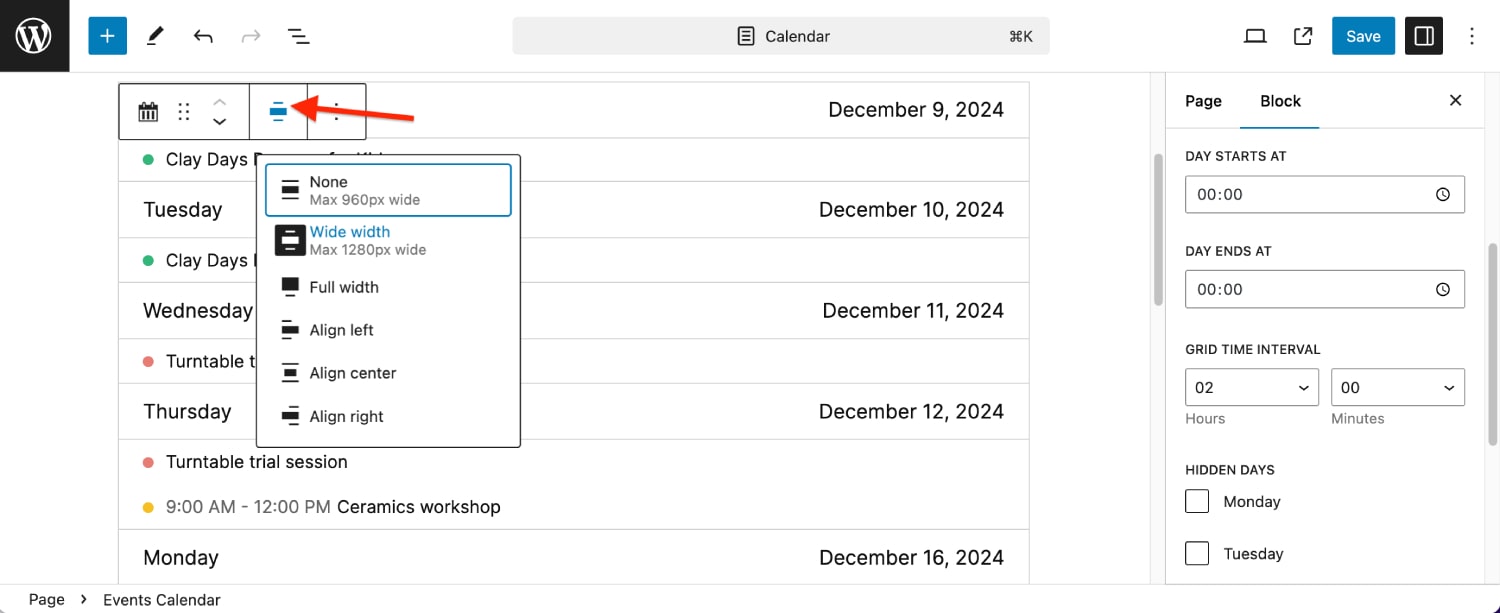
4. Customize the width of the calendar/list.
The calendar width may vary depending on your default WordPress theme layout settings. To adjust it, simply click on the block layout settings and select your preferred block width.
Make sure to save or update the page/post once all settings are configured.
To display multiple calendars on the same page, just add the same Events Calendar block as many times as needed with the needed calendar selected in the block settings.
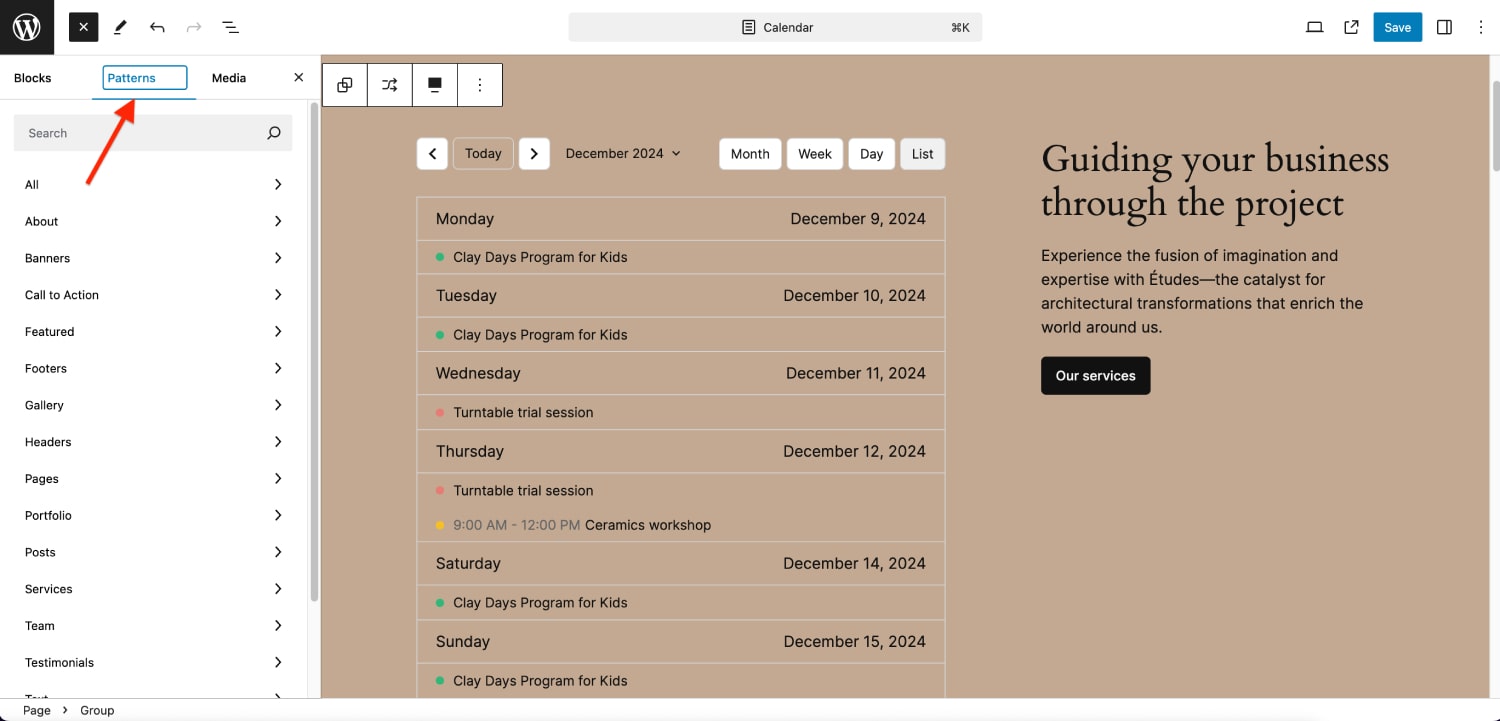
Use the WordPress block editor default WordPress block patters to play with some designs elements of the calendar/list of events.
Add Events Listing
Use WordPress Block: Events List
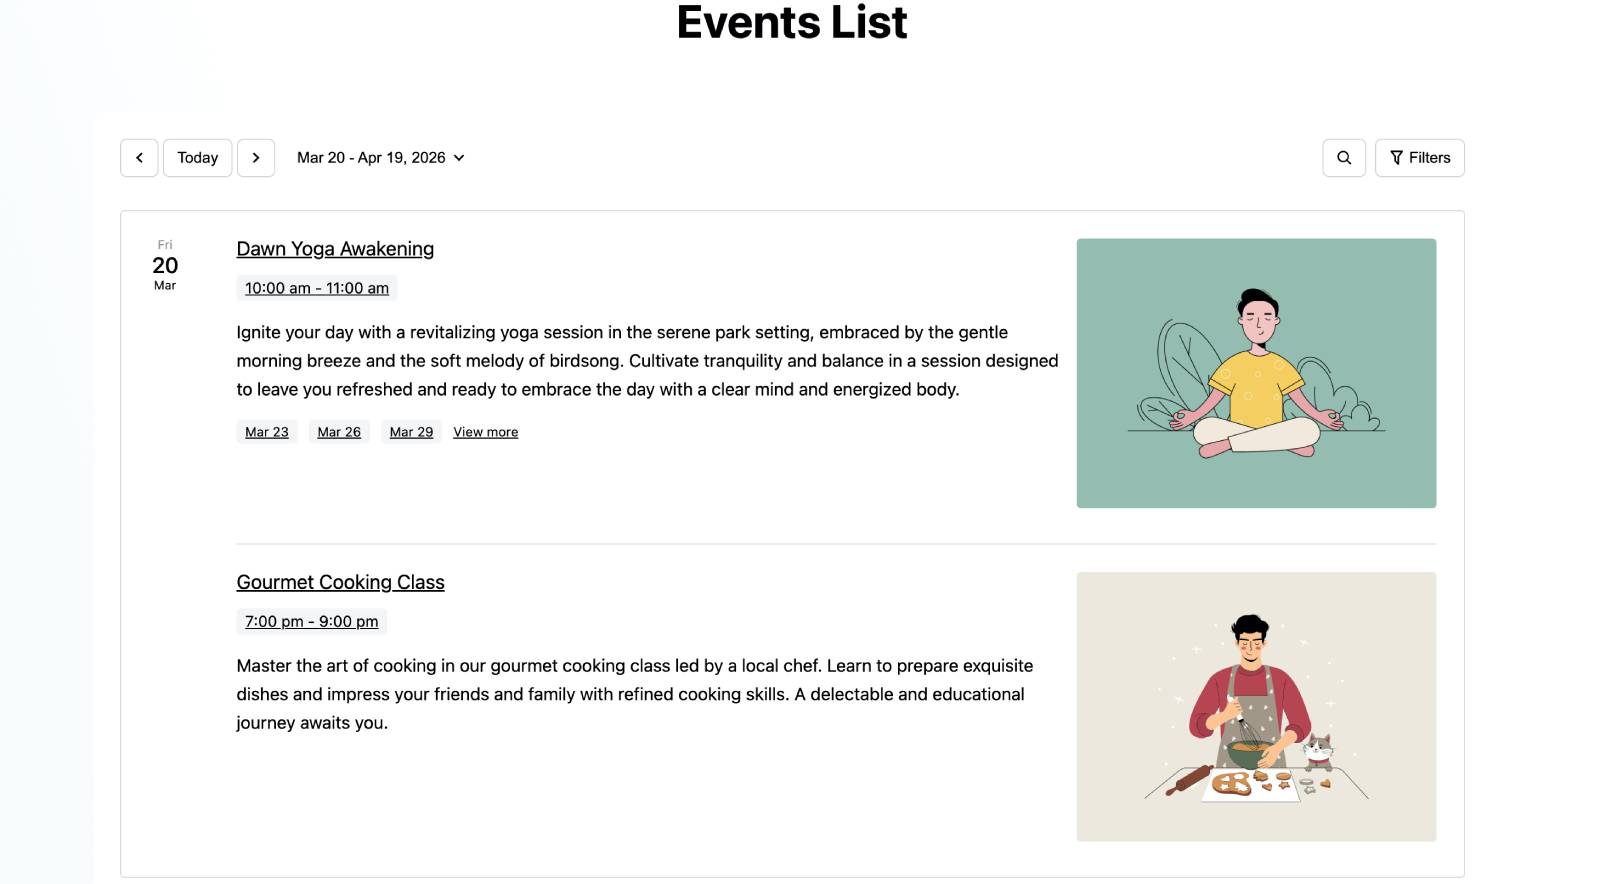
The Events List block is designed to display a structured, informative list of events. Using this block, you can:
– Highlight selected upcoming events within a defined time frame.
– Present each event clearly as a card with key details.
– For recurring events, optionally show a few nearest upcoming dates.
1. Open the needed page or post.
Go to the page or post where you want to display the events listing and open it in the WordPress block editor.
2. Insert the Events List block.
Drag and drop the Events List block onto your page.
3. Configure the Events List block settings.
Click on the calendar and open the block settings from the right.
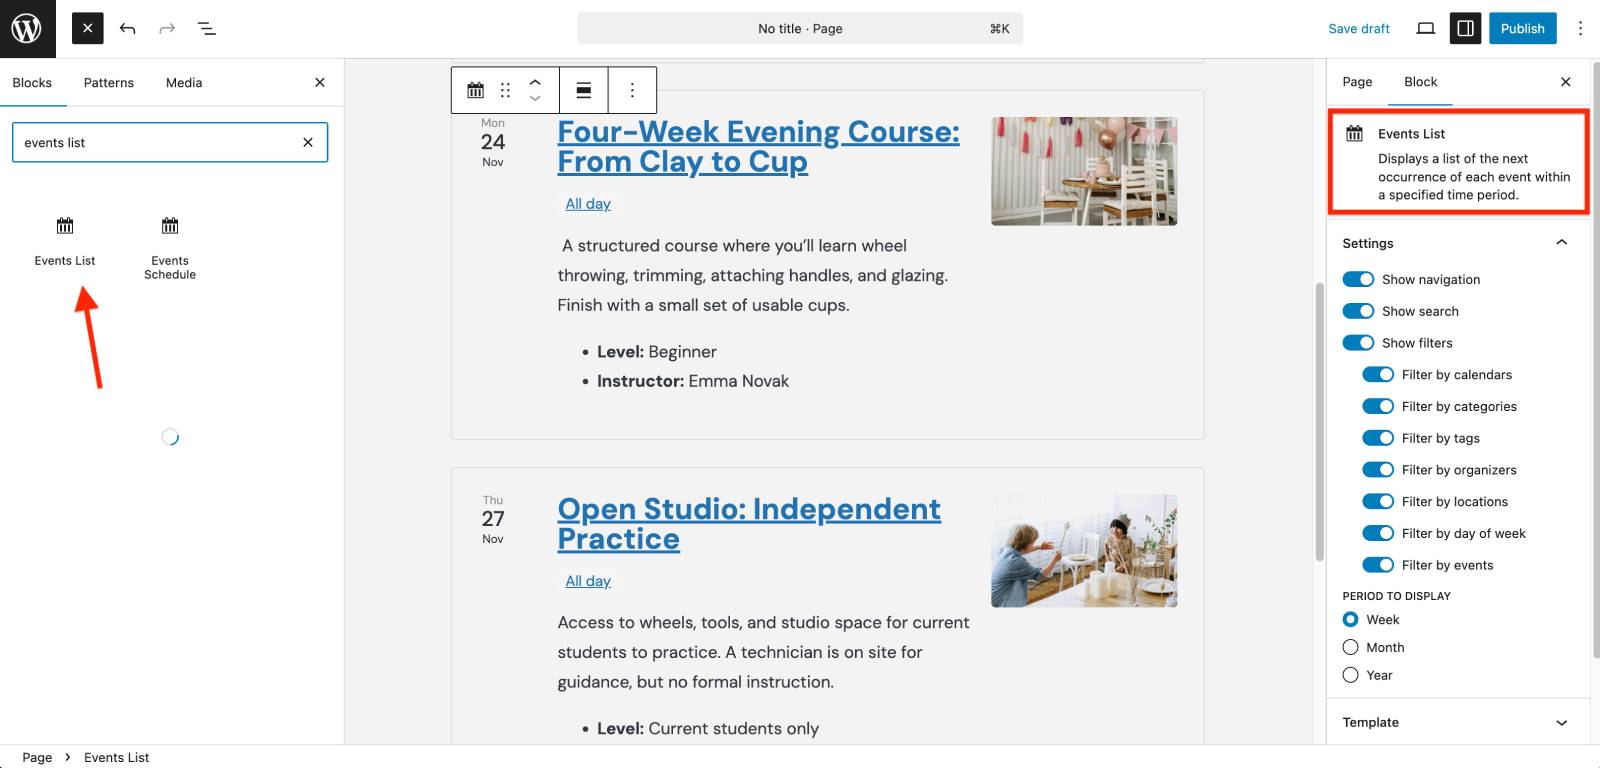
- Enable or disable interface elements: navigation, search bar (by event names), and filters selector.
- Choose to show events scheduled for: the next week, the next month, the next year.
- Use the Template section to control the layout of the event cards, including:


– Show or hide the event title/description/image/time.
– Adjust the description length.
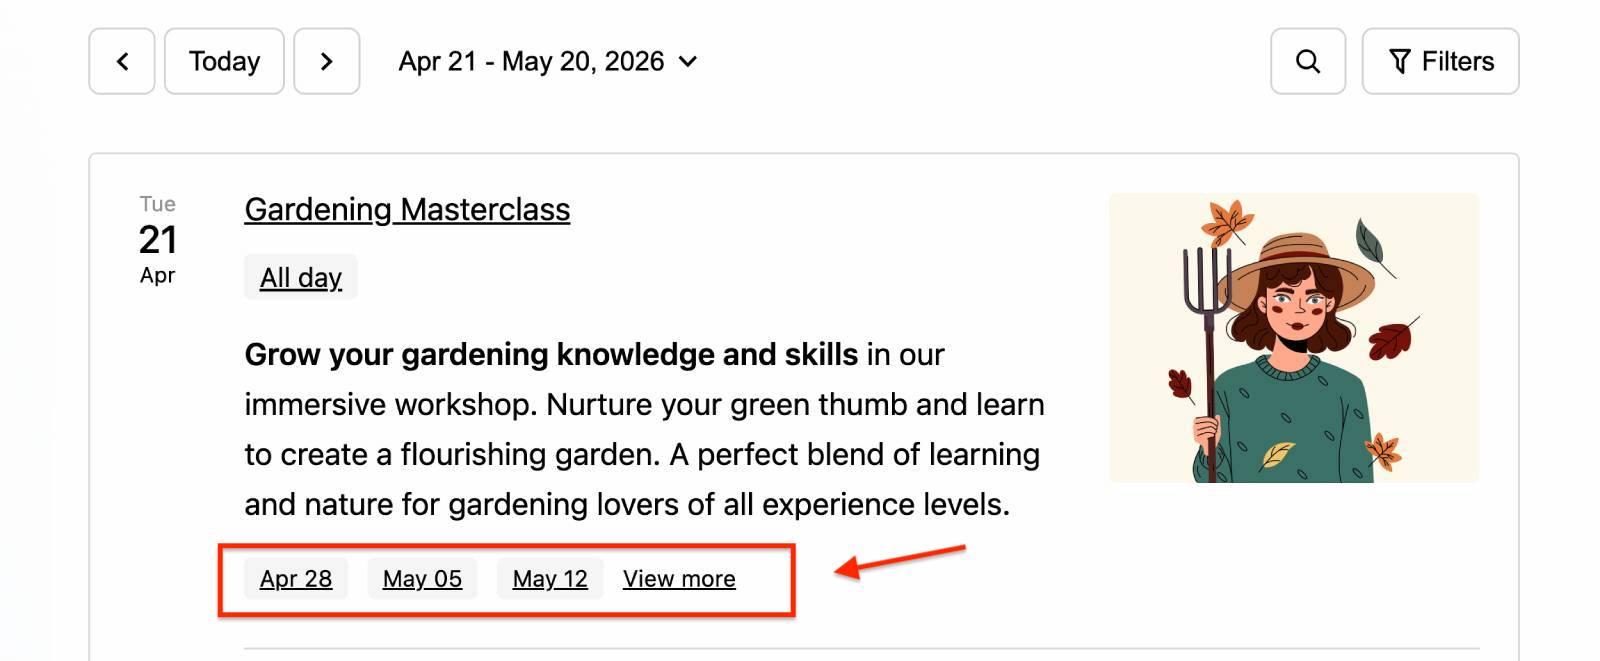
– For repeating events, optionally enable ‘Show upcoming dates’.If you enable “Show upcoming dates”, a recurring event will display its nearest upcoming dates (each date link has its unique event URL) –

- To control which events appear in the listing, use the Filters section in the block settings.
Add Events Summary (Simple List)
Use WordPress Block: Events Schedule
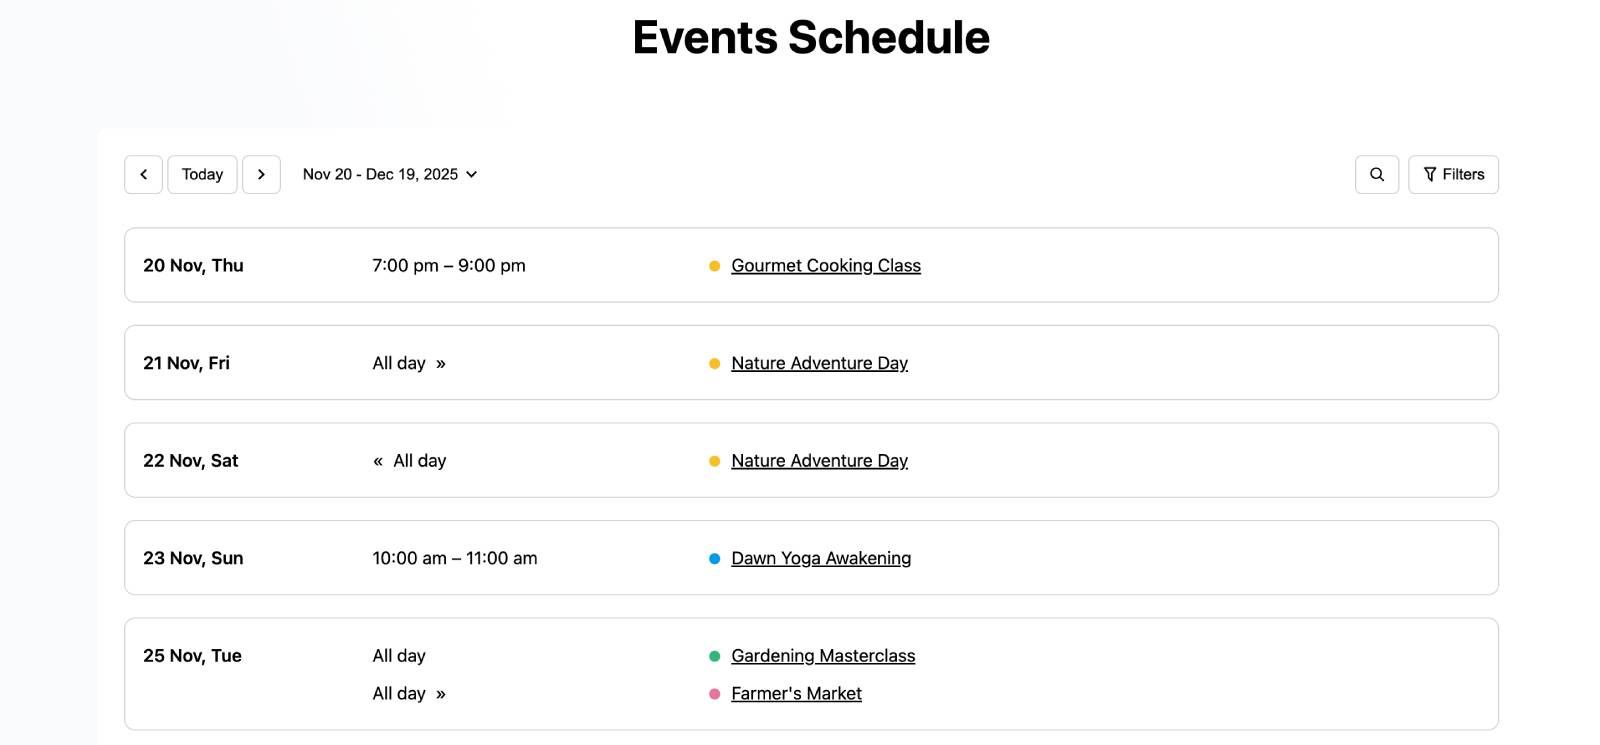
The Events Schedule block is designed to display a compact, time-focused schedule of events for a selected period. Using this block, you can:
– Show a clear, chronological list of events focused on event time.
– Display every single occurrence of each event within a chosen period.
– Help visitors quickly see what happens and when, without extra details.
1. Open the needed page or post.
Go to the page or post where you want to display the events schedule and open it in the WordPress block editor.
2. Insert the Events Schedule block.
Add the Events Schedule block to your page using the block inserter or by searching for “Events Schedule”.
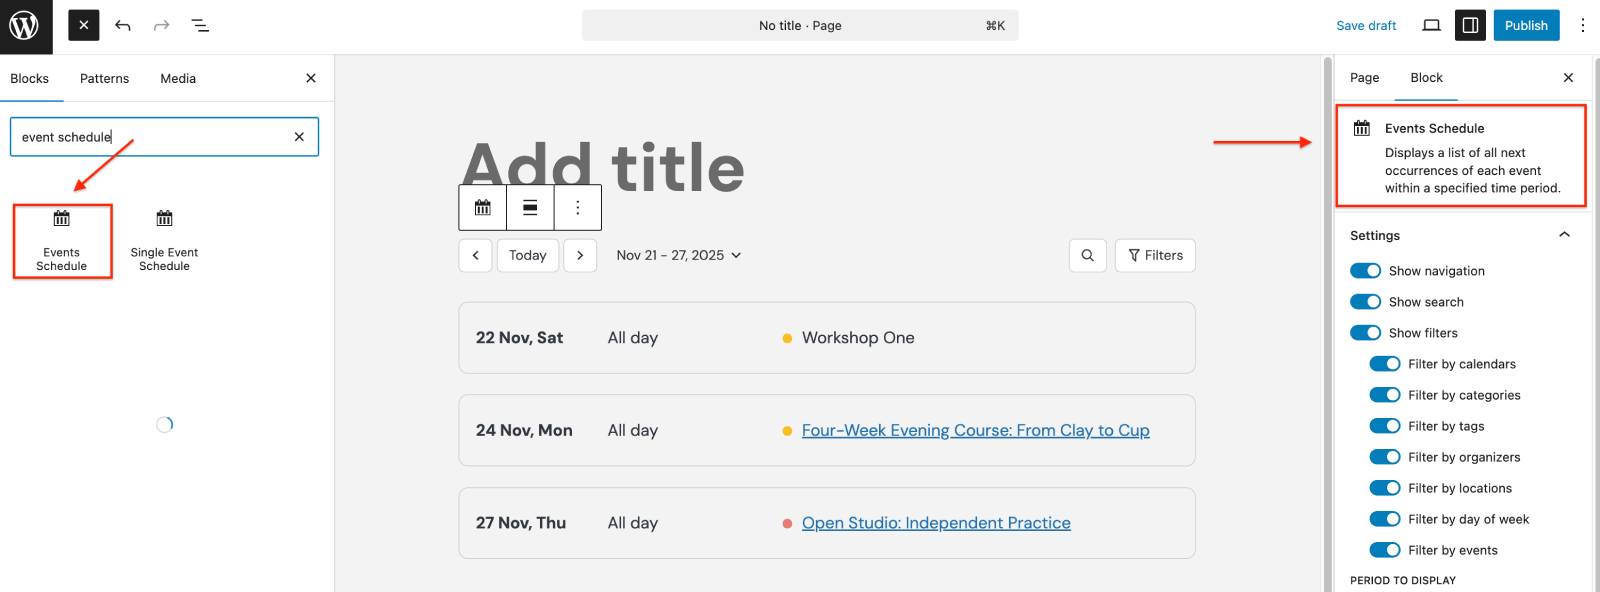
3. Configure the Events Schedule block settings.
Click on the Events Schedule block to open its settings panel on the right.
- Enable or disable interface elements: navigation, search bar (by event names), and filters selector.
- Choose to show events scheduled for: the next week, the next month, or the next year.
- To control which events appear in the schedule, use the Filters section in the block settings.
Note: The filters and search blocks are interconnected and work together with the calendars and list blocks, no matter where they are placed on the page (including widgets, headers and footers). For example, you can add the Events Calendar, Events Filters, and Events Search blocks as separate elements on a page. When a visitor applies filters using the Events Filters block or performs a search using the Events Search block, the results will automatically update the events displayed in the Events Calendar block. This approach provides flexibility to add or remove specific elements, or position them differently on the page, while still ensuring they remain fully connected.
Use a shortcode
There are a few ways to create the events calendar shortcode.
Use the shortcode builder
The MotoPress Events Calendar plugin is supplied with a handy shortcode builder, which allows you to configure your shortcode settings in the visual customizer. Here is how to use it:
1. Go to the Events menu in your WordPress dashboard.
2. Click the hamburger menu icon (☰) in the top right.
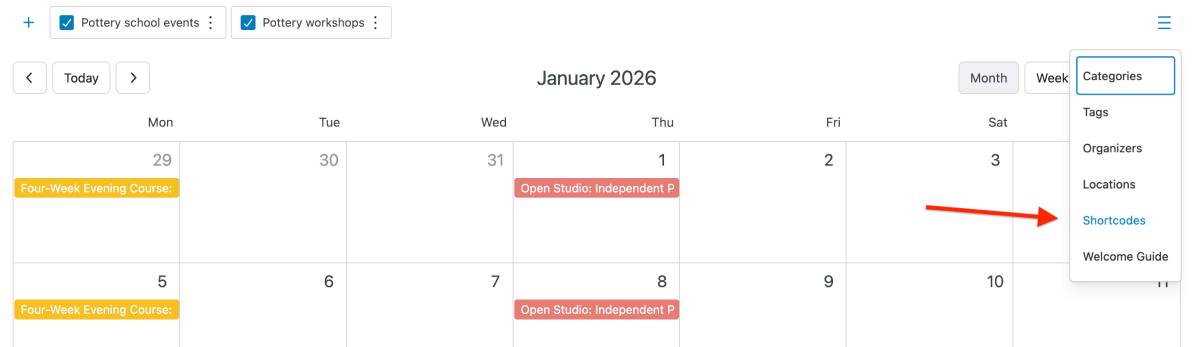
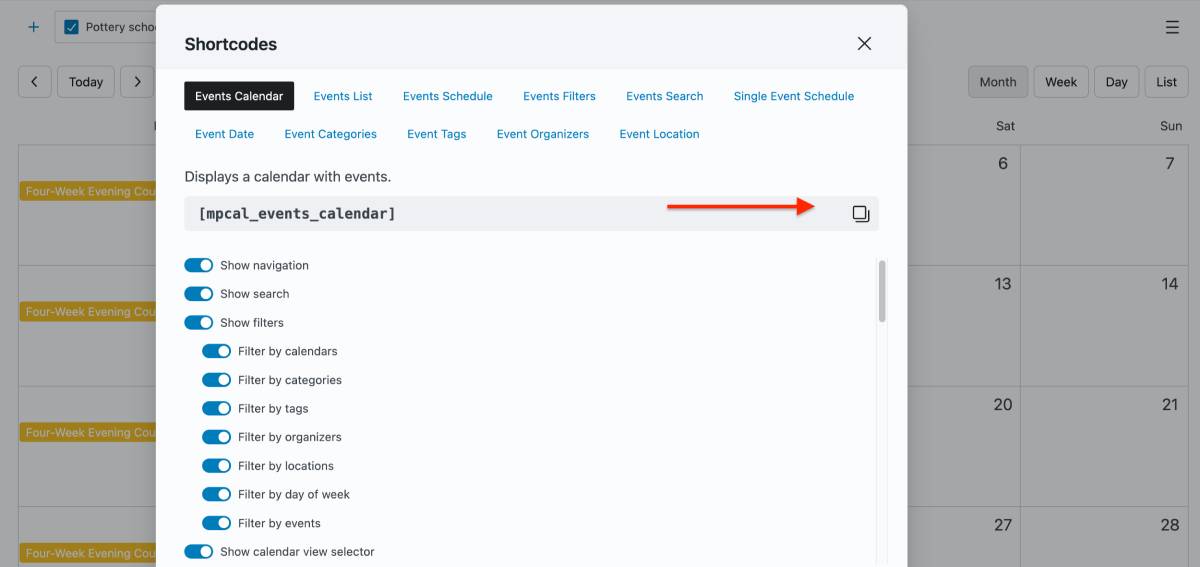
3. Select ‘Shortcodes’ from the dropdown. This will open the shortcode builder panel with an intuitive interface to customize your calendar display. Configure exactly how your calendar will appear on your site.
4. Once you’re happy with the settings, click the copy shortcode icon to grab your custom shortcode.
5. Go to the needed page to insert the shortcode:
– If you’re using the Classic Editor: Simply paste the shortcode into the content area where you want the calendar to appear.
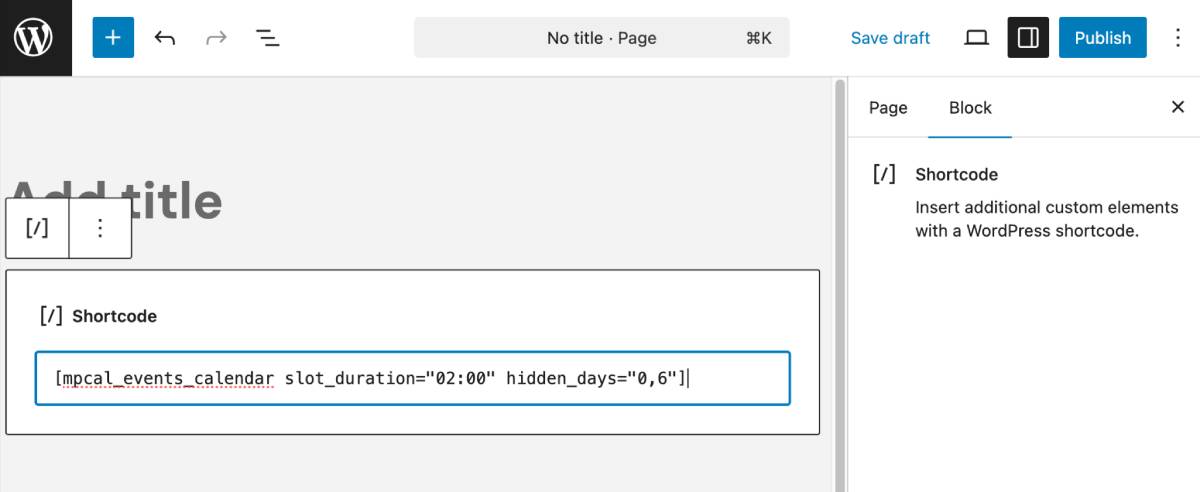
– If you’re using the Block Editor (Gutenberg)/other page builder: Add a Shortcode block/module to your page, then paste your copied shortcode into that block.
6. Preview your page before publishing to ensure the events calendar displays as expected.
Paste a shortcode manually
We recommend using the Shortcode builder as described above for the ease of use and customized events calendar plugin shortcodes, but below is also a list of shortcodes with default settings that you can simply copy and paste to your WordPress.
- [mpcal_events_calendar] – Displays a calendar of events with filters.
- [mpcal_events] – Shows a listing of the next occurrence of each event (1 week by default).
- [mpcal_events_schedule] – Outputs a simple list of all next occurrences of each event (1 week by default).
- [mpcal_events_filters] – Outputs a list of filters, normally used with event calendars or lists on the same page so that applied filters work for showing events.
- [mpcal_events_search] – Outputs search and location bars, normally used with event calendars or lists on the same page so that applied actions work for showing events.
- [mpcal_event_schedule] – Shows the schedule of a single event for the next 14 days (must be used on the event page or with an event ID).
- [mpcal_event_date] – Shows the date of a single event (must be used on the event page or with an event ID).
- [mpcal_event_categories] – Shows the categories of a single event (must be used on the event page or with an event ID).
- [mpcal_event_tags] – Shows the tags of a single event (must be used on the event page or with an event ID).
- [mpcal_event_organizers] – Shows the organizer of a single event (must be used on the event page or with an event ID).
- [mpcal_event_location] – Shows the location of a single event (must be used on the event page or with an event ID).
Note: If the calendar is published, all events you add to it via the Events menu instantly become public.