Table of Contents
MotoPress Booking Calendar accepts online payments.
To set up the needed methods, go to Calendars > Settings > Payments tab.
The Payments menu is further divided into General settings and tabs for various payment methods.
Stripe
What you need before connecting:
– A Stripe account.
– MotoPress Booking Calendar plugin updated to version 1.2.0 or higher.
– Connection tokens from your Stripe account.
Step 1: Configure Booking Calendar Settings
In your WordPress dashboard, go to:
- Booking Calendar > Settings > General tab.
- Under Confirmation mode, select “Confirmation upon payment”.
- Choose your booking currency.
- Click Save Settings.
Step 2: Enable Stripe
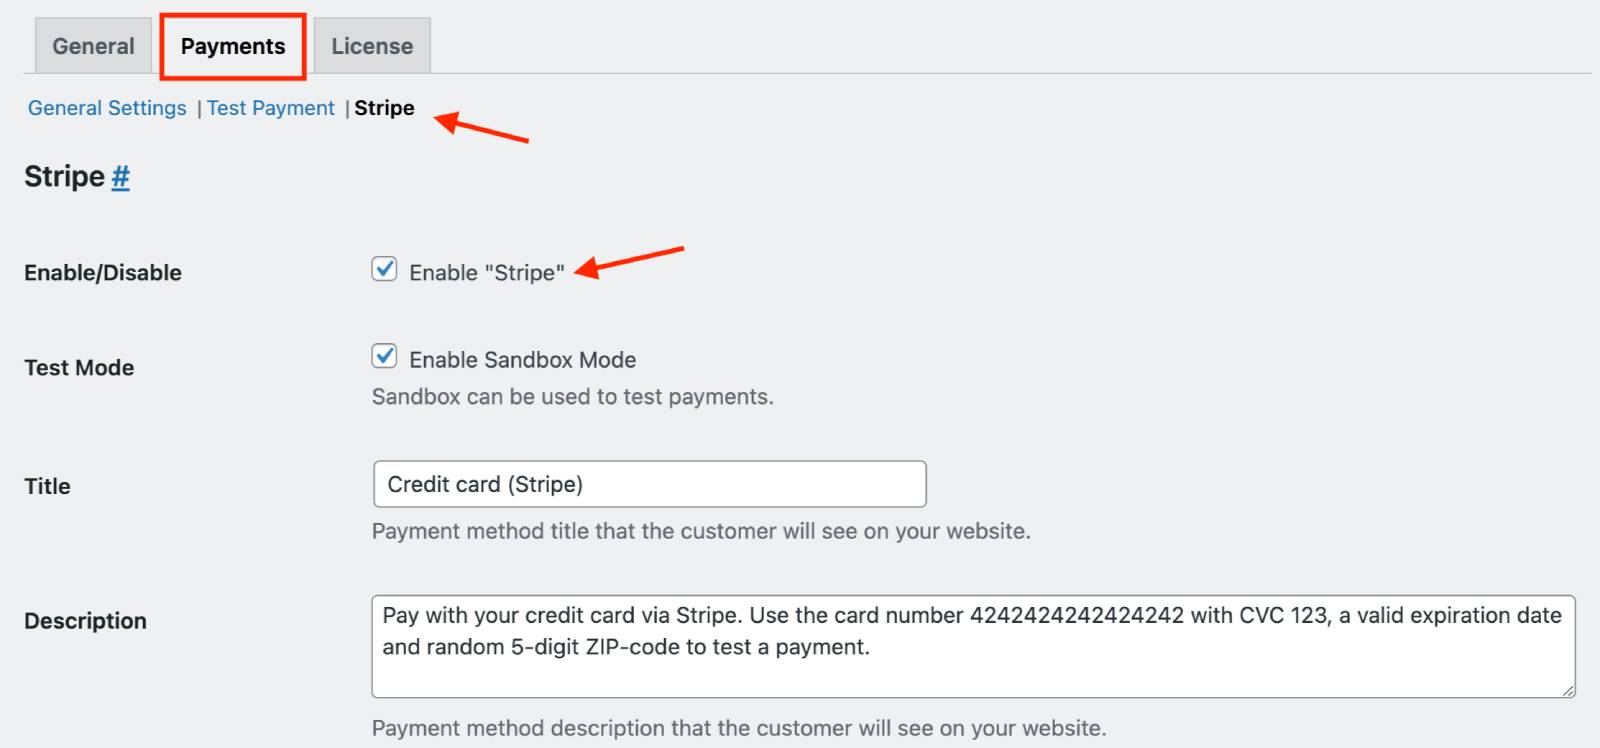
- Navigate to Payments > Stripe.
- Check Enable Stripe.
- (Optional) Add a title, description, and preferred language (Locale) to display to customers.
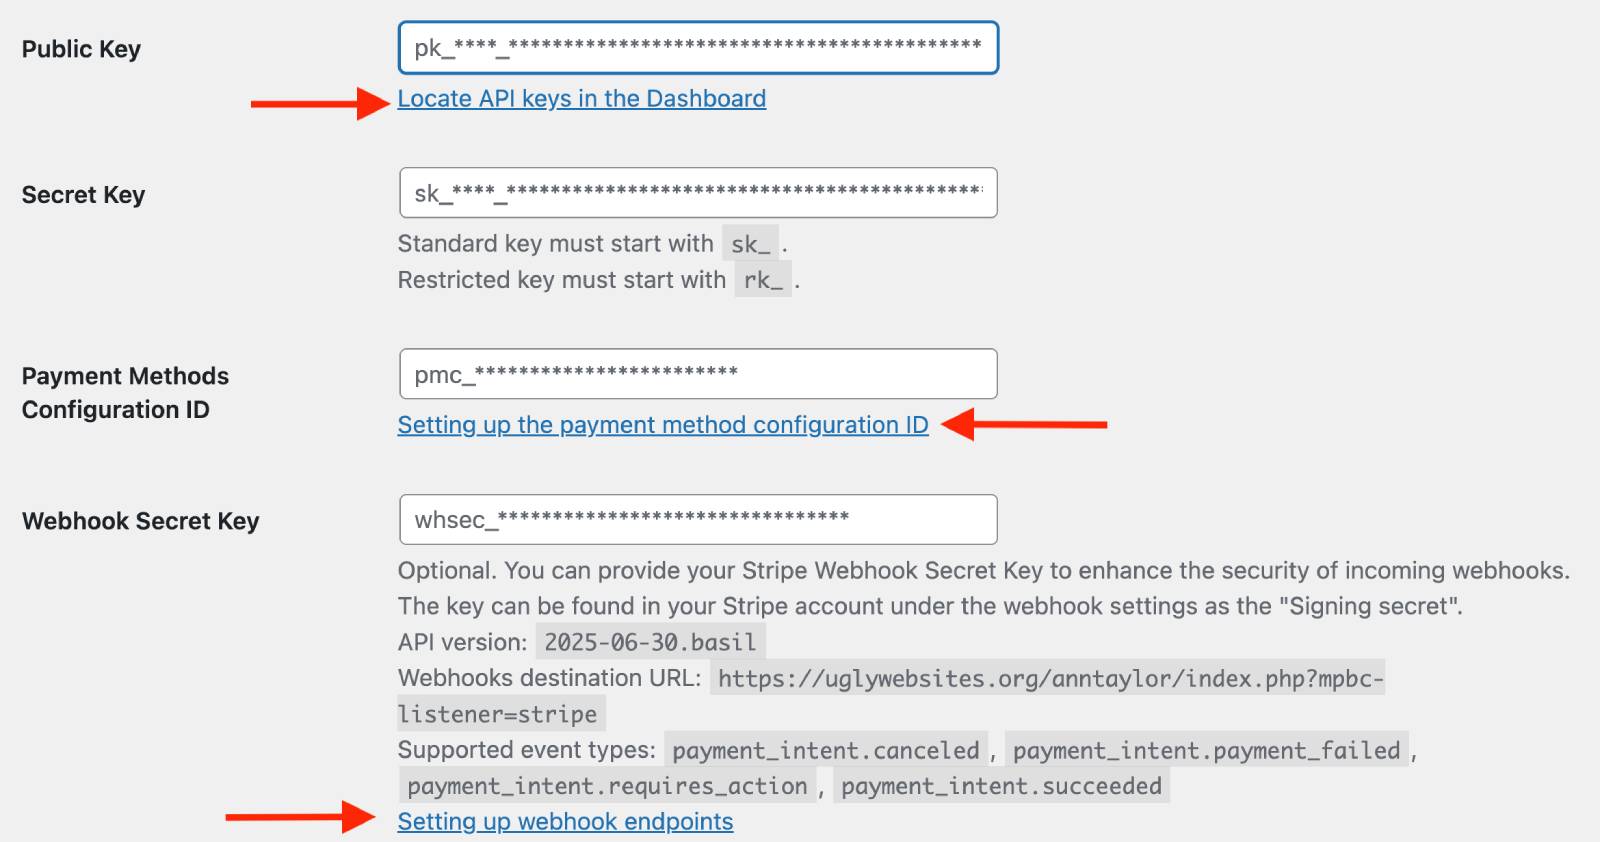
- Add the following keys from your Stripe account:
- Click Save Settings.
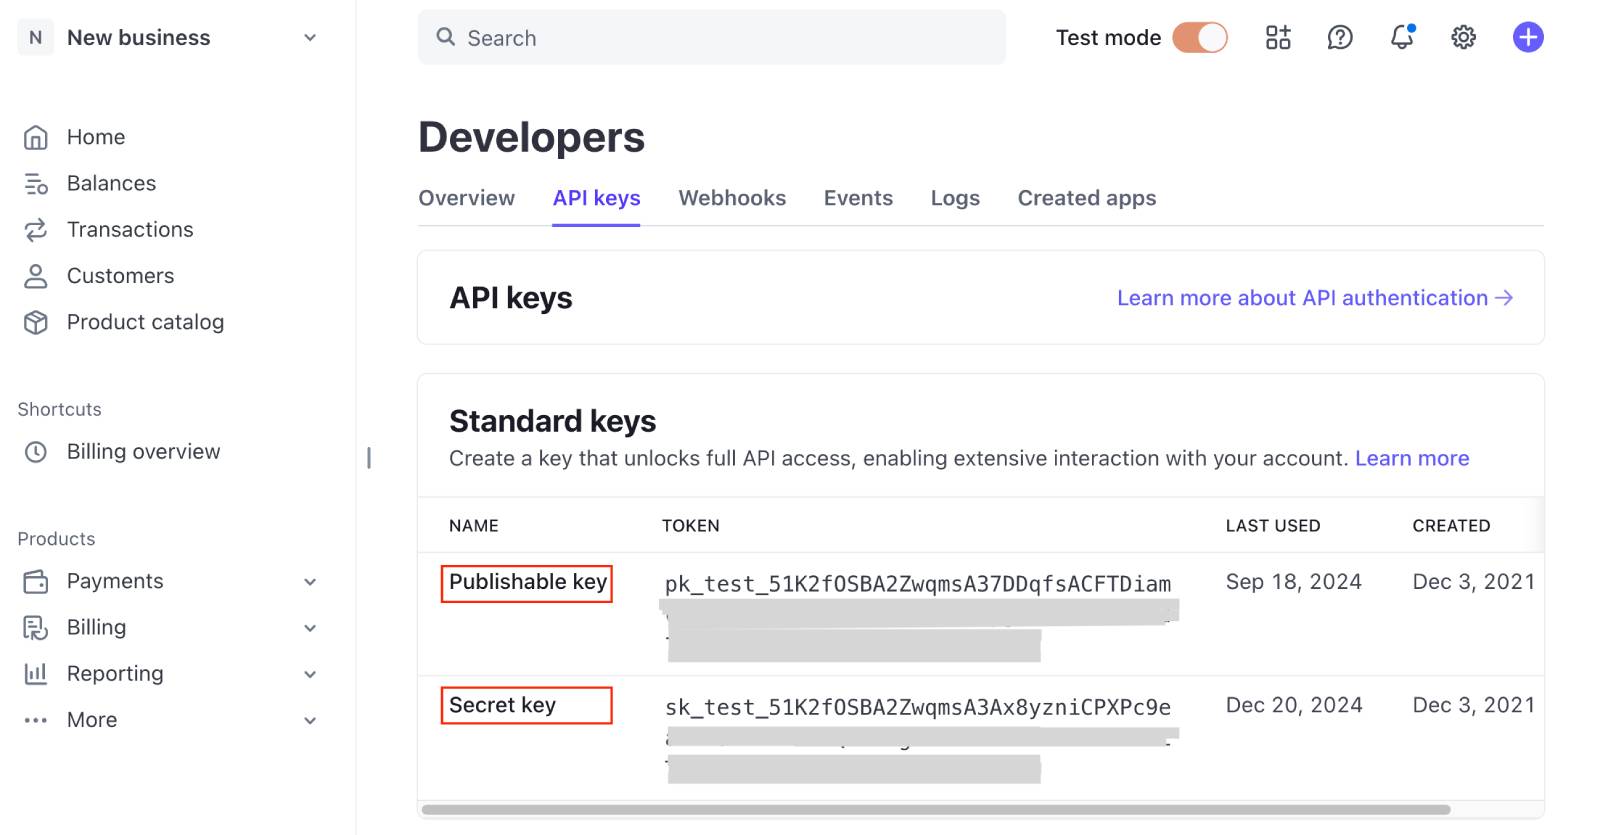
– Public Key
– Secret Key
– Payment Methods Configuration ID

– (Optional) Webhook Secret Key – recommended for added security and specific methods like SEPA Direct Debit.
You’ll find direct links to these keys in your Stripe through the plugin’s Stripe settings menu. For a step-by-step guide, watch a video.
Step 3: Set Stripe as the Default Payment Method
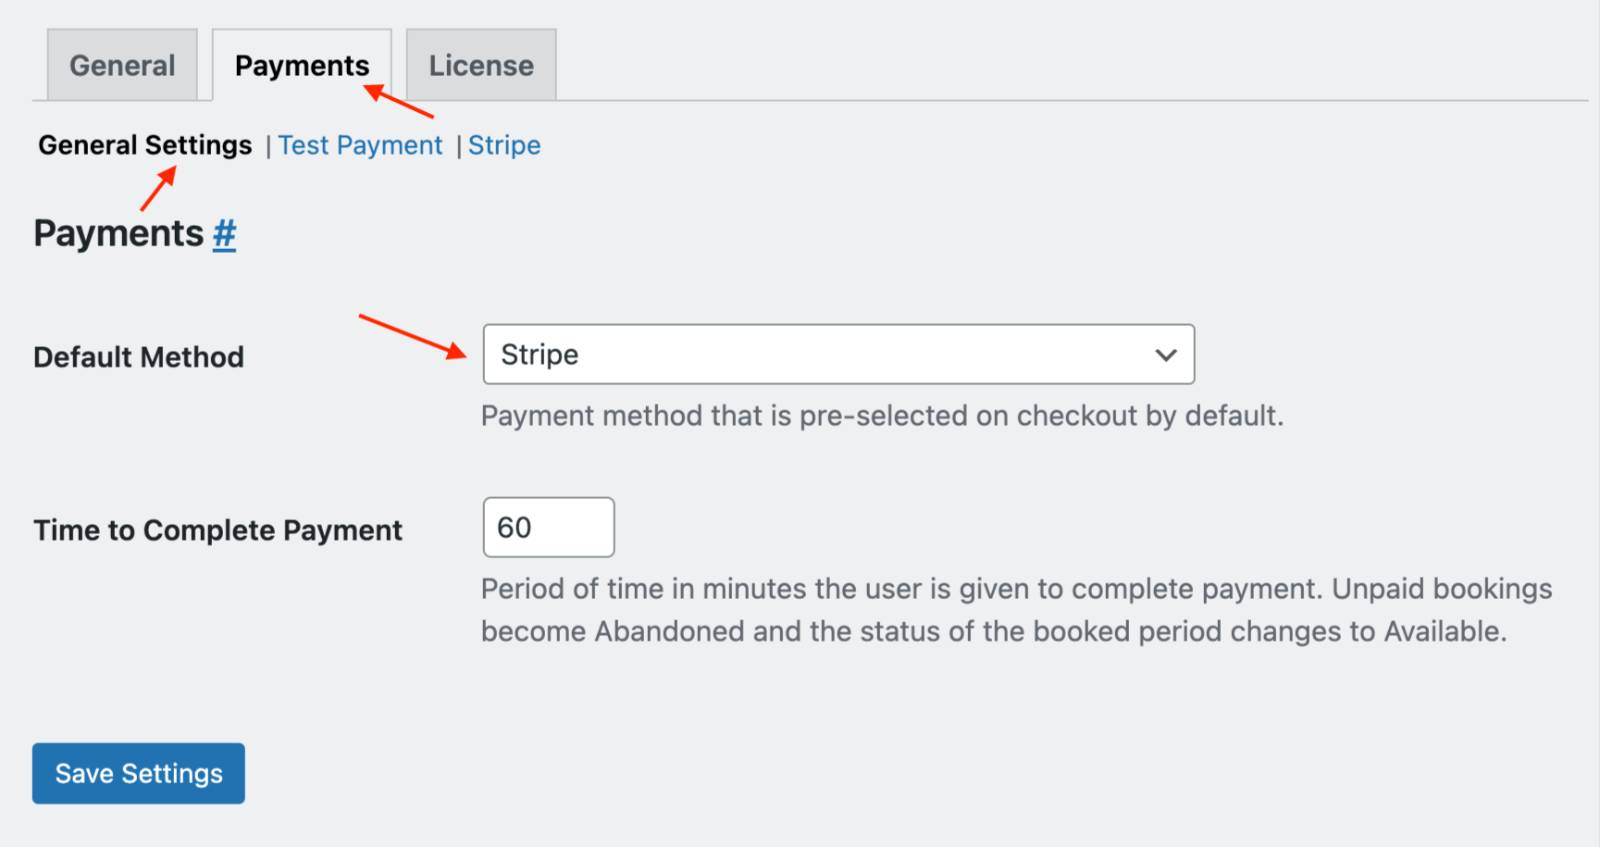
- Go to: Payments > General Settings.
- Under Default Payment Method, choose Stripe.
- Set the payment timeout (the time customers have to complete payment). If payment isn’t completed in time, the booking will be marked as Abandoned.
- Click Save Settings.
Ensure your plugin currency matches the supported currencies in your Stripe account.
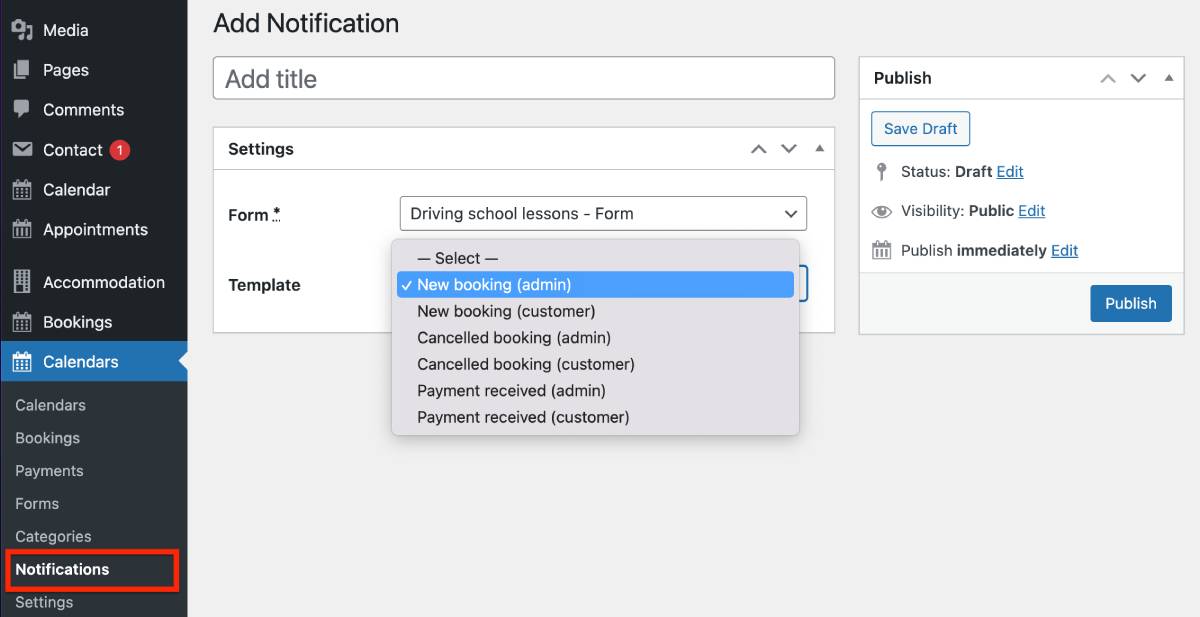
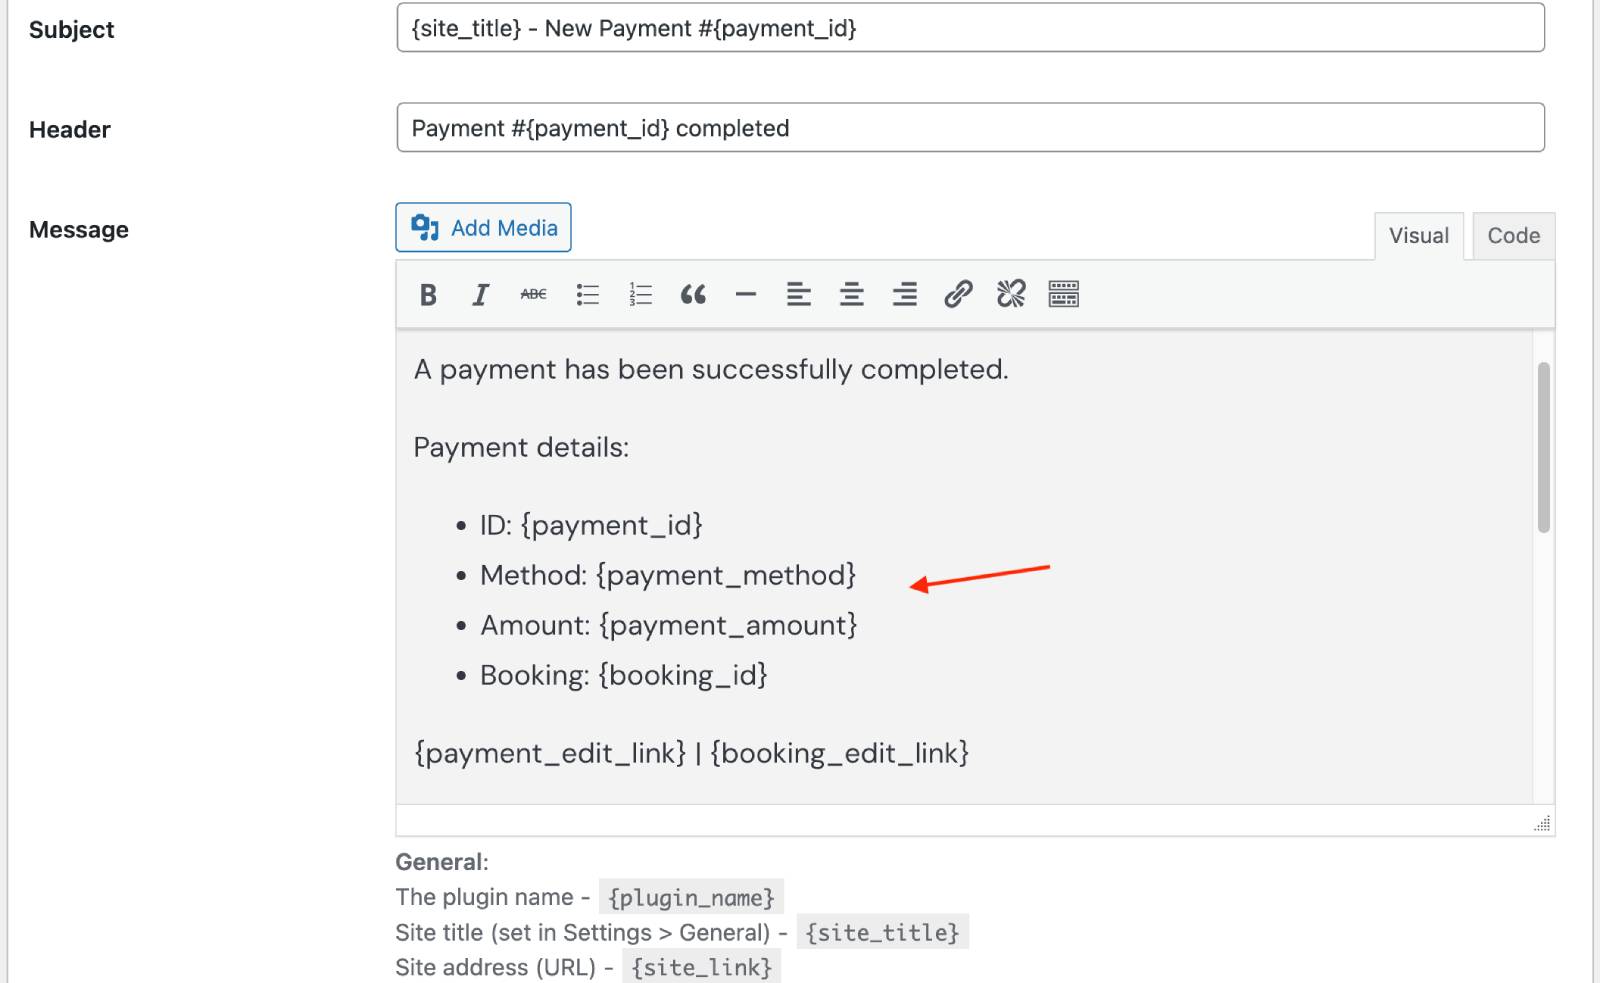
Step 4: Customize Payment Email Notifications
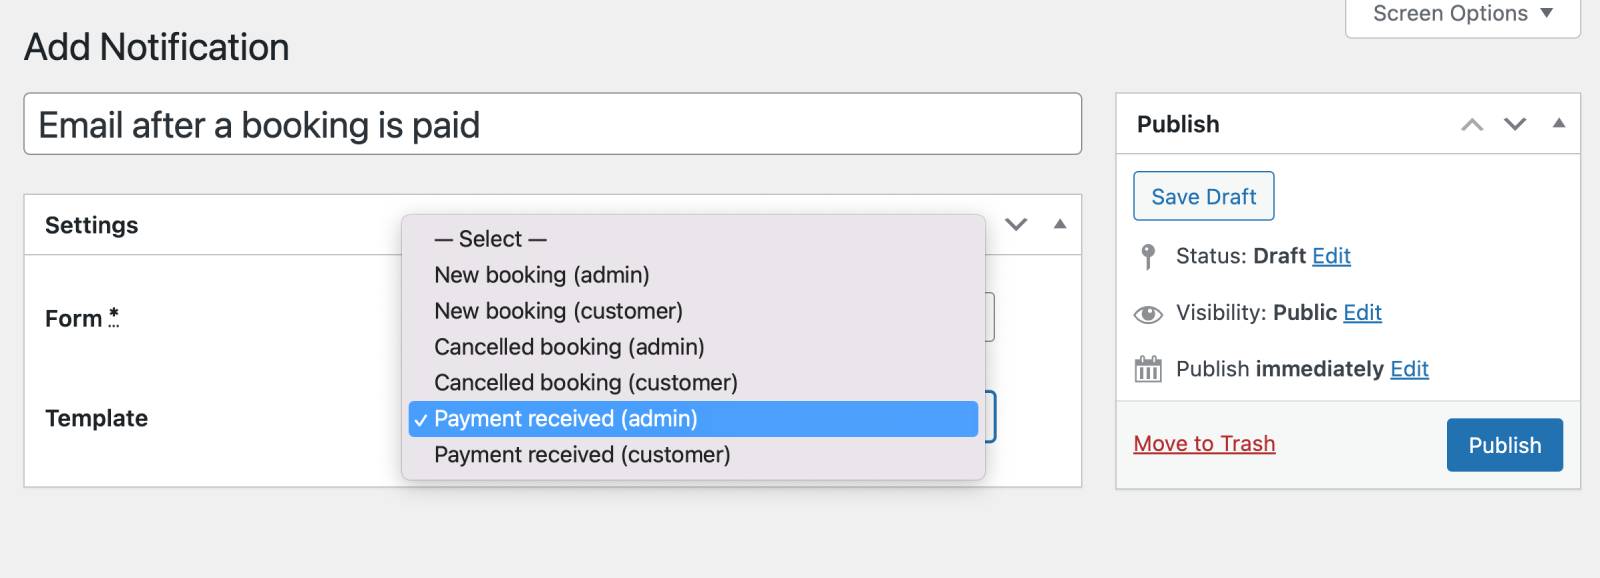
For bookings with payment (sent after successful payment), you can enable these emails:
– Payment received (admin)
– Payment received (customer)
Create and customize them under Notifications > Select template > Publish. Use various tags, including payment-related like ‘Total paid’ and ‘Left to pay’.
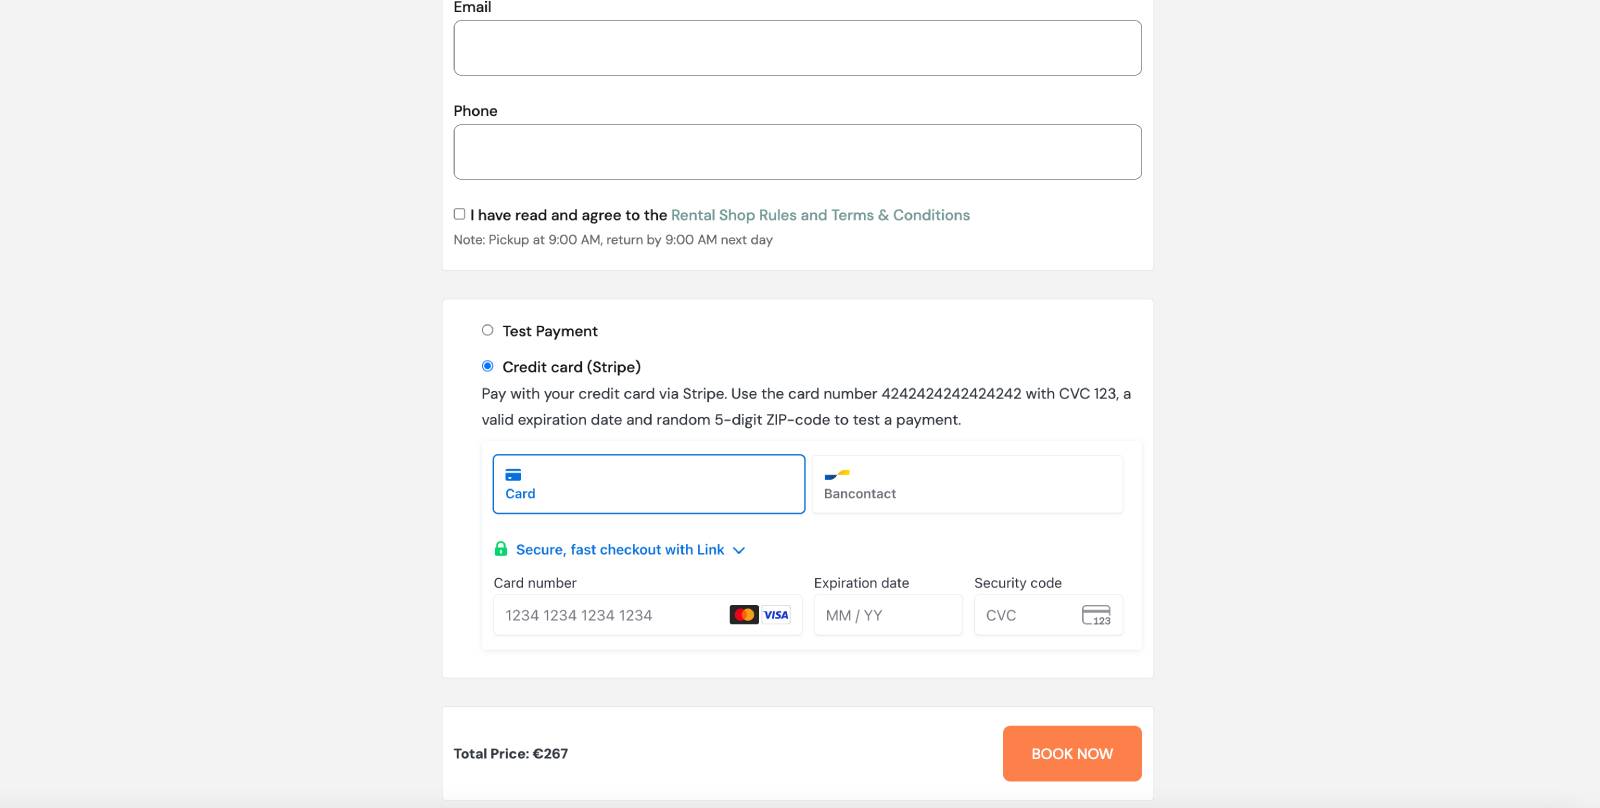
Step 5: Test Stripe on Your WordPress
You can test payments before going live:
- In Stripe settings, enable Test Mode.
- Ensure all tokens are added.
- With Confirmation upon payment enabled, make a test booking.
- View all test/live transactions under Payments > Logs.

The checkout process will display payment gateways based on:
– Your payment methods enabled in Stripe.
– Supported currencies.
– Customer’s browser and location.
Pay on-site
With the Pay on-site option enabled, customers can reserve their booking online and complete payment upon arrival.
To activate this payment method:
- Go to Calendars → Settings → General Settings → Booking confirmation mode → set to “Confirm upon payment” → Save changes.
- Go to Calendars → Settings → Payments → Pay on-site.
- Click Enable.
- Select Save changes.
You can optionally customize the payment method with:
– custom title
– description
– additional payment instructions
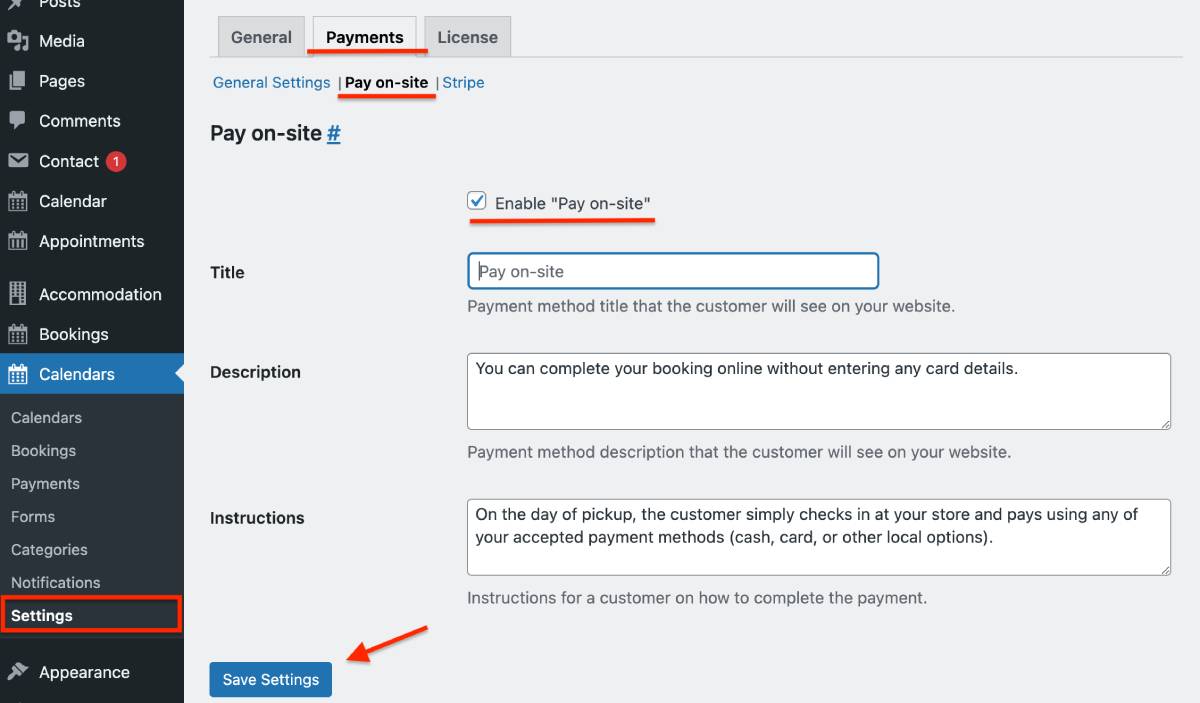
These details will be displayed to customers on the checkout page.
The Pay on-site method can be enabled alongside other payment gateways, such as Stripe, allowing customers to choose their preferred option during checkout.
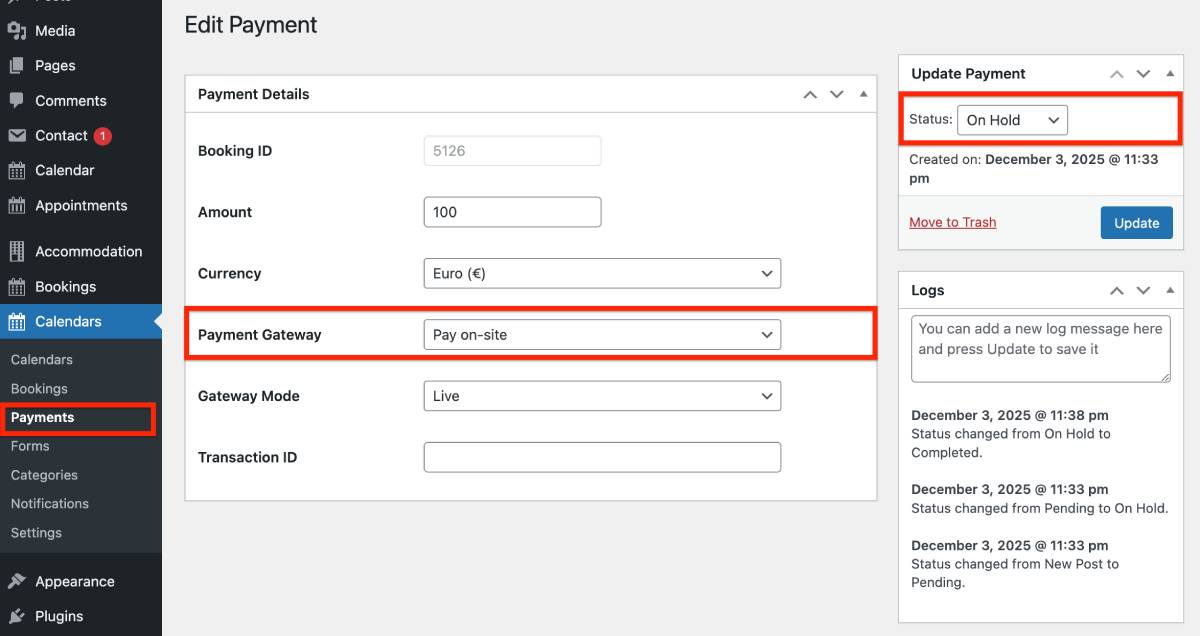
All payment records are available in the Payments menu. Bookings submitted using the Pay on-site method will appear with the status “On hold” until you manually update their status after receiving payment from the customer on-site.
Make sure to create ‘New booking’ notifications if you want to send automated emails to customers and admins once such bookings are placed: go to Calendars → Notifications → Select form → Select template → Publish.