Table of Contents
Configure the MotoPress Appointment Booking plugin
The Lorenty theme is powered by the MotoPress Appointment Booking plugin.
It will help you accept rental payments and allow customers to book rentals via the booking widget, as well as help you showcasing your team or rental units on the website using the plugin’s data.
Here is a step-by-step guide on how to configure the plugin: scheduling plugin documentation.
- Go to Appointments > Settings menu > General to set a booking confirmation mode, currency, default time slot for bookings, enable multi booking, coupon codes, choose system pages, etc.
- Add Employees via the Employees menu.
- Add locations via the Locations menu (e.g. cities, areas, online or physical places, etc.).
- Add working hours and breaks via the Schedules menu (e.g. schedule, lunchtimes, days off, etc.).
- Add and customize rental services or equipment you offer (bikes, tools, scooters, boats) via the Services menu.
- Categorize services by Tags and Categories via the respective menus (you can show categories in the booking widget).
- Set up automated email notifications for the admin and client via Appointments > Settings menu > Emails.
- If you want to accept online payments or set another payment method (e.g. pay on site or wire transfer), go to Appointments > Settings > Payments and click Manage next to the needed payment gateways.
- Add a booking widget to your site: you can do this with a dedicated Gutenberg block in the WordPress block editor (the Appointment form block) or using shortcodes.
Adding Rental Units
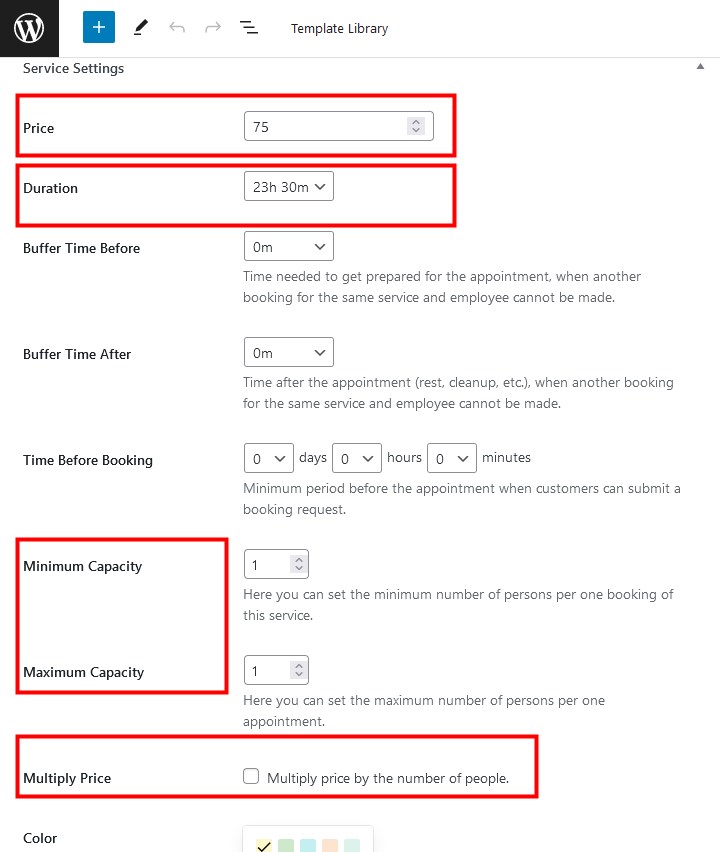
To add equipment rental units to the plugin, use the ‘Services’ menu. Each rental must have a ‘duration’ set as well, indicating the minimum rental period for that specific service/rental unit. The price is set for the rental period and can be optionally multiplied by the number of people renting it (for this to work, the capacity field must be filled out). If you have multiple rental units of the same type, you need to add them as separate services.
Scheduling
The ‘Schedule’ menu enables the configuration of time periods in a day, with available slots for bookings in your store and can vary from day to day. This time frame can be any up to 24 hours per day and it needs to be assigned to a designated employee. The ‘Employee’ field in the booking form can be hidden completely. This allows clients to select a rental item and, optionally, a location directly on your website, simplifying the booking process.
Multi-Day Rentals
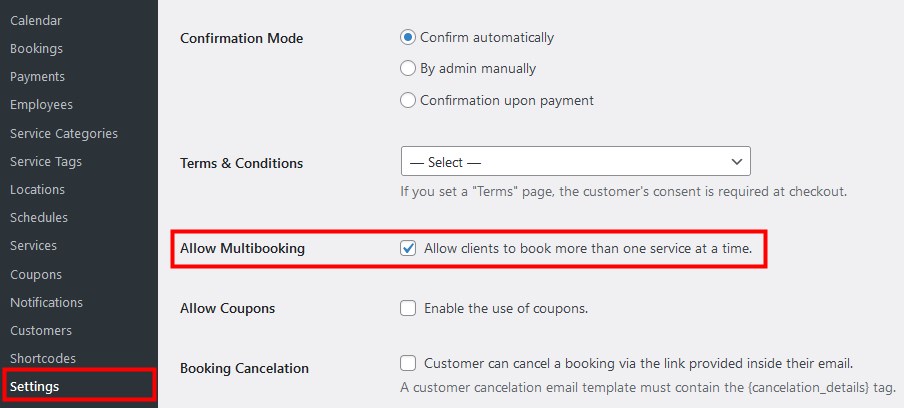
For services/units available for rent over multiple days, a schedule can be set from midnight to midnight per day. Additionally, you must also enable the ‘Allow clients to book more than one service at a time’ in the Settings menu, which permits clients to add multiple days or slots to their cart.
This flexibility is applicable to other rental periods (e.g. 1 hour). Clients can add multiple instances of the minimum period to their cart and book them in a single transaction. In the example below, a client books a rental unit for 3 days.
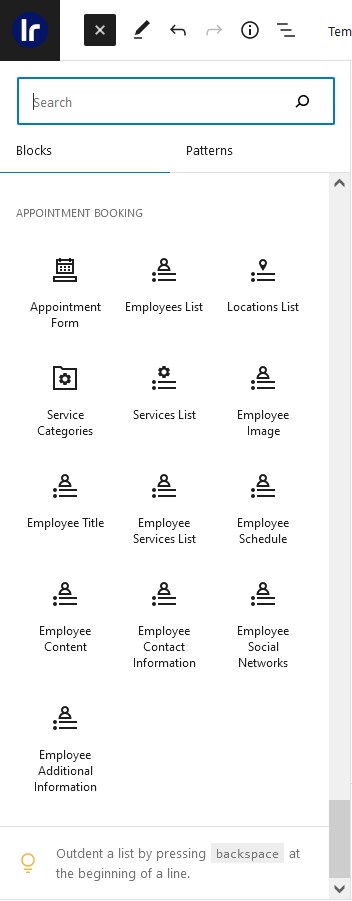
Your rental units, team, locations and other details can be presented via Appointment Booking plugin blocks for Gutenberg you can find in the block editor.
There are 13 blocks you can simply drag and drop to any needed page and customize using the block settings in the right sidebar. These blocks use data you add via the Appointment Booking plugin menus.
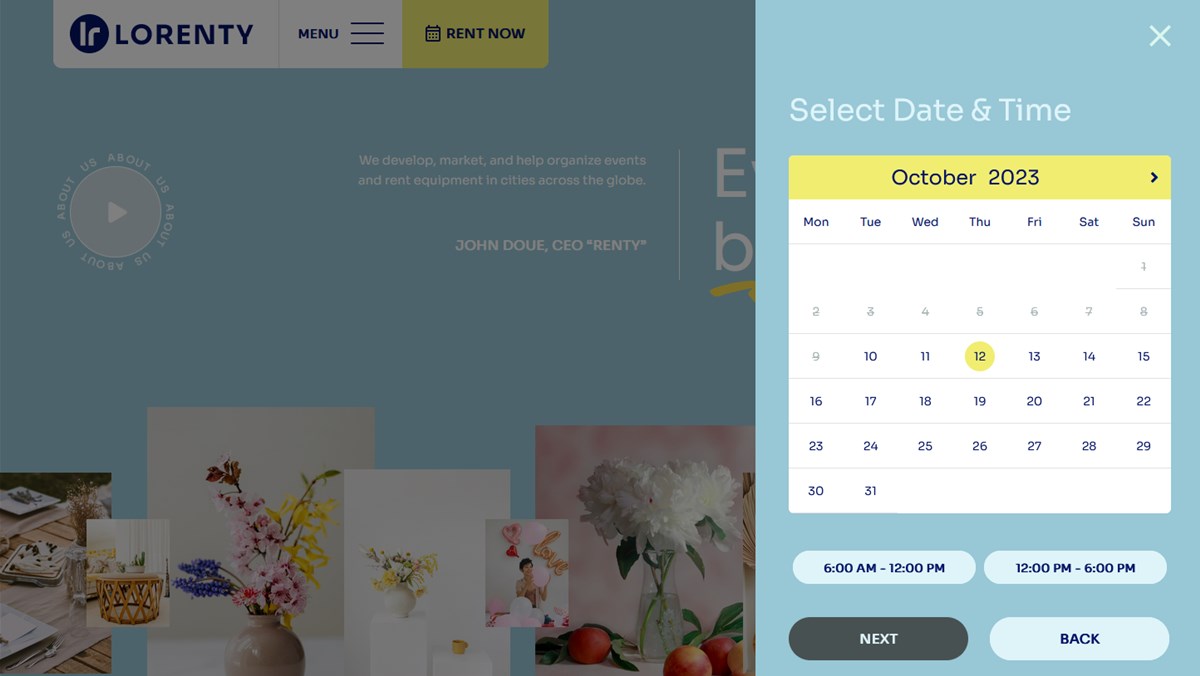
Add a booking form
In the Lorenty theme, by default, the booking form is displayed in the theme widget area. It’s opened when clicked on the Rent Now button in the header area.
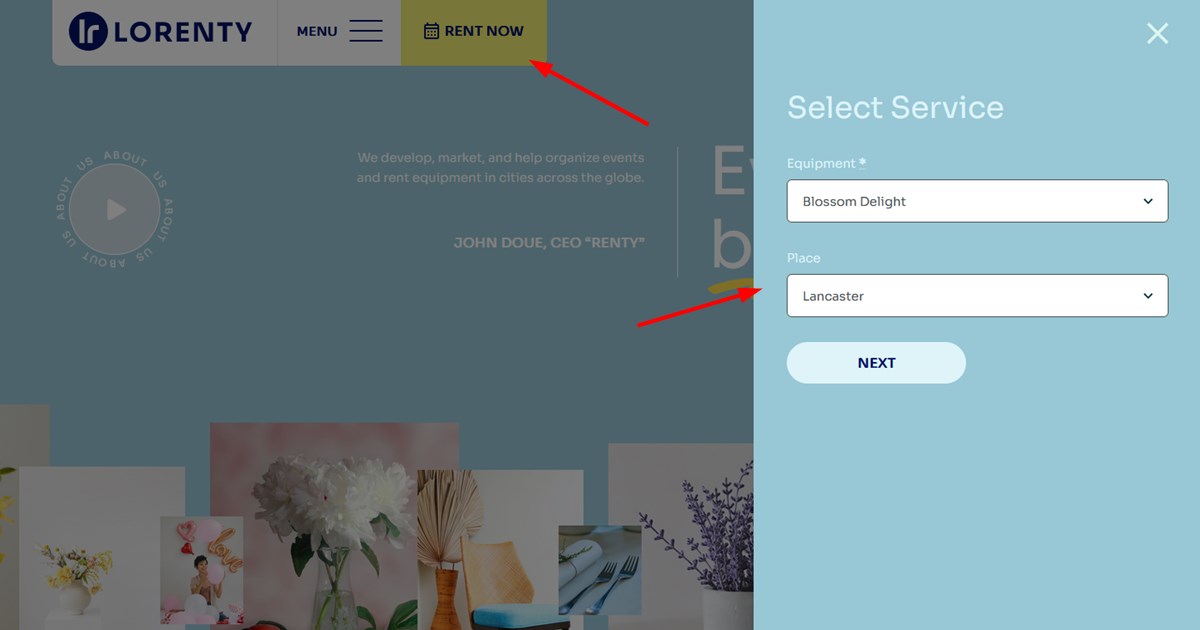
You can edit the field labels and their appearance in the appointment booking widget in the theme header menu via: WP Dashboard > Appearance > Widgets > Sidebar widget > click on it to customize.
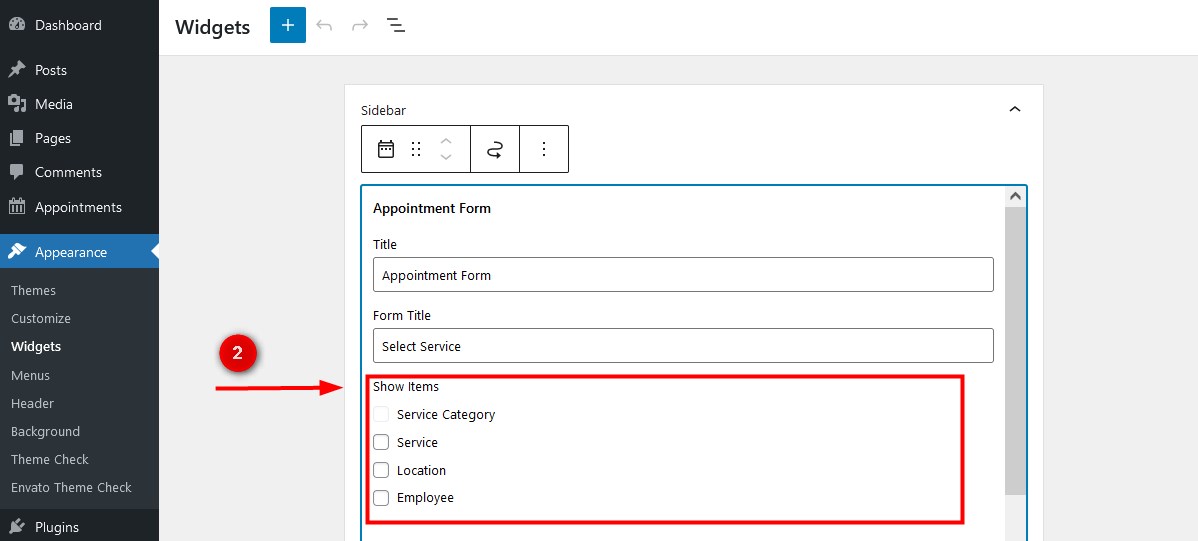
How to customize the booking widget in the Lorenty theme:

- Show or hide default fields in the widget by clicking show/hide toggles in ‘Show items’.
- Rename default field labels > > simply edit texts in ‘Labels’.
- Display pick-up or pick-and & return times (‘show end time’).
If you want to create a booking form for an individual rental unit:
1) firstly pre-select the values (service, location, etc.).
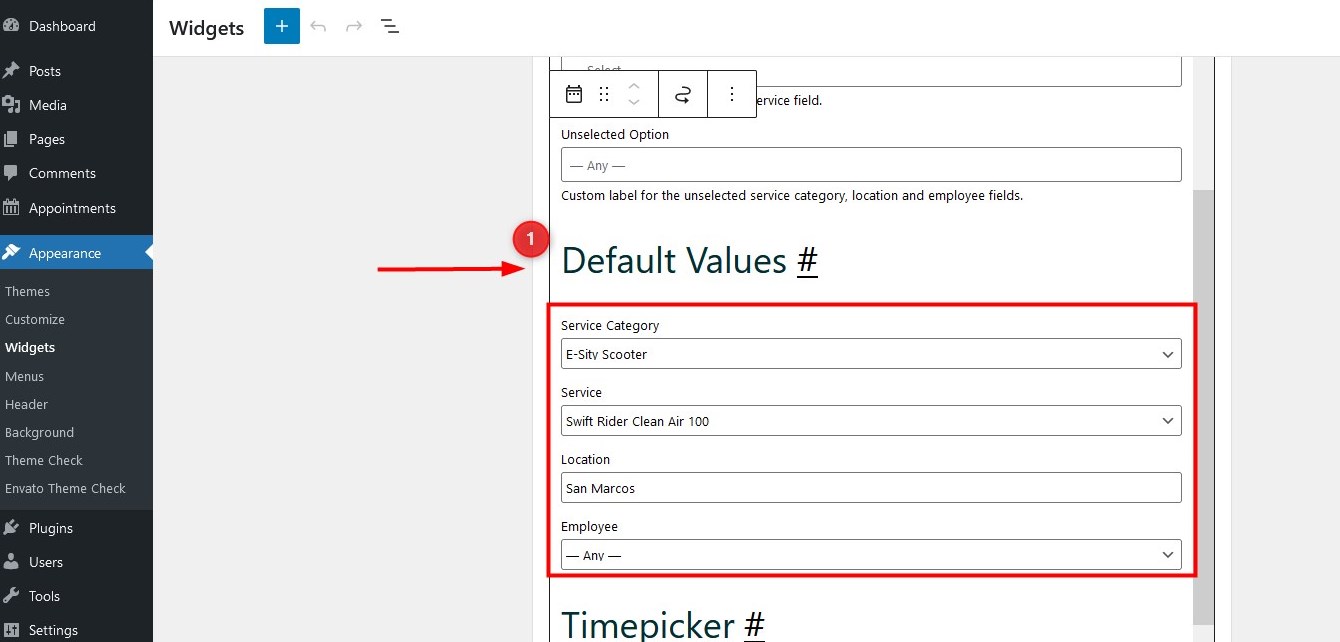
2) then hide all the fields in the booking widget (unselect them).
In this case, the form will be shown with the availability calendar right away, without the form fields.
To change text on the Rent now button, go to Appearance > Customize > Theme options > Appointment.
To change location of the Rent now button, go to Appearance > Customize > Theme options > Sidebar button position.
Learn how to add a booking form widget to any website page.
Create a directory of rental units
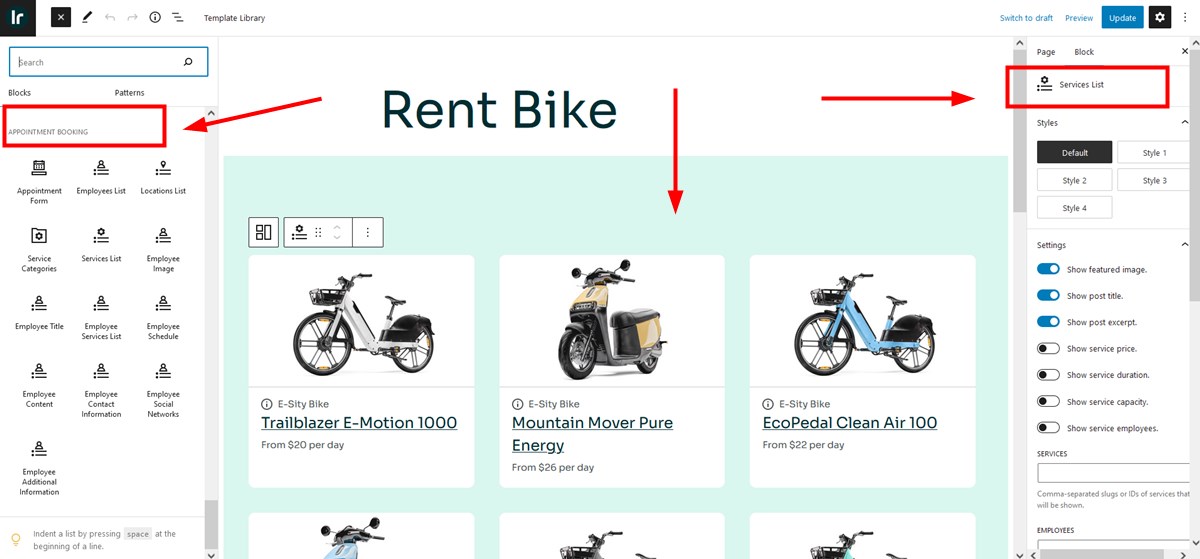
To showcase a directory of rental units you added via the Appointment Booking plugin, you can use a dedicated Services list block. It fetches data from the ‘Services’ you add via the plugin, including a rental unit price, image, and more. Click toggles in the block settings to choose what information must be displayed in the directory.
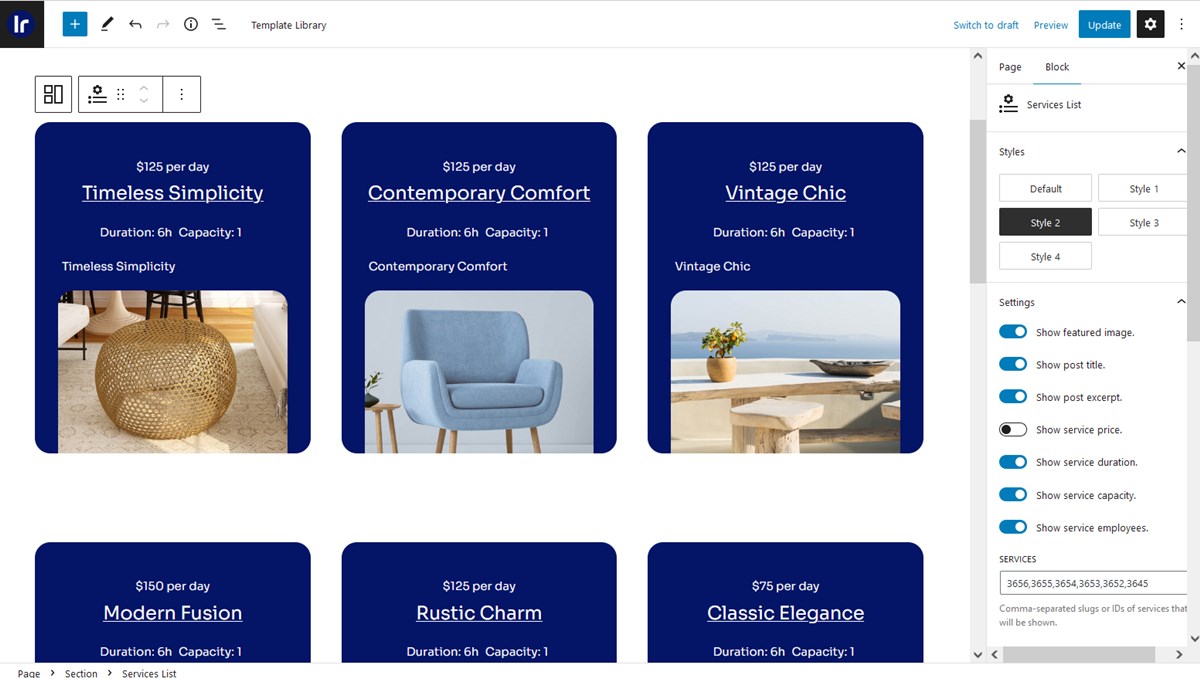
There are many more settings that would help you customize the appearance of the directory, for example:
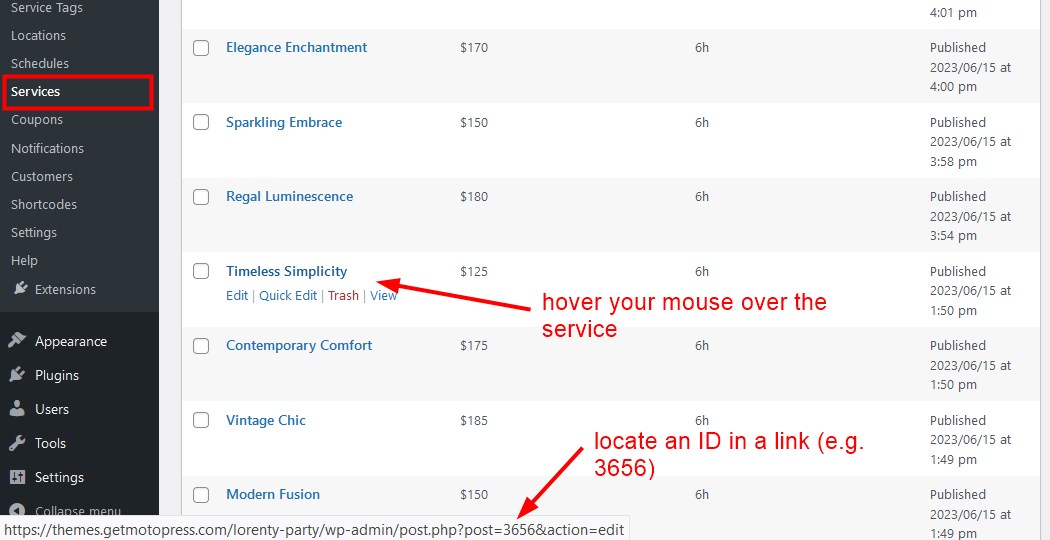
– You can also display only specific services or employees by IDs:
– You can choose a visual design for the directory in the Styles section.
– Choose how many rental items per page to show, etc.
How to make any button or link open your sidebar
To open a sidebar by the button or link on your website, you need to add the CSS class main-sidebar-toggle to any link, button, or menu item of your website.