Table of Contents
Quick start guide
- Install and activate the Bro Barbershop WordPress theme.
- Install and activate the plugins that the theme offers to install. You may optionally disable unneeded plugins later.
- Optional: Import sample data to get design like in the demo.
- Configure the settings for the Appointment Booking plugin.
- Set up and customize the front page.
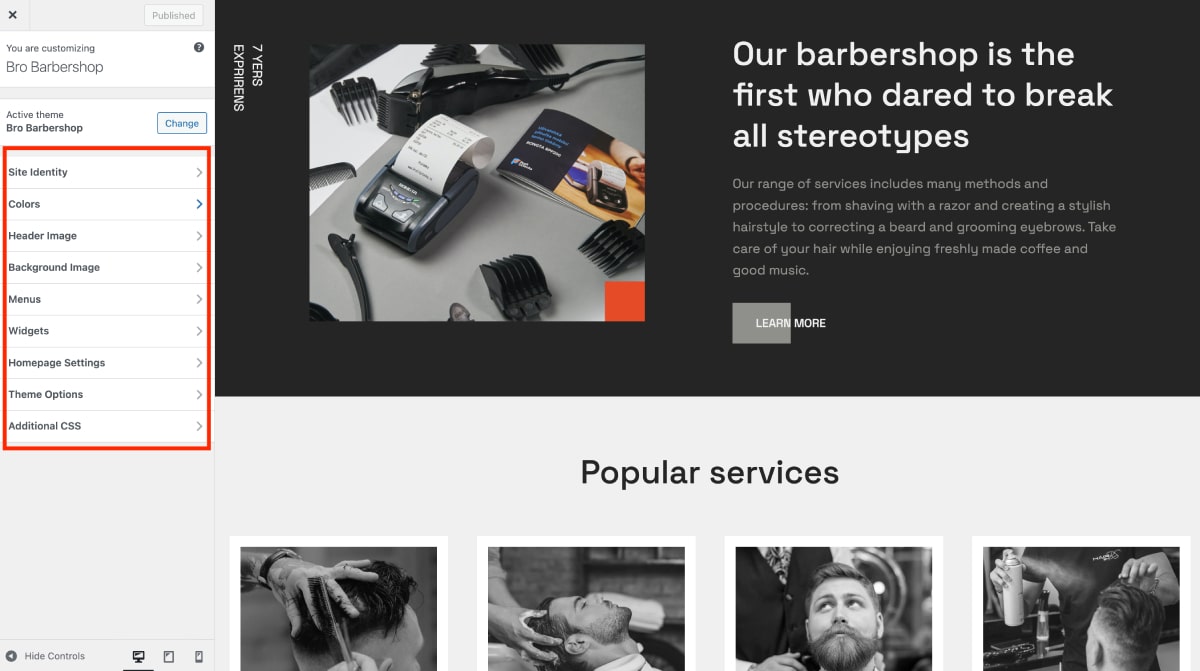
- Edit the content of your site, such identity, menus and header in the WordPress Customizer (Appearance > Customize).
- Customize other website pages with WordPress blocks.
Installation
- In WordPress, go to Appearance → Themes and click the Add New button.
- Click Upload Theme, Browse and Choose File; then select the theme’s ZIP file. Click ‘Install Now’.
- Click ‘Activate’ to use your new theme.
- Install plugins after activation to match Bro Barbershop demo (can deactivate later). Click on the ‘Begin installing plugins’ link.
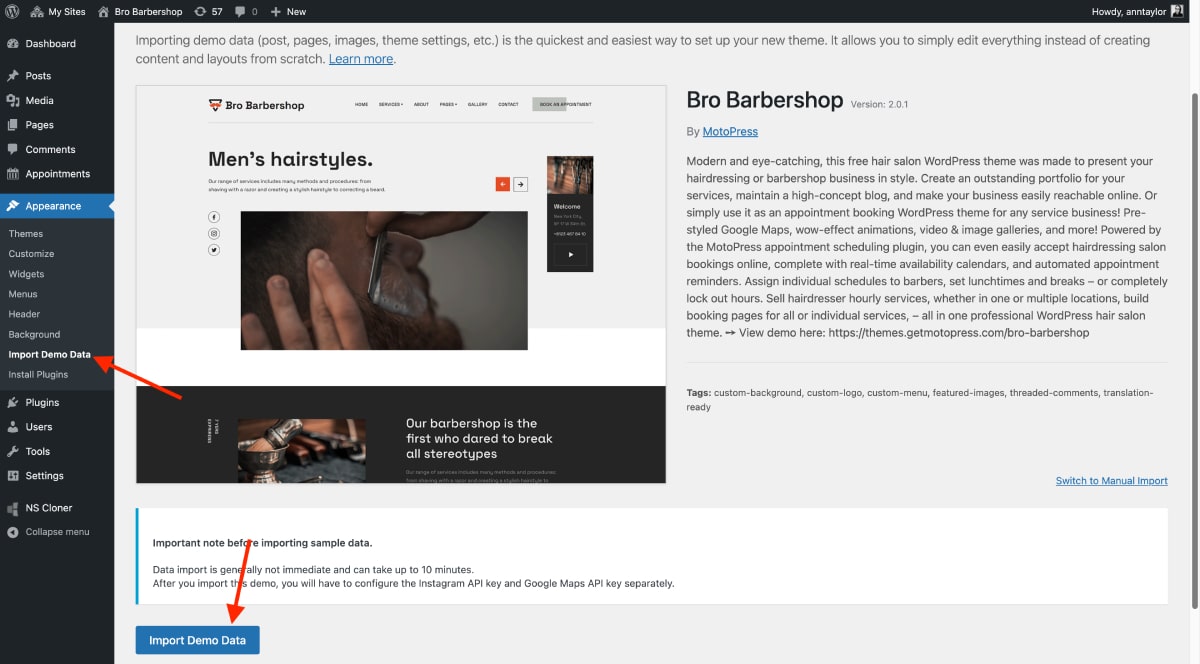
- Once all plugins are installed and activated, you may want to import sample data to the theme to edit all pages easier. For this, go to Appearance > Import Demo data; import data to your site by clicking on the Import Demo Data button.
Once the demo data is imported, you can customize the theme’s content and set up the plugin for accepting appointments.
Booking forms
The Bro Barbershop WordPress theme is powered by the MotoPress Appointment Booking plugin Lite. It allows you to accept unlimited bookings online through the website form.
This booking plugin includes easy-to-use WordPress blocks. These blocks let you quickly build pages showcasing your team, services, and anything else using the plugin’s content.
Detailed booking plugin tutorial: scheduling plugin documentation.
Below is a quick guide on how to set the salon booking system:
- In Appointments settings (under General), choose how bookings are confirmed (payment, manual, etc.) and set currency, time slots, and multi-booking options.
- Add staff members via the Employees menu.
- Add locations via the Locations menu (e.g. salons, departments).
- Create availability schedules for stylists via the Schedules menu (e.g. add working hours, lunchtimes, days off, locations, etc.).
- Add and customize services through the Services menu.
- Categorize services by Tags and Categories via the respective menus.
- Set up email notifications for the admin and client via Appointments > Settings menu > Emails.
- If you want to receive online payments via preferred payment gateways, you need to upgrade to PRO.
- Add a booking form to your site with a WordPress block: (the Appointment form block). More on this below.
If you use the demo content for the Bro Barbershop theme, the booking wizard must be already placed at multiple theme locations, including navigation menus and website pages.
But if you are adding the widget from scratch, you can add it as a block to the widget areas or the regular pages/posts.
Add the booking form to the website header
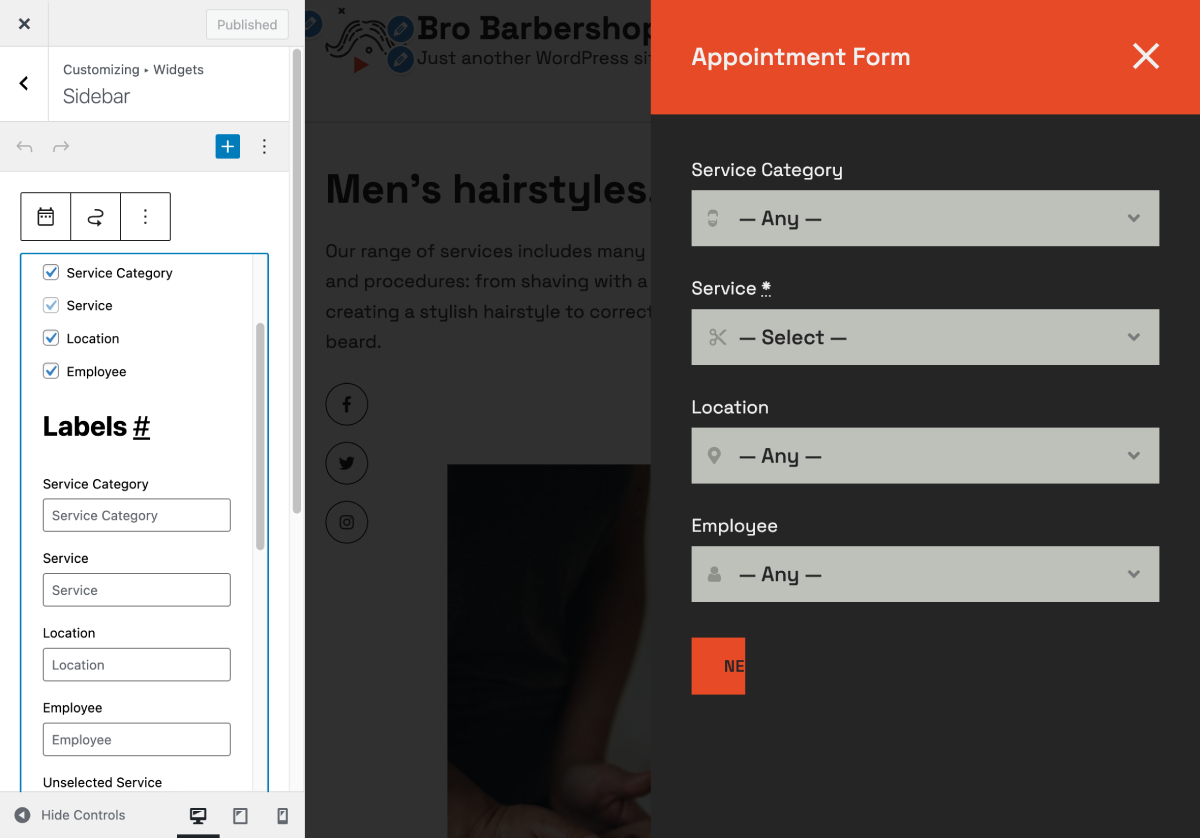
There is a dedicated Sidebar widget area. All you need to do is to provide the text for the booking button and insert the Appointment form block into this area.
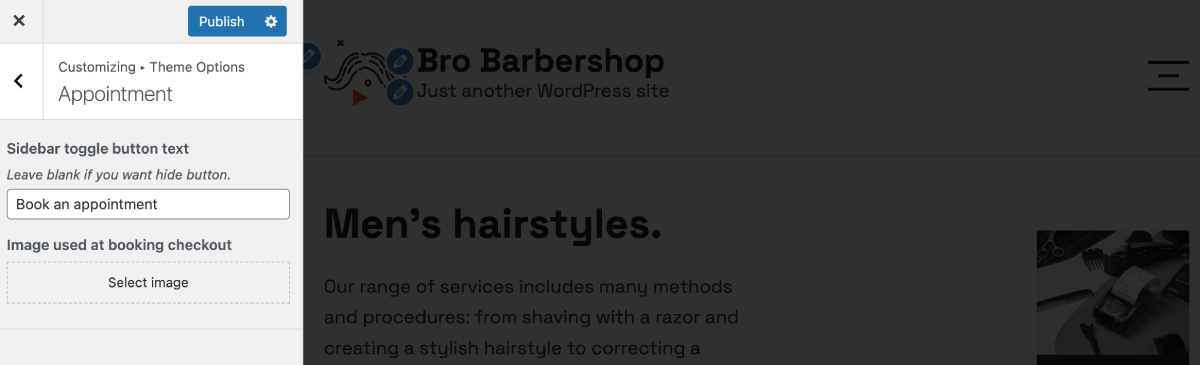
- Go to WP > Appearance > Customize > Theme options > Appointment > Sidebar toggle button text > Add the booking button label.
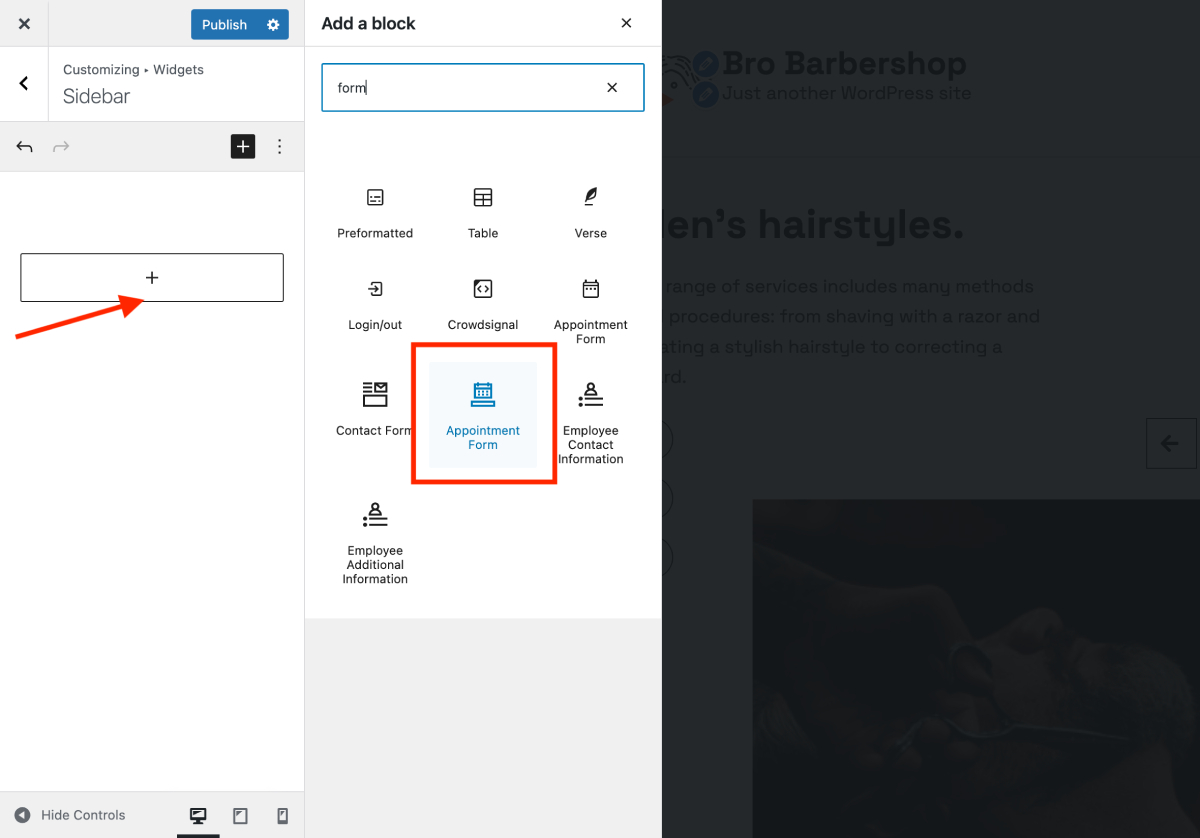
- Go to the WordPress Customizer > Widgets > Sidebar > Add block > Select the Appointment form block.
- Click on the added widget to customize field labels and other settings.
Add the booking form to any page
To add the appointment form to your WordPress page, simply use the existing Appointment Form block within the block editor. Go to the desired page and insert the block either on a blank page or within another block, like a Group block.
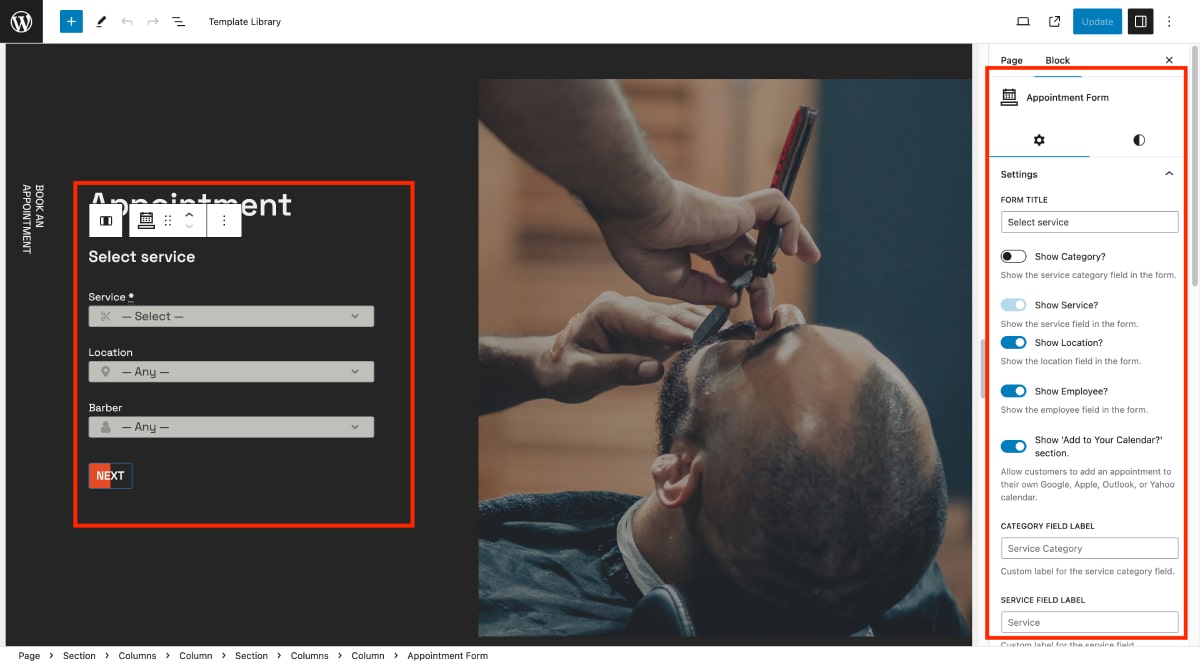
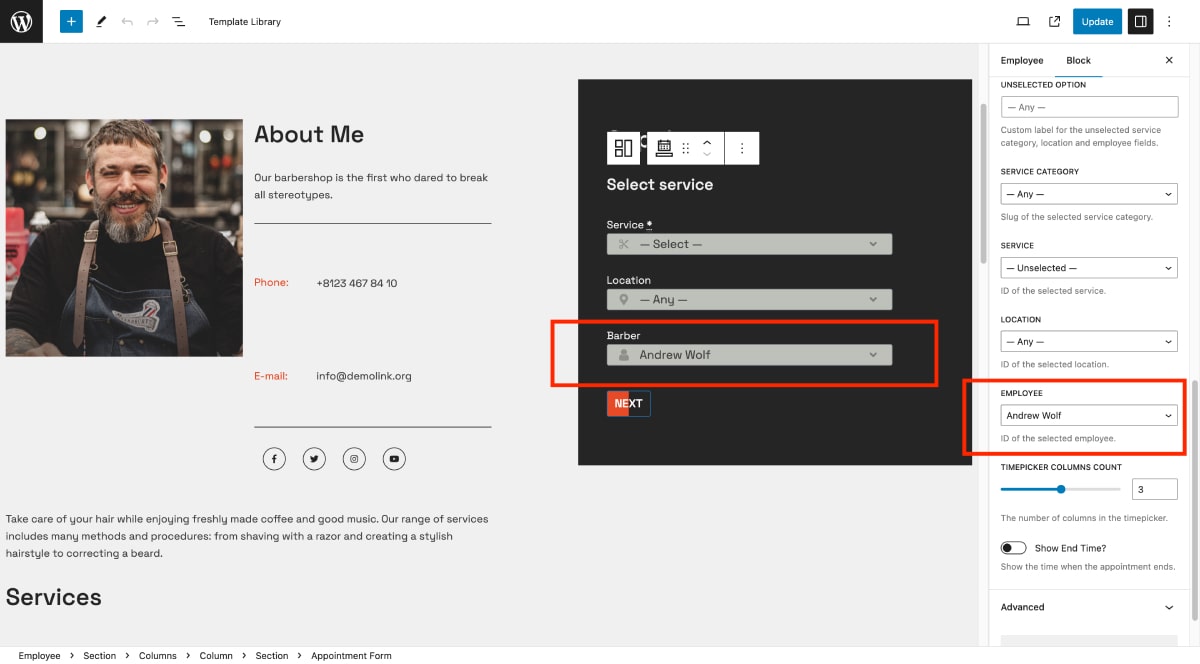
If you want to create a booking form for a specific employee or service, make sure to select the needed ones in the form settings.
In addition to the Appointment Form block, you can use other blocks from the Appointment Booking plugin category across your site. These blocks will automatically populate with data you’ve configured through the plugin’s settings.
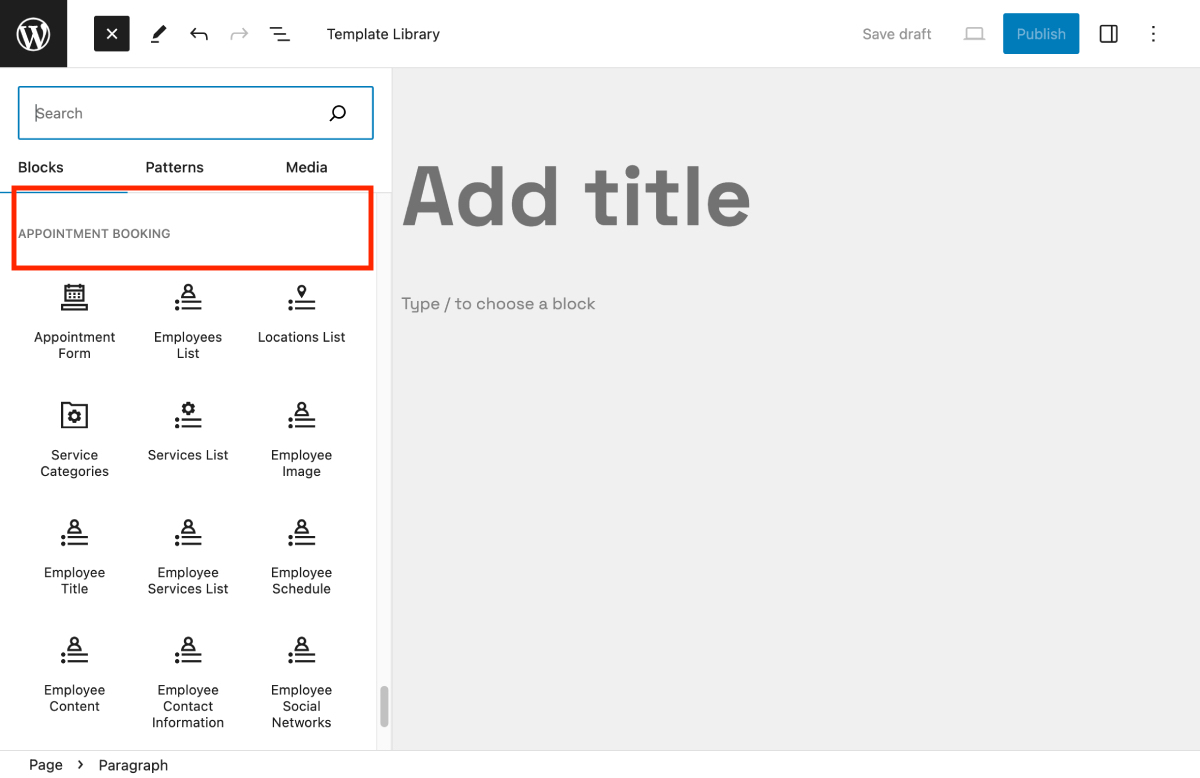
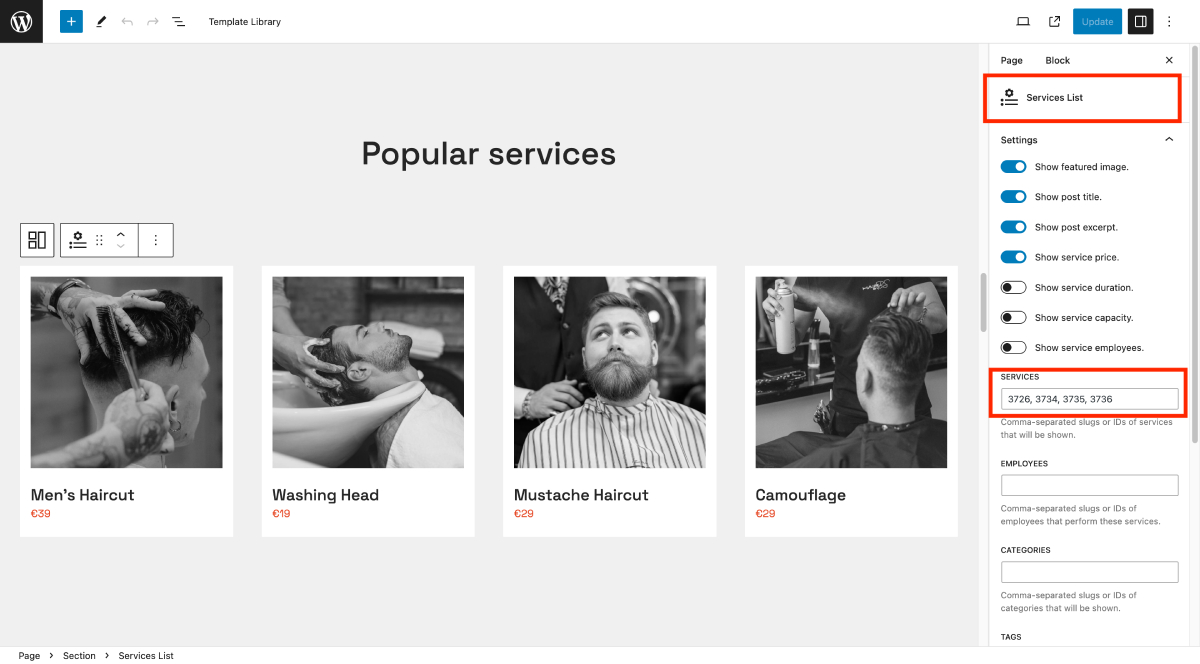
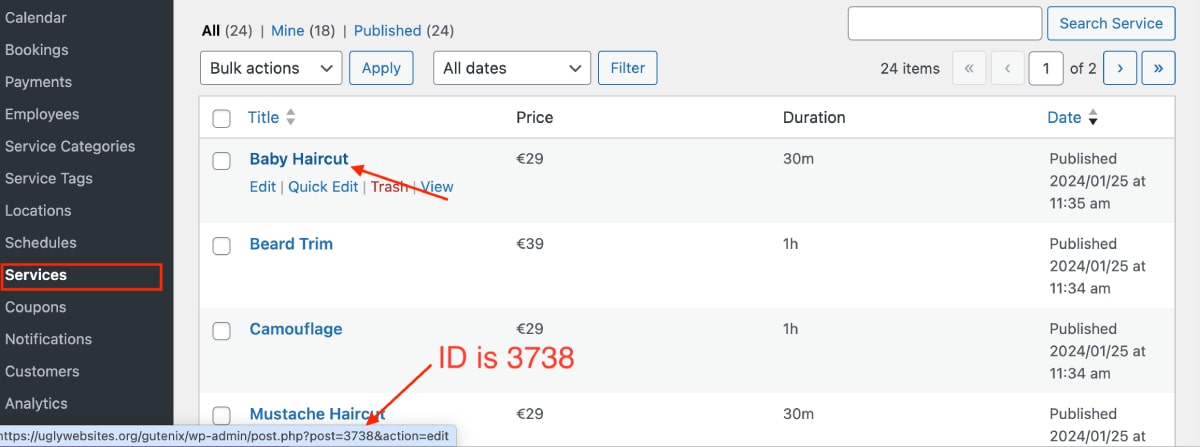
For example, the Services List block lets you showcase all your available services. To display specific services only, you can input their unique IDs within the block.
To find out a service ID, go to Appointments > Services > hover your mouse over the name of the service to see the ID in the link:
You can add all other blocks related to the Appointment booking plugin in just the same way.
How to make any button or link open your sidebar
To open a sidebar by the button or link on your website, you need to add the CSS class main-sidebar-toggle to any link, button, or menu item of your website.