Table of Contents
Before you start
All demos of Booklium are similar in terms of plugins they rely on, which implies you can customize the online booking system, the property search form, property templates, navigation menus, website width, etc. in the same way no matter the demo you choose.
The main difference is in the default front page design, the number of some inner pages, the default color scheme, and default settings for the property booking system. All Booklium demos are created with different combinations of Getwid content blocks for Gutenberg, but you can completely alter them.
However, if you start with a default demo, you can significantly speed up your work. So the main criterion when choosing a demo is a default design you find the most suitable for your business.
Quick start guide
- Install and activate the Booklium WordPress theme.
- Install and activate the required plugins. You may optionally disable unneeded plugins later.
- Import sample data (if you install a theme on a fresh website). Booklium allows you to choose from several sample templates optimized for a hotel, multiple properties, a single property, etc.
- Feature accommodations and enable online bookings (work with the MotoPress Hotel Booking plugin).
- Set up and customize the front page.
- Edit the website identity, menus and header in the WordPress Customizer.
- Customize other website pages.
Installation
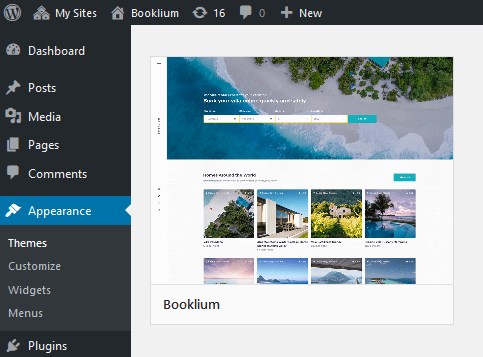
- In your WordPress admin panel, go to Appearance → Themes and click the Add New button.
- Click Upload Theme, Browse and Choose File; then select the theme’s ZIP file. Click Install Now.
- Click Activate to use your new theme.
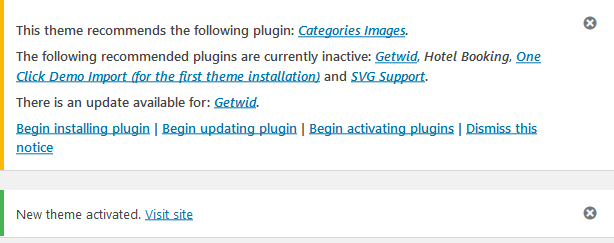
- Immediately after the activation, you’ll be prompted to install several plugins which ensure that your website looks and functions as the chosen Booklium demo – you can install all of them at this stage and later deactivate/uninstall plugins you won’t need. You simply need to click the “Begin installing plugins” link.
- Once all plugins are installed and activated, you may want to import sample data to the theme to edit all pages easier.
Warning! Import sample data only in case it’s a fresh website and it doesn’t contain any custom content!
Import sample data
When all required plugins are installed and activated, Import Demo Data menu should appear under the Appearance menu on your WordPress dashboard. Head over to this menu, choose the most suitable demo for your project (you can preview each demo before activating it) and run the importer by clicking on the “Import Demo Data” button.
You will also see a quick guide on how to import sample data:

Important: If you already imported demo data of one template to your website and then changed your mind and decided to switch to another template, you need to delete sample data of the first template before you can import a new one. The best way to do that is to reset your website using a free WP Reset plugin. When you reset a website, all custom content is deleted.

Once the process is finished, you can start customizing your theme!
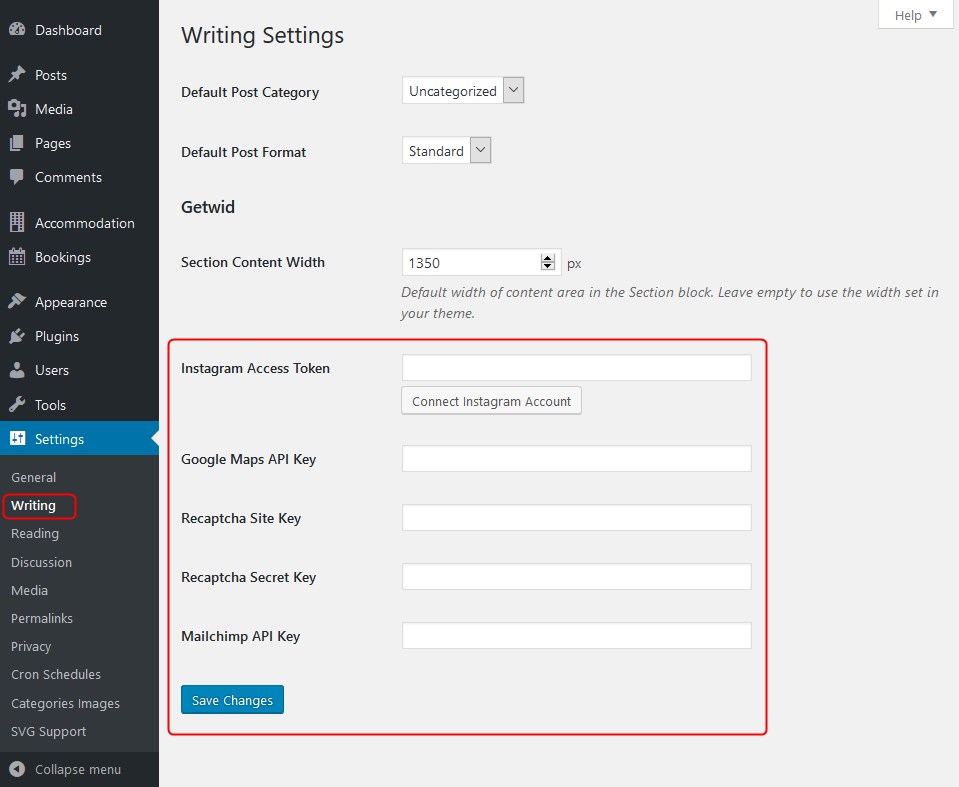
Insert API keys (optional)
You don’t need some of the extra plugins that work through API integration – the Getwid WordPress Gutenberg Blocks plugin by our team can be used instead. If you plan to use any content modules by Getwid for Gutenberg that require API integration (e.g. Google Maps, Instagram Gallery, reCaptcha, etc.), you can obtain your API keys and insert them anytime via Settings → Writing Settings → Getwid.
There are 2 ways you can proceed with the Booklium theme customization:
- General website settings and design customization.
- Add rental properties via the MotoPress Hotel booking plugin and configure the needed settings for the booking system.
We recommend starting with a way 2. This will help you firstly add properties-related content and only after that customize the theme appearance (as well as appearance of the rest of the theme).