Table of Contents
Site title and logo
In WordPress Customizer, go to Site Identity to edit site title, logo and tagline.
Header image
The main header image is a featured image of the page. To set it, you should go directly to your Front page from the main WordPress Dashboard and change the featured image.
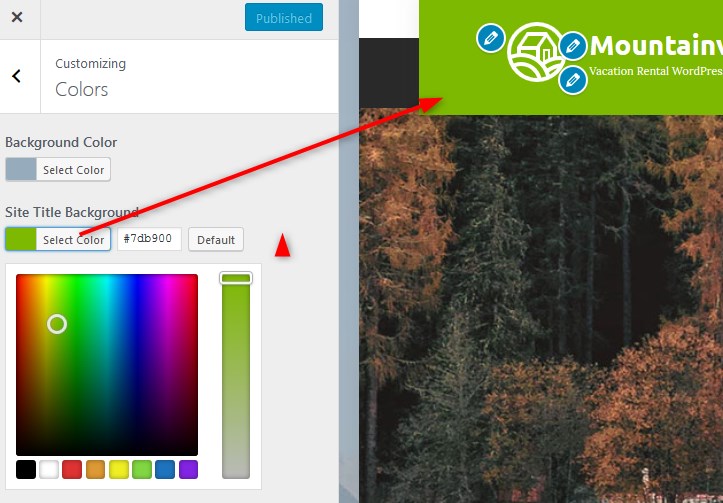
Colors
Currently in Mountainview you can change a background color and a site title background.
Background image
If you want to set your custom image on the background, navigate to Background image in the WordPress Customizer and upload it.
Menus
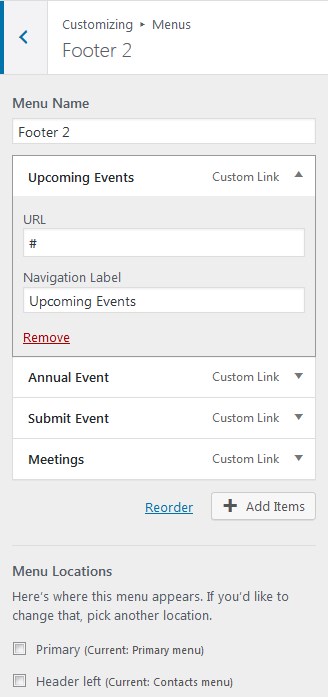
There are different menu locations: primary navigation menu, contact info menu, four footer menu widgets, social icons and sidebar. You can customize or delete any of them.
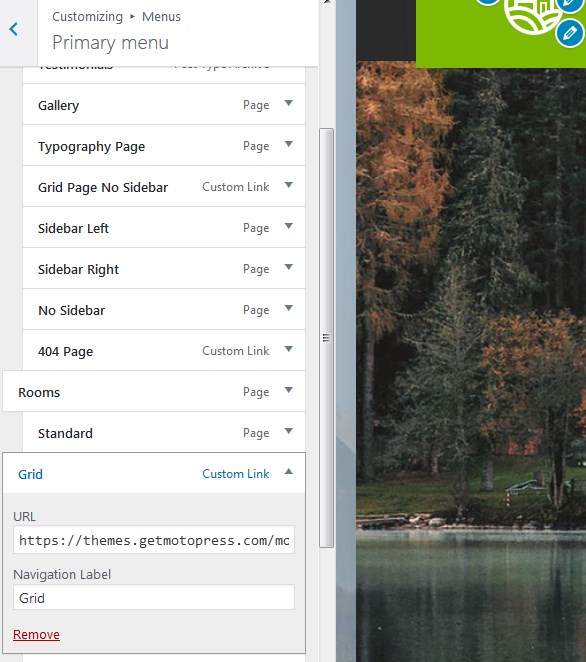
To edit any of the menus, go to WordPress Customizer → Menus.
The alternative way to customize your menus from the WordPress dashboard is via Appearance → Menus.
Primary menu – is the one with your site pages. If you already added some pages, simply drag and drop them in the WordPress Customizer to set the needed order in the primary menu. You can also rename, add or delete menu buttons.
Add any piece of content to your footer menu – social media icons, contact info or website page links via WordPress customizer in the same way we described for other menus. You can add up to 4 items (columns) into Footer menu.
Social icons
To add social icons to Footer or Header menu, navigate to WordPress Customizer → Menus → Add Menu → Add Custom links with the appropriate names (e.g. Twitter, Tripadvisor) and links to your social media accounts.
Blog
The Blog page is designed with an individual sidebar (separate from the optional front page sidebar). For the single posts, you can use either with or without sidebar page templates (set the preferable template in Post Attributes).

If you plan to use a sidebar on the blog, you can customize widgets that appear in this sidebar (separately from the front page sidebar). To add widgets to the blog sidebar, go to WordPress dashboard → Appearance → Widgets → Blog sidebar.
If you don’t add any widgets to the blog sidebar, the page will display the major sidebar of the front page.
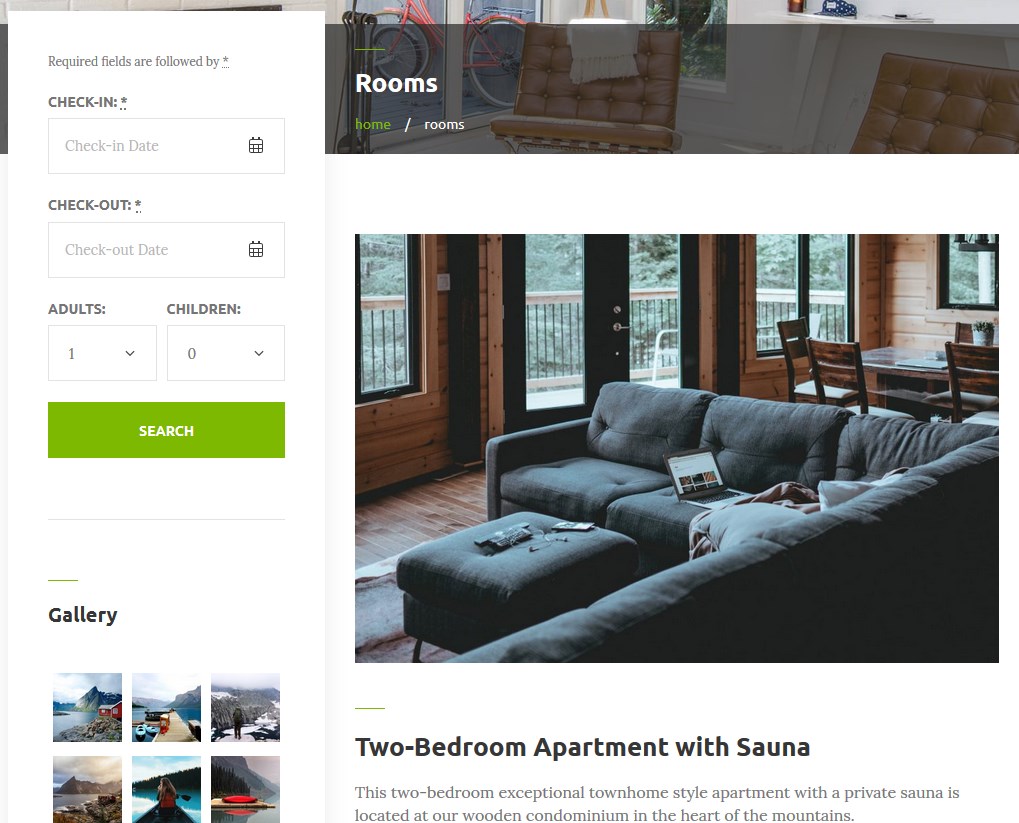
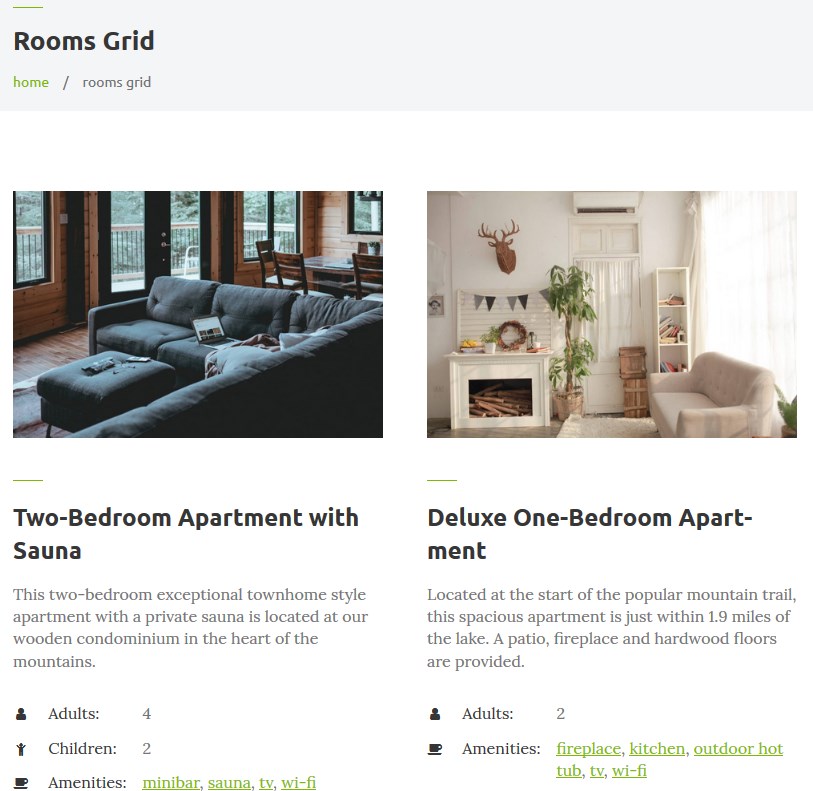
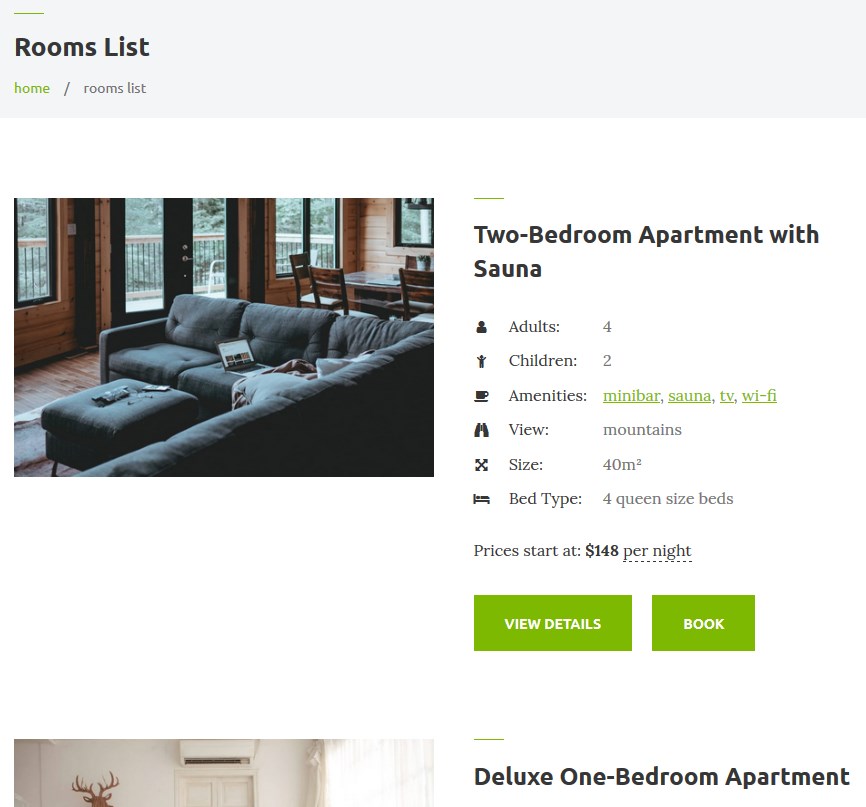
Set layout for properties listing
Go to WordPress Customizer → Booking options to choose the needed layout for accommodations listing:
Default (list with sidebar)
Grid
List
Contact us page
In Mountainview we use Jetpack contact us page. If you enabled Contact form module as we described in the Installation section, you should see Feedback menu on your WordPress dashboard. There you can generate a contact form and then simply paste its shortcode to the Contact us page. You can also use any other plugin to insert a contact form.
Page Templates
There are several page layouts you can work with:
- Sidebar left (with a customizable sidebar).
- Front page
- Front page no sidebar
- Grid no sidebar
- Grid sidebar left
- No sidebar
- Sidebar right
Set the needed layout in the page Attributes of the page.