Table of Contents
WordPress Customizer settings
The front page of Villagio can be easily editable with the WordPress Customizer – a live editor.
To start working with it, go to your WordPress dashboard → Appearance → Customize.
With its help you can edit:
Site title and logo
While the WordPress Customizer is opened, go to Site Identity to edit site title and logo. Here you can also update the tagline.
Theme options
- Optionally enable the front page slider (choose the animation effect for it and set the slider width)
- Change a site layout:
Default site layout

Full-width site layout
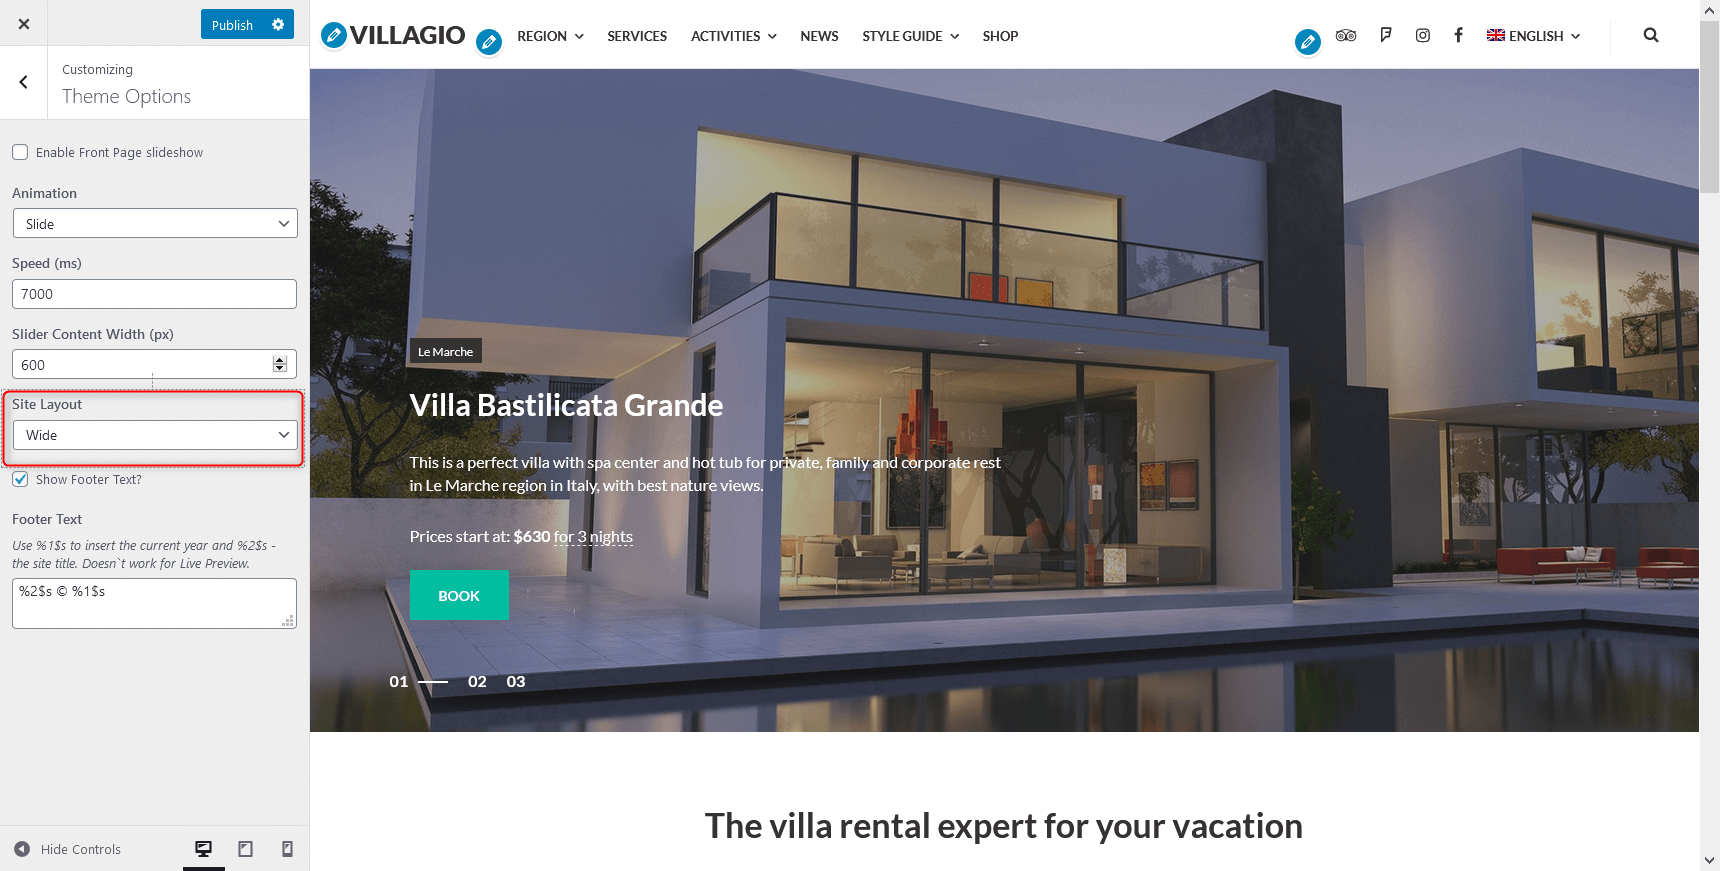
- Show or hide footer text.
Colors
You can change the color scheme yourself easily with a color picker. To change colors, go to Colors in the WordPress Customizer.
You can change the background color, main text color, brand color, and brand color hover for buttons.
Background image
If you want to set your custom image on the background, navigate to Background image in the WordPress Customizer and upload it.
The changes you make in the left-hand side menu are instantly visible (but not saved until you click the Save button). You may also notice the blue icons with the pencil – you can click on them to get instant access to all theme parts you want to modify.
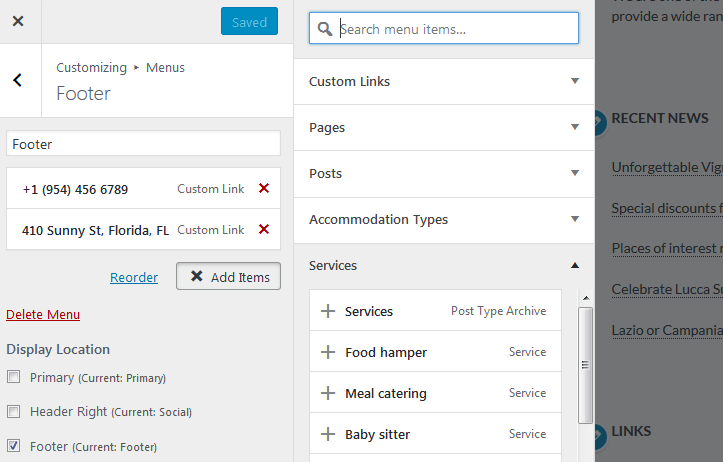
Menus
There are 4 menu locations in footer and header: Footer, Links, Primary, Social. You can customize or delete any of them.
To edit any of the menus, go to WordPress Customizer → Menus.
The alternative way to customize your menus from the WordPress dashboard is via Appearance → Menus.
Here is how you can customize menus visually via WordPress Customizer: simply drag and drop the items, edit their content.
Social icons
To add social icons to the Header menu, navigate to WordPress Customizer → Menus → Add Menu → Add Custom links → Hader Right (Social) with the appropriate names (e.g. Twitter, Tripadvisor) and links to your social media accounts.
In the Display Location menu choose the menu where the social icons should be displayed. Note: the social media icons are displayed only in Social menu in header; in other menu locations the links to your social media accounts will be displayed as text.
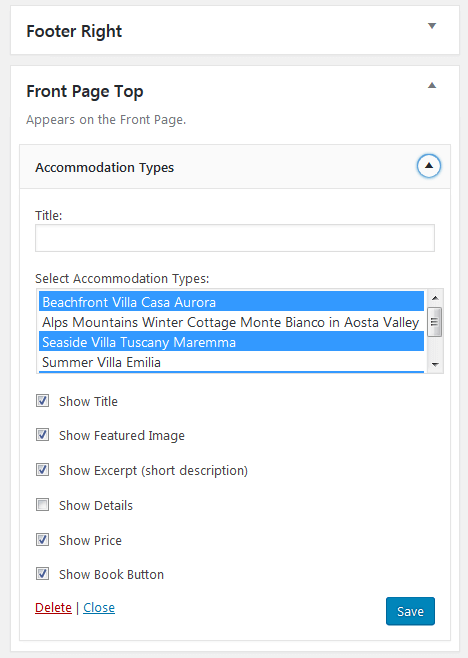
Widgets
Villagio features just one widget area on top of the front page: Accommodation types slider by default. You can view, add or delete widgets in the Appearance → Widgets. New widgets may appear when you enable new plugins.
If you want to change the slideshow effects or set the time for sliding the properties automatically, go back to the Customizer → Theme Options and apply preferable settings.
Testimonials
Testimonials are powered by the Jetpack plugin.
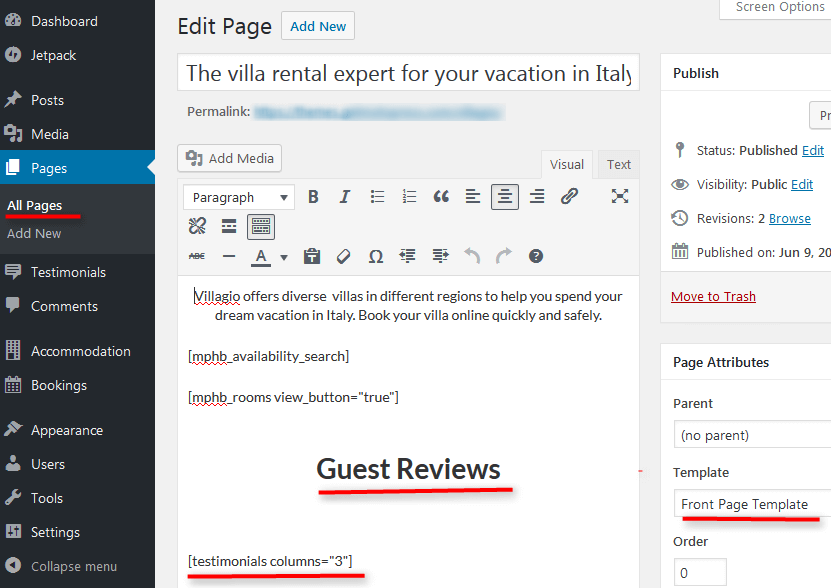
To display the Testimonials on the front page, you should add them via shortcode in a standard TinyMCE – content area of the page. Here are the steps:
- Add the testimonials content via WordPress dashboard → Testimonials. To later showcase them on the website use the shortcode [testimonials]
- Go to the needed page or post (e.g. home page) and add the shortcode with your custom parameters (more shortcode attributes for modifying Testimonials layout can be found here.)
Page templates
There are several page layouts you can work with:
- Page with sidebar (default)
- Page without sidebar
- Full width page template
- Front page
- Grid with sidebar (displays content and child pages in a grid layout)
- Grid without sidebar (displays content and child pages in a grid layout)
Blog
Follow the steps below to display blog posts on your website instead of a static front page (the one with your custom content blocks):
- Create new page and name it accordingly (blog, news, etc.).
- In Settings → Reading set “Posts page” to blog, news, etc. you just created.
- Scroll down and Save changes.
- If you want your front page to show latest posts, Navigate to Appearance → Customize → Static Front page → set to show “Your latest posts”.