Table of Contents
WordPress Customizer Settings
Go to Appearance → Customize to edit the following theme sections:
Site identity
Upload your logo, input a title, tagline and add a favicon. The theme supports SVG vector logos.
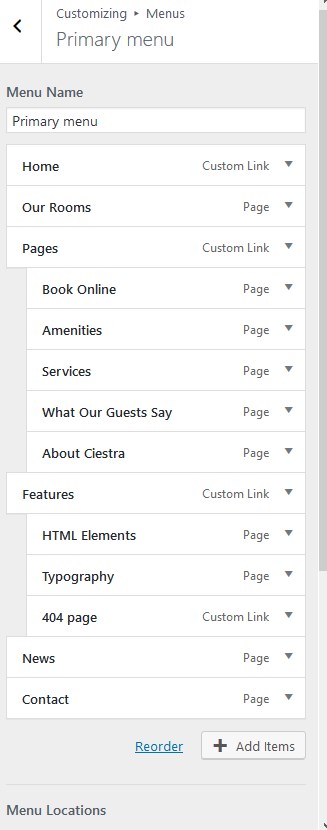
Menus
Here you can add menu items, change their location and content. Use “Add items” button to add menu items to a particular menu and choose the location for this menu: primary, contact, socials, footer, footer page socials and front page contacts.
To add social icons to the menu, navigate to WordPress Customizer → Menus → Add Menu → Choose location Socials → Add Custom links with the appropriate names (e.g. Twitter, Tripadvisor) and links to your social media accounts. The social icons will appear once you add the links.
You can also customize, move or delete other menu items as well as change their positions.
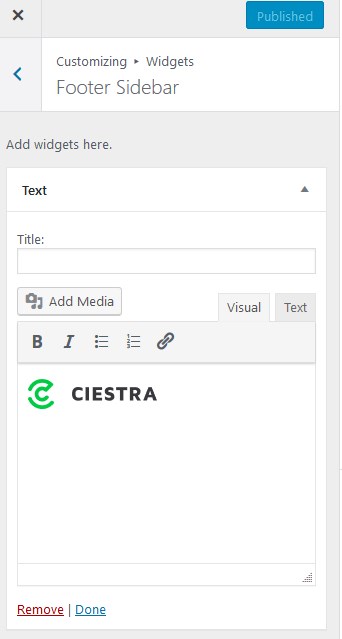
Widgets
Here you can select the appropriate widgets for the following widget areas: Sidebar (will display the chosen widgets if you opt for displaying the sidebar on the blog), Footer sidebar and Front Page Top Sidebar (by default, the search availability form).
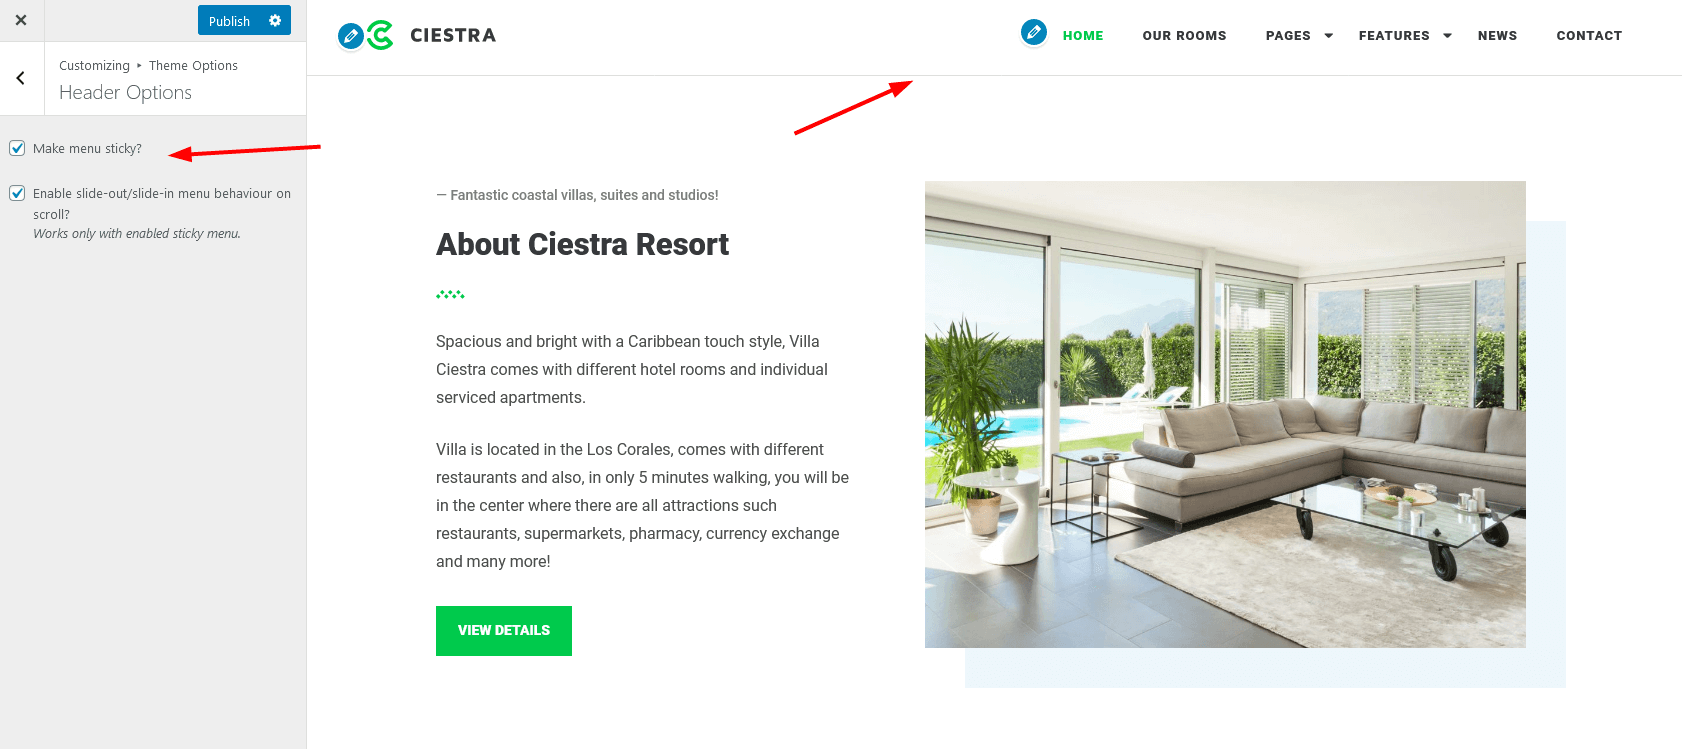
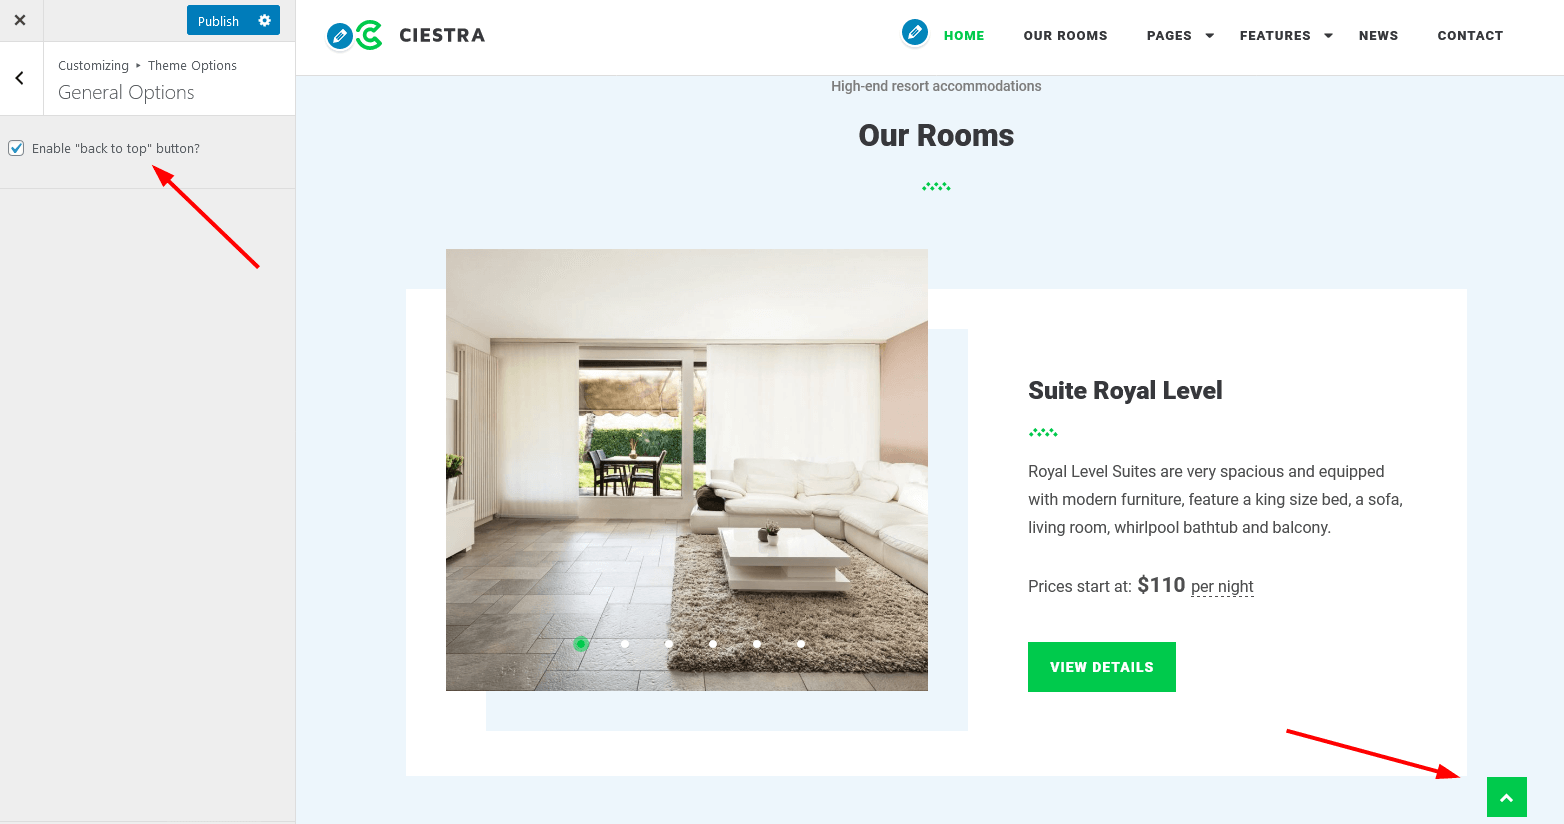
Theme options
- In the Header options you can make a header sticky so the navigation menu is fixed when you scroll a page. You can also enable a slide-in/slide-out menu behavior on scroll.
- Here you can also set the preferable blog layout: with or without sidebar. To set the individual post layout (with or without sidebar), edit the post page template (left editor panel). By default, the blog and individual post pages are displayed without a sidebar.
- Optionally edit or disable a footer text.
- Optionally change the styling element – a widget title image, which is by default wave lines (upload your own if needed).
- In the General options section you can enable the back to top button, which brings a visitor right back to top from the bottom of the site without scrolling.
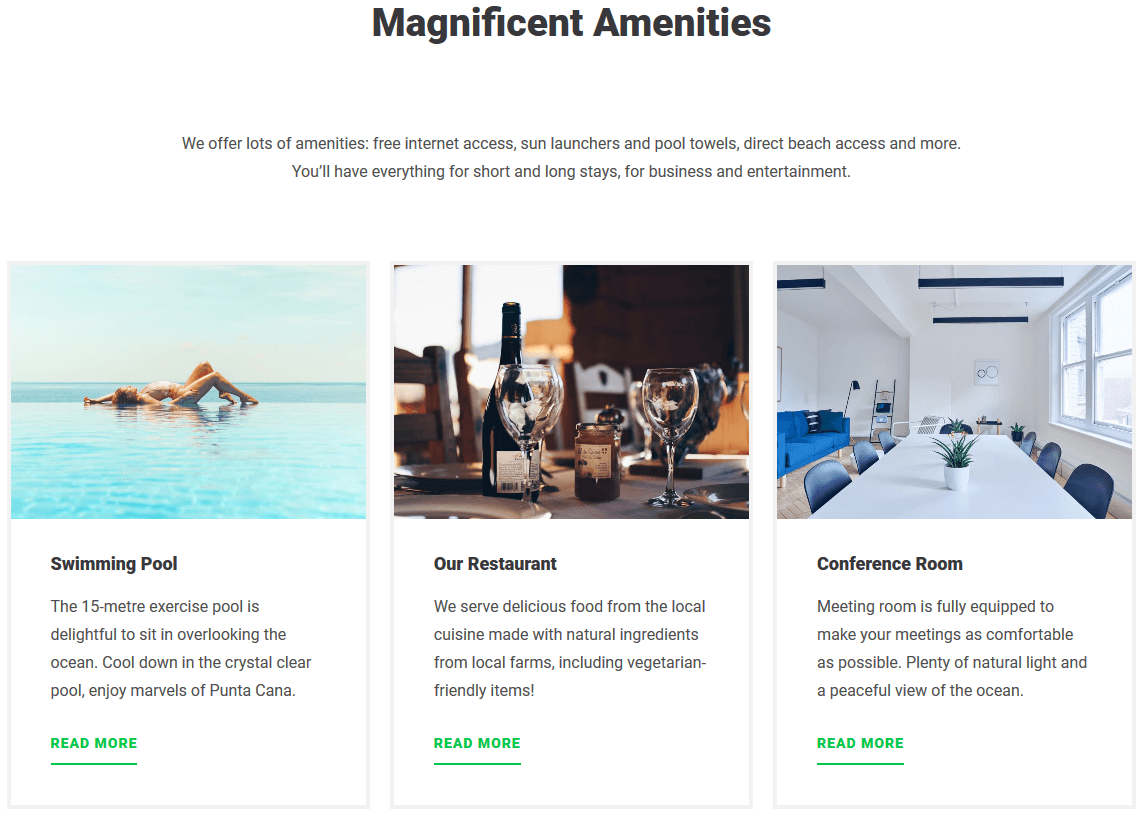
Amenities page
If you want to display your Amenities/Services/Special offers, etc. in the normal grid layout (like the Amenities demo page) on a separate page, you should firstly add all items via Amenities → Add new in your WordPress dashboard.
Then create a new page and paste [amenities] shortcode. Change the number of columns with the following parameter: [amenities columns=”3″] where 3 is a desirable number of columns.
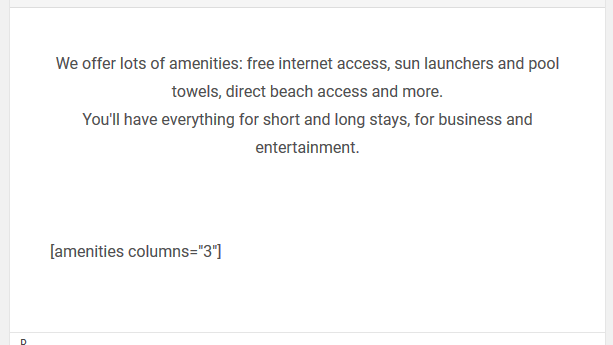
Use “Wide” page template for a professional page look.
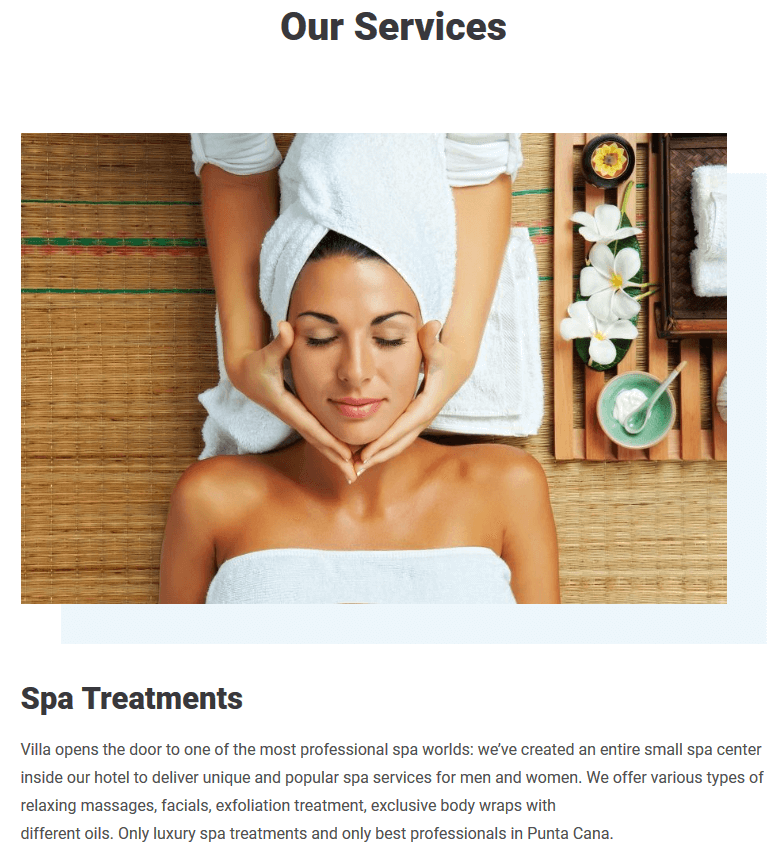
Services page
The Services page is created with the MotoPress Hotel Booking plugin shortcode [mphb_services] for the services list. If you added all available services via Accommodation → Services, you can list all of them on any page by simply pasting [mphb_services] shortcode:

View all available parameters for this shortcode via Accommodation → Shortcodes. Use “without sidebar” page template for a professional page look.
Contact page
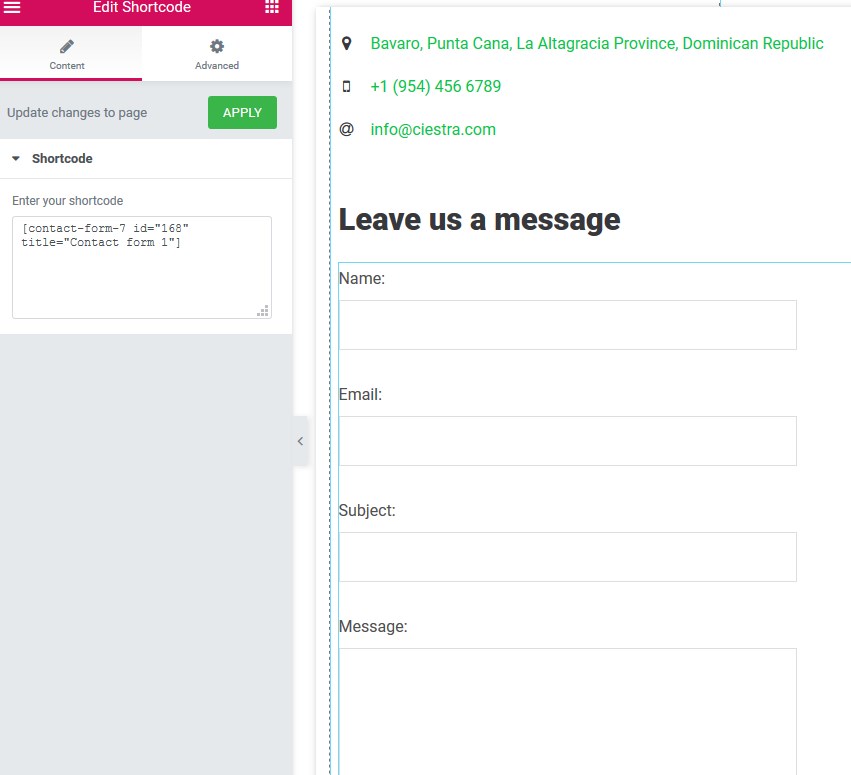
The layout of the Contact page is designed with Elementor page builder so you can update it visually just like the front page or “About us” page.
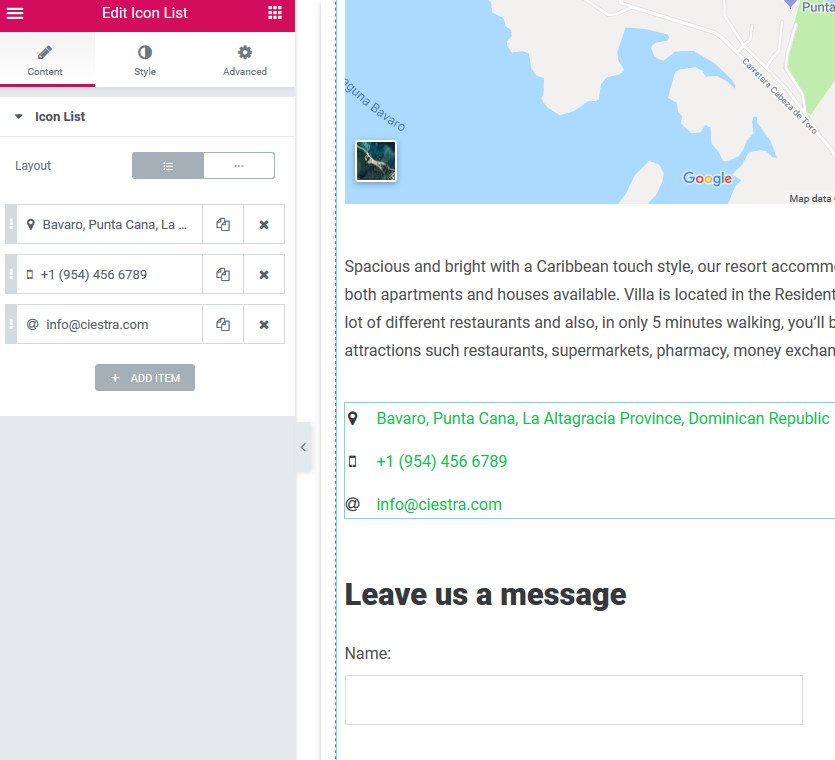
The contact form is powered by the Contact Form 7 plugin. To properly display the form on the page / edit fields, you should firstly create a form via WordPress dashboard → Contact → Add new (or Contact forms)
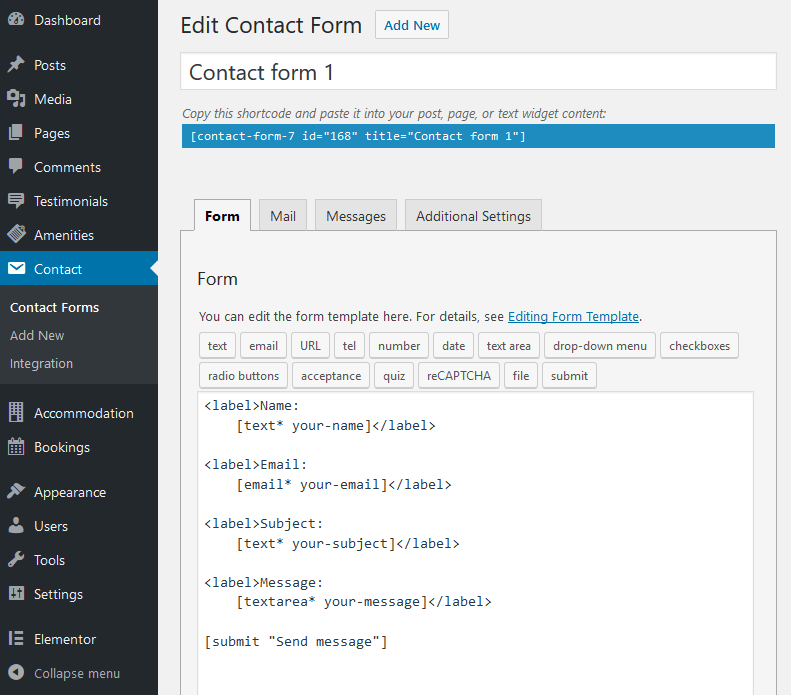
Create or edit your form and insert the shortcode into Elementor:
You can use any other WordPress contact form plugin instead.
Page templates
The theme provides a variety of page layouts. You are able to set the following page layouts which could be found at the right panel of the page editor:
- Front Page
- With Sidebar
- Without Sidebar
- Wide
The blog layout can be with or without sidebar (editable in WordPress Customizer) and the individual post can be displayed either with or without sidebar as well (editable in page template).