Table of Contents
Some global website settings, such as a logo or colors, can be customized via WordPress via the WordPress Customizer.
Navigate to Appearance > Customize to edit global site settings in Lorenty.
Site identity
Change the site title and tagline, upload your logo, set a favicon that will be displayed in the browser. A tagline is often displayed in conjunction with the site title, below it.
Main site colors
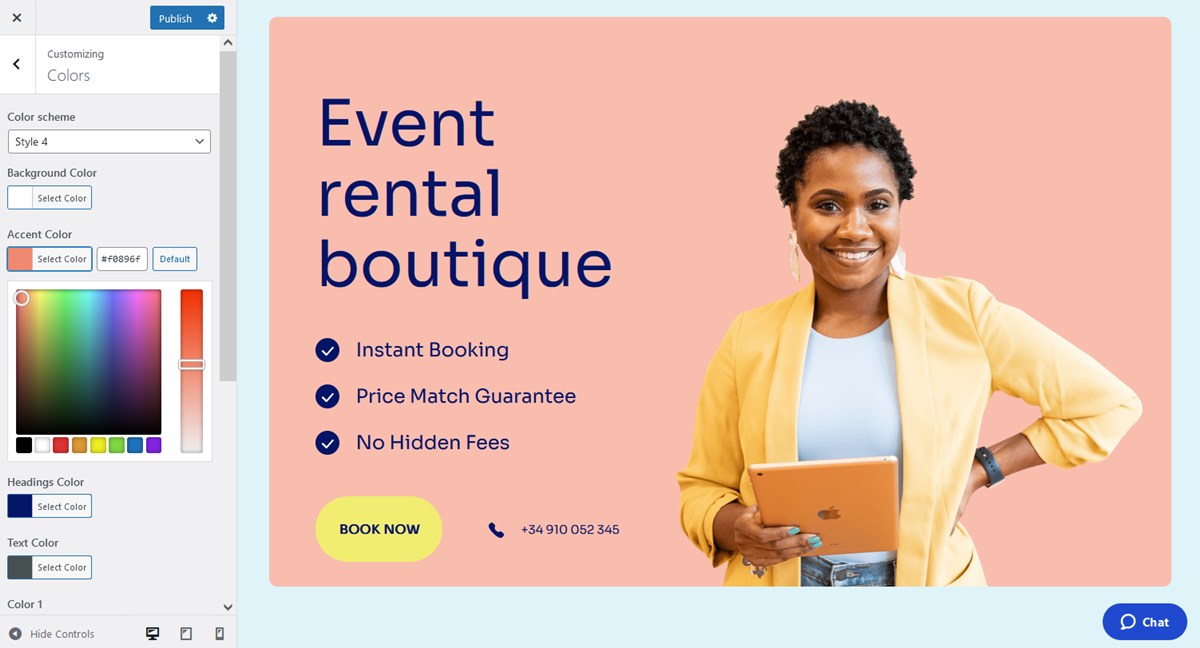
In the Colors menu, you can customize individual accent colors that appear across the website.
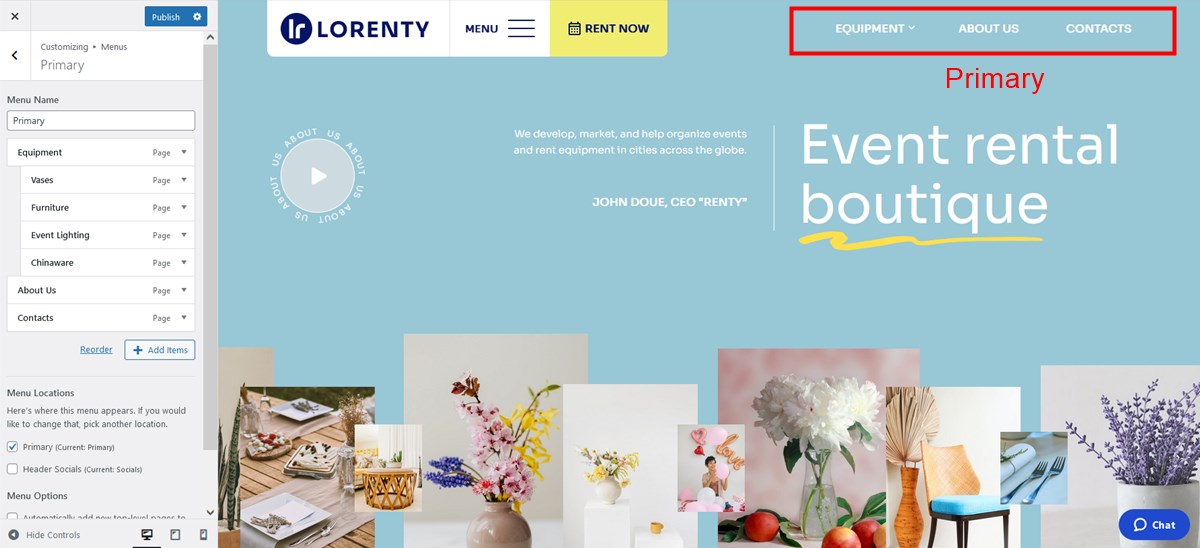
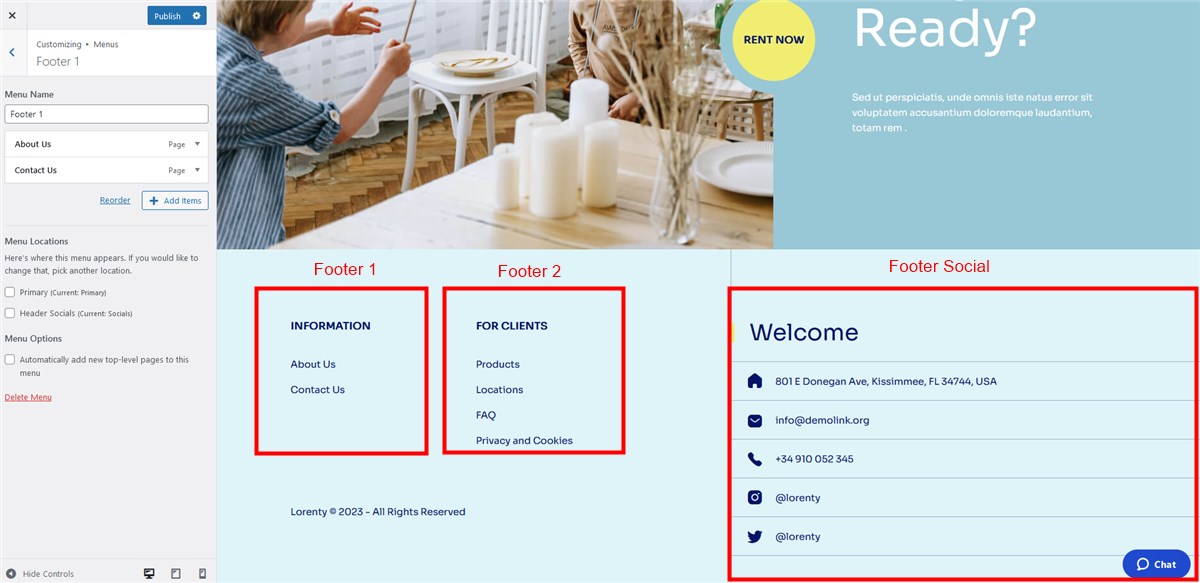
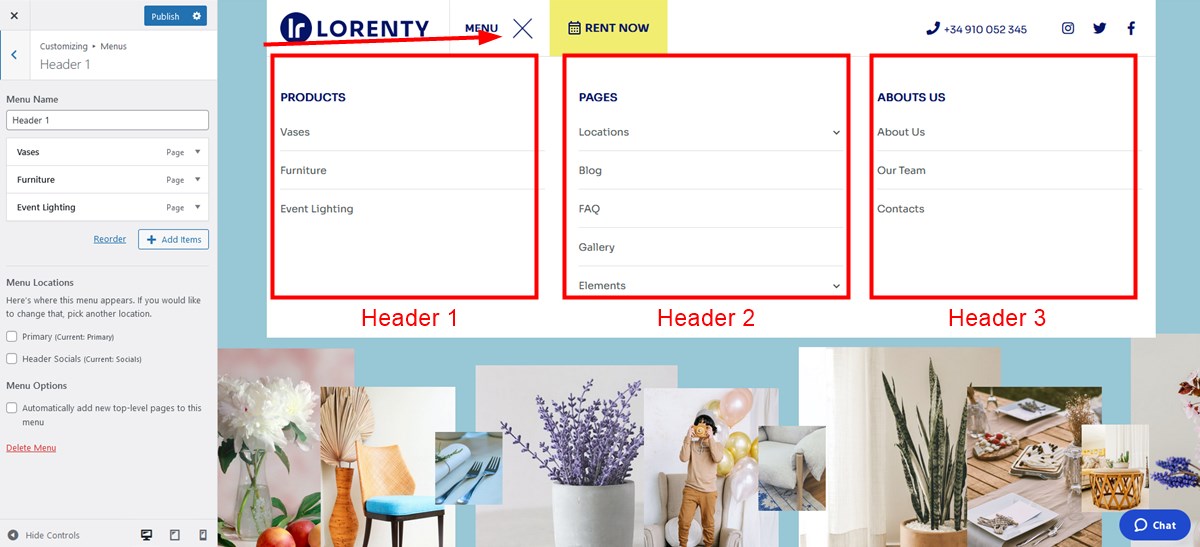
Site navigation menus
There are different menu areas in Lorenty.
Note: footer and header navigation menus are technically placed into widget areas of the theme. This means you can replace these menus with any other content blocks.
Widgets
Content elements displayed in the footer, header and other global website parts are customized via Widgets.
Lorenty comes with 8 widget zones, you can see and customize them via Appearance > Widgets.
The appointment form: it’s powered by the Appointment Booking plugin. You can customize which fields to show and rename them.
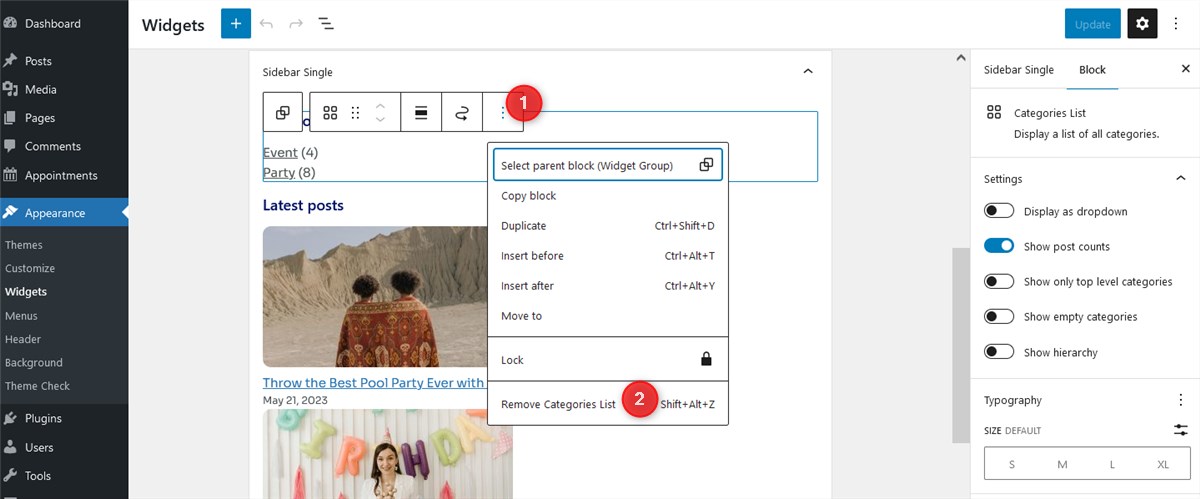
Sidebar single: By default, it contains the Categories list block (the data is sourced from your blog categories) and the Latest posts block (the data is sourced from your recently published posts).
Header and footer widgets. See the ‘Site navigation menu’ above.
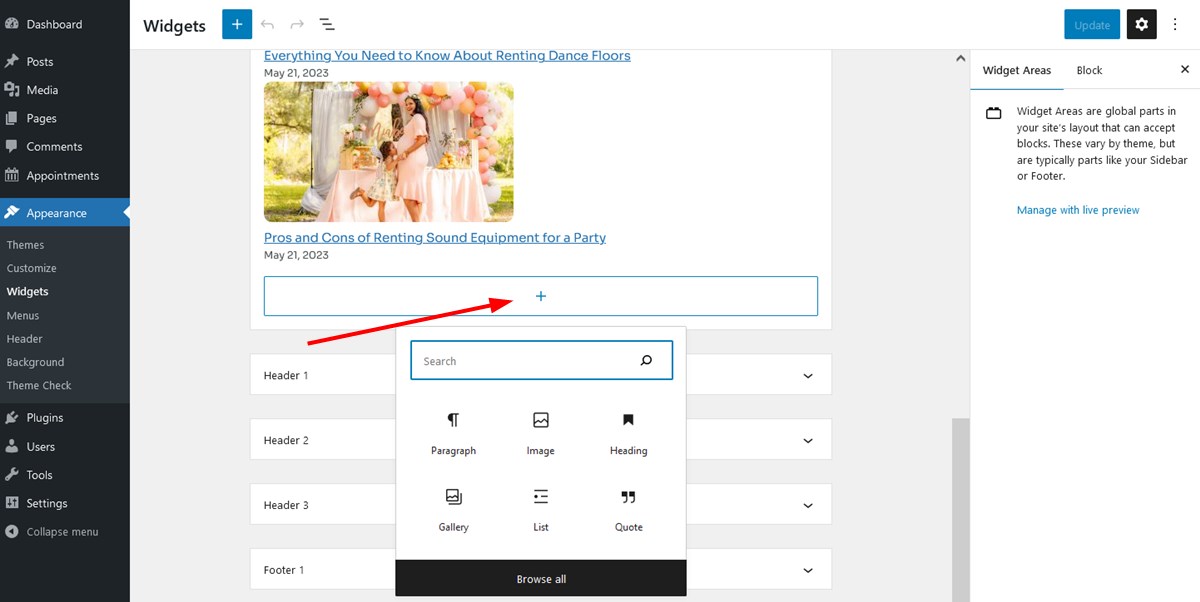
You can add or remove blocks from the widget areas:
Theme Options
Choose design options for the Lorenty theme.
Header
- Static:
- Absolute without background – you can change a color for this in the Menu Color for Canvas template section below:
- Absolute with background:
Sidebar button position
By default, it’s a Rent now button that opens the booking form widget.
Footer
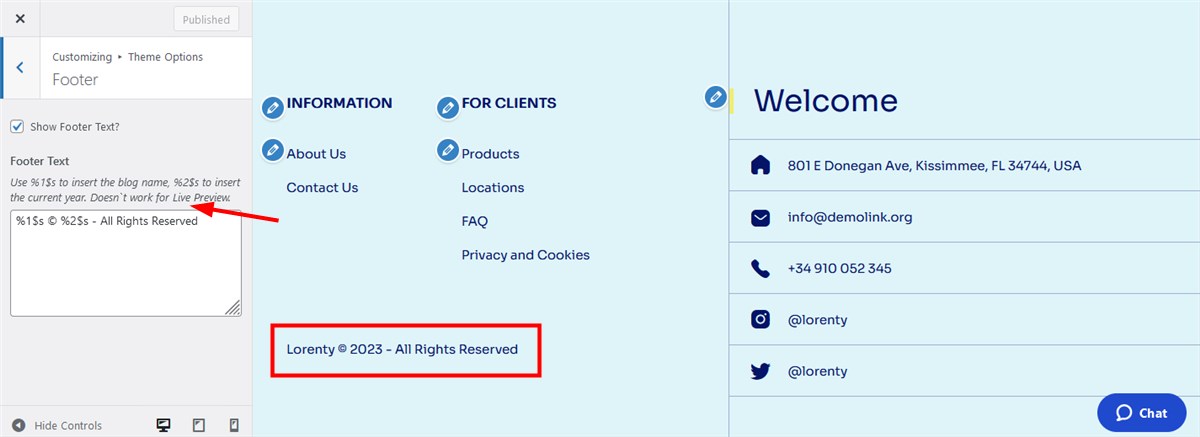
Add footer text.
Appointment
Customize the ‘Rent now’ button text and add an image that appears at checkout.
