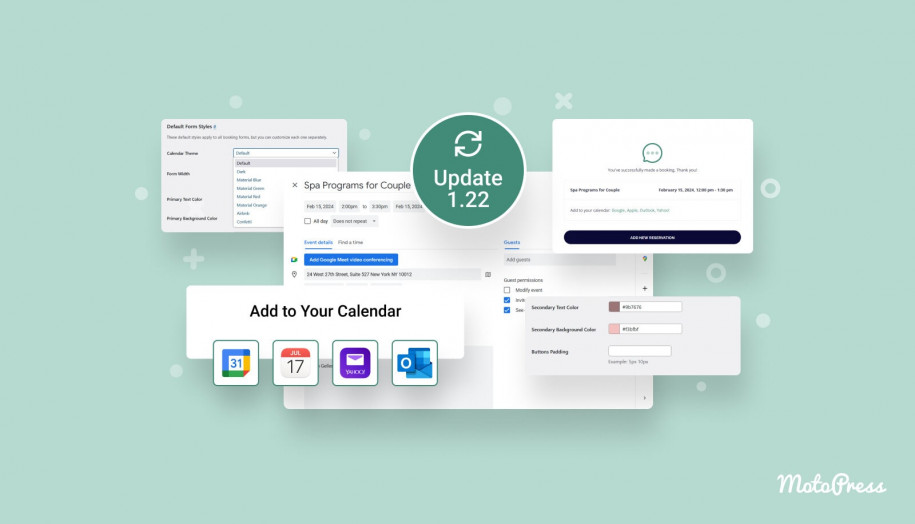
Reduce No-Shows & Enhance Form Design with Appointment Booking 1.22.0
Table of Contents
Exciting news! Version 1.22.0 of the Appointment Booking plugin brings two major updates: in addition to a number of minor fixed and improvements, we’ve also released two big new features you’ll love:
- Enable your clients to add bookings to their calendar. Are your clients sometimes forgetting about their appointment? Decrease no-shows significantly with this new feature! Once a client makes a reservation through the booking form, they are offered to add a booking (an ‘event’) to their personal calendar with a click, whether it’s a Google, Apple, Outlook, or Yahoo calendar.
- Improve default styles of the booking form. In simple words, make your appointment scheduling form a bit prettier, regardless of your WordPress theme! With added customization settings, you can now personalize the calendar scheme and other design parts easily. No need for extra add-ons or plugins; it’s now a default feature in the core MotoPress appointment scheduling plugin.
Let’s now learn a bit more about these updates!
Update #1 Enable clients to add bookings to their calendar with a simple click
We’ve added this feature to help you improve the customer experience and reduce the likelihood of missed appointments.
You know how it is with modern life, everyone’s all about calendars and schedules; and with everyone trying to organize their numerous plans in one convenient spot, they surely tend to choose one of the world-loved calendar apps out there.
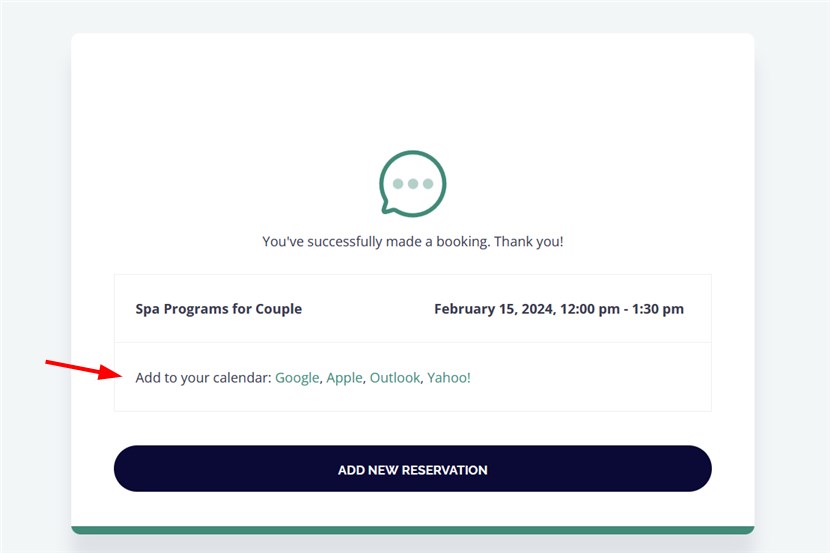
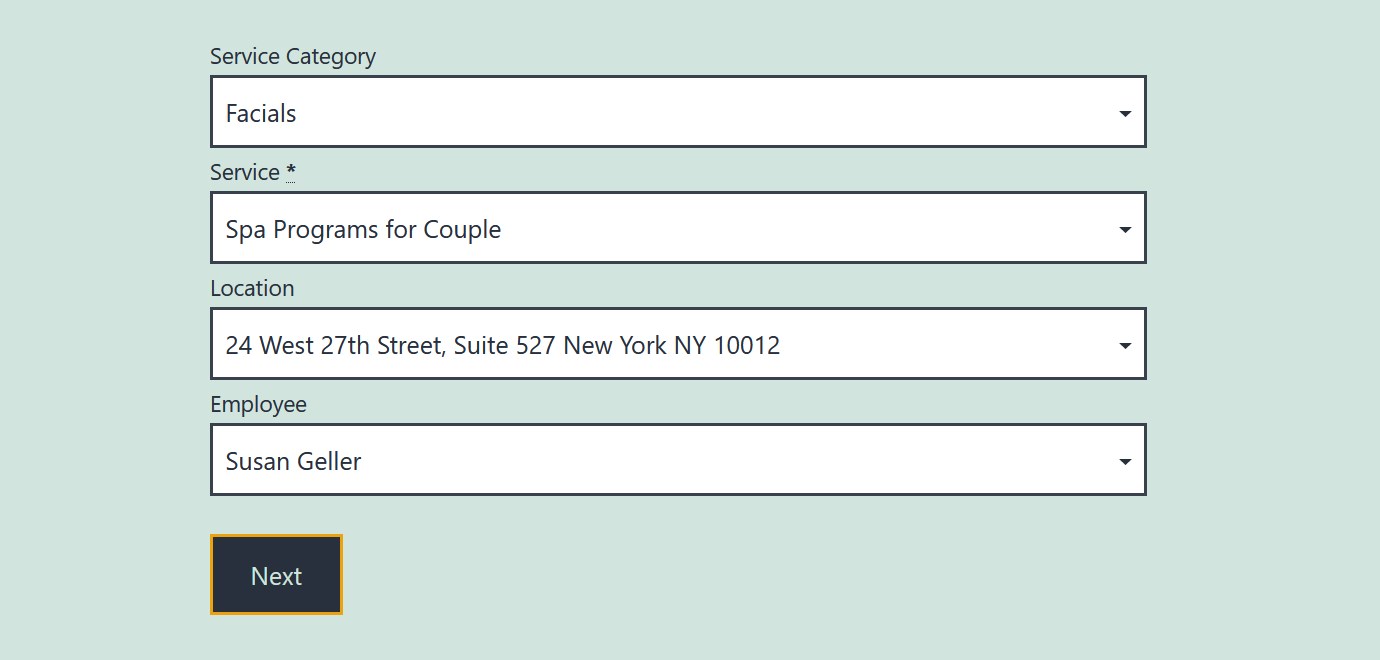
The new option appears on the final step of the reservation. From now on, upon receiving a message confirming their successful reservation, a client is also offered the convenience of seamlessly syncing their appointments with their preferred calendars.
So, what happens is, when clients can easily add their appointments to their calendars, they’re way more likely to remember and show up on time for their bookings.
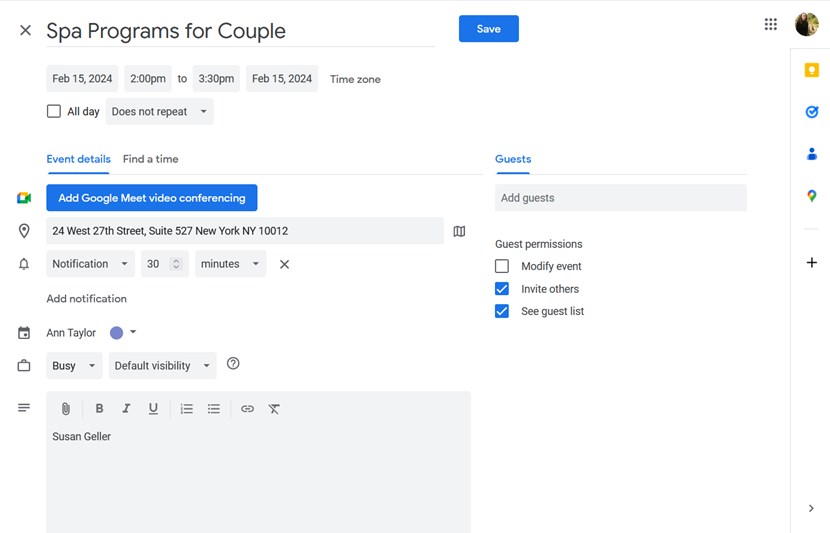
Google Calendar and Yahoo Calendar: Upon clicking on the preferred calendar, a client is redirected to their calendar and offered to add/save this event.
Of course, they can customize their event notifications, event details, and other information depending on the calendar settings available.
When using Google Calendar from the phone, it will open an app. As for Yahoo Calendar, since it’s a web-based calendar service and there is no mobile app, it will prompt the user to log in. If they’re already logged in, they can easily add the event to their calendar.
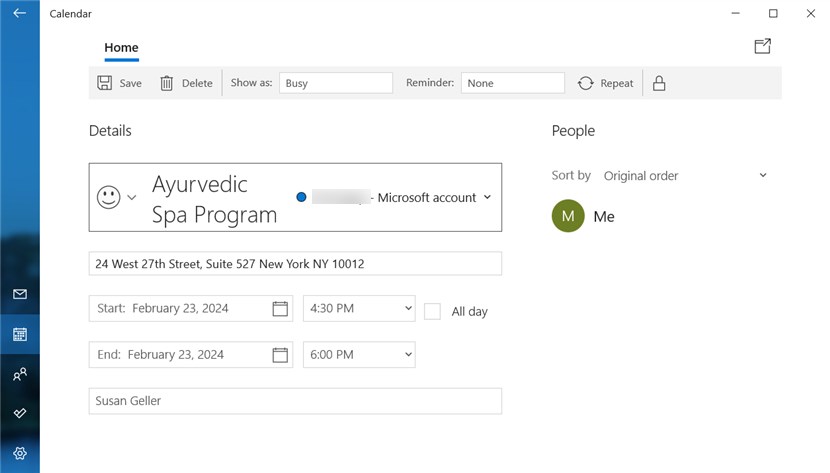
Apple Calendar and Outlook Calendar: Clicking on either typically triggers the download of an iCal file to the device used. If a client is on their phone, it will seamlessly open a dedicated app for quick and smooth booking addition.
Here are more details:
- Date format will also depend on a calendar used.
- A client’s time zone will be used (the time is converted according to the zone difference with those set in your WordPress time zone settings).
- If a client has multiple appointments in their reservation, they will be offered to add each one separately.
How to turn on this option?
Enable/disable the feature right from the customization panel of the block in your preferred editor: the block editor, Elementor or Divi. This is enabled by default.
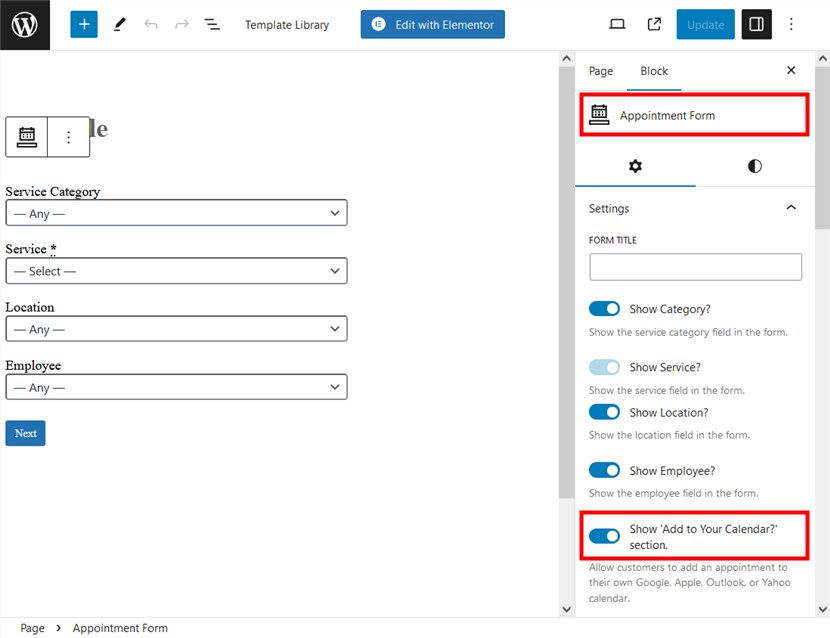 So, it’s a matter of a button toggle!
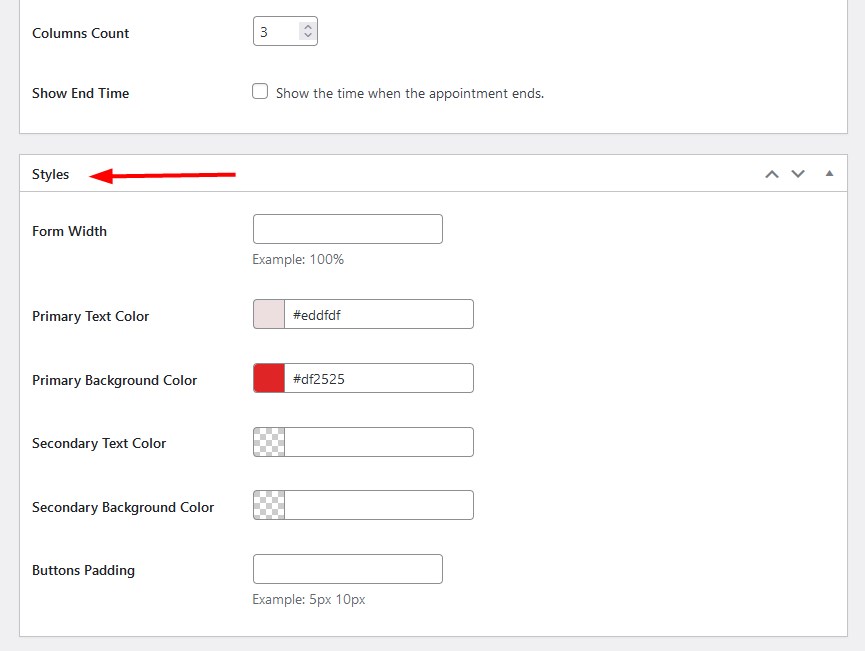
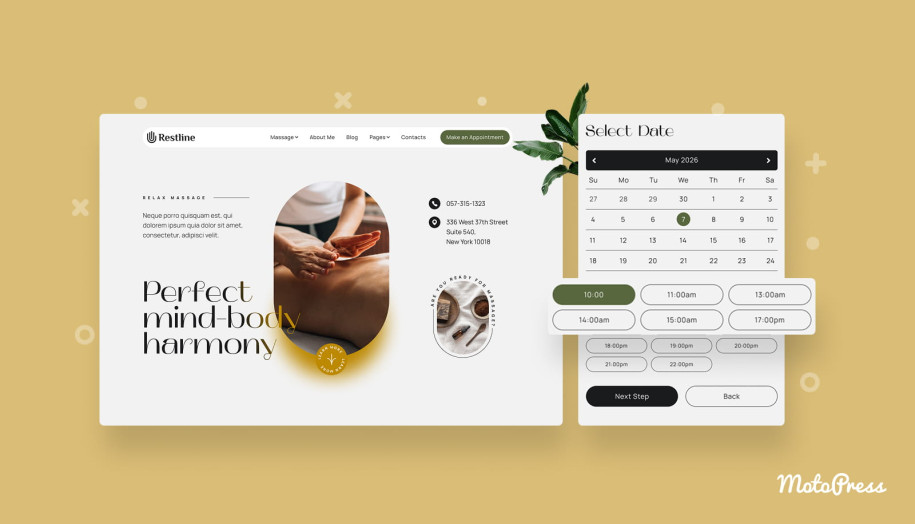
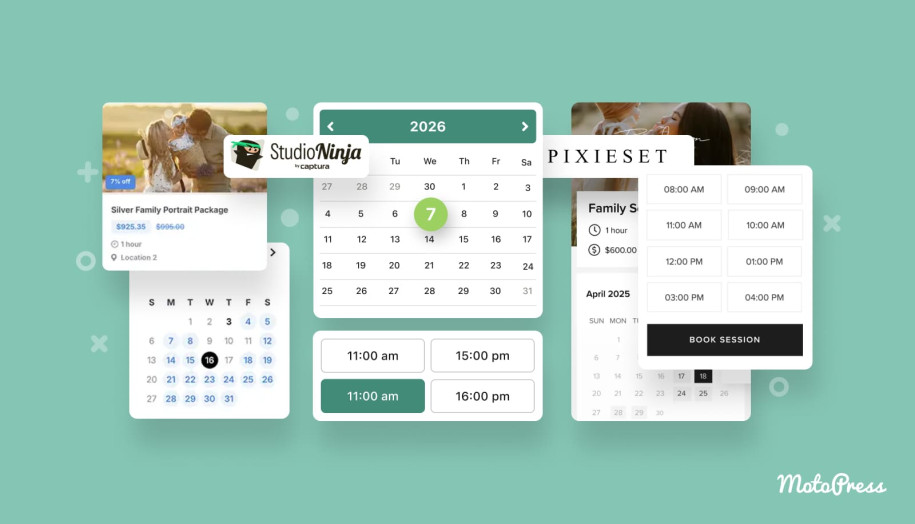
Update #2 More design options for the booking form
The best way to get perfectly designed booking forms is, of course, to opt for a dedicated WordPress appointment theme. If you are, however, on any other theme, the form might look too plain upon the plugin activation.
So, here is the solution that comes to the rescue with the recent update!
 These are global settings that apply to all forms, no matter in what way you added either to the website: with Elementor, the block editor, Divi, or even a shortcode.
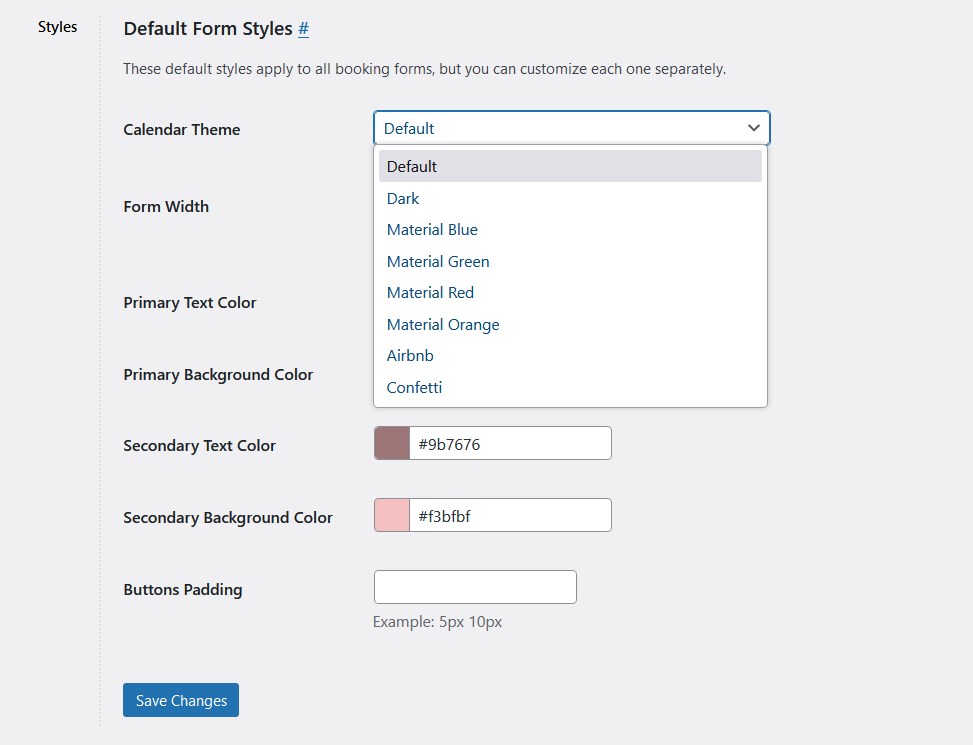
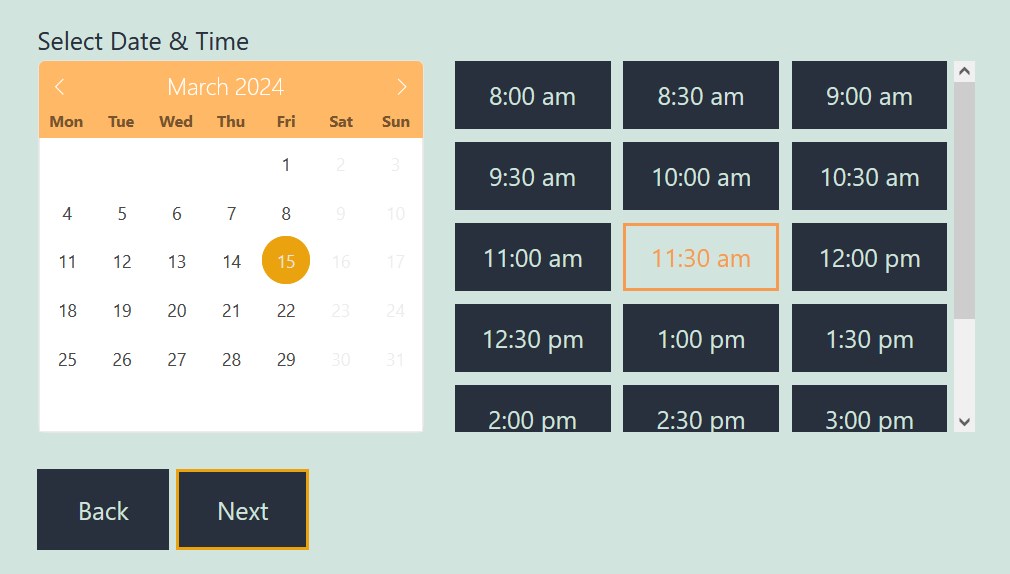
- Change calendar theme style
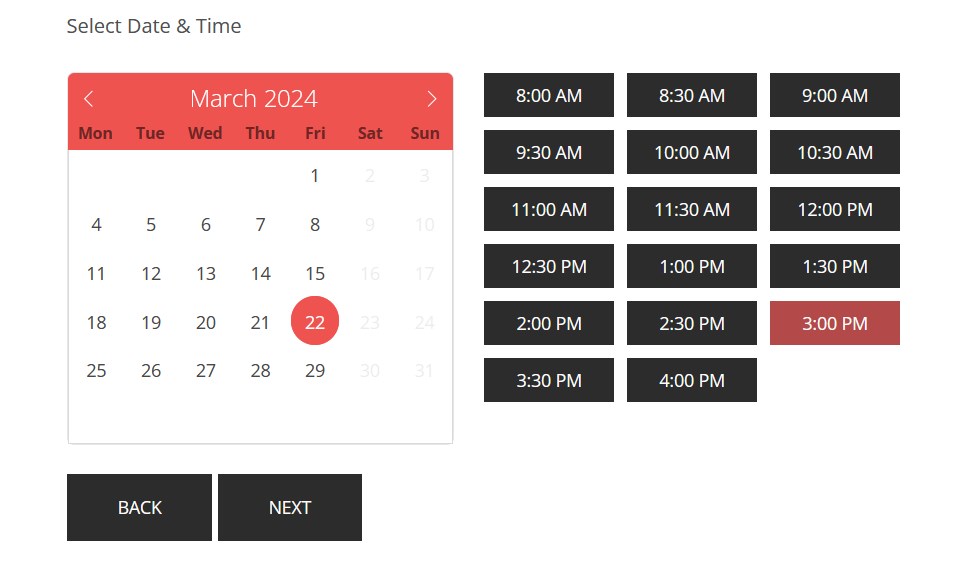
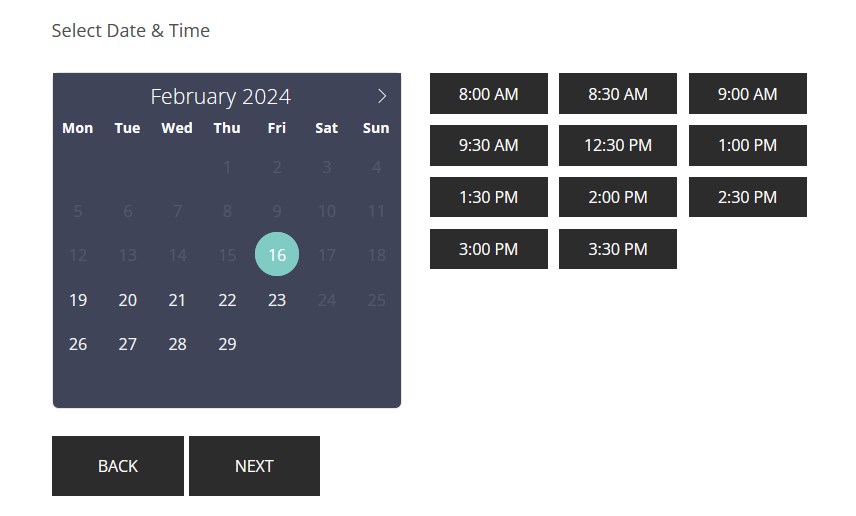
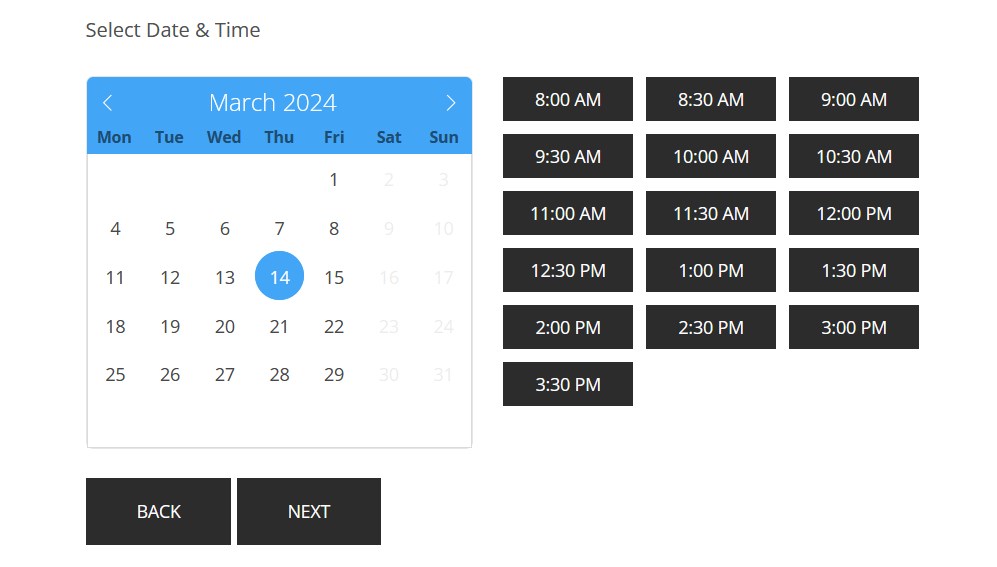
Dark, material blue, material green, material red, material orange, Airbnb, Confetti
We’ve added a few styles with various color schemes to help you choose a more appropriate variation that matches your website’s design. These styles apply to a calendar with a date picker. A few examples below:
- Form width
You can make the form wider or narrower depending on where it’s placed on your website and the page width. This adjustment applies to the form filters, which are normally the first step in the booking wizard. By default, the form width is 50%.
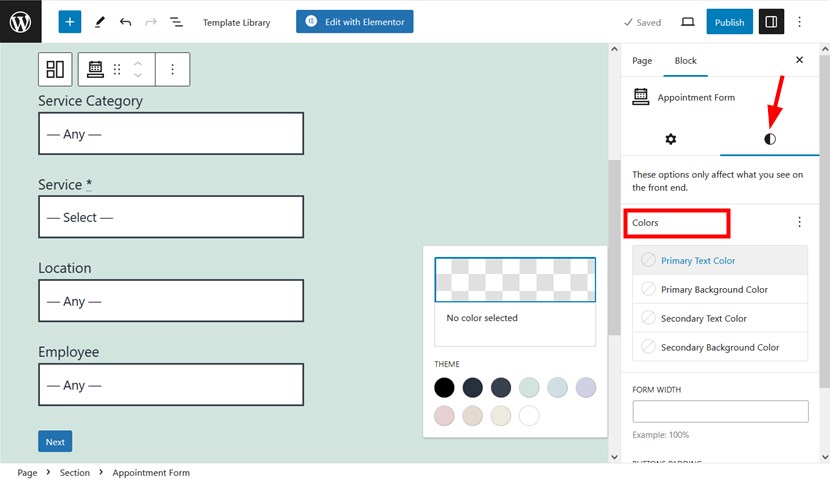
- Colors
 Primary Text Color & Primary Background Color: apply to the Next and Add More buttons, active state of dates in the calendar and time slots.
Secondary Text Color, Secondary Background Color: apply to the Back button, inactive state of dates in the calendar and time slots.
- Button paddings
Adjust the space between the edge of the button and its content. Increasing the padding will add more space around the button’s text or icon, while decreasing it will reduce this space.
Note: the settings you configure here apply across all appointment scheduling forms you created with the Appointment Booking plugin. However, you can alter these settings individually for forms. To do this, just open the page/post, where the form you want to edit is located – click on the block/widget settings panel > open ‘Style’.
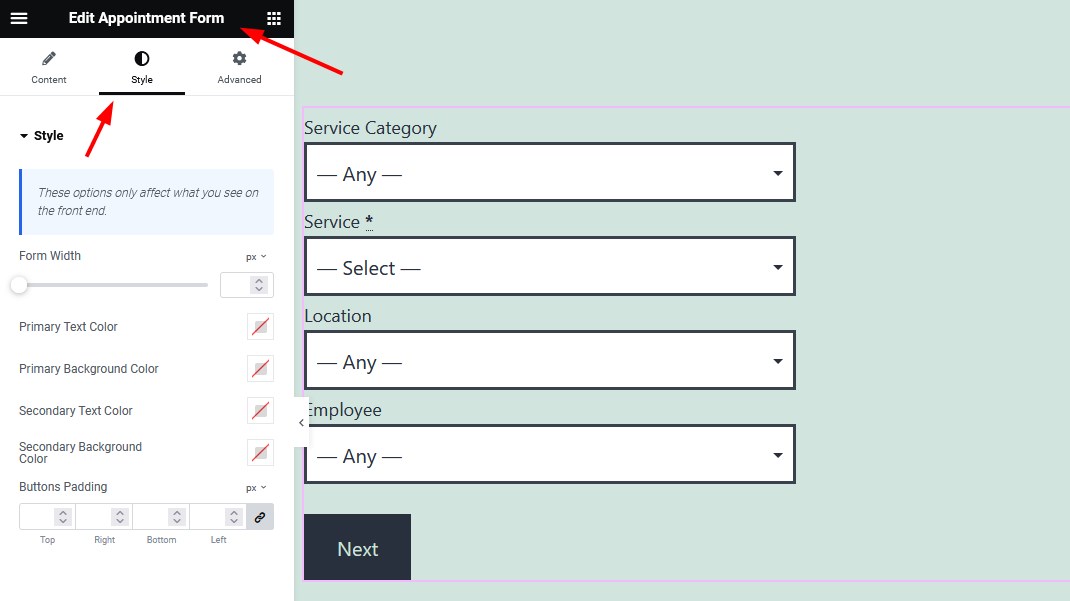
 If you are working in Eementor, find the Styles tab in Elementor (the Appointment Form widget), like below:
 In Divi, go to the Content tab > Appointment Form Styles section in (the Appointment form module).
When customizing an appointment form via WordPress widgets, use the Styles tab as well.
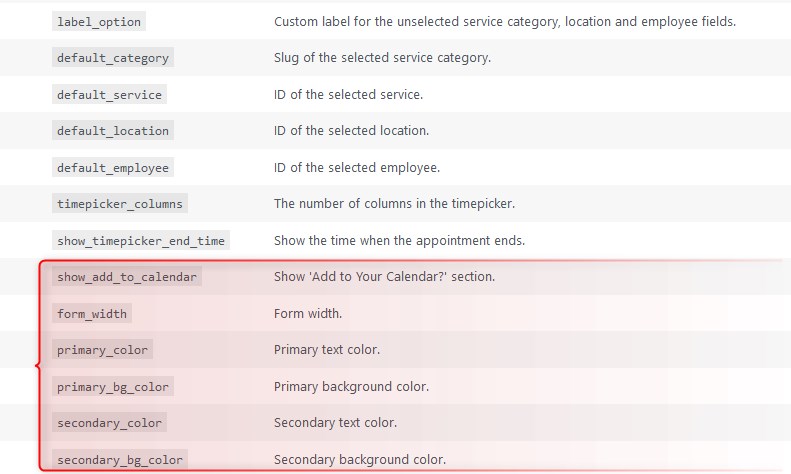
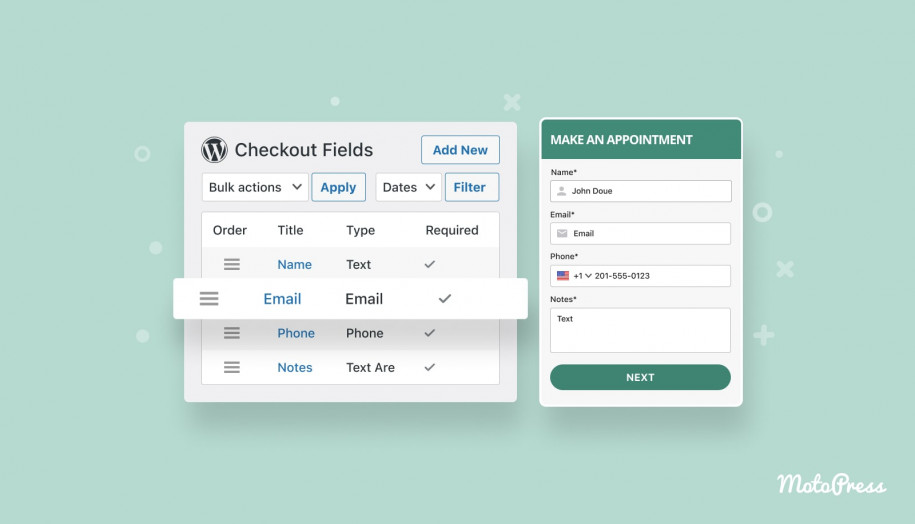
If you use shortcodes, you can find new parameters for the style customization via Appointments > Help > Appointment form.
As an alternative approach, you can go to the Shortcodes builder via Appointments > Shortcodes > select Appointment form and visually build a shortcode.
 To sum up, with the recent update version 1.22.0 of the MotoPress Appointment Booking plugin, you get:
- New capabilities to decrease no-shows by enabling clients to add appointments to their personal calendars.
- More styling options for the booking form to help you create a better visual match for your website.
- Several fixes to improve the performance of various Appointment Booking plugin menus.
Good post. Need the option to make the e-mail field for customers as optional while booking appointment. Some customers specially seniors don’t have an active e-mail address. It’s much needed. Hopefully it’ll be considered in the next development phase.
Thank you