Sync Employee’s Google Calendar to Website Bookings since Appointment Booking 1.10.0
Table of Contents
Since Appointment Booking 1.10.0, all employees can sync their schedules with their personal Google Calendars!
This will definitely help your staff stay up to date with all new bookings they receive via your website, with instant notifications, without a need to log into your website.
Read how you can allow employees to manage their accounts and bookings
To make things work, you need to complete two steps.
Video guide
You can optionally watch a video guide on how to set up the connection.
On the admin’s side:
- As a website administrator, you firstly need to create an app in the Google Developer Console.
On the employee’s side:
- Employees need to assign their calendars to their accounts on your website.

How to make it work?
1.1. Register an app with the Google Developer Console
First of all, you need to bridge the Google application with your website.
To do that, you need to create an app using the Google Developer Console and obtain your keys, so-called Client ID and Client Secret. Follow the next steps to do that.
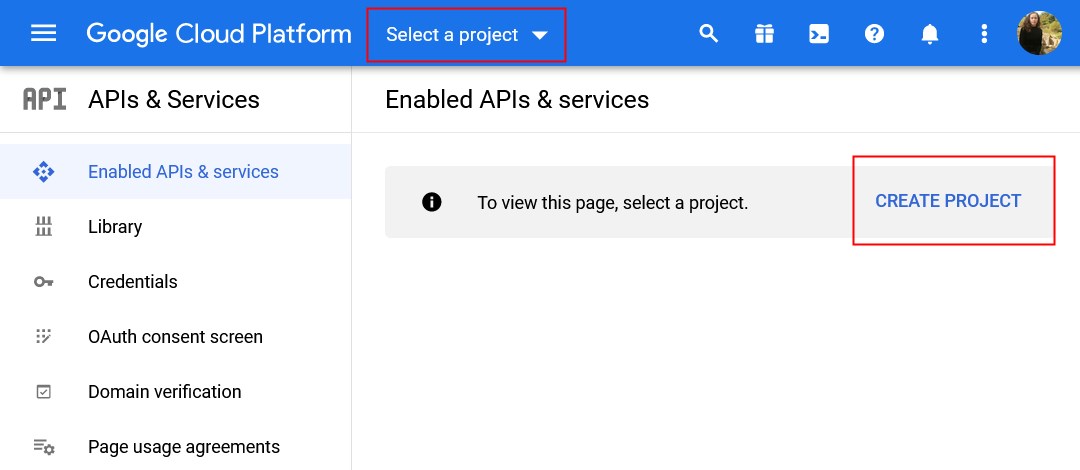
- Go to the Google Developers Console.
- Click on “Create project” or “Select a project” if you have active projects.
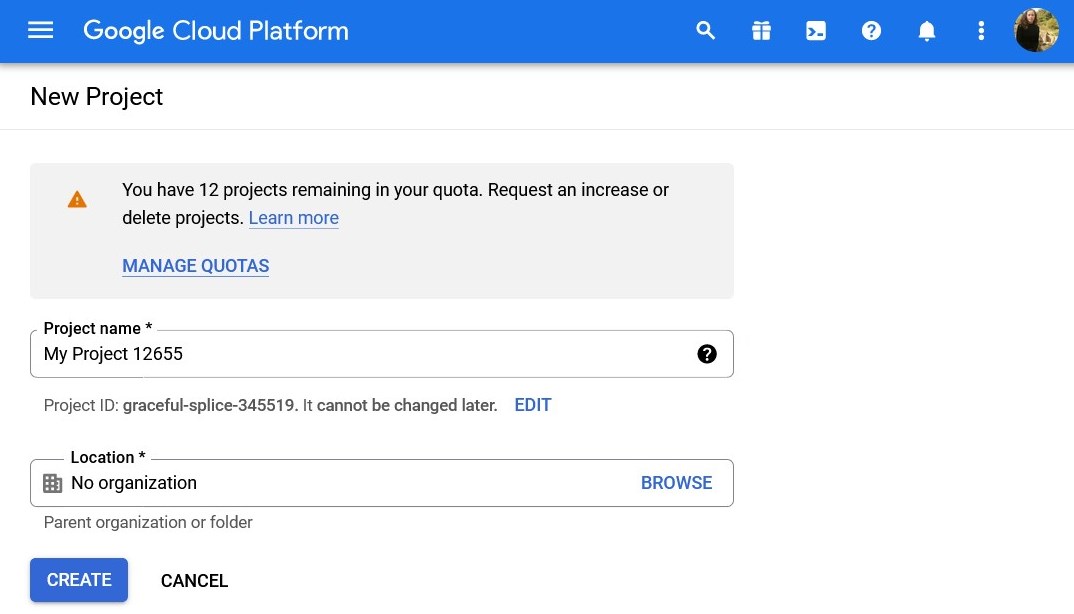
- Fill in the required fields.
- Once you created or chose a project, you’ll be taken to the project dashboard.
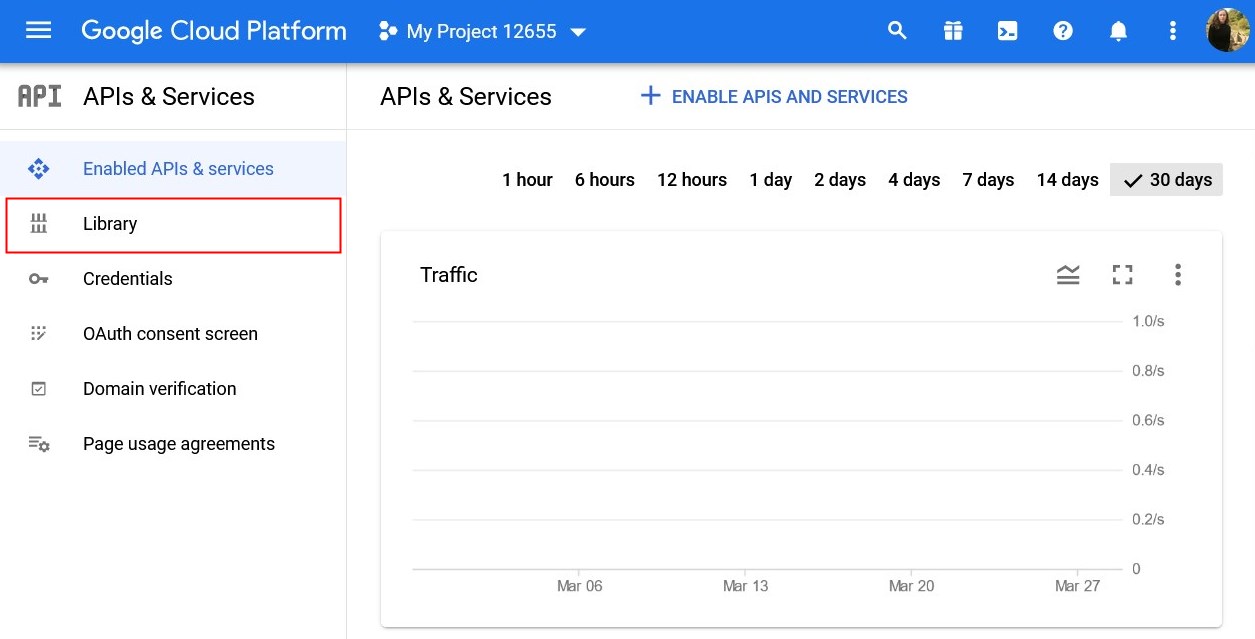
- Choose “Library” in the menu.
- Select the Google Calendar API.
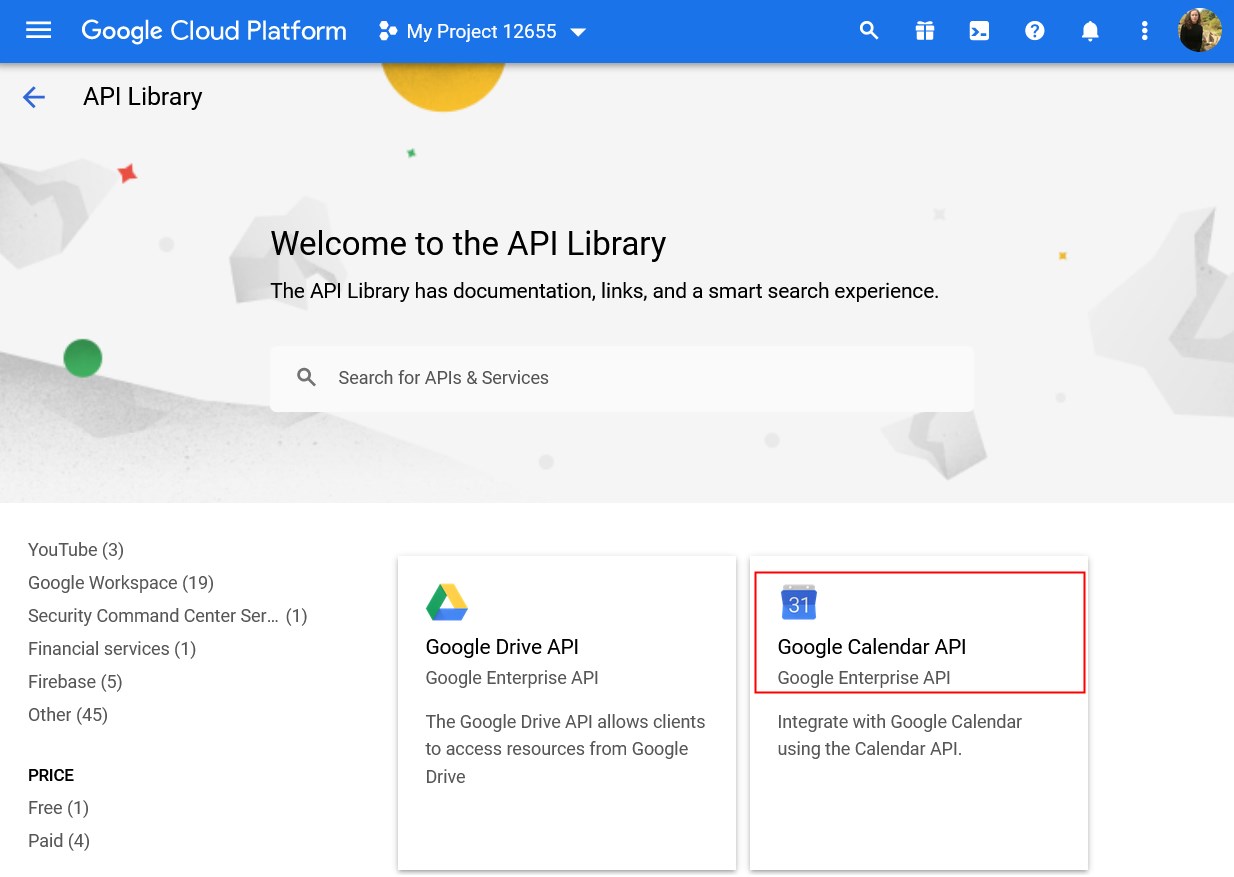
- Choose it and click “Enable” on the next screen.

- One the next step, you need to click on the “Create credentials” button.
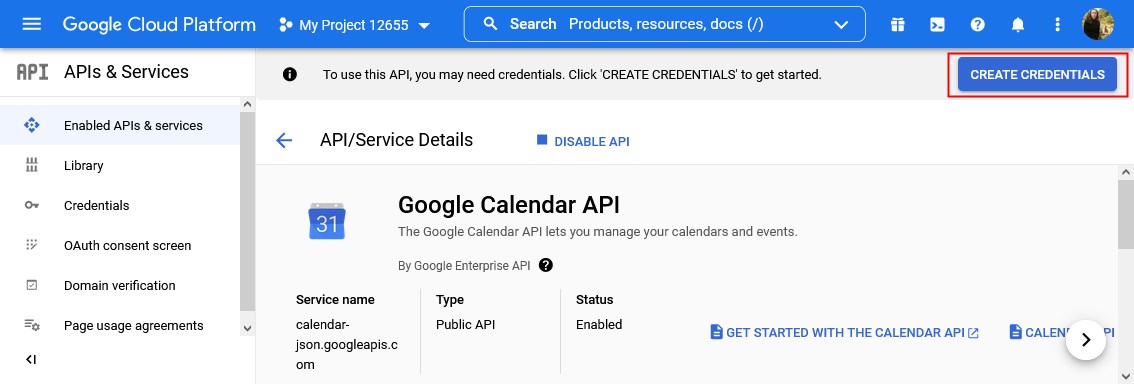
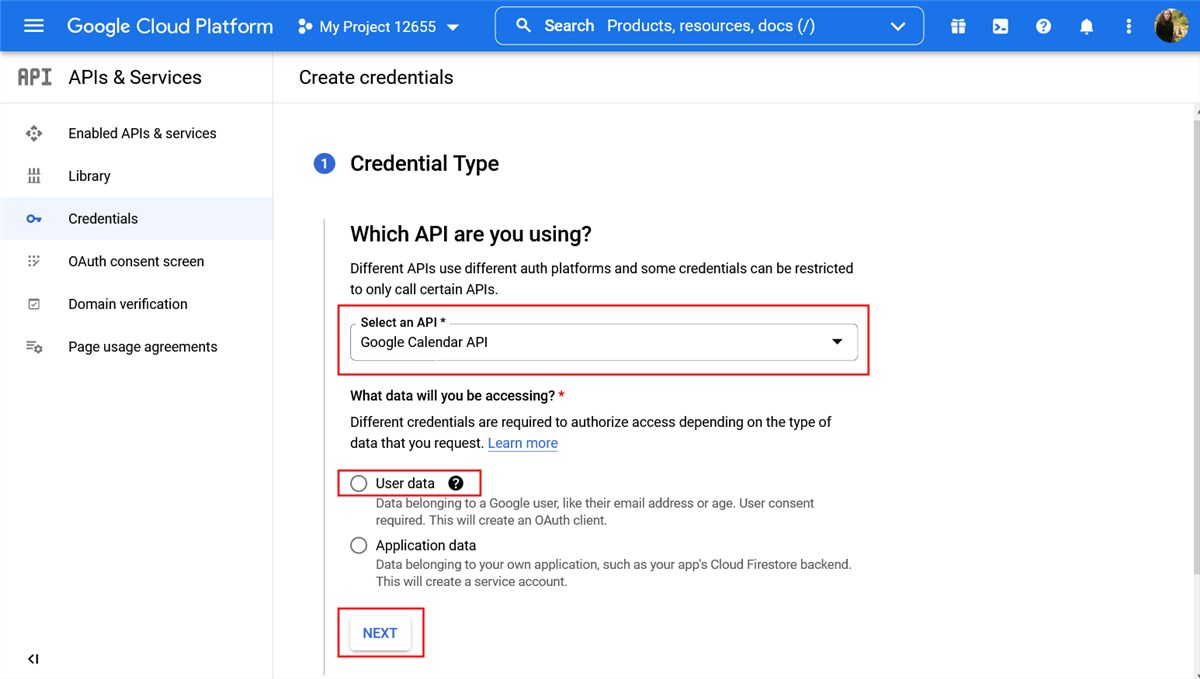
- Set your credential type, which is Google Calendar API.
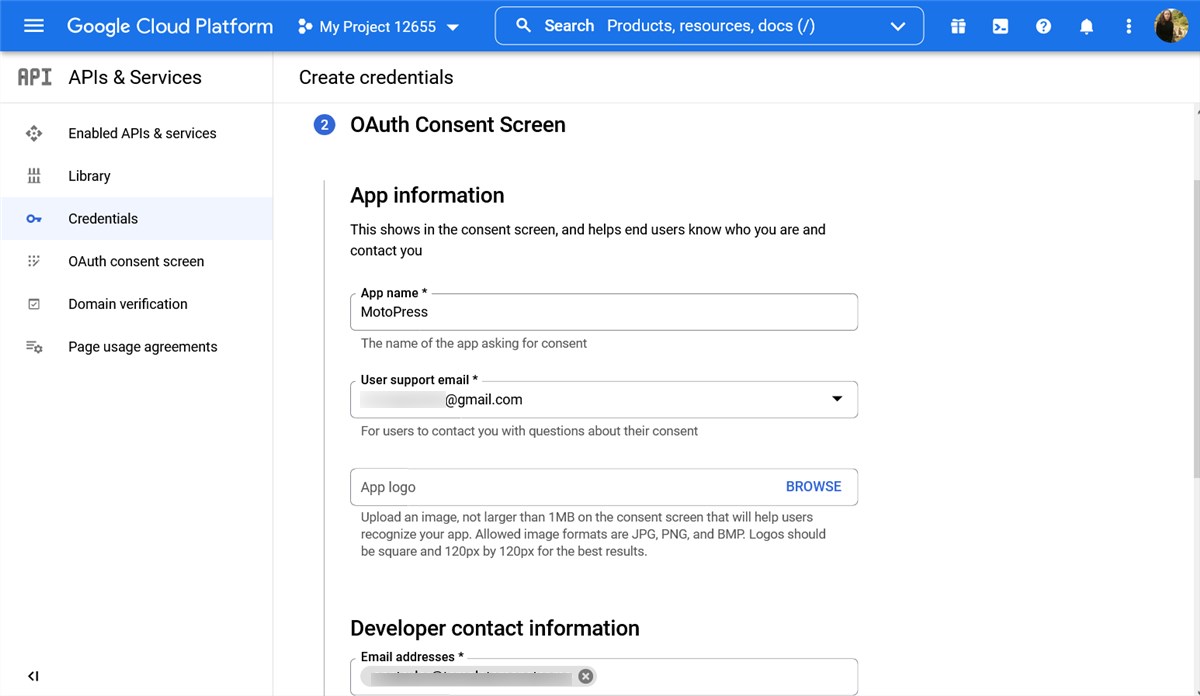
- On the next step, provide a name for your application and contact email addresses.
- Save and continue to the OAuth Client ID step. Publish the app.
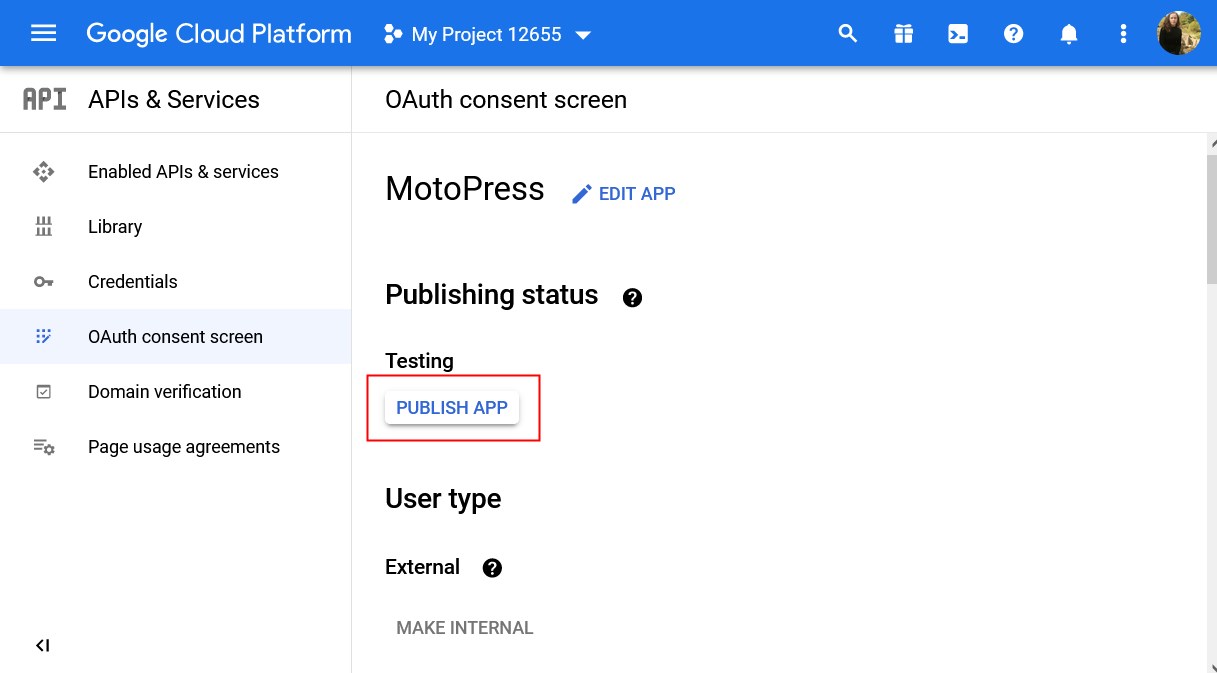
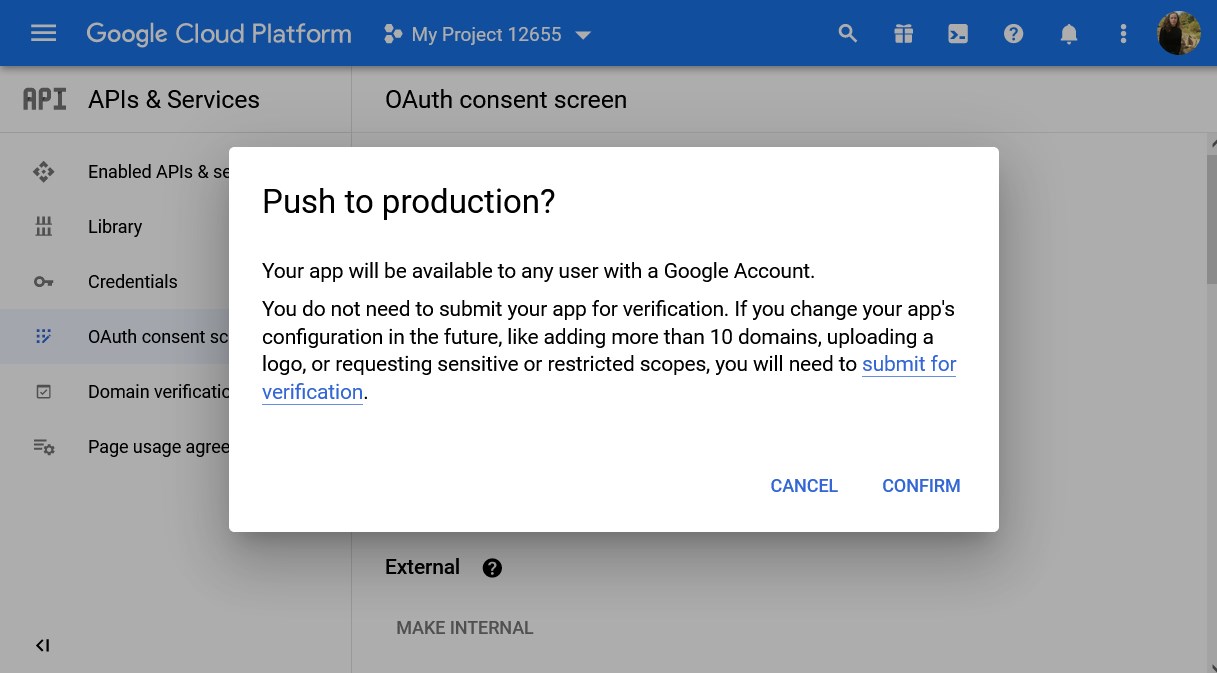
Click “Push to production” to confirm your actions.
- Head to “Credentials” from the left-hand menu > click “Create credentials” > choose OAuth client ID in the drop-down menu.
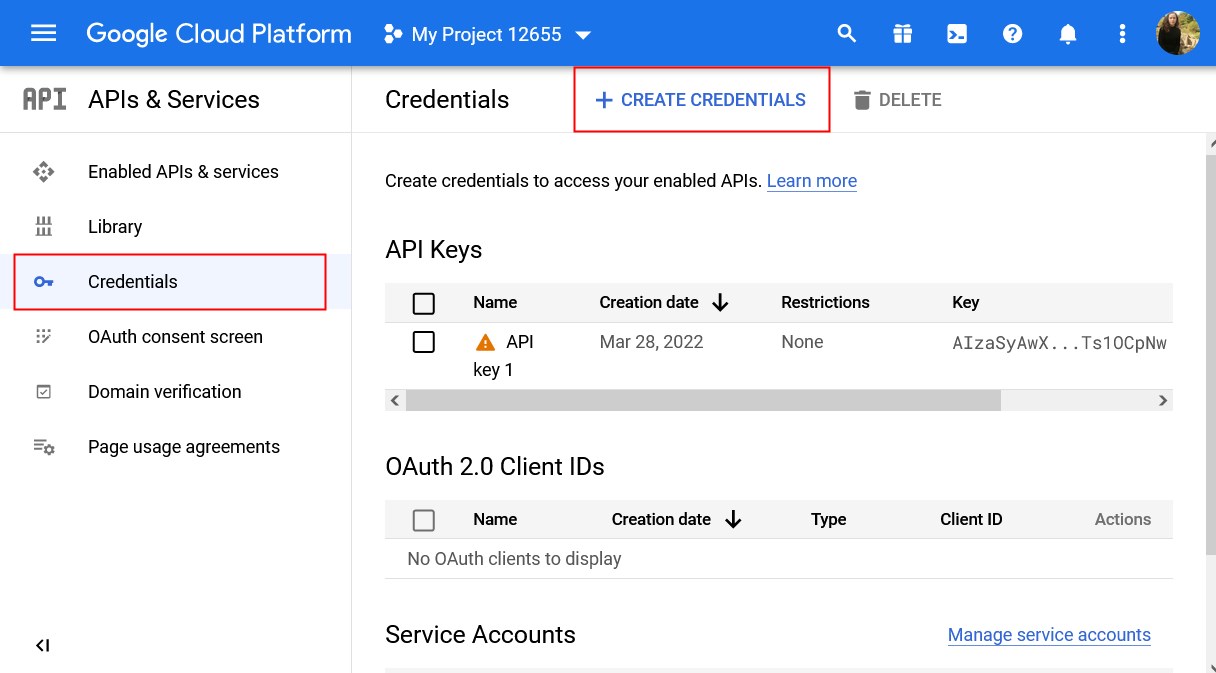
- In the new menu, choose “web application” as an application type. Also click “Add URL”.
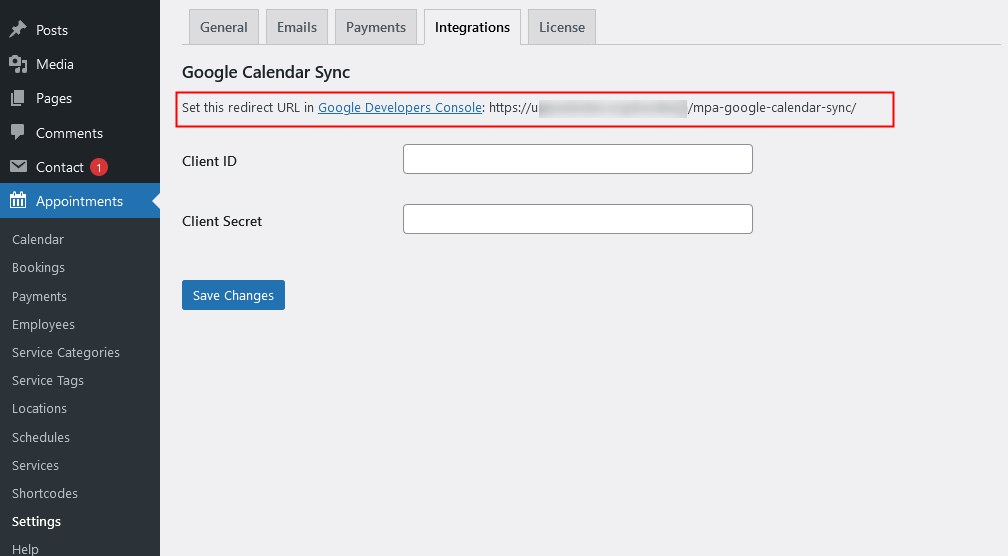
Paste the URL from the Appointment Booking plugin dashboard and click create. You can find it via Appointments > Settings > Integrations > Google Calendar sync URL.
Use this URL as an authorized redirect URL.
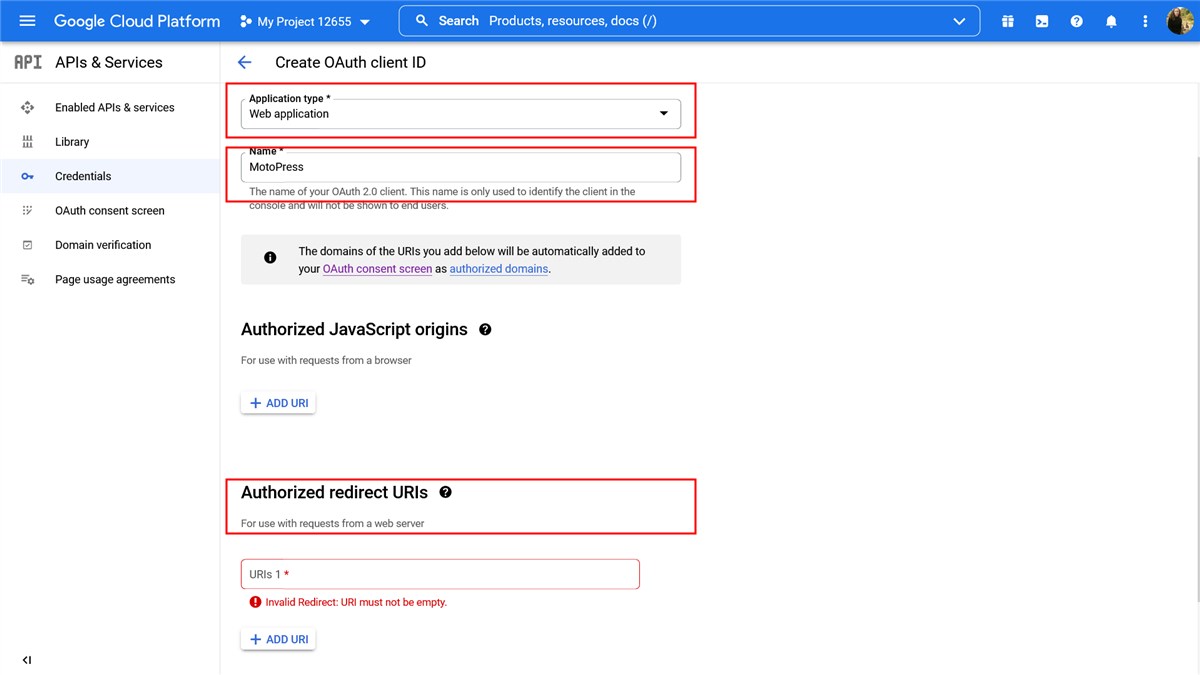
After all the needed fields are filled in, click “Create”. This will generate your Client ID and Client Secret key credentials.
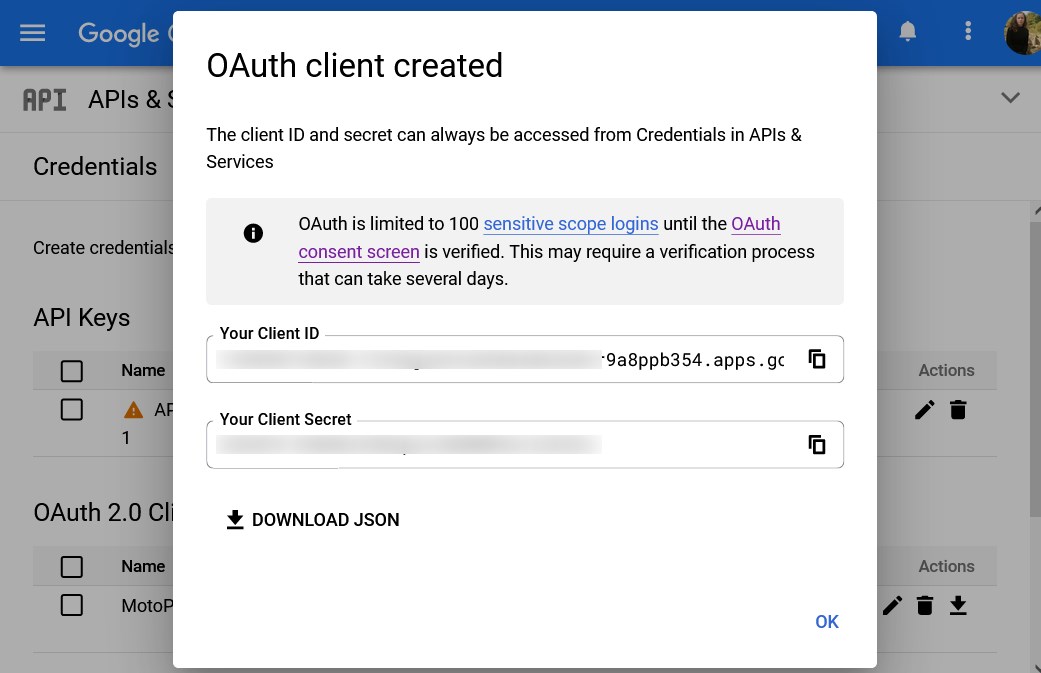
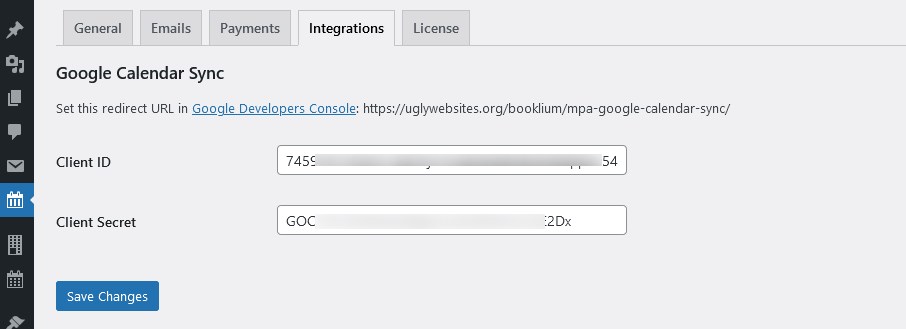
Copy them and paste to the Appointment Booking dashboard.
If you are on Appointment Booking 1.10.0, you’ll find dedicated menus for placing these keys via Appointments > Settings > Integrations > Insert keys > save changes.
Once this connection is established, you now need to set up things on the employee’s side.
1.2. Bridge employee’s Google calendar to your site
Your employees must log into your website via their accounts and connect the latter with their Google calendars.
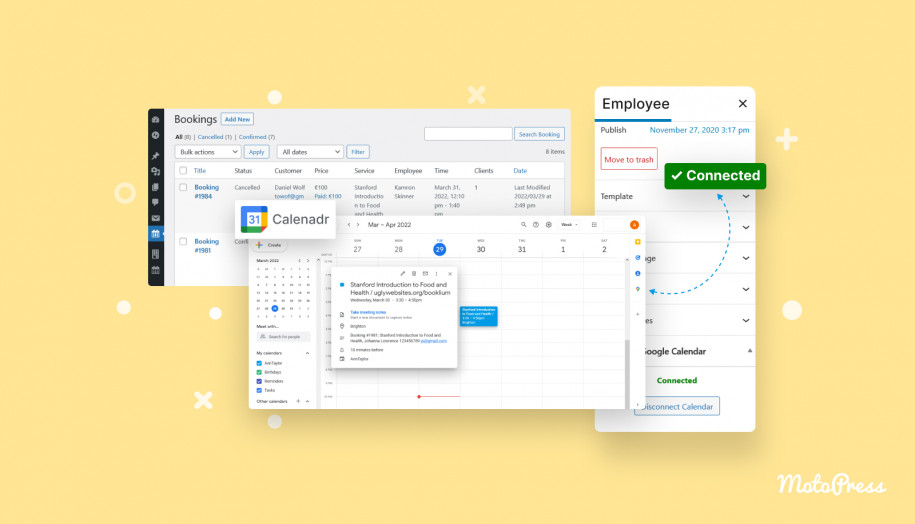
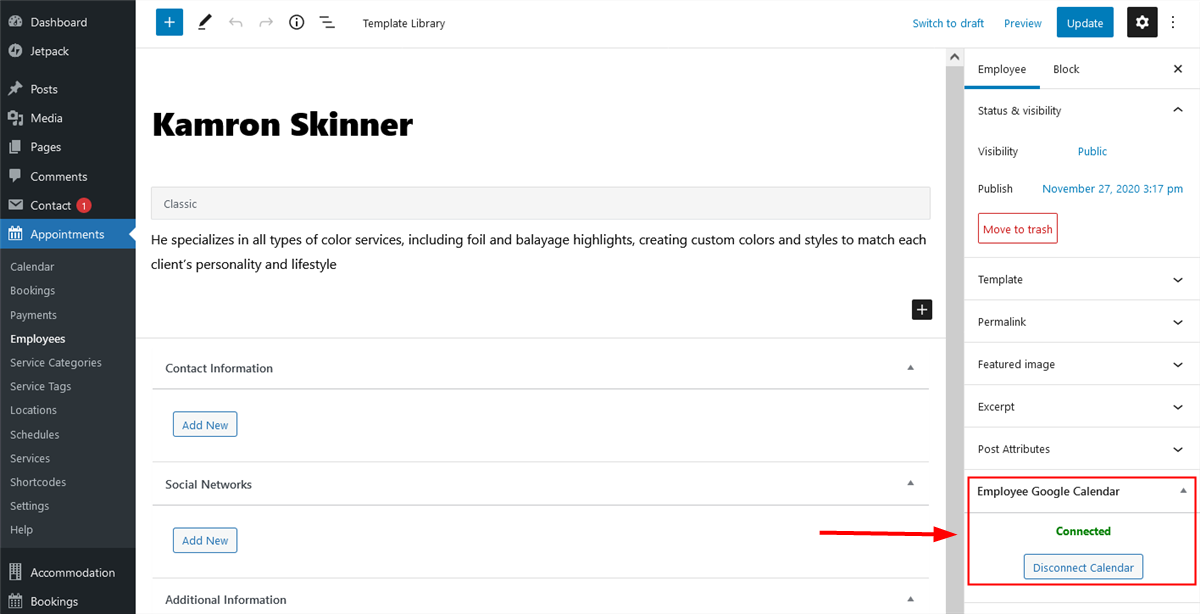
They can do that via Employee > Employee Google Calendar > Connect to Calendar.
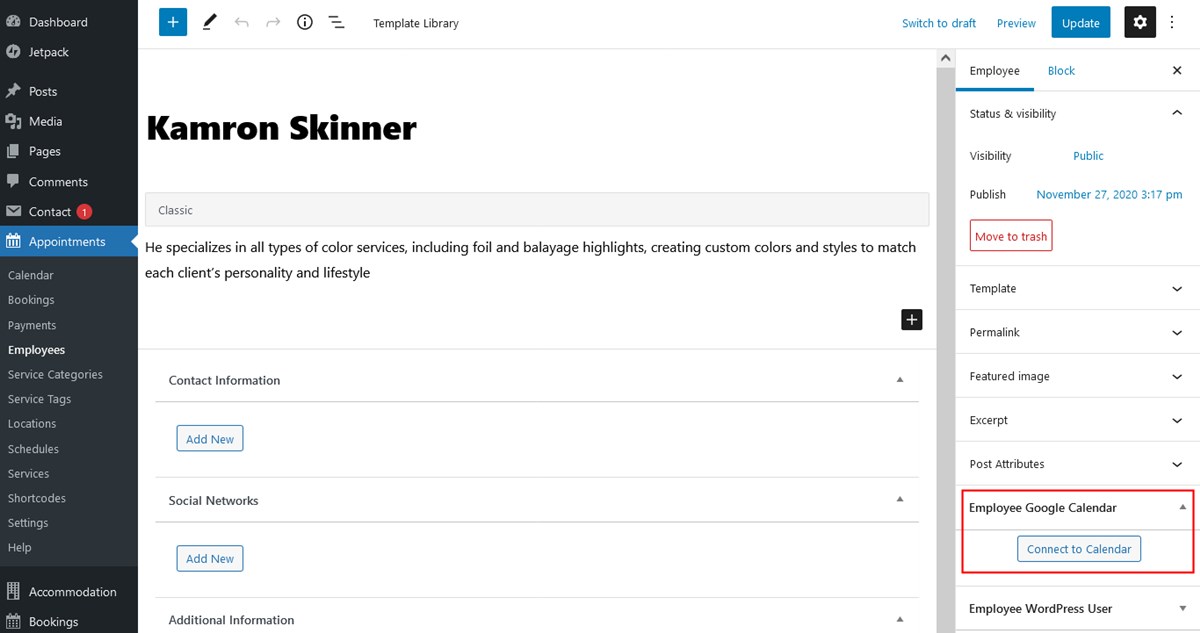
They will be redirected to their Google accounts for connecting calendars.
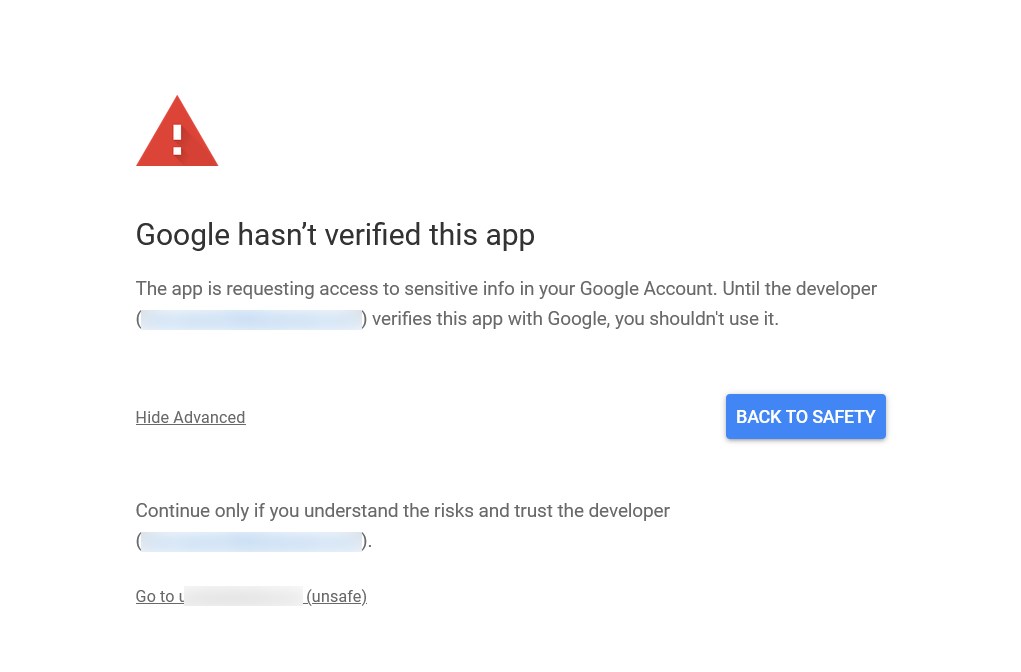
It’s possible that Google will mark this app as not verified. Your employee just needs to hit “Advance” and then click “Go to <your domain>”. This will allow them to log in.
If the process is successful, they’ll see that the account is ‘Connected’ in your website dashboard:
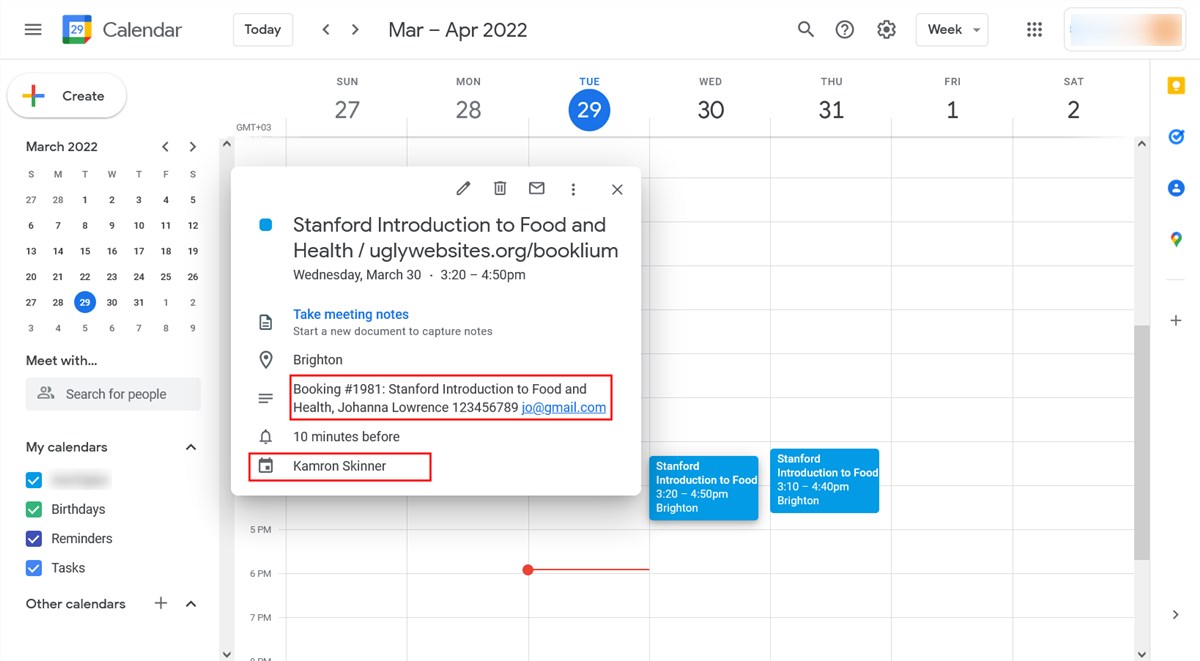
All the new bookings submitted by clients on the website or added by the site admin by hand via the Bookings > Add new.
The way your employees receive calendar notifications depends on their Google Calendar settings.
That’s it! It might take a while to create an app and connect to your WordPress site built with the Appointment Booking plugin but it’s worth it.
Some other important things to keep in mind:
- Once the appointment is scheduled via your site, it’s automatically added to the employee’s Google calendar.
- Change the statuses or reschedule appointments via the plugin. All the changes you / your employee make to the appointment booking on the website are updated in the respective Google Calendars. For example, if you change the booking status to ‘Canceled’, it automatically disappears in the employee’s Google calendar schedule. The changes you make to the booking in the Google Calendar are not reflected in your WordPress site. That is, it’s a one-way sync.
- Customers who booked a service are added as participants to the Google Calendar.
Update to the latest Appointment Booking plugin version to help your employees manage their bookings via popular calendar application without any hassle! Let us know if this worked for your site and whether you still have any questions.