Allow for Customer Accounts since Hotel Booking 4.2.0
Table of Contents
The latest version 4.2.0 of the hotel reservation plugin WordPress system by MotoPress introduces two big updates: the new Customers menu and user dashboards.
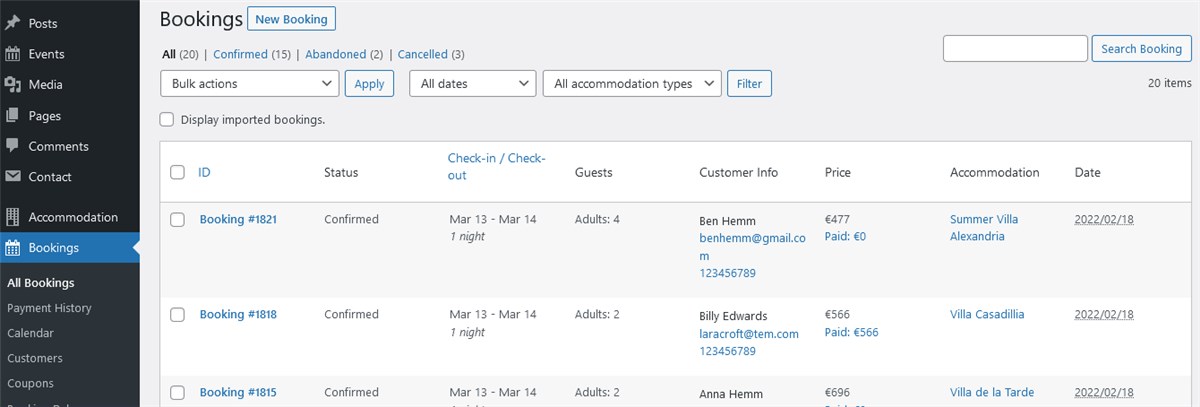
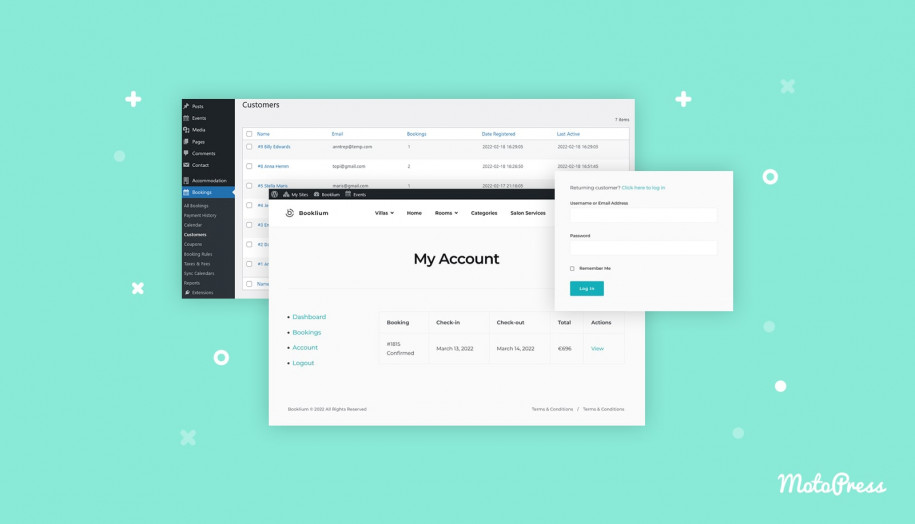
You can find the new data on all your guests via Bookings > Customers. This database is built around your user’s email address or user ID.
Video tutorial
Watch a video on how customers can create an account.
This means you have an entire list of customers separate from the Payment history or Bookings databases, which should give you direct access to user details and simplify your client management tasks.
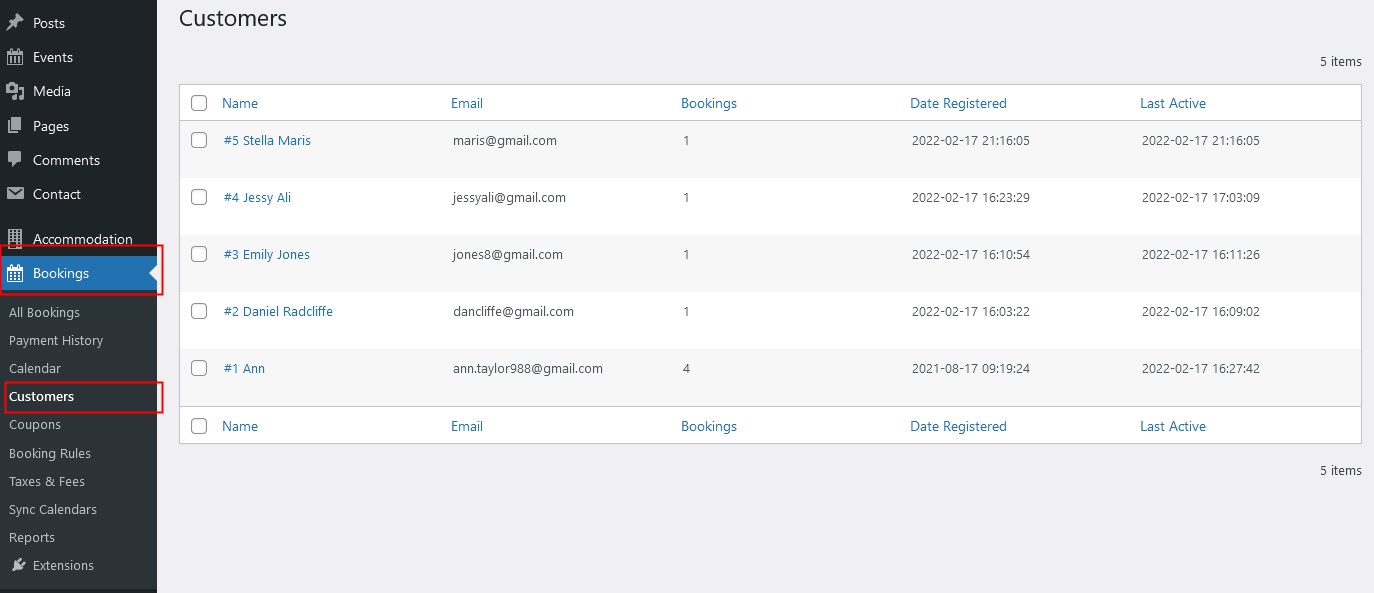
For example, with this customer accounts option, you can quickly find the needed person and update the information they provided.
In the new Customer accounts menu, you see the list of all clients, whether they have a personal account on your website or not.
If they do, they’ll have a user ID and the “Edit User Profile” link that allows you to edit customer info.
If you don’t see these two signs, that means a user made a booking but they don’t have an account.
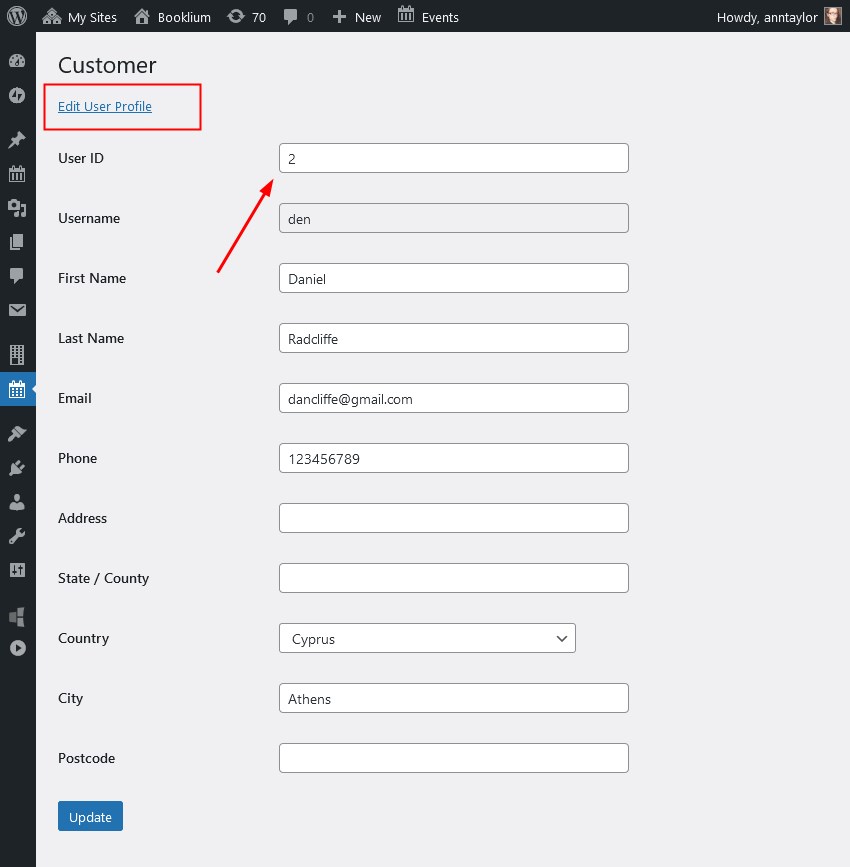
Clicking on the “Edit user profile” button will get you to the customer details, such as a name or a user role. Note that you can do pretty much anything here, even update an email address, but you can’t change a username.
If a customer has an account and a username, it will always be prior for assigning all future bookings to it. If not, their email address is used.
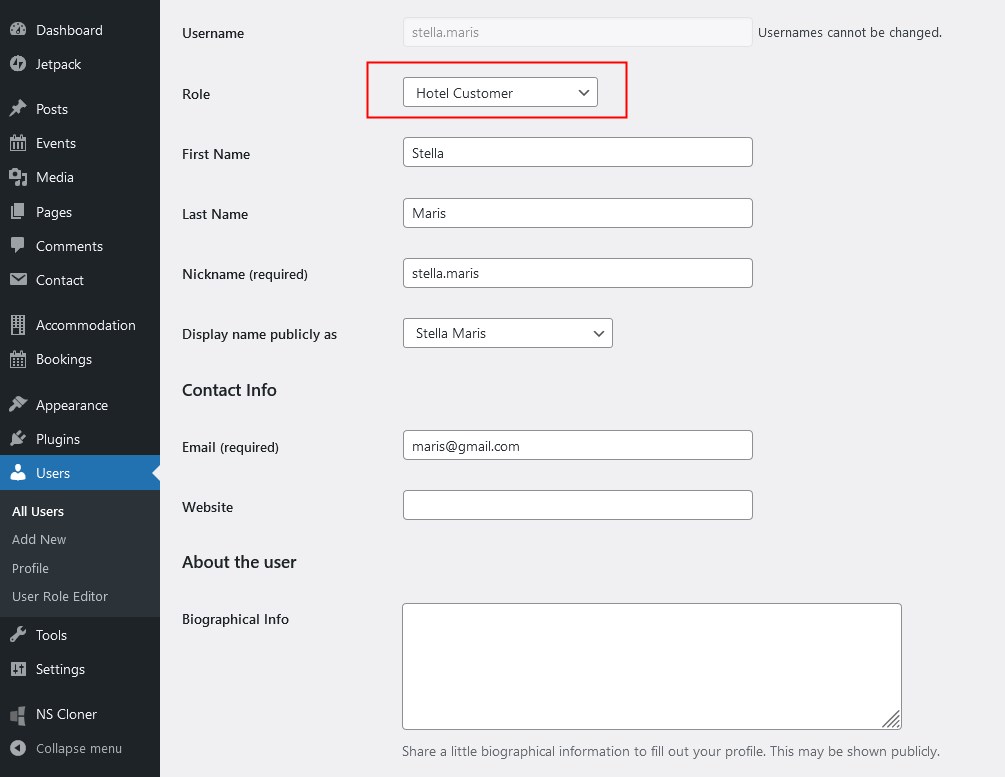
The new “Customers” menu registers all users, whether they made a booking by themselves or a booking was added by the site admin by hand.
This brings us to the next important chapter, the creation of user accounts!
Get started with user dashboards
As it was mentioned at the beginning, user dashboards are one of the key new things you can employ to help customers:
- easier view their bookings in personal accounts
- speed up and simplify all bookings in the future thanks to the pre-populated customer info (for logged-in users).
The account creation process is directly associated with the checkout page – this is where guests provide their details.
You can set up accounts in different ways. Select your preferences via Accommodation > Settings (General tab) > Accounts.
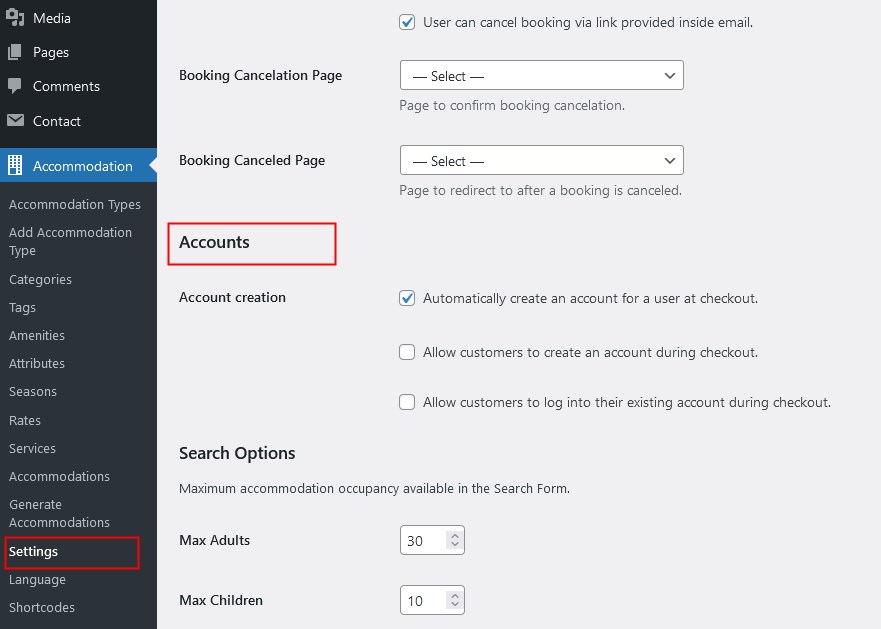
Here are your choices:
- Automatically create an account for a user at checkout: no customer action required, an account is created automatically and a user is notified about it via email.
- Allow customers to create an account during checkout: let your guest choose whether they want to have one by offering a checkbox at checkout.
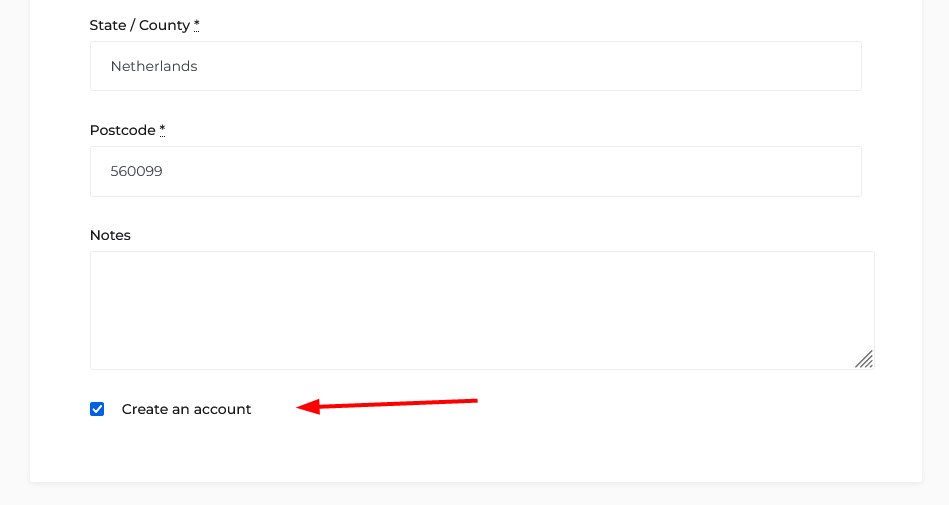
There is one more checkbox that asks you to choose whether you want to output the login area for existing customers:
- Allow customers to log into their existing account during checkout.
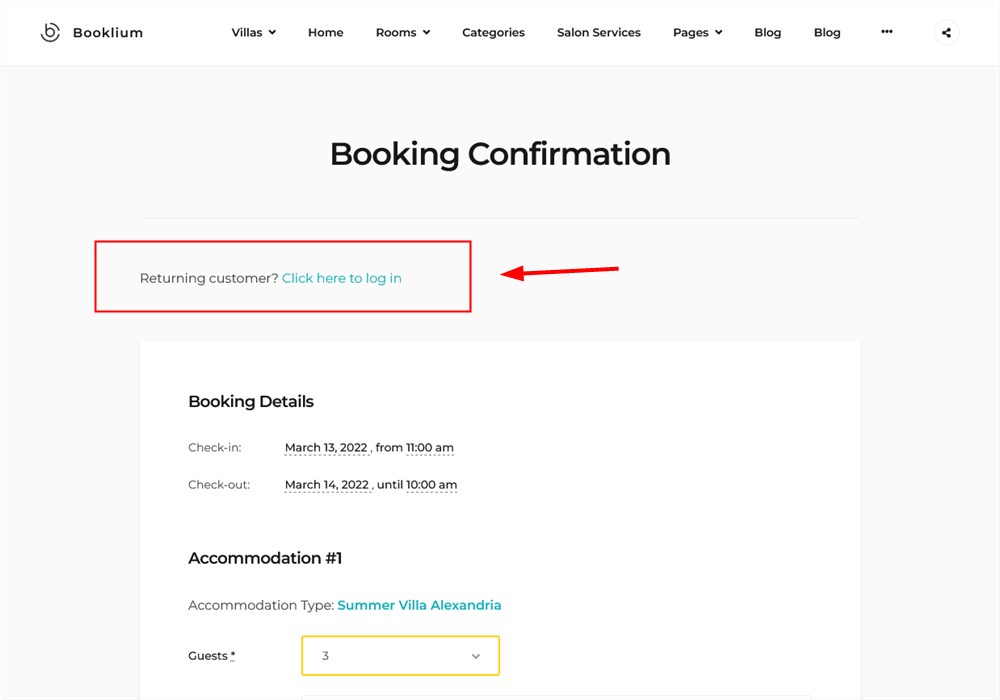
Account holders will be redirected to the dedicated login area:
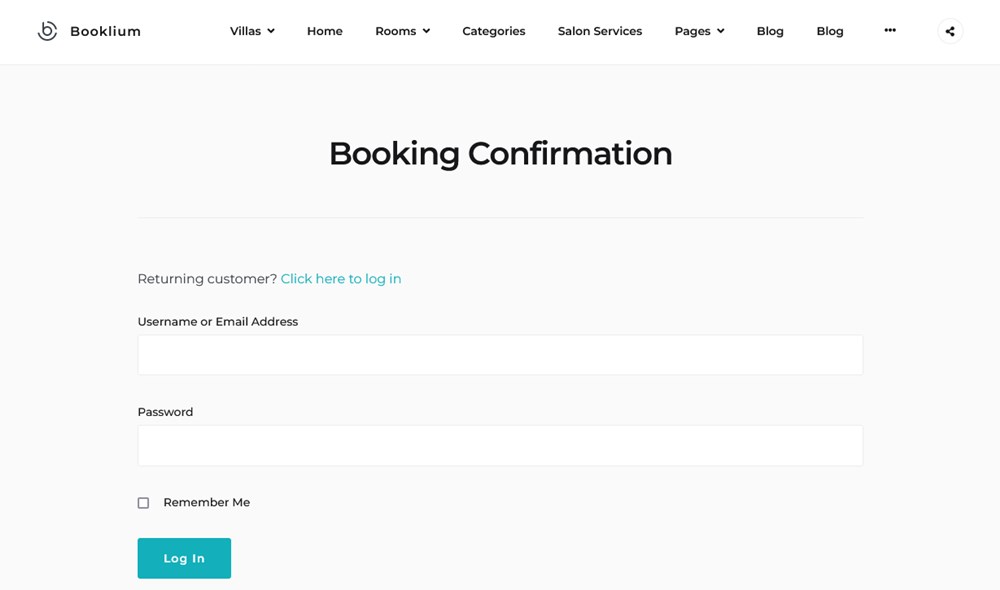
This is a way for customers to make new bookings really quickly since all the personal data fields are already filled in.
Notice that if a logged-in existing customer is making a booking for someone else, even for a person with a different email address, this new reservation is still assigned to the logged-in user ID.
That means one ‘customer’ may have many assigned bookings:
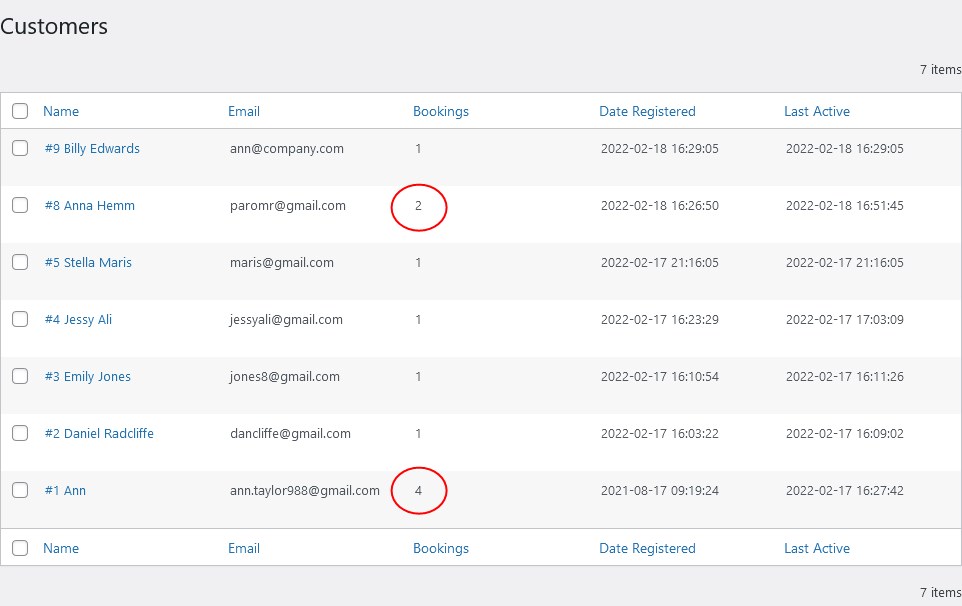
However, you still receive a different new booking in a list of bookings each time a new reservation pours in.
How to add the “My Account” page to your site
It’s crucial to differentiate the public “My account” login area on your site and the actual so-called system “My account” page.
You may choose to not even display the former on your site but the latter is necessary so you must make sure that it’s set up. This page is where your customers are redirected to.
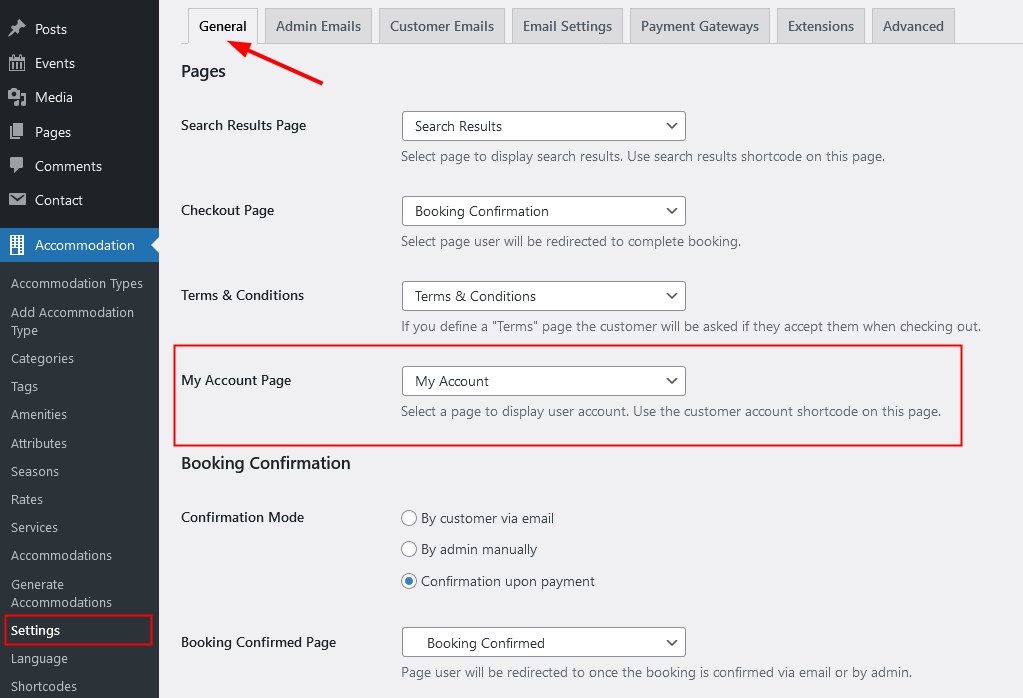
To do that, check out whether it was added automatically after you updated to Hotel Booking 4.2.0: go to Settings > General > Pages > My Account page.
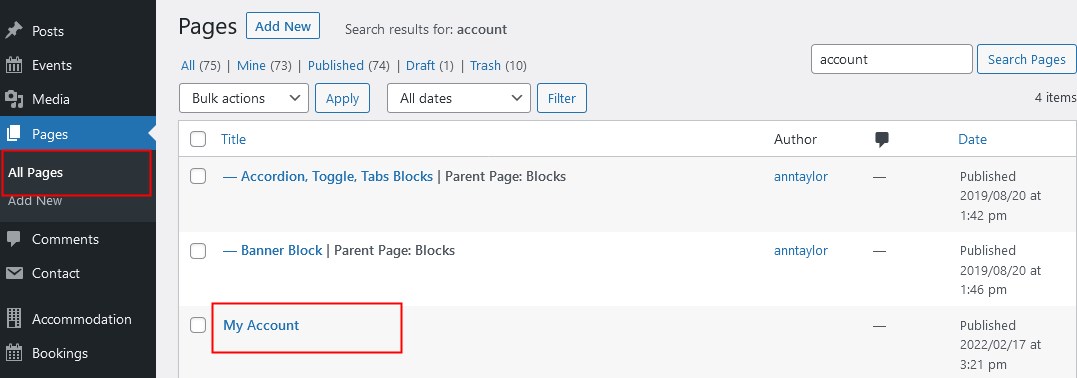
Remember the title of the page, find it via Pages and make sure that the proper shortcode is added.
The login area is generated with the [mphb_account] shortcode.
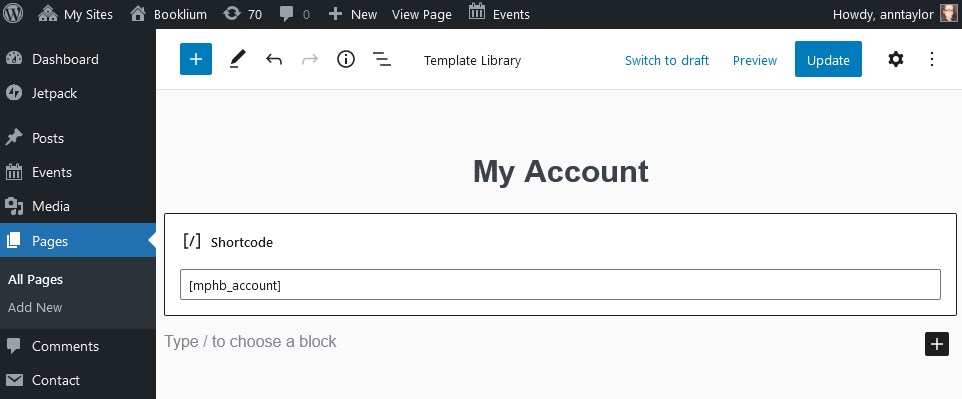
If for some reason it was not added, you just need to add this same shortcode, preferably using the dedicated shortcode blocks in the block editor or any other website builder.
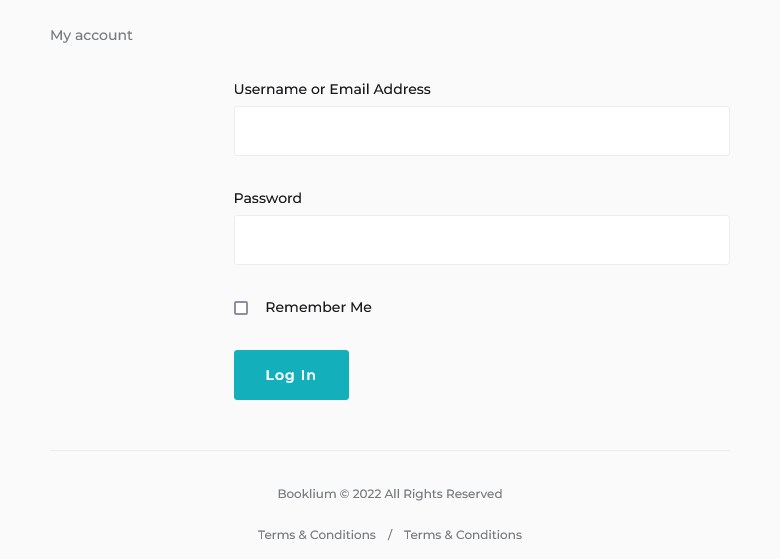
If you do want to display the login area somewhere in the visible website parts, you can do that using:
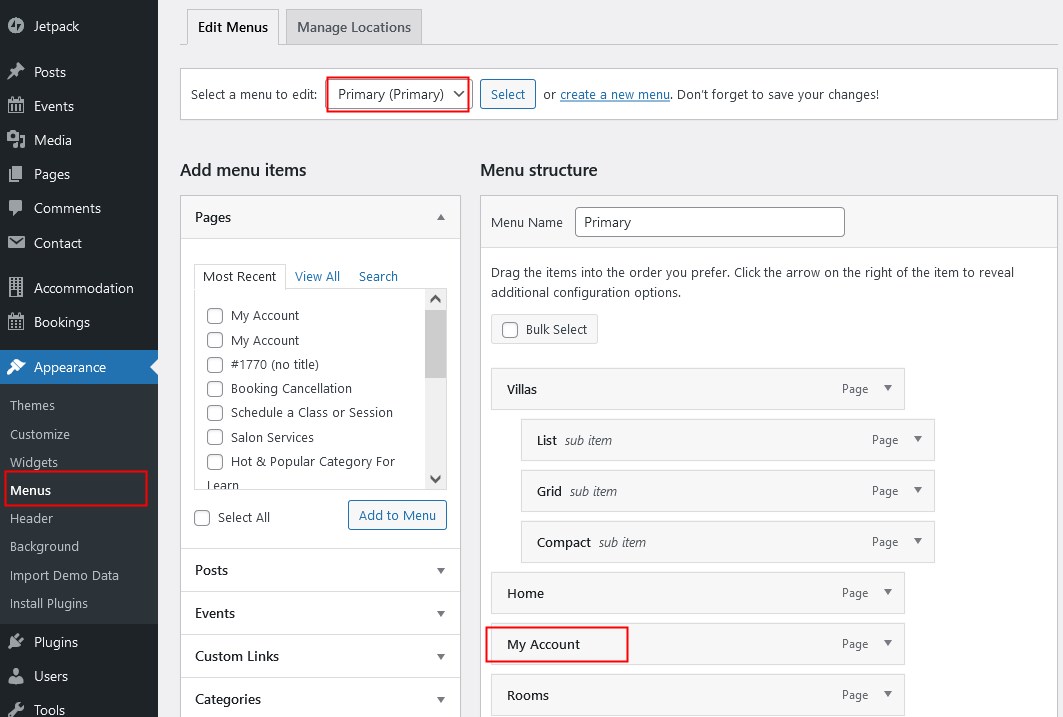
Site navigation menu
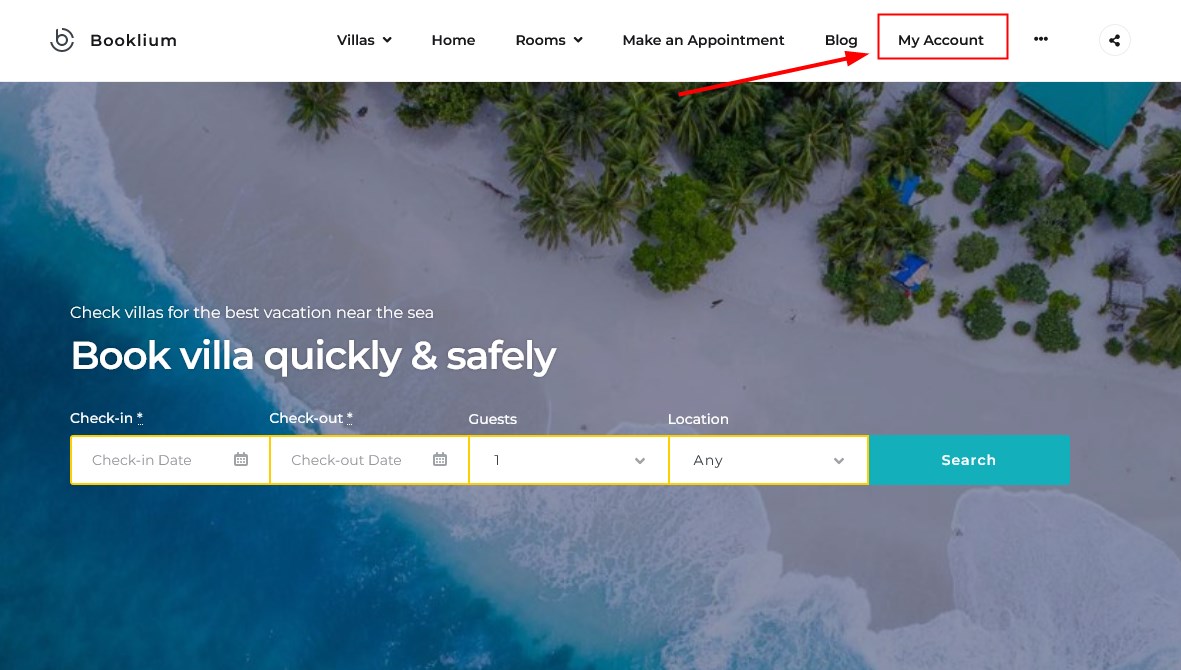
Add the “Account” page to the site menu via WordPress menus.
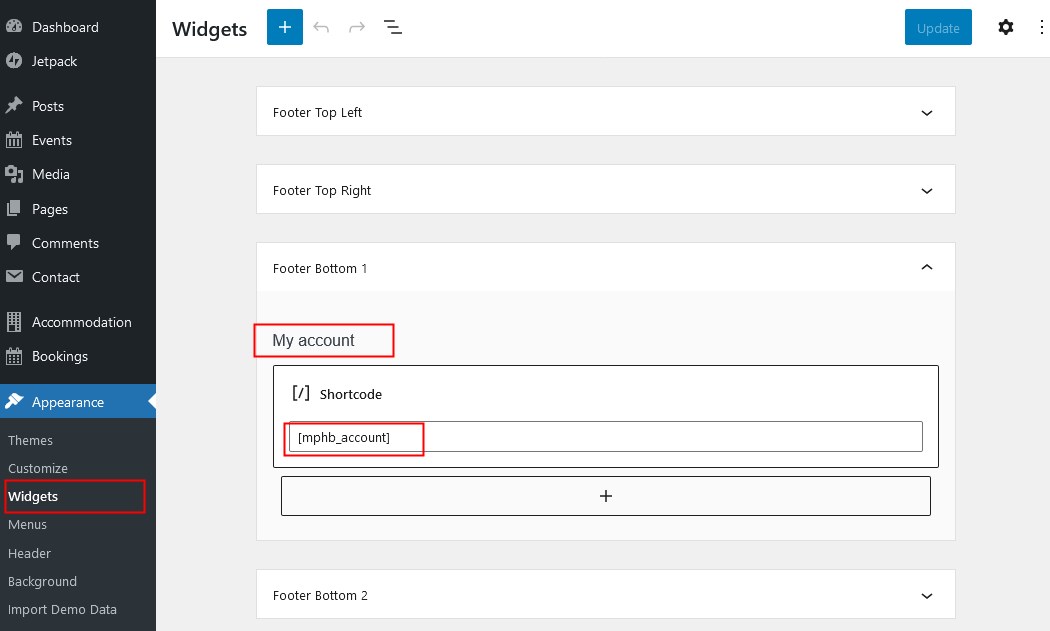
Widgets
If there is a widget area that your theme allows for, add a dedicated one to this area.
Add it to the available widget zones on your site.
This will bring a login area for existing users on your site.
Customer dashboard walkthrough
No matter which way to create a user/customer accounts you’ve chosen, automatic or by user’s intent, a user receives their login credentials via email.
Here is a default one:
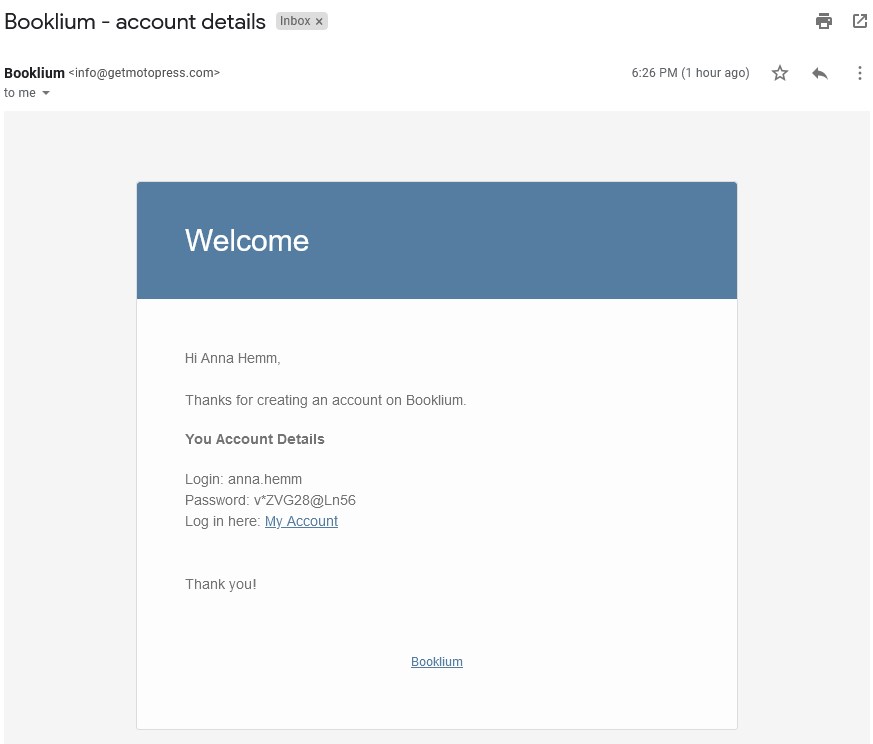
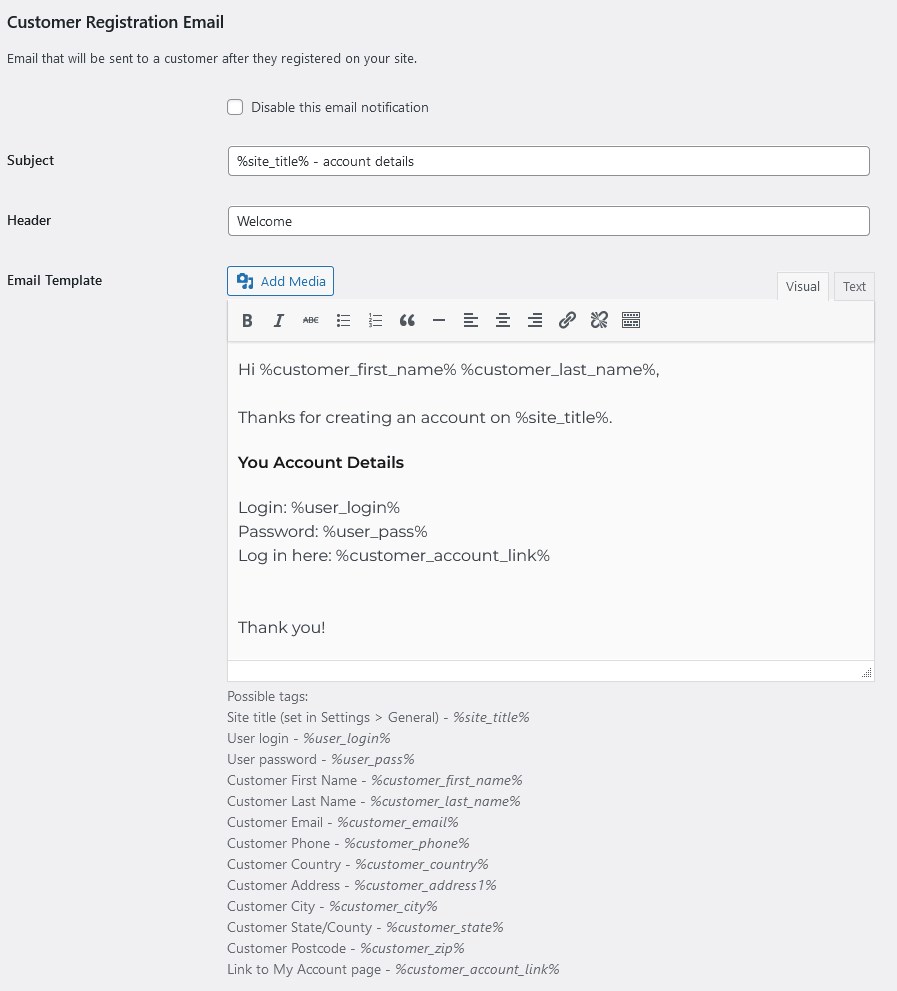
This is a template-based automatic notification. You can modify this email template just like any other via Accommodation > Settings > Customer emails tab > scroll down to Customer Registration Email.
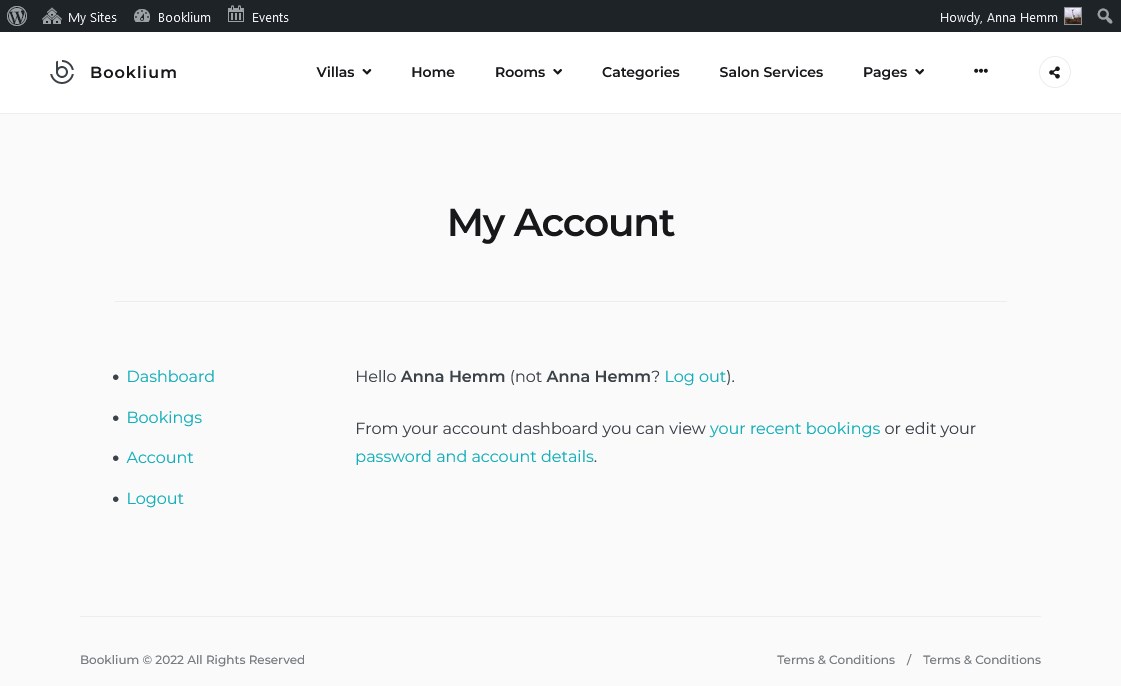
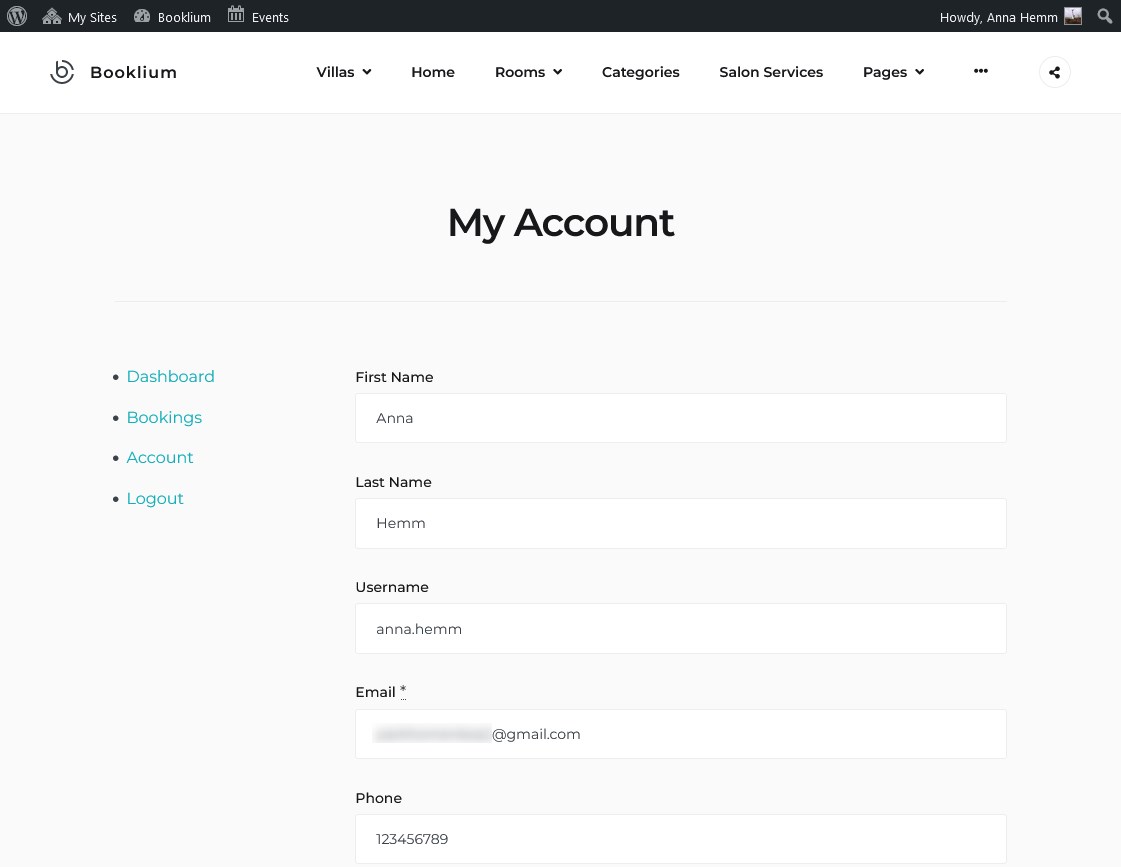
The “My account page” welcomes clients with a categorized dashboard that navigates through bookings and personal details sections.
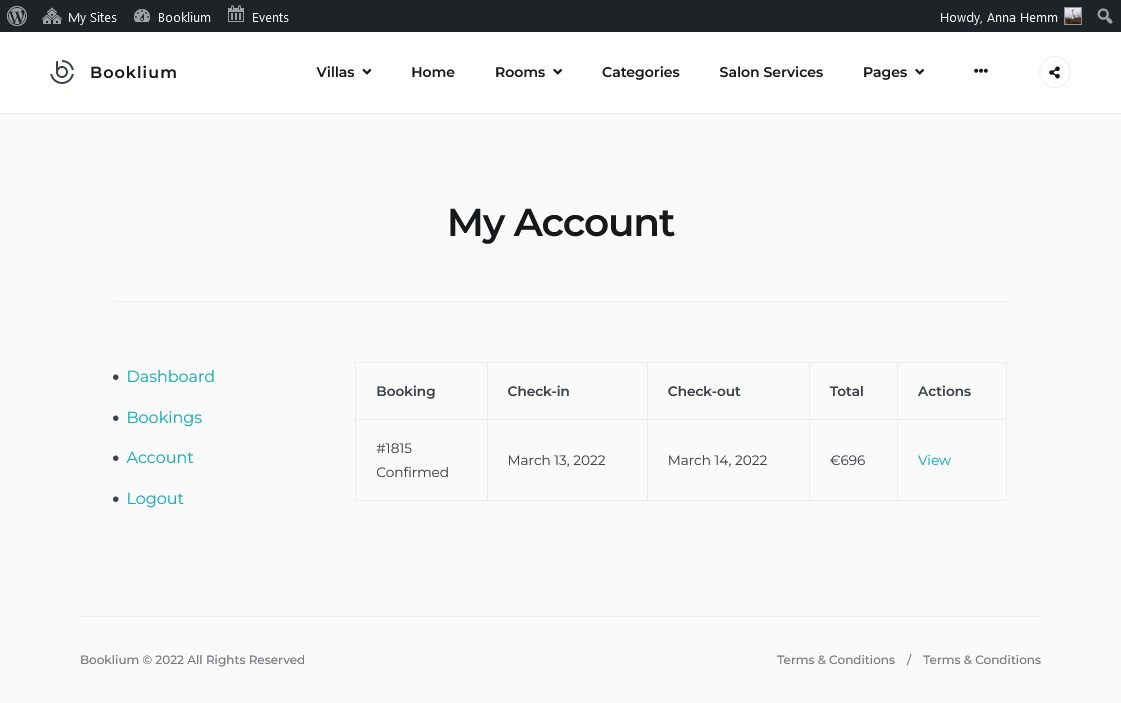
All past and future reservations are recorded and accessible via the Bookings menu.
The “Account” section allows guests to update their personal info.
I guess that’s it! If you want to give your clients better bookings access and management options, this is where the customer accounts come to the rescue. The login area should also bring more value and trust to your site for all new prospects. Make sure to update the Hotel Booking WordPress plugin 4.2.0 to get the new features!

Hello, i want to display the list of my clients in a contact form , is that possible via a shortcode ?
Hi Ahmed, Thanks for your question however I’m not sure I get it correctly. Could you please clarify it in more detail by providing examples or describing the use case?