Meet Stripe & More Payment Gateways for the Appointment Booking Plugin
Table of Contents
The long-awaited update has finally arrived! We’re pleased to tell you more about the recent MotoPress WordPress Appointment Booking plugin update 1.5.0 that makes it possible to accept payments online for your appointments.
Updating the plugin to the latest version, you can set up a range of payment methods for online via Stripe and its associated local gateways, as well as choose to allow clients to select the wire transfer or pay on arrival methods.
To support these new methods, we’ve also updated default email templates that you’ll also be able to customize your way.
In addition to the online payment processing options, we’ll also tell you more about the new booking widget customization options that will assist you in tailoring your online booking form design even further.
So let’s see what has changed in the plugin settings and how you can benefit from these changes.
New booking confirmation modes
In order to set up any of the payment methods, you should first go through the new confirmation modes setting that we’ve also added in the Appointment Booking 1.5.0 update.
Read about previous updates: Allow clients to book multiple services
Find them under Appointments > Settings > Confirmation mode and designate how far you want to automate booking submissions.
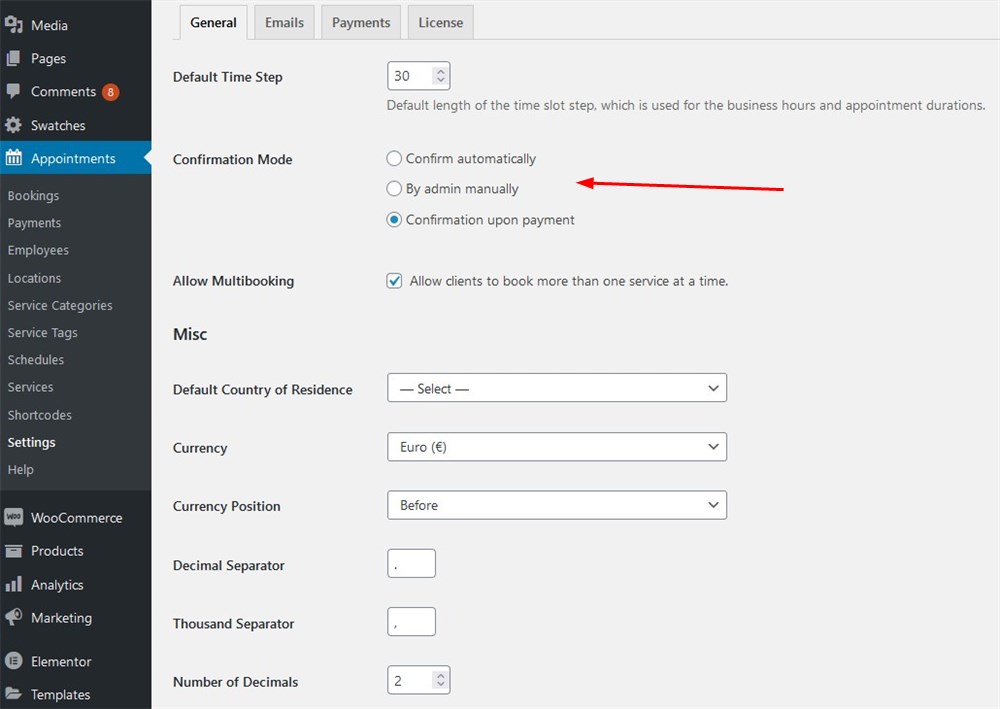
Choose the default way to approve booking requests:
- Confirm automatically: bookings are added automatically as ‘Confirmed’.
- By admin manually: you manually change booking statuses to the needed ones.
- Confirmation upon payment: bookings are added as ‘Confirmed’ if submitted via any payment method.
As you see, from now on, you can automatically confirm bookings by payments.
How to enable payment gateways and manage payments
We’ve added the payment setup and configuration settings to the Settings menu.
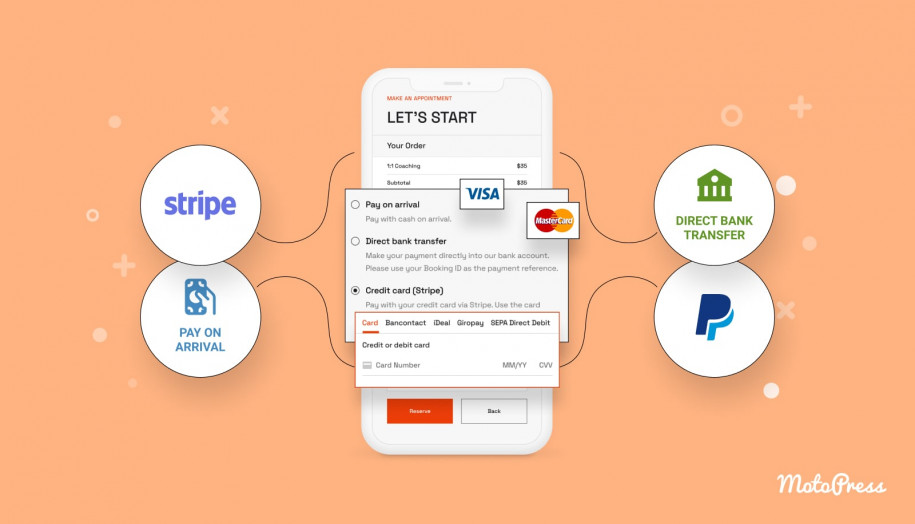
Navigate to Appointments > Settings > Payments. Here you can enable payment methods that work for you and go through the general settings. To set up your preferences or connect the payment processing account, click Manage next to each method.
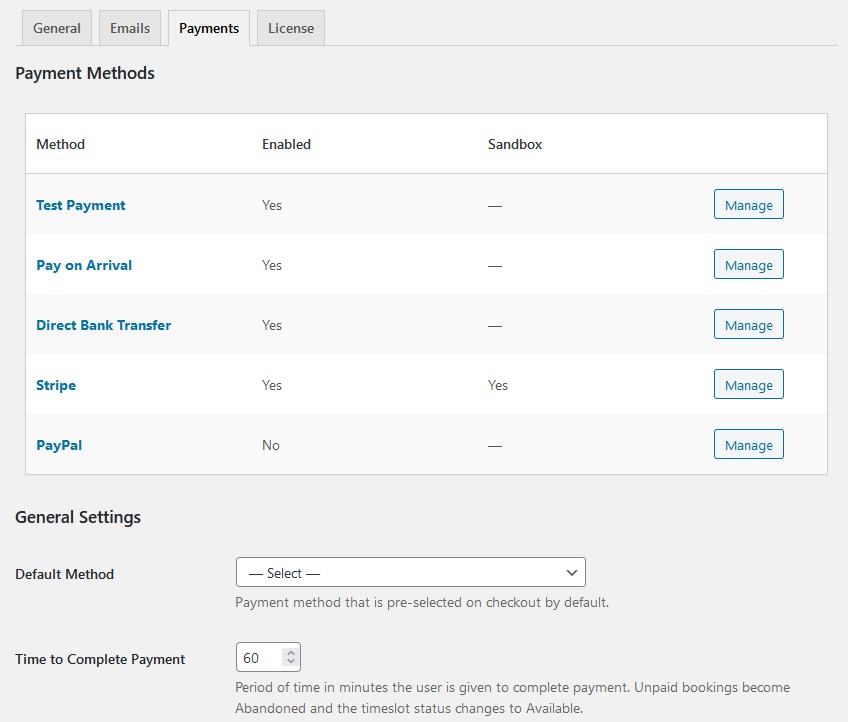
Let’s see what payment methods can be used so far:
Test Payment. It’s a sandbox that will help you test the waters on the live site and see how the payments are processed.
Pay on Arrival. For this method, which implies you clients can choose to pay on site, you can customize the method title, description and provide instruction of how the payments are handled in this case. For example, you can specify whether you accept payments in cash only or by card.
Direct Bank Transfer. This method allows you to output information at checkout that explains how clients can send you money directly to your bank account. Here you can also customize the text message and instructions.
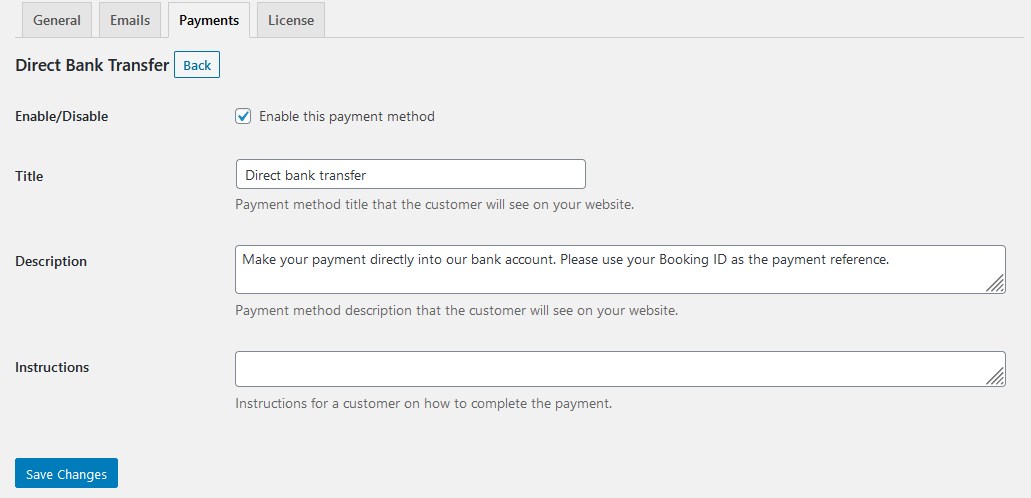
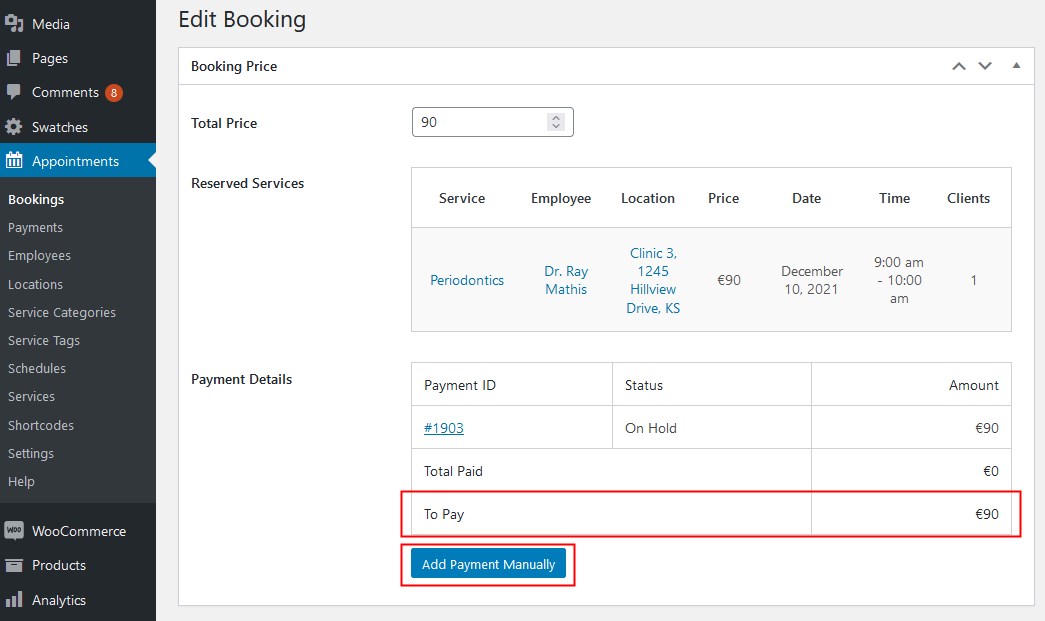
Bookings submitted using this method are instantly created with the ‘Confirmed’ status in your admin dashboard. Once you receive the money from your client, you need to open the needed booking, then click ‘Add payment manually’ to save this payment.
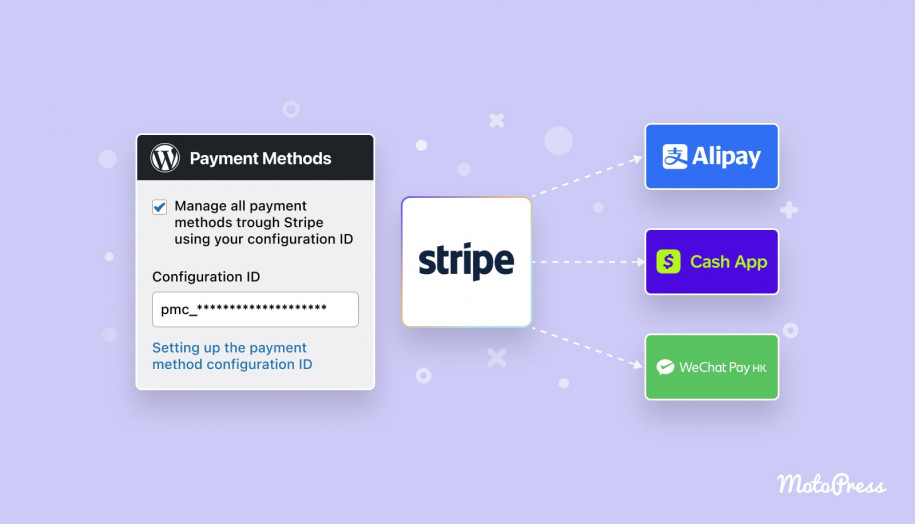
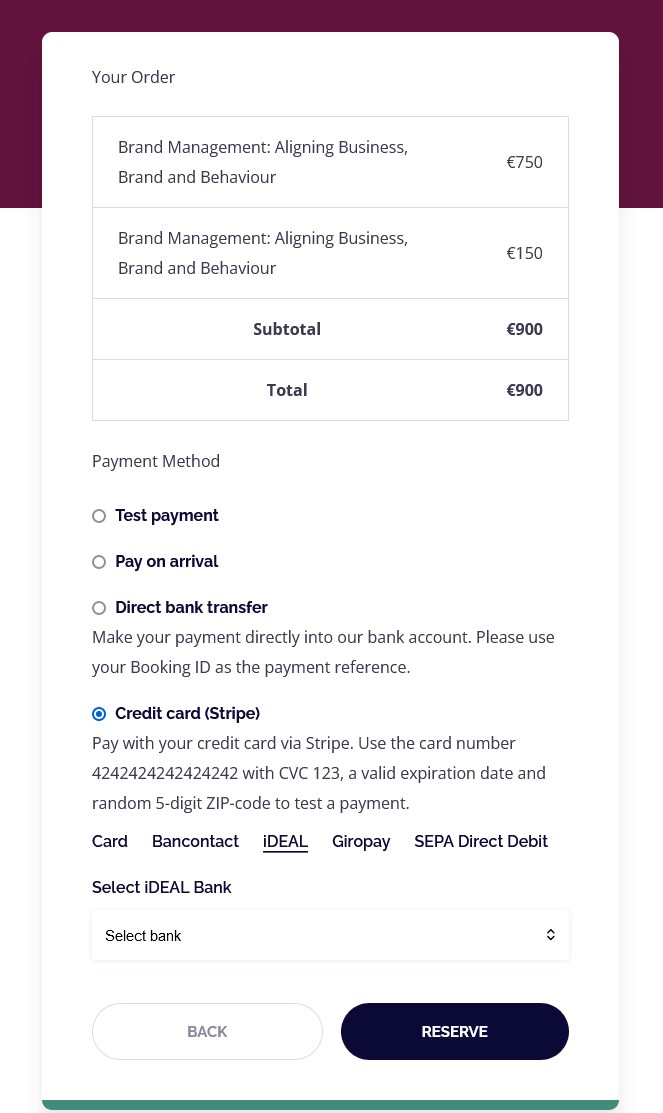
Stripe. By adding your Stripe-associated credentials (API keys), you’ll be able to add Stripe as a payment method to checkout. Additionally, Stripe allows you to connect more payment methods, such as card payments, Bancontact, iDEAL, Giropay, SEPA Direct Debit and SOFORT.
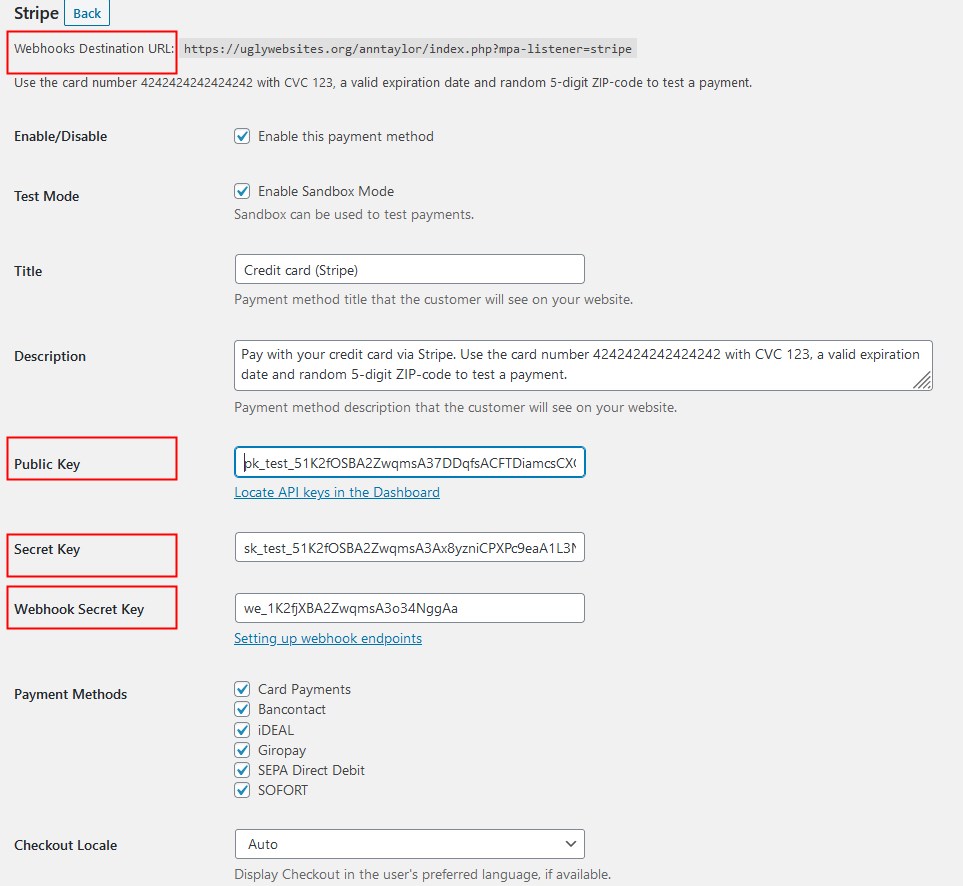
Some of these extra Stripe methods have limitations, for instance:
- Bancontact, iDEAL, Giropay, SEPA Direct Debit and SOFORT have the EUR currency requirement.
- SOFORT works only for Austria, Belgium, Germany, Spain, Italy and Netherlands.
- You can test Stripe using a sandbox mode and also preselect a checkout locale.
As for the booking wizard, the payment options are added to the final step of the booking process, so that clients are asked to choose a payment method after they choose services, date & time, and provide their personal details.
Don’t forget that you can test how payments work using sandbox modes.
GENERAL PAYMENT SETTINGS
You should also go through the general settings that will apply to all payment gateways. Those include:
- Optionally set which of the allowed methods must be pre-selected at checkout.
- Designate time in minutes given to a client to complete their payment.
- Create or choose a site page that clients will be landed to after paying via methods that handle payments on their external pages. It’s a so-called ‘Payment received page’ that must contain a message of a successful payment receiving.
EXPLORE THE PAYMENTS MENU
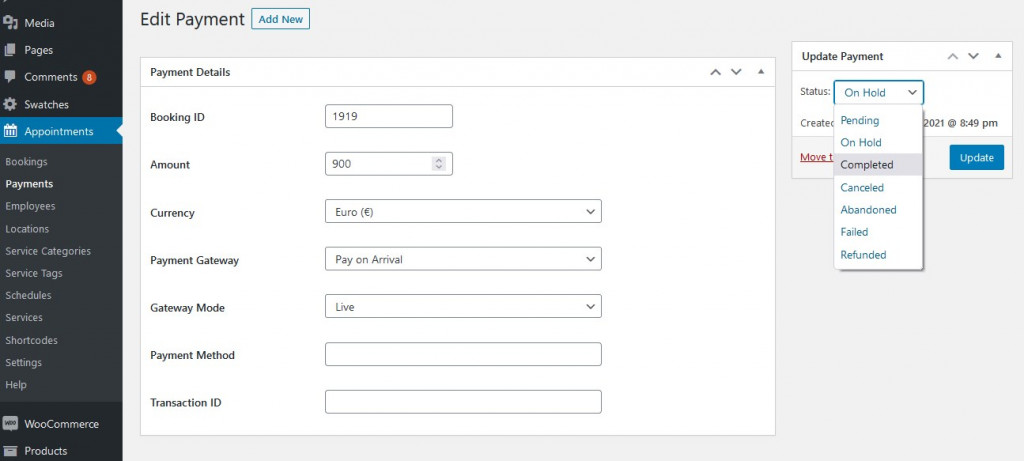
All Appointment Booking plugin payments that you receive via the site or add manually via the WordPress dashboard are stored under the new Payments menu.
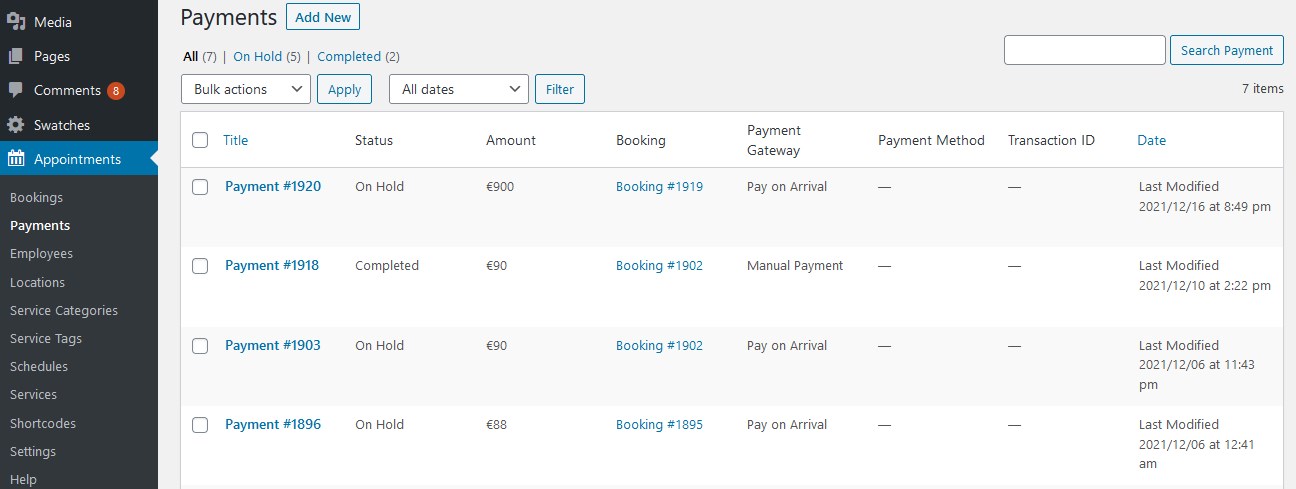
The preview mode displayed the amount paid, booking status, payment gateway and transaction ID. You can see more details and change booking details when you open a needed one.
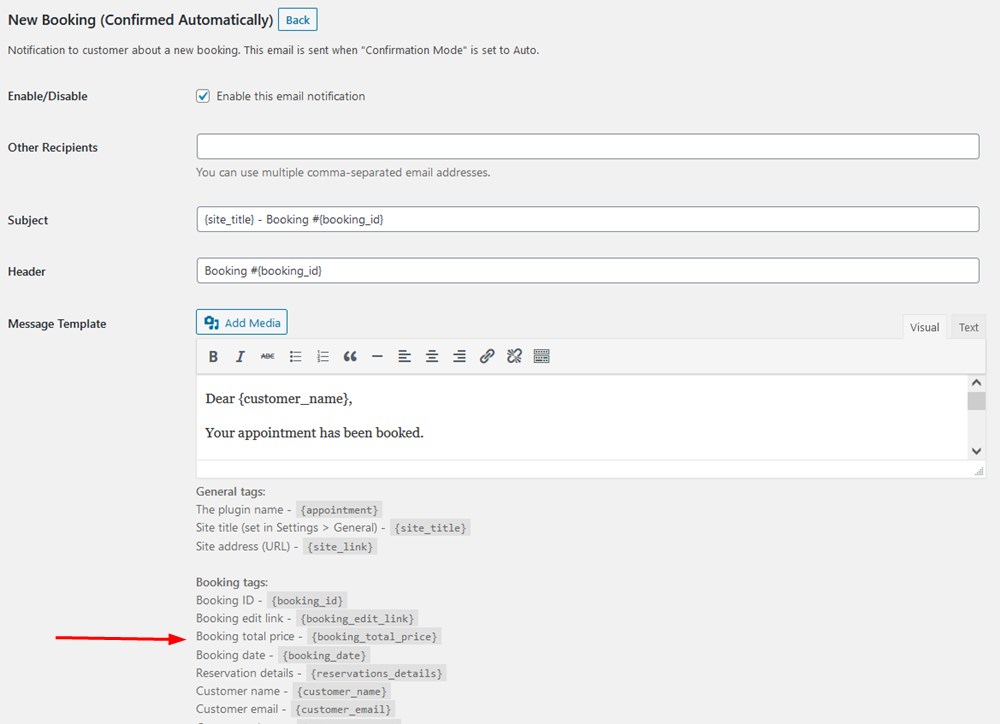
Email templates were also updated
We updated all email notification templates to support more automatically generated tags for bookings associated with payment gateways. You’ll see that all email templates are associated with confirmation modes.
Check out these templates via Appointments > Settings > Emails.
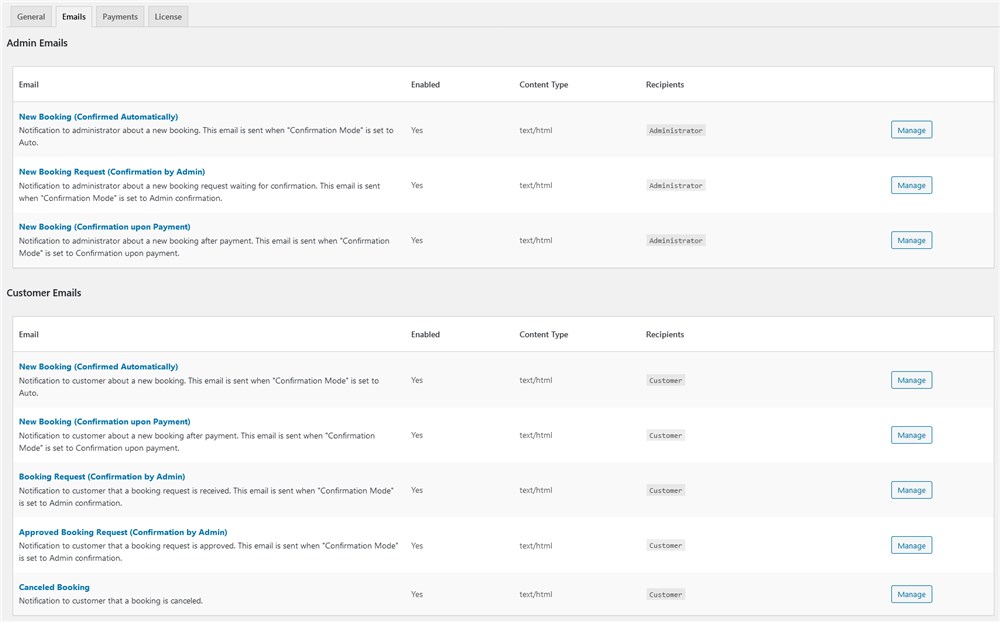
Feel free to see updated content of these emails and optimally change text or add more tags.
The booking widget customization settings
Another great news is that we’ve added a few more bookings flexibility settings that you can find either via Appointments > Shortcodes > Appointment form settings or via the dedicated Gutenberg block / Elementor widget’s settings panel.
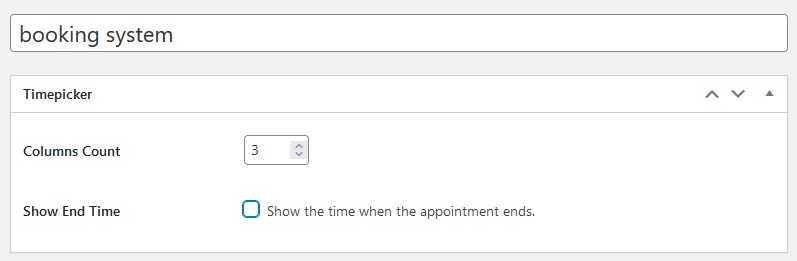
Here is what you can change:
- Change the booking form title (appears above the first field).
- Optionally remove the appointment end time from the timepicker.
- Change the number of columns for the timepicker.
So in a result, you can have up to 5 columns and hidden end time in the appointment timepicker.
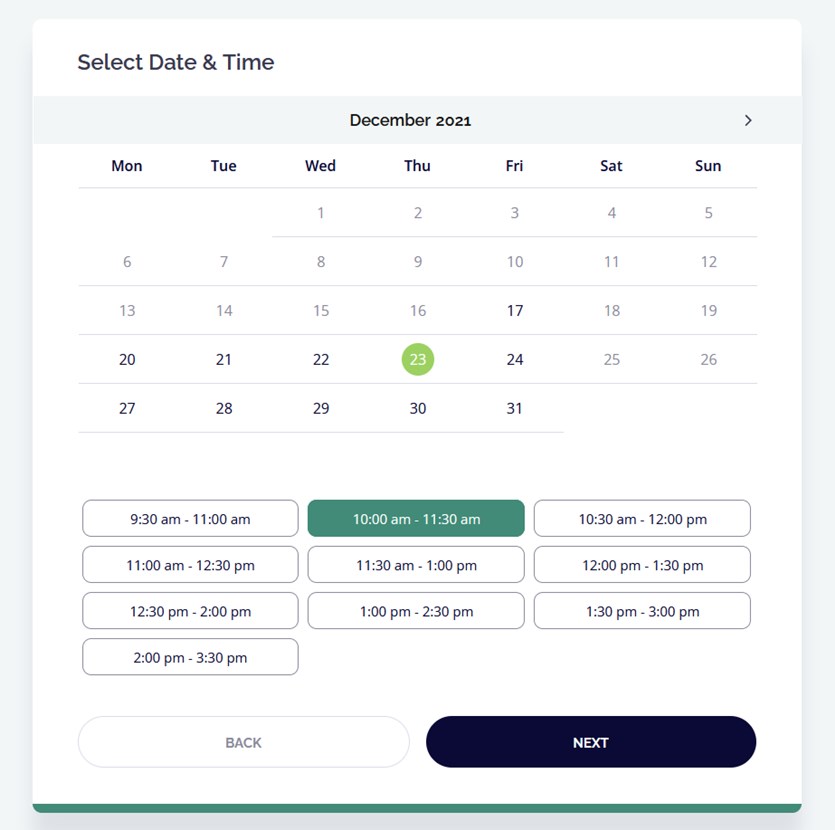
Here is a default view:
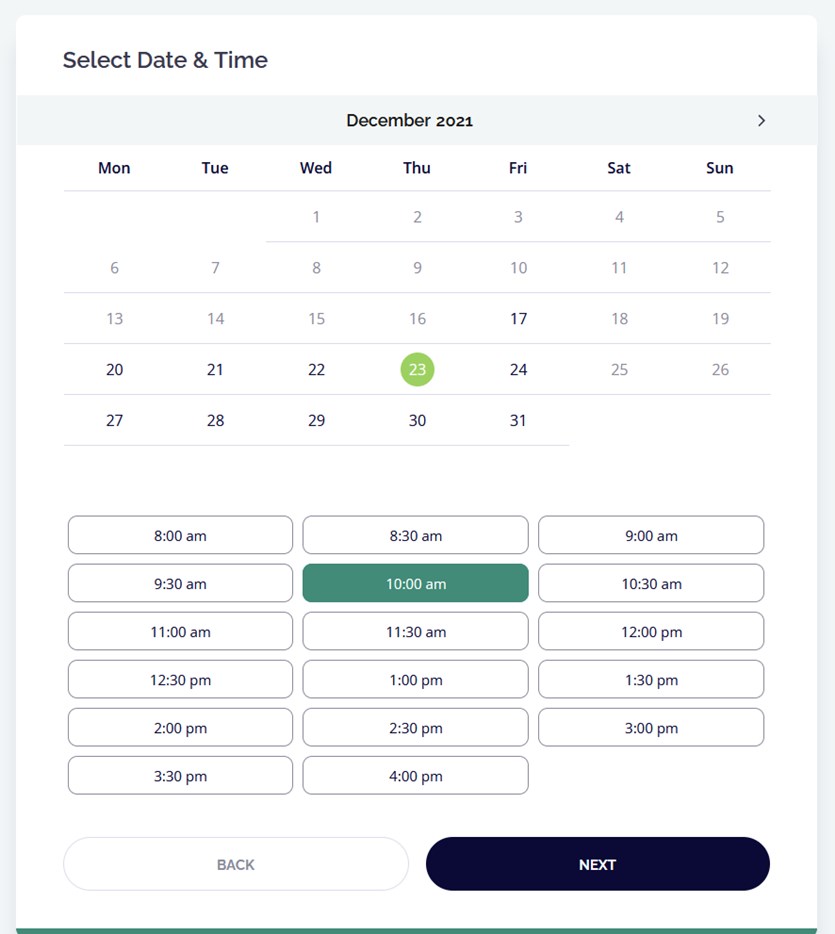
For example, let’s leave the number of columns and hide the endtime:
Hopefully, integrating the appointment booking plugin payments will bring more flexibility, productivity and, of course, bookings via your website powered by the WordPress appointment scheduling plugin. These are the main news and even more great updates to come this year! Stay updated and let us know if you have questions so far.