
Adding a Booking Request Form to Your Site: Two Easy Methods
Table of Contents
Looking for the best way to add a booking request form to your vacation rentals website? While it is always great to have an availability calendar or fixed time slots for helping you rent out your property or various accommodation options, sometimes you may just want to add a form to let potential guests request bookings. That’s exactly what we are going to show you in this article. We’ll cover not just the benefits of this type of accommodation booking. You’ll also learn how to easily integrate such a solution using WordPress plugins and embeddable forms in a few easy steps.
What is a Booking Request Form?
Before we go further and find out if it is even possible to build a request form into your hotel site, let’s learn more about the form itself.
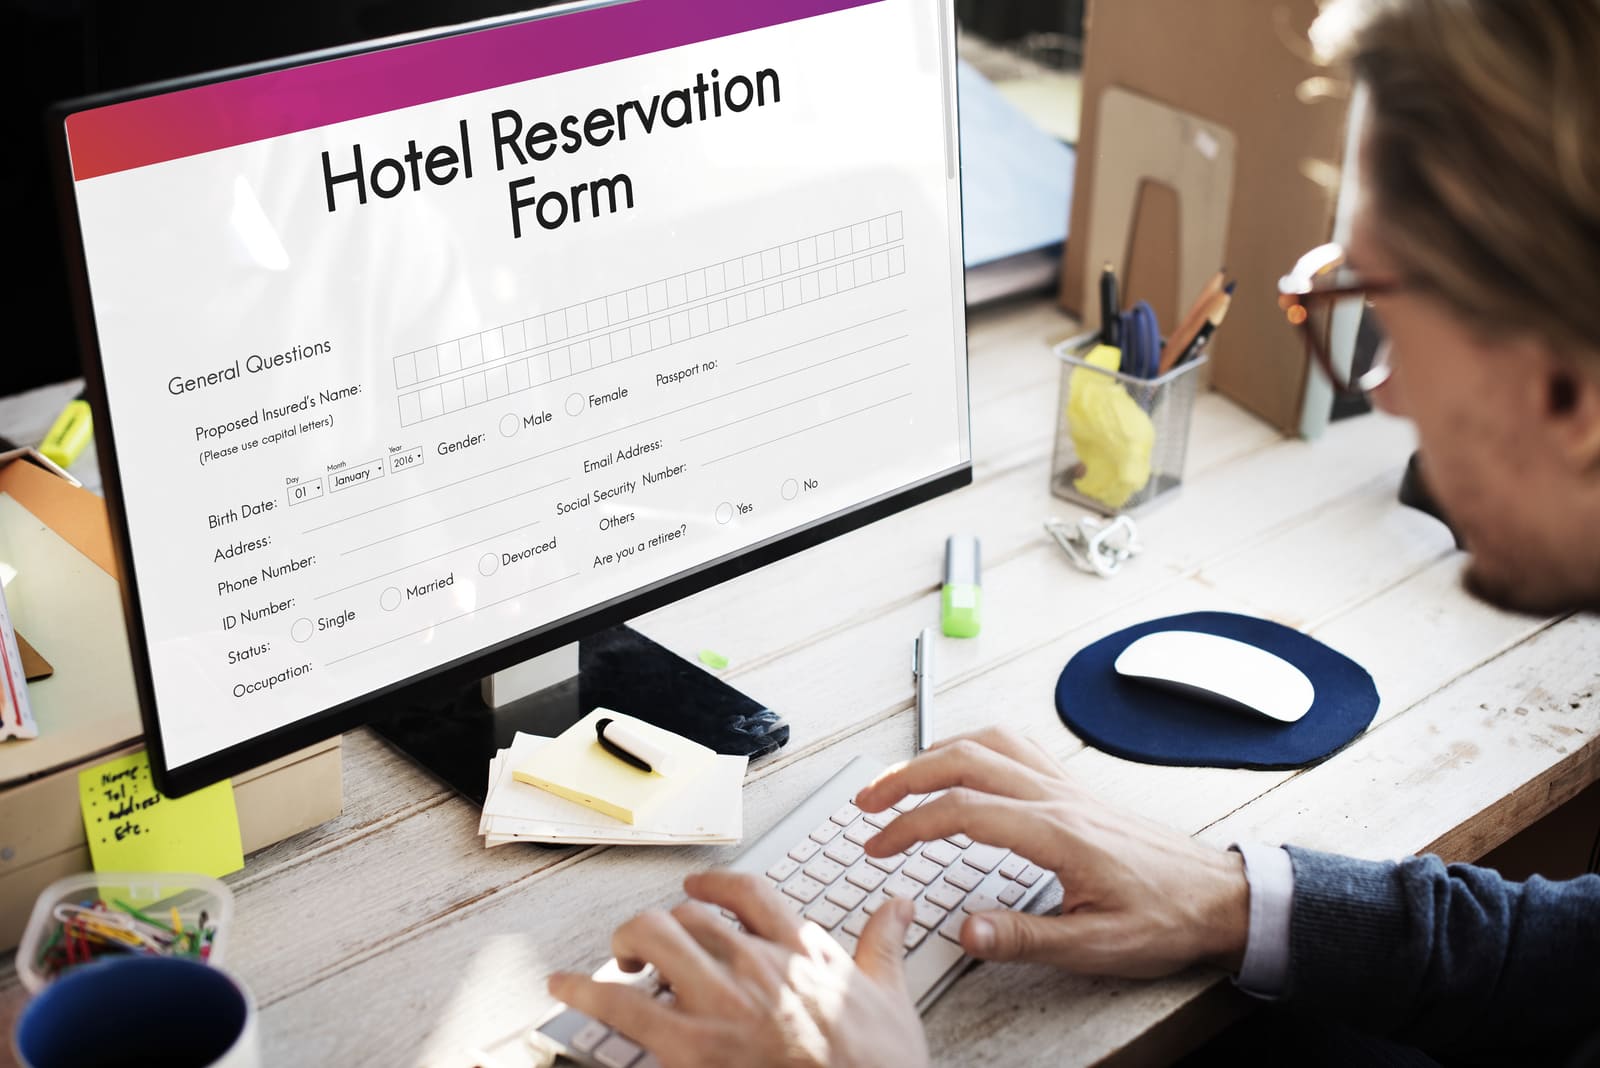 The booking request form is a simple form built to help your soon-to-be guests submit important data. It is designed to be easy-to-use so that your site visitors can provide what you need to confirm a reservation for them. Usually, such a form can be created with nearly any WordPress booking request plugin or online form builder. It needs to contain these elements:
- Guest name;
- Email address;
- Phone number;
- Check- in date;
- Check-out date;
- Number of guests (adults & children);
- Room type;
- Special requests;
- Submit button.
The data submission can happen in one or several steps. This depends on whether you want to make your form more user-friendly without it taking a lot of space on your website’s page. After filling out the form, you receive all the data you need to confirm a reservation or offer alternative dates. As the last step, your potential guest needs to confirm the reservation after they receive more information about a specific room’s availability from you.
How to Integrate a Booking Request Form with WordPress Plugins
Knowing a bit about the booking request form and its usual purpose, let’s learn how to integrate it into your website with WordPress plugins.
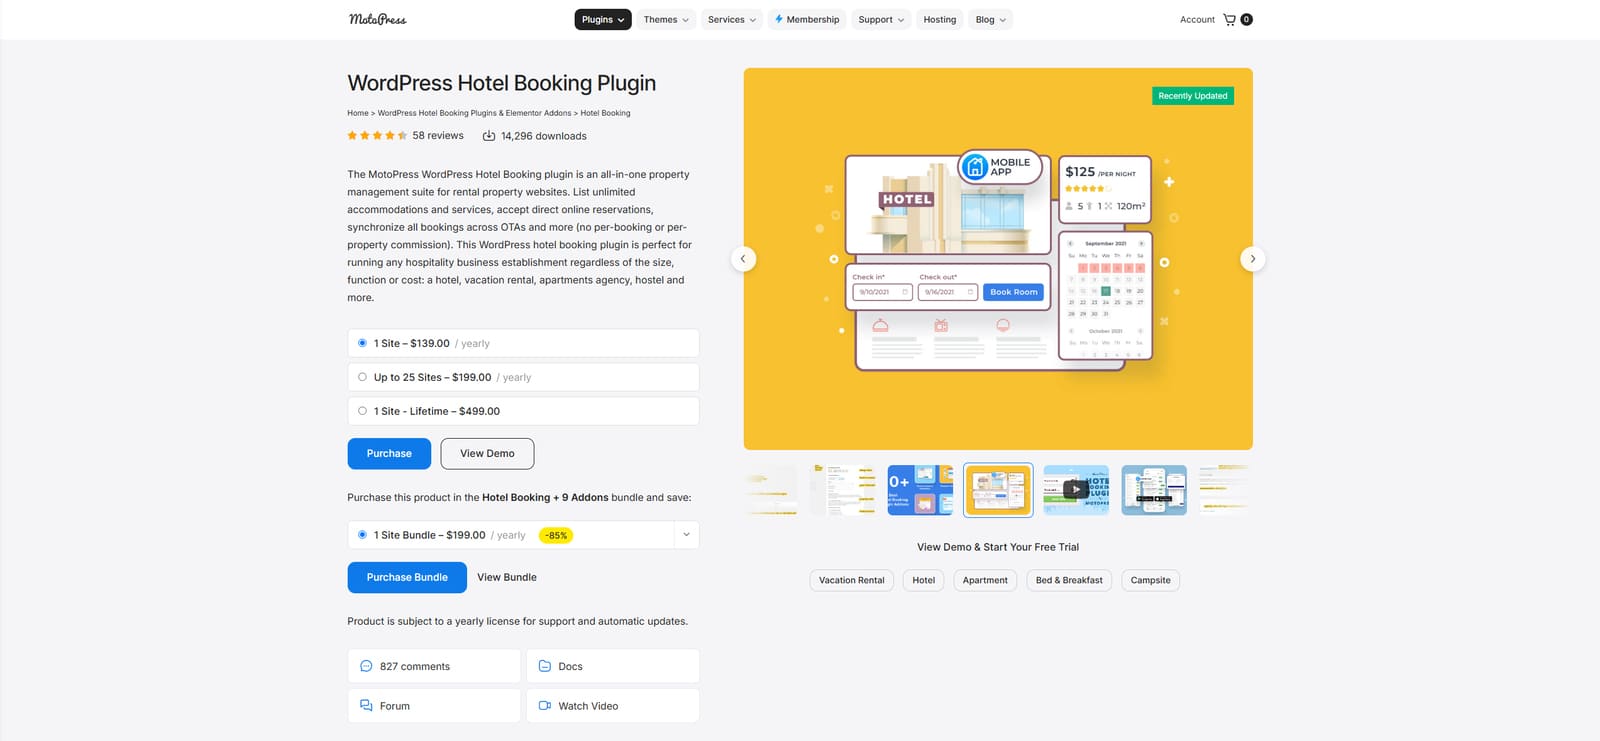 To demonstrate the simplicity of this configuration process, we’ll use the Hotel Booking plugin by MotoPress as an example. It is quite easy to set up and highly configurable.
Using this method, your guests will be able to see real-time availability and send booking requests for specific dates without an instant payment.
Considering you’ve already prepared the plugin for work on your website, we’ll describe the process below. It is easy to follow as you just need to perform a few steps, even if you already have an established hotel website.
Step 1. Change the Plugin Mode
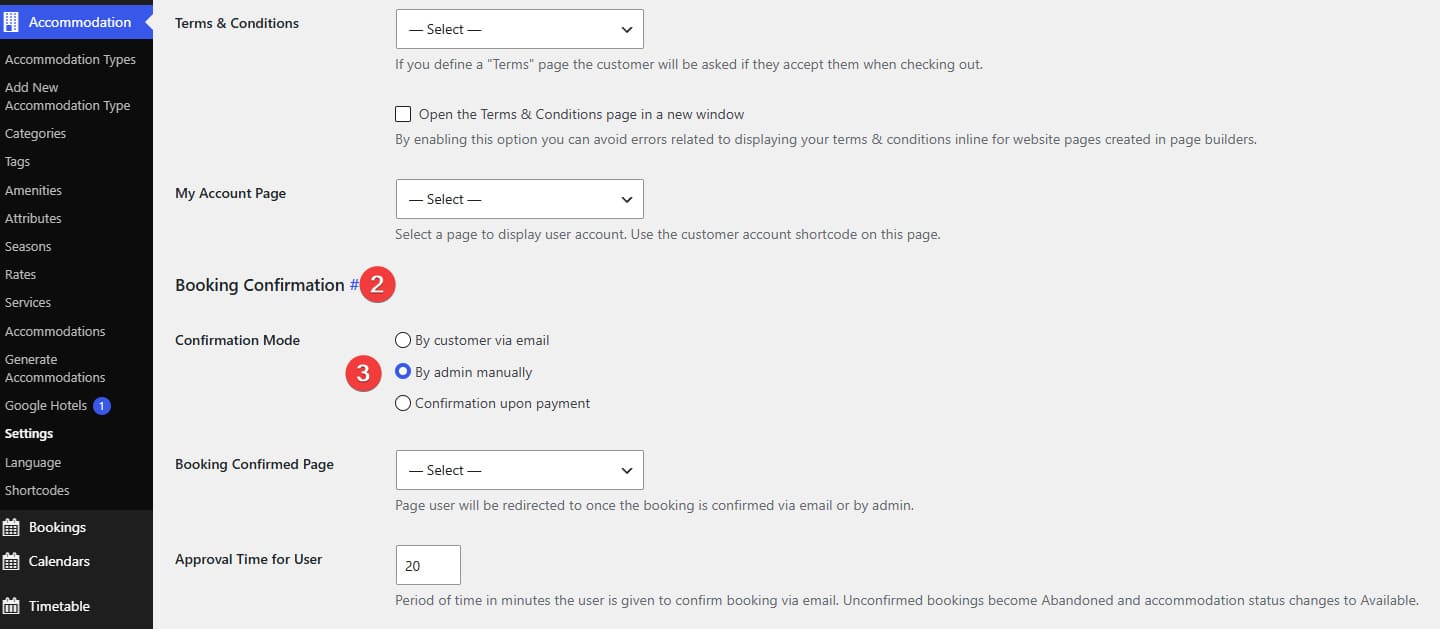 Before we actually add a booking request form, we need to make confirmation of bookings work manually. This, however, also switches off automatic booking confirmations and online payments. Still, it is a vital step for booking requests to work. Here’s how to do it:
- Navigate to the Accommodation – Settings tab.
- Scroll down to the Booking Confirmation section.
- Change the Confirmation Mode to “By admin manually”.
- Press “Save changes” at the bottom of the page.
Step 2. Set Up the Admin Email Notification
Next, you’ll need to set up email notifications for the site admin to get notified when a new booking request form is filled out. To do this, perform these actions:
- Navigate to the Accommodations – Settings – Admin Emails tab of your WordPress booking request plugin.
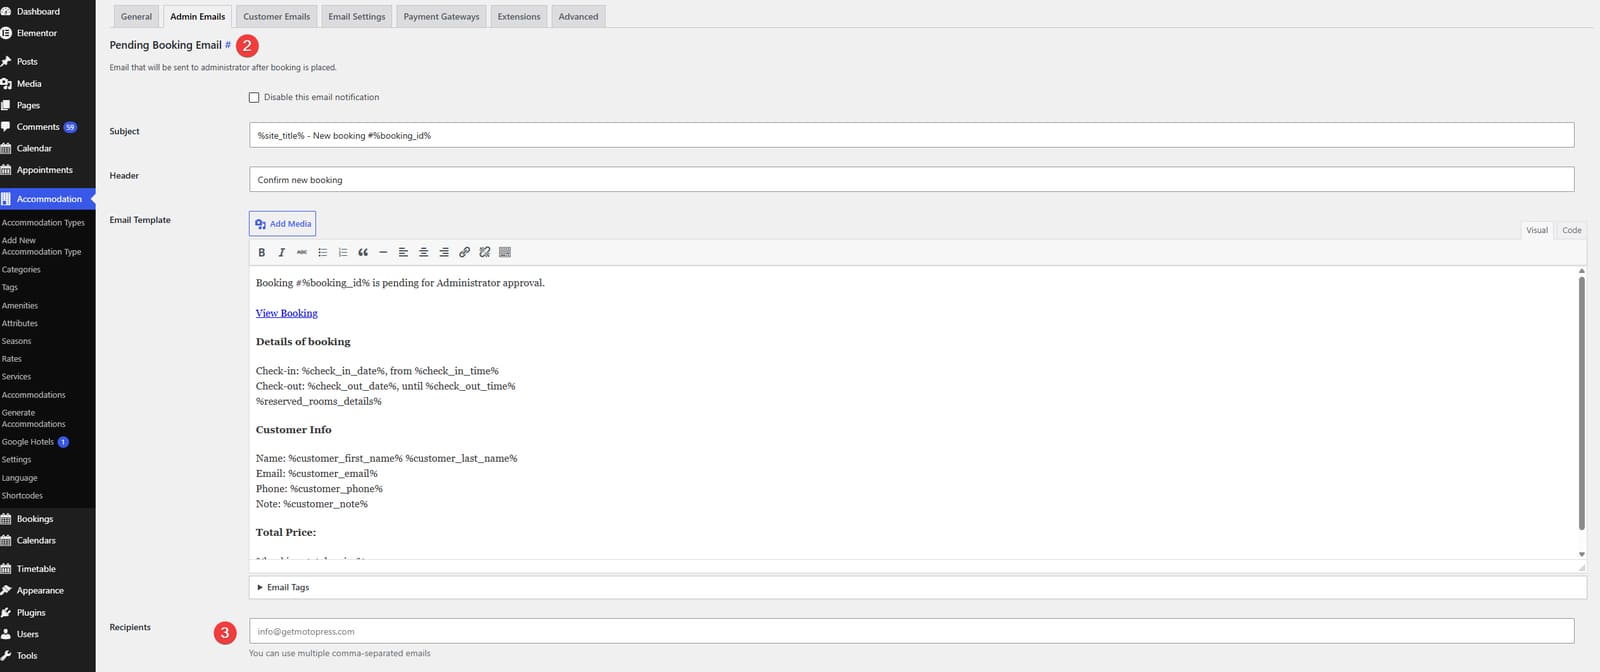
 On the opened page, you can easily edit the template of the notification that will inform you of a placed booking. For example, you can use the email tags to automatically insert varied data for each booking.
- Additionally, you can add recipient addresses if you want to send emails not just to the WordPress admin.
- Press “Publish” or “Save Changes” to finish creating the notification.


Step 3. Changing the Booking Status
Manual booking mode requires confirming the placed booking. It can be done via the plugin dashboard.
- Navigate to the Bookings – All Bookings tab.
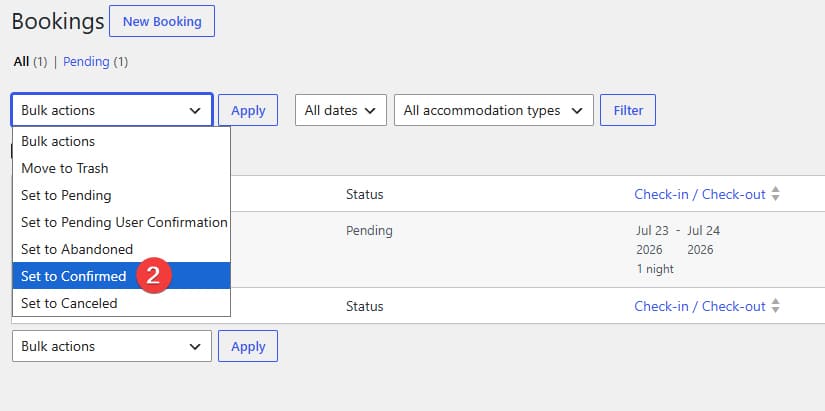
 On this page, you’ll see all placed reservations, including those that need your confirmation. Choose the desired booking to confirm it. You can do this just by selecting a booking or several with a tick on the left and then picking “Set to Confirmed” in Bulk Actions.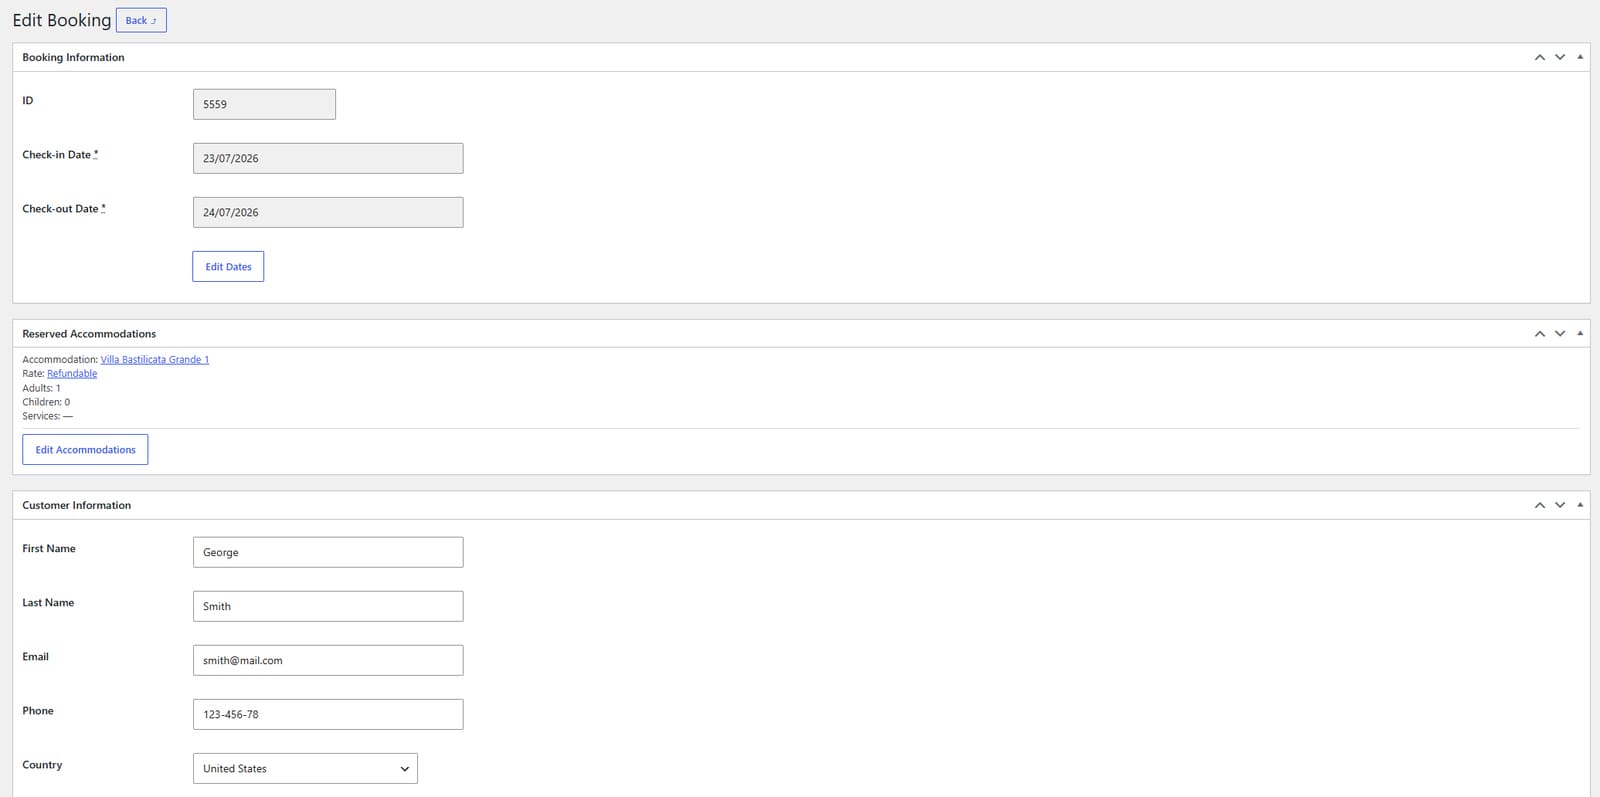
 Alternatively, you can check the details received through the booking request form and edit them if necessary before confirmation. In the “Edit Booking” page, you’ll see all the details and information provided by the customer and the room they are planning to reserve. Here you can review all necessary information, such as:
- Customer information;
- Reserved accommodations;
- Check-in and check-out dates;
- Total booking price & price breakdown.
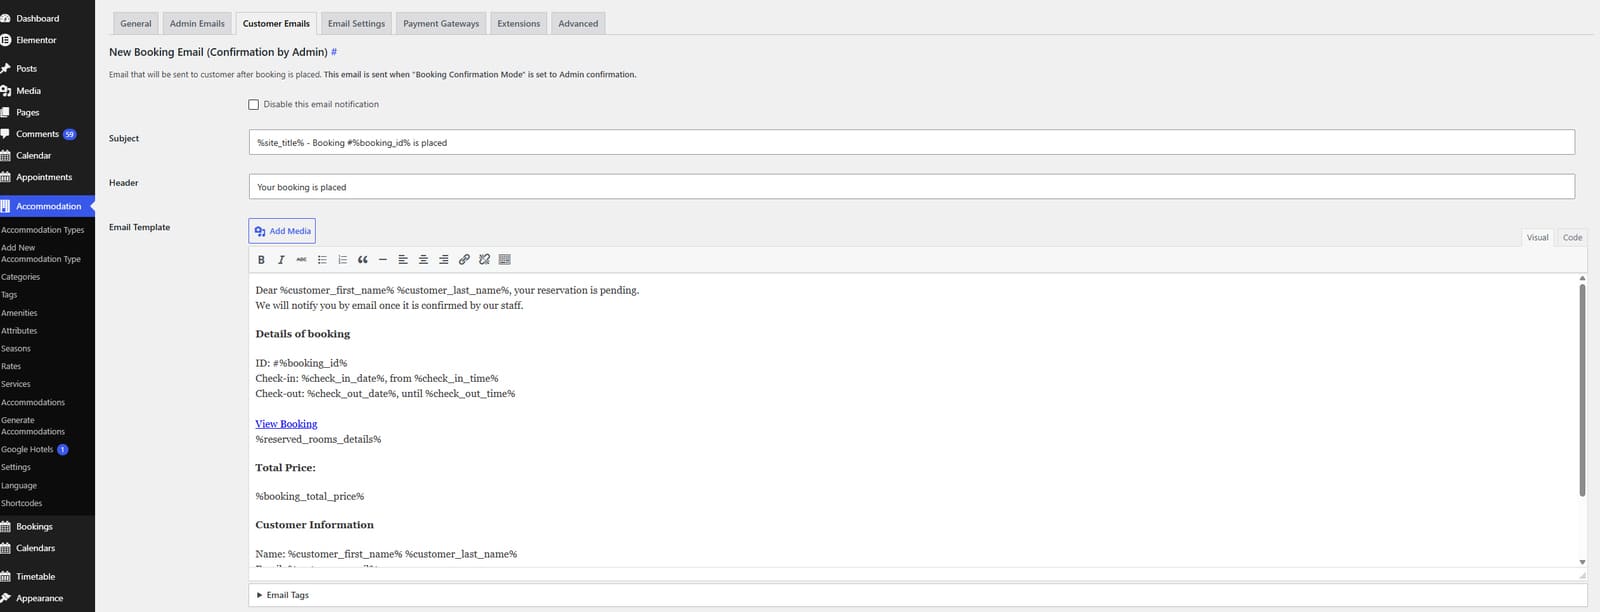
 Before confirming, make sure the email notifications deliver proper information using your WordPress booking request plugin. Open the Accommodations – Settings – Customer Emails tab. On this page, you’ll see all templates sent to customers. These include “New Booking Email (Confirmation by Admin)” (sent after booking is placed) and “Approved Booking Email”, which is sent after booking is confirmed.
- Don’t forget to save changes to notification templates on the Settings page.
- Back on the “Edit Booking” page, in its upper right corner, change the booking status to Confirmed.
- Press the “Update Booking” button to confirm it.
Step 4. Editing and Rescheduling Existing Bookings (Appointment Booking only).
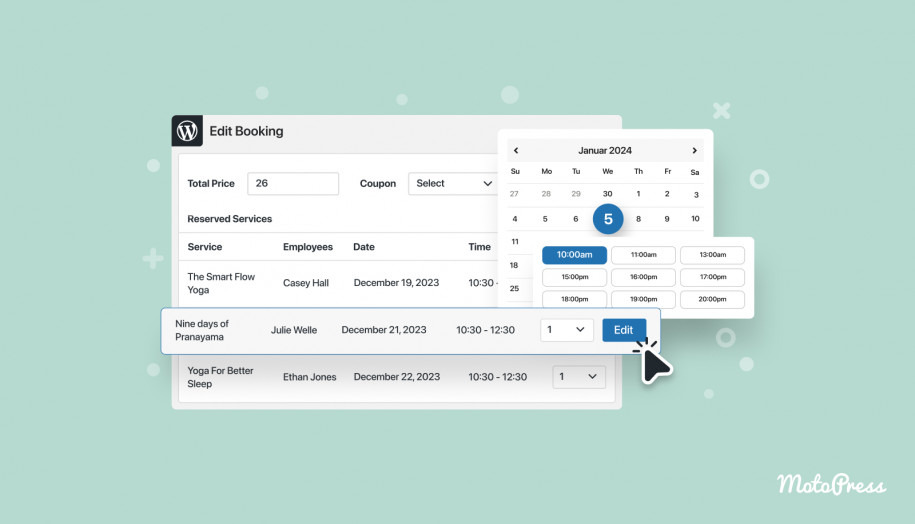
What if you use Appointment Booking instead of Hotel Booking? In this case, you may need to reschedule bookings from time to time. The plugin also supports manual confirmations, which is useful if you need to review information before confirming an appointment. If you have already received reservations via the plugin’s booking wizard (which works similarly to a booking request form), here’s how to review, edit, and reschedule or confirm them:
- Navigate to the Appointments – Bookings page.
- Choose the existing booking you want to reschedule or edit.
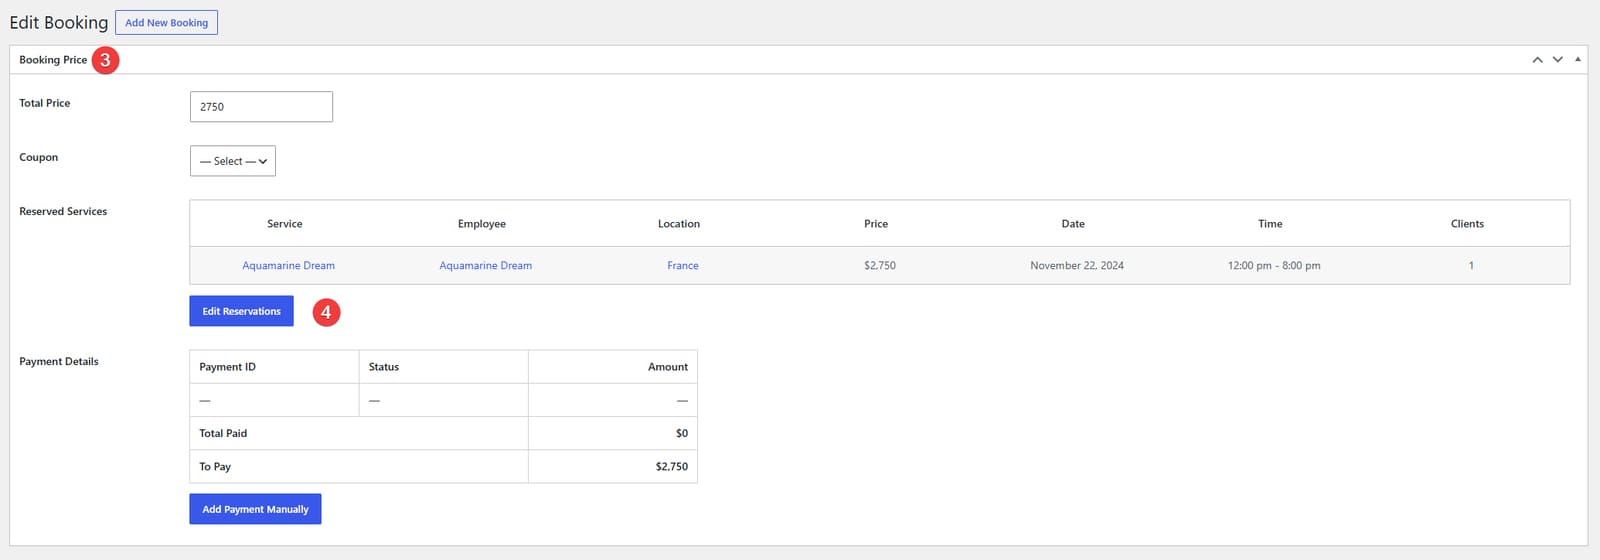
 On the opened “Edit Booking” page, you can change any kind of information you need. It supports:
- editing reservations
- changing booked service price
- editing customer info
- modifying booking status.
- To edit a reservation and reschedule it, press the “Edit Reservations” button. Then press “Edit” to change the reservation data and timeslot.
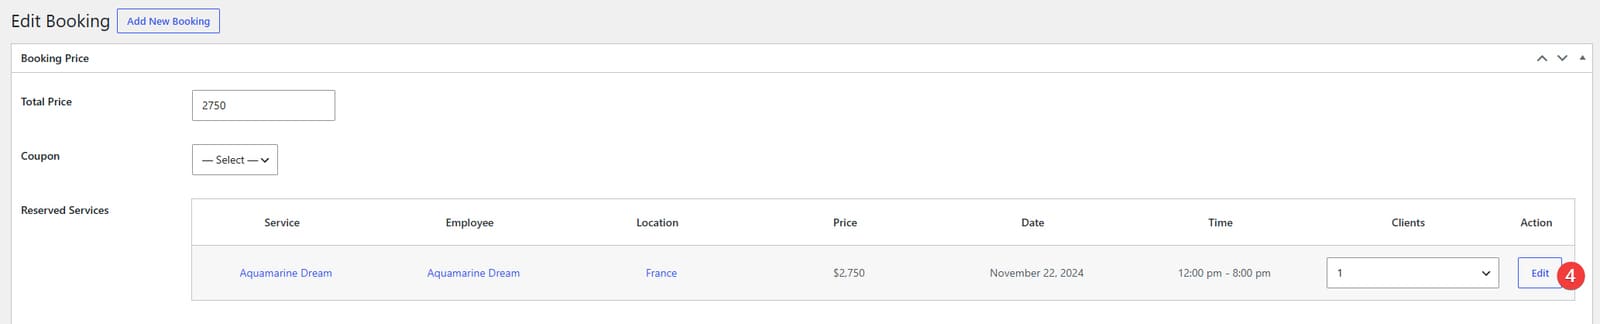
 After choosing a new date and time for the booking, press “Next”. You’ll see a new date in the “Reserved Services” panel.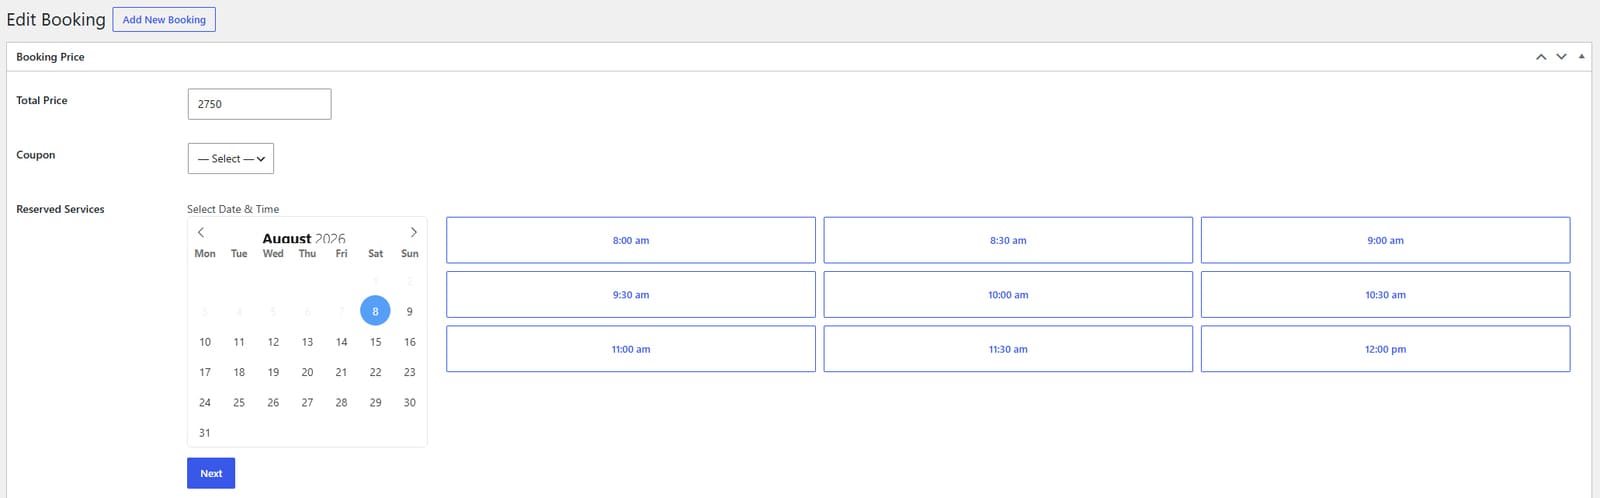
 To confirm the booking, change the status from Pending to Confirmed in the upper right corner of the page (“Update Booking” section).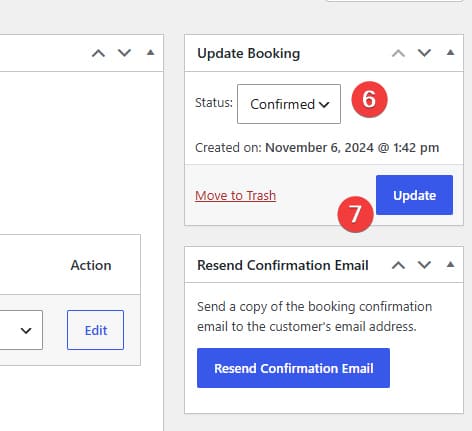
 Press the “Update” button to finish editing.

How to Integrate a Booking Request Form with Embeddable Solutions
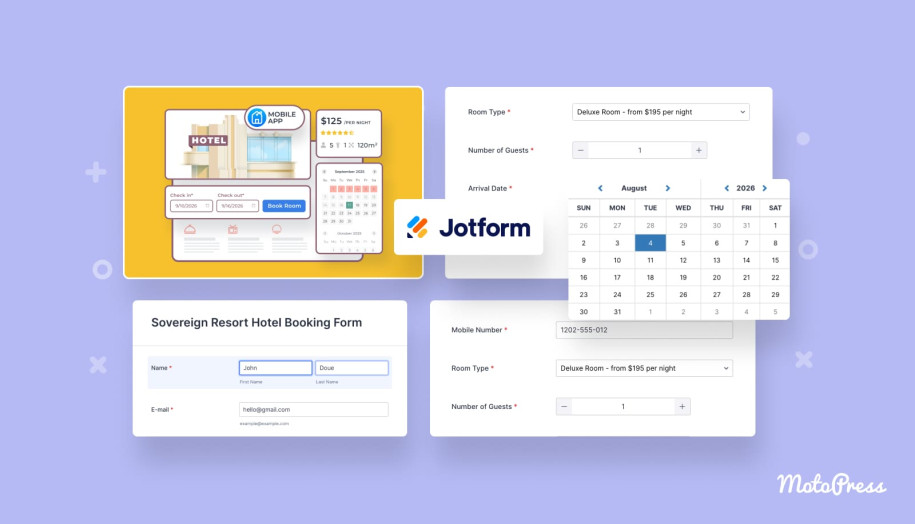
 Using booking WordPress plugins that allow manual confirmations is quite simple. But what if you want to apply an embeddable third-party solution to create a booking request form? If that’s the case, you’ll be glad to know dozens of free and premium services allow you to do just that. By creating a professionally designed form using tools like Jotform, you’ll have a ready-made solution to get booking requests in a flash.
Standalone form builders like Jotform allow you to integrate a booking form anywhere you need. Moreover, with templates such platforms deliver, you can easily design a stunning and responsive form in a few steps and embed it on any website, from HTML-based to ones built with WordPress and Wix. Thanks to its vast library of form layouts, it can even offer you a travel booking request form template. Let’s look closer at how it’s done.
Step 1. Create a New Form Using a Template
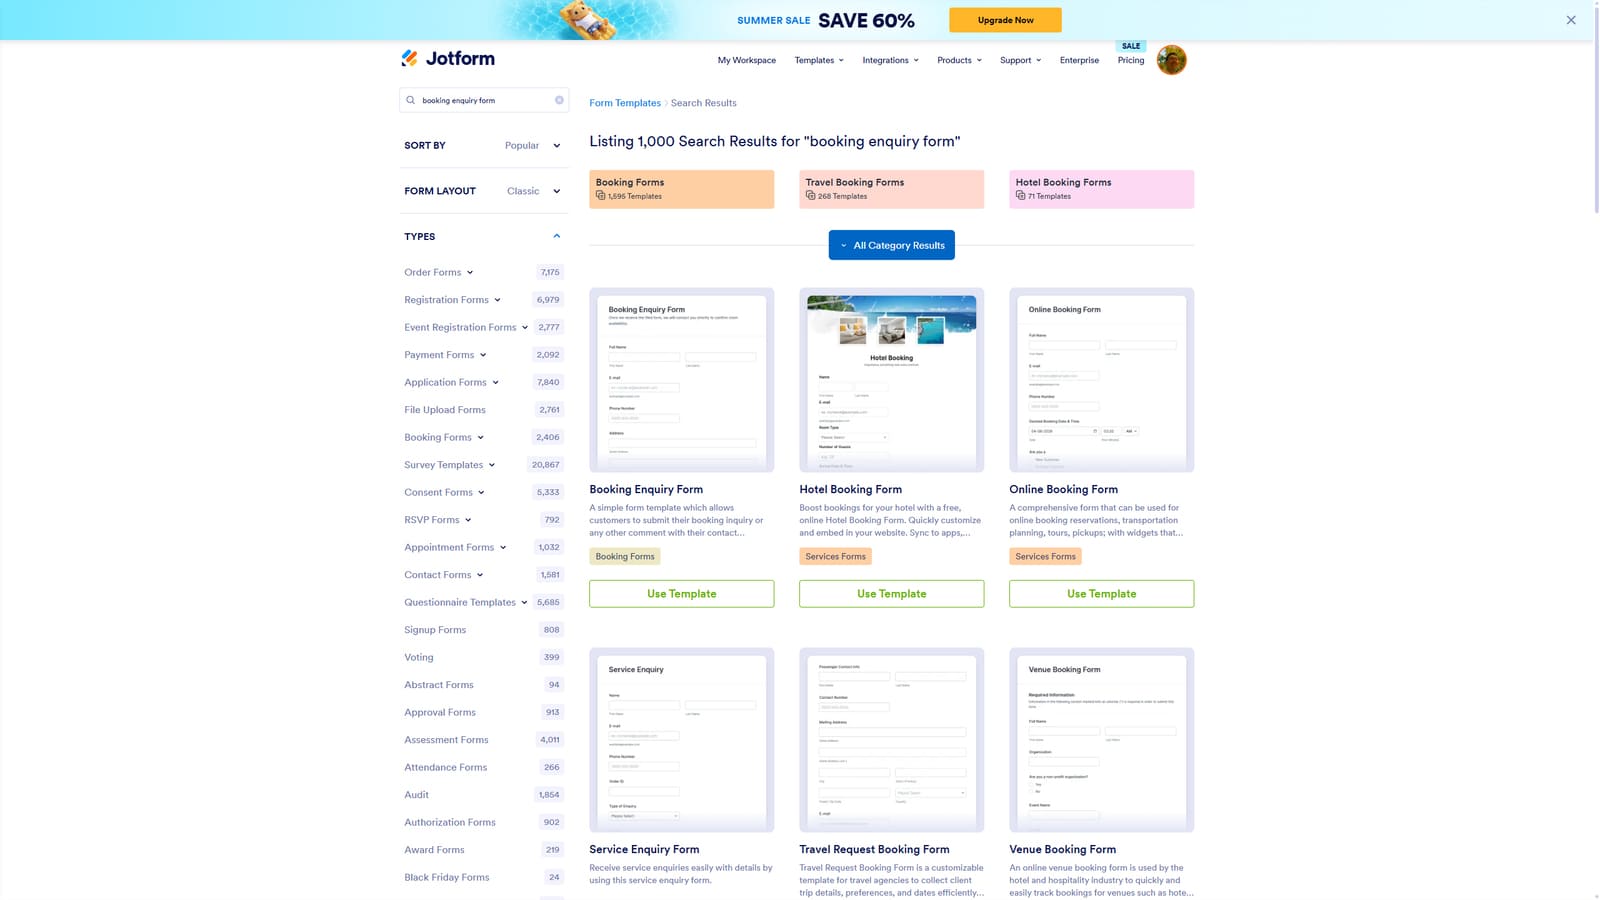 After registration, you can start creating forms right away. The easiest way to get a booking request form is to choose a ready-made booking template that has at least the majority of fields you need. To do this, follow these steps:
- After registration, navigate to the Templates – Form Templates menu on the Jotform website.
- Enter “booking enquiry form” in the search field and press Enter.
- In the search results, click on any form you like and press “Use Template”. In this example, we’ll use the template called “Booking Enquiry Form“.
Step 2. Form Customization
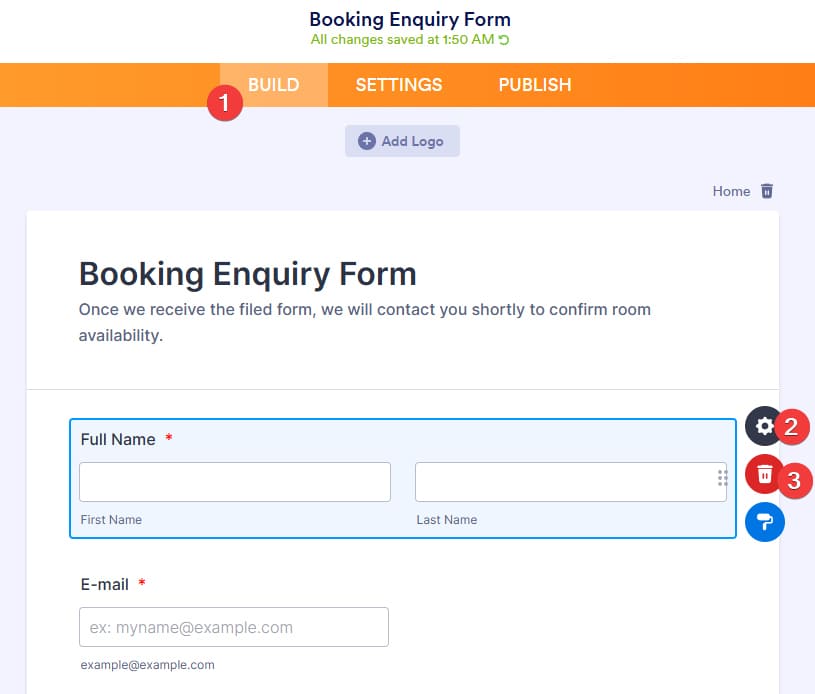 During this step, you can add or remove fields and basically change almost any part of the form. For example, you can add extra fields or remove those you don’t need. Here’s how to do that:
- Use the “Build” tab of the form editor.
- By clicking the gear button, you can configure each field and customize it. For example, Jotform supports changing field labels, alignment, placeholder text, editing width, entry limits, and other options.
- If you click the trash can button, the field will be deleted. Press Ctrl-Z to undo the deletion.
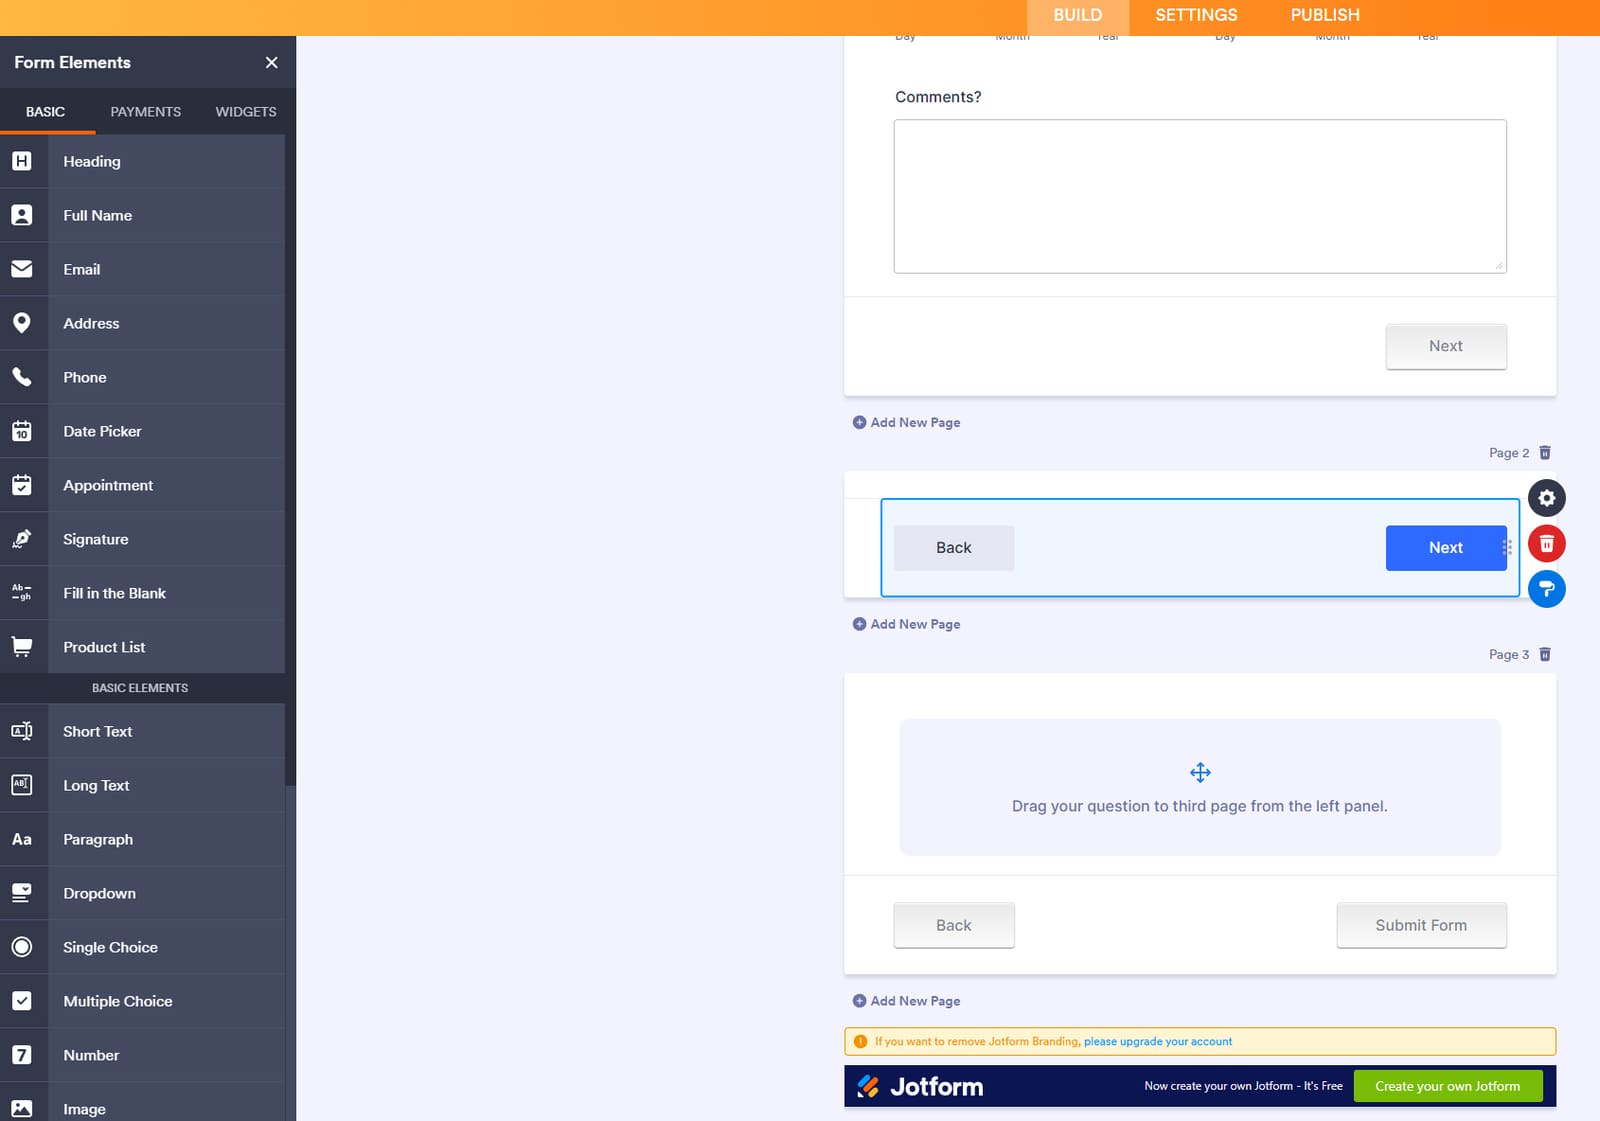
 If you want to add an extra step to the booking request form, press “Add New Page” at the bottom of the form. Then, drag elements from the sidebar on the left to complete the page.
- At the bottom of the page, you can choose what exactly you want to edit in the hotel or artist booking request form template. For example, by clicking the “Thank You page” tab, you can customize the page that guests will see after submitting their request.
Step 3. Enabling Email Notifications
To make sure you are informed of new incoming bookings, you need to set up email notifications. It is quite simple and can be done in a few steps.
- Navigate to the Settings tab of the form editor. Then, click “Emails” on the left sidebar.
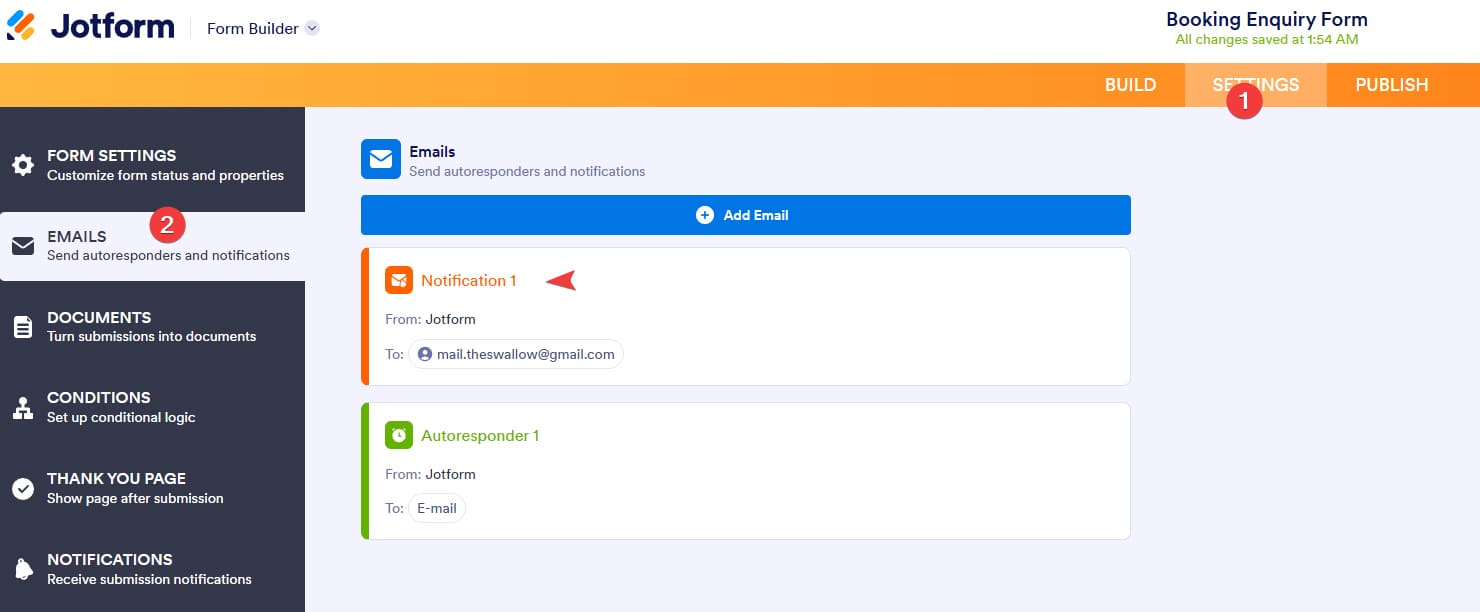
 Here you can configure notifications and an autoresponder connected to the booking request form. To edit notifications for you as a hotel owner, you can use the existing notification (Notification 1). Click on it to start editing. The email editor will open.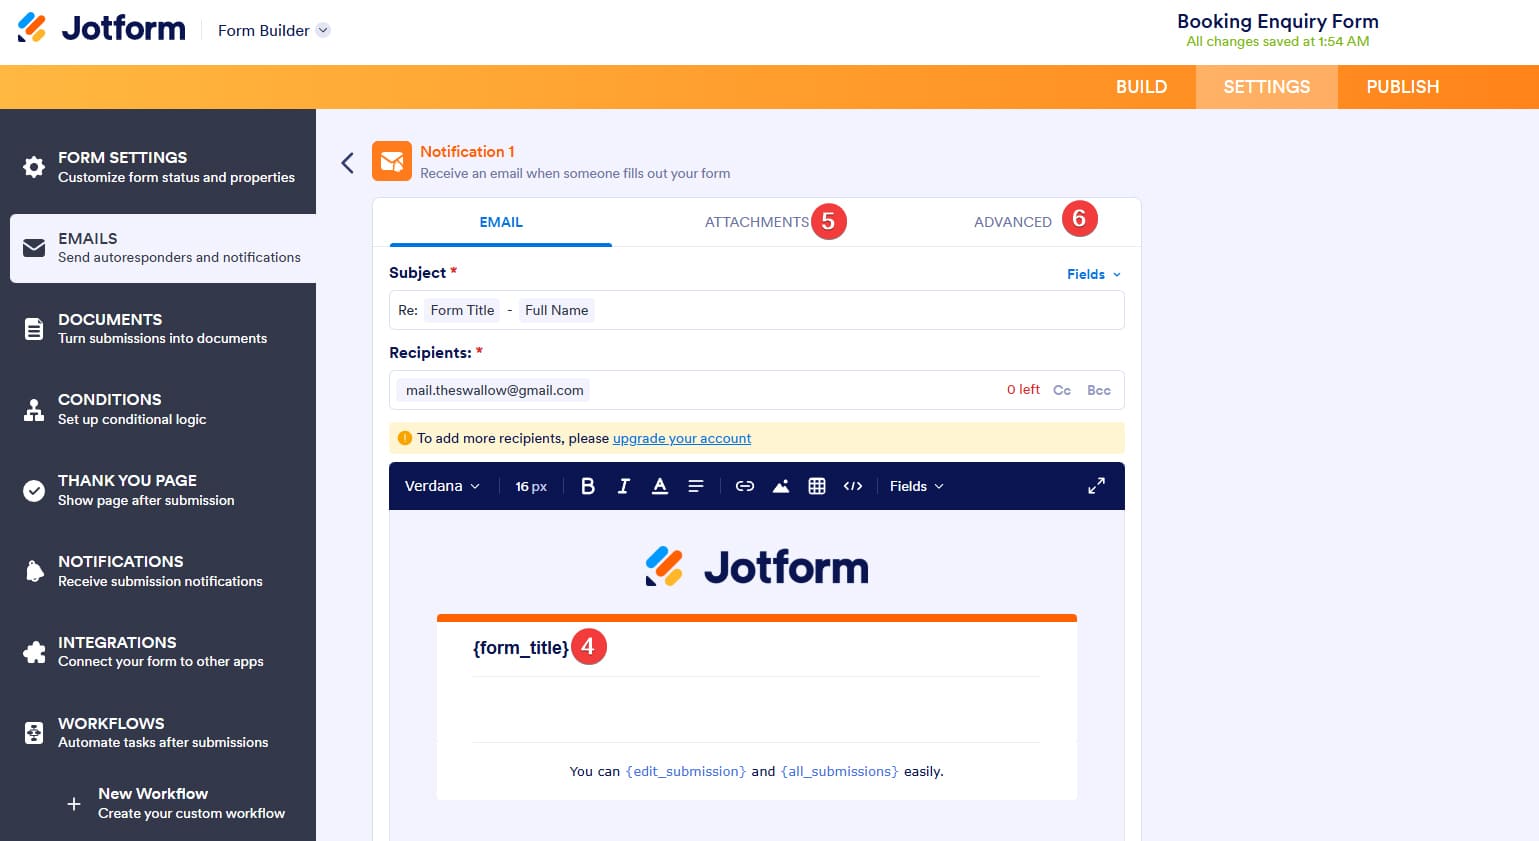
 In the editor, you can add anything you need to make a detailed email about the new booking request.
- Feel free to use tags that automate the content that the email template includes.
- In the Attachments tab, you can enable sending files as attachments (if you plan to allow your guests to send attachments using this form).
- In the Advanced tab, you’ll see extra options for this email template. For example, here you can edit the sender name, email, or add an email address for clients to send their responses.
- Press “Save Email” to finish editing.
Step 4. Publishing and Embedding
After you edited and customized your form, it’s time to publish it! During this step, we’ll also show how to embed it on your website.
- Navigate to the Publish tab.
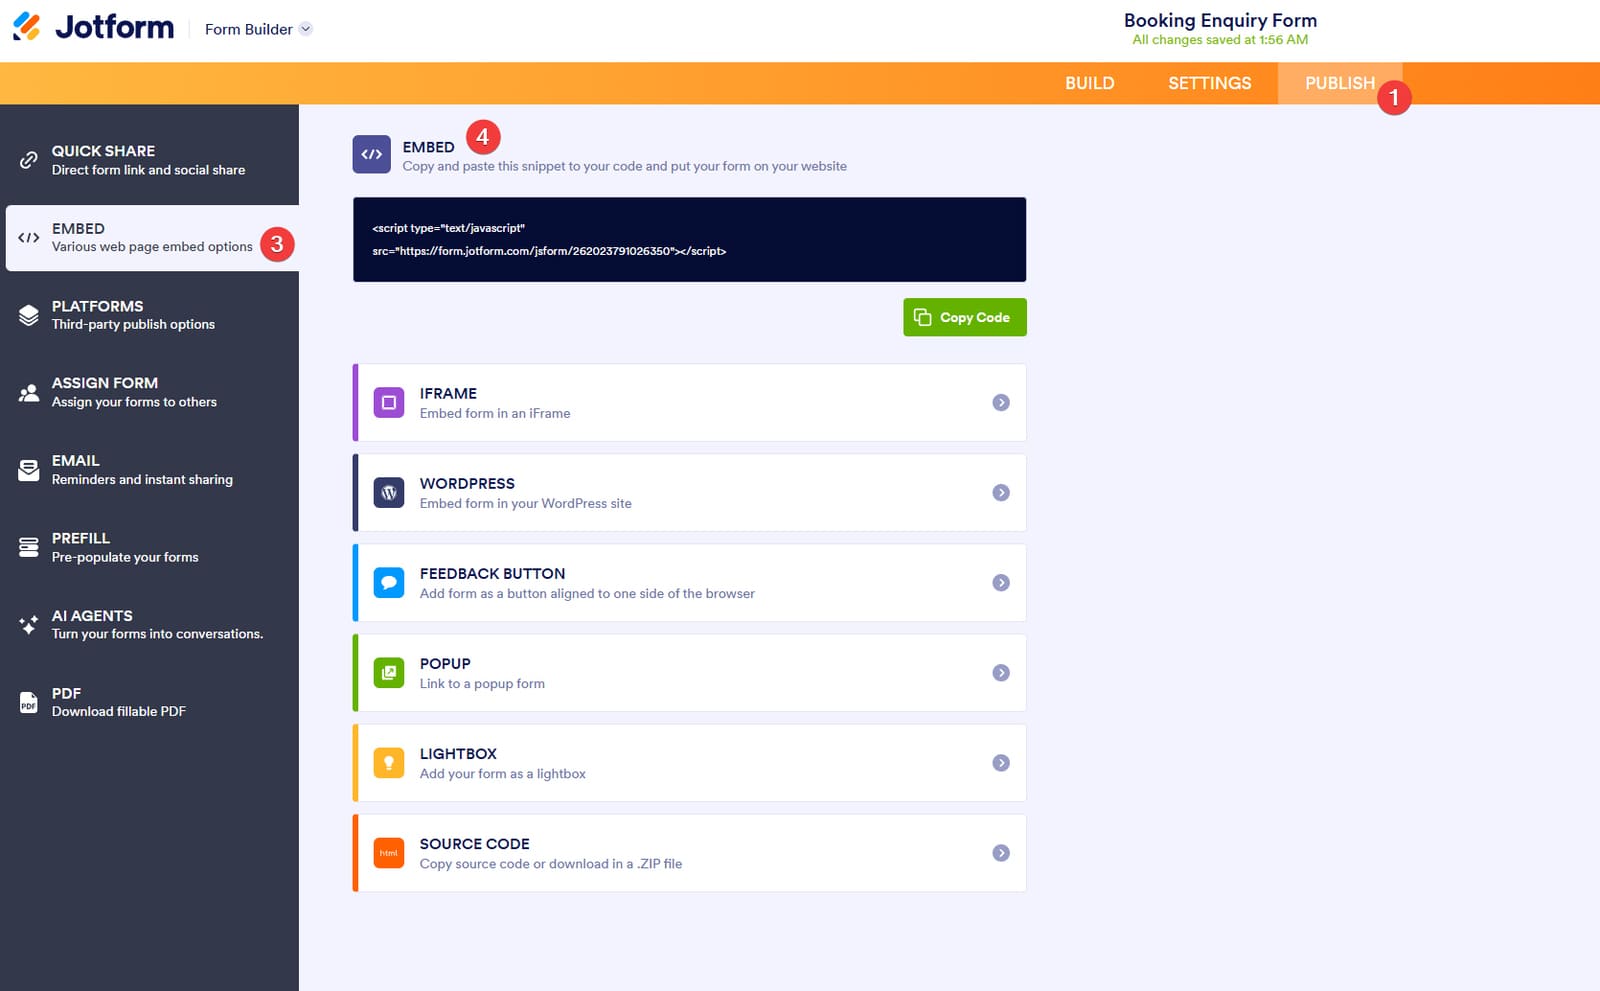
 You’ll see a dozen ways to share your form with guests, from a direct link to publishing it on social media.
- Click “Embed” on the left sidebar to start integrating the form with your website.
- Jotform supports multiple ways to embed your form, and it’s not just copying code to add it to any page later. Depending on what’s best for your site, choose one of the following:
- Embed code;
- iFrame;
- WordPress;
- Feedback button;
- Popup form;
- Lightbox;
- Source code.
- Depending on what you choose, you get a script in most cases or a shortcode for WordPress to display a form online. With HTML-only websites, you need to add the code to the needed part of the page. Platforms like Wix or Squarespace, in their turn, use special extensions or blocks to embed a script. In this case, adding a booking request form is even easier, but it always requires a preview before publishing changes.
Conclusion
As you see, integrating a booking request form is quite simple and doesn’t take a lot of time. Whether you use a WordPress website for your hotel and vacation rentals or a website builder supporting embeds, you can get such a form working with ease. Besides, having such a form (for example, using a WordPress booking request plugin) makes it easy for you to stay connected with your guests even before they arrive at your hotel. A properly built request form for bookings gives your guests more than a way to contact you; it also delivers other benefits:
- Convenience: With a booking request form, your guests can quickly submit reservation requests at any time. Using any device they are comfortable with, your future guests don’t need to call or send a separate email.
- Faster communication: Thanks to the bookings being based on direct communication, your visitors get their booking details collected in a single step. This helps you as a hotel owner to respond with higher efficiency.
- Personalized service: By customizing the form, you can let guests add special requests, even if you are using an artist booking request form template. This is also a great way to meet their accommodation needs, as it guarantees a tailored experience for guests.
- Valuable insights: As you collect the information through booking requests, you get a better understanding of customer needs. Besides, such an approach is best for improving your services over time while listening to your guests.