Table of Contents
Since version 1.10.0 of the WordPress appointment booking plugin, all employees can sync their site schedules with personal Google Calendars. This will allow employees to view their bookings without a need to log into your website.
To add Google Calendar integration to your site and the Appointment Booking plugin, you need to firstly create a dedicated app on the Google Developer Console, then sync each employee’s calendar to their profile on your site.
Keep in mind:
- When an appointment is scheduled via your site, it’s automatically added to the employee’s Google calendar if it’s synced.
- It’s a one-way sync process. Change the booking statuses or reschedule appointments on the site, not via the Google Calendar. Changes made to the appointment booking on the website are updated in the respective Google Calendar. For example, if you change the booking status to ‘Canceled’, it automatically disappears in the synced employee’s Google calendar. However, the changes you make to the booking in the Google Calendar don’t apply to employees’ working schedules on your WordPress site.
Create an app with the Google Developer Console
Register an app with the Google Developer Console and obtain your Client ID and Client Secret. credentials. For this, do the following.
- Go to the Google Developers Console.
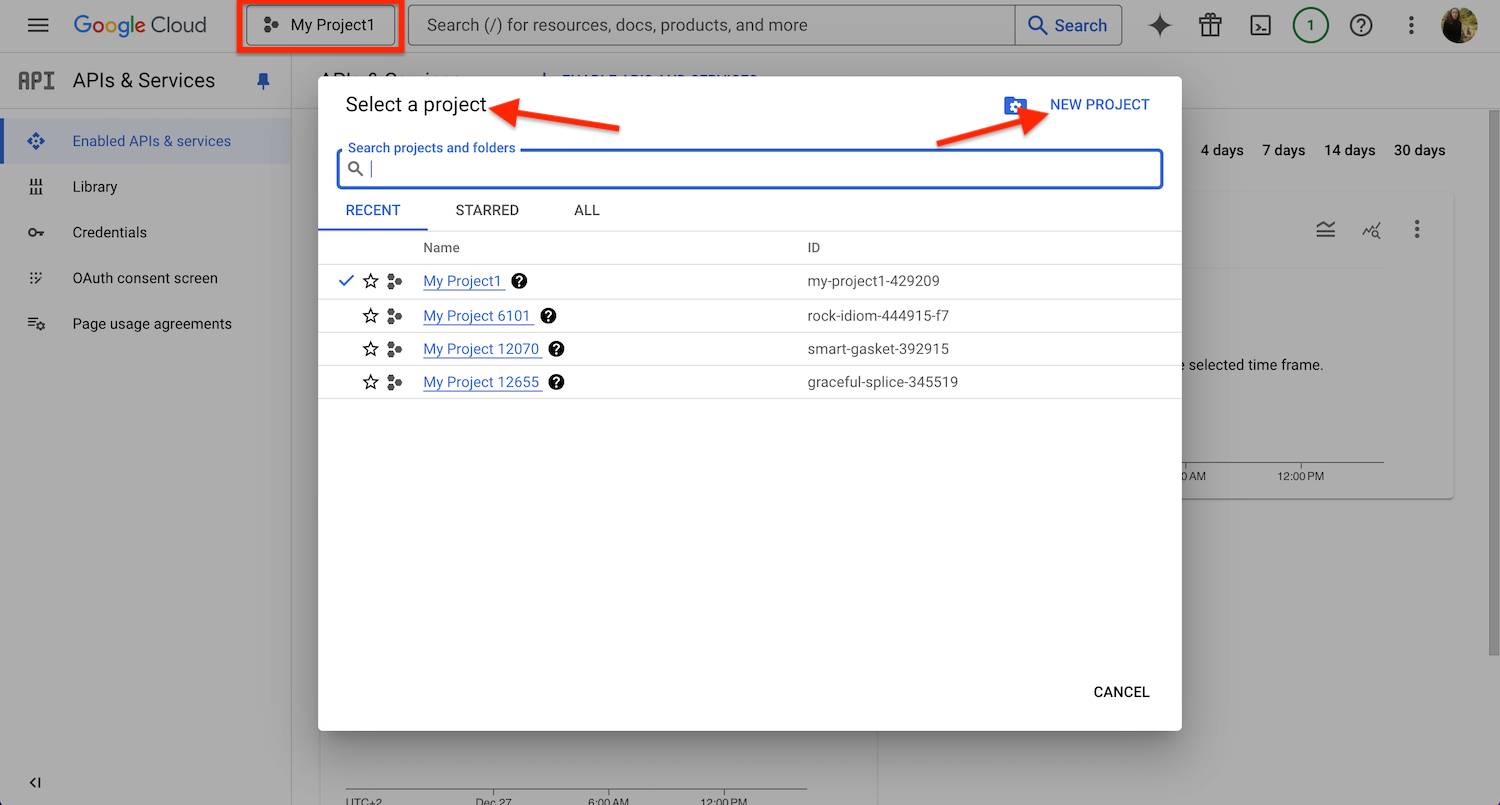
- Choose “New project” or “Select a project” if you have got active ones.
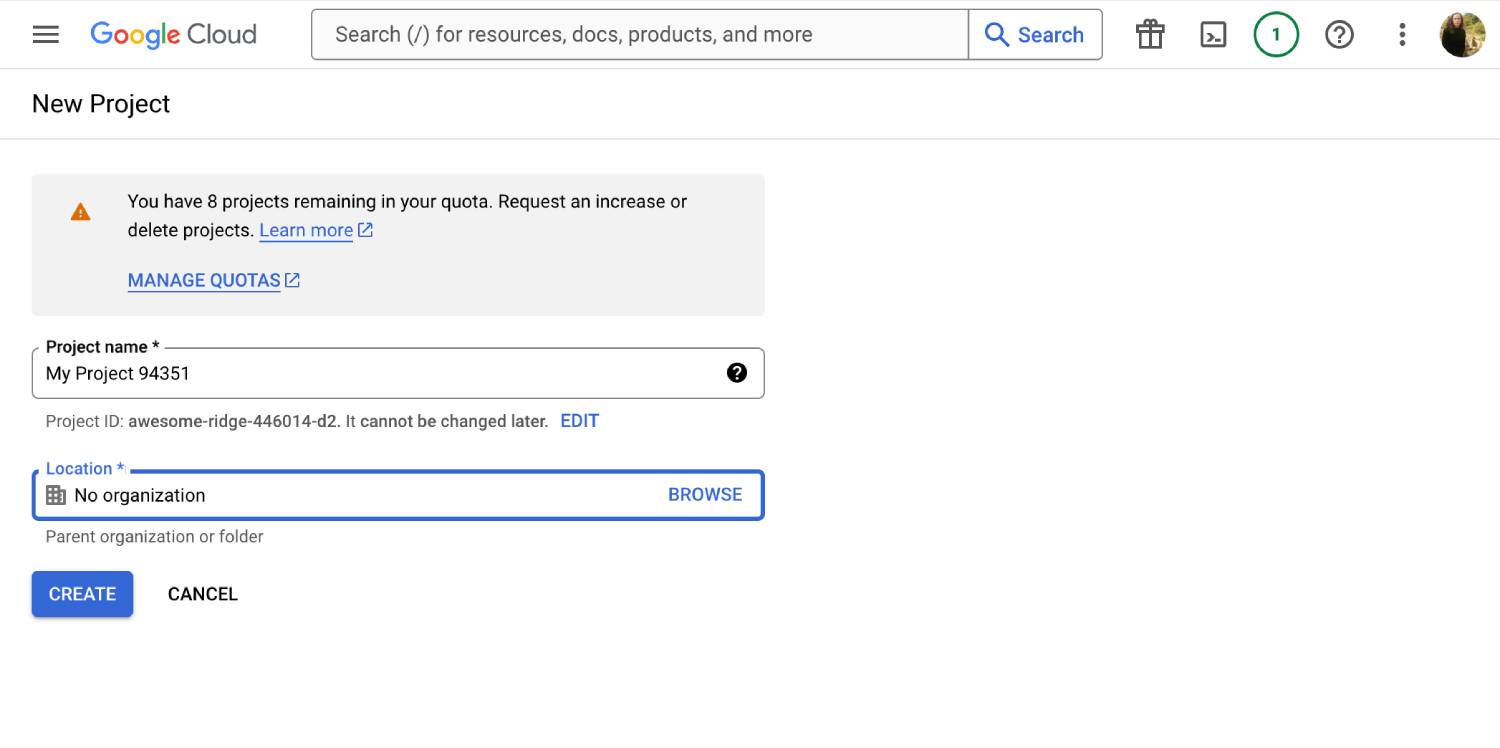
- For a new project, fill in the fields like below and click ‘Create’.
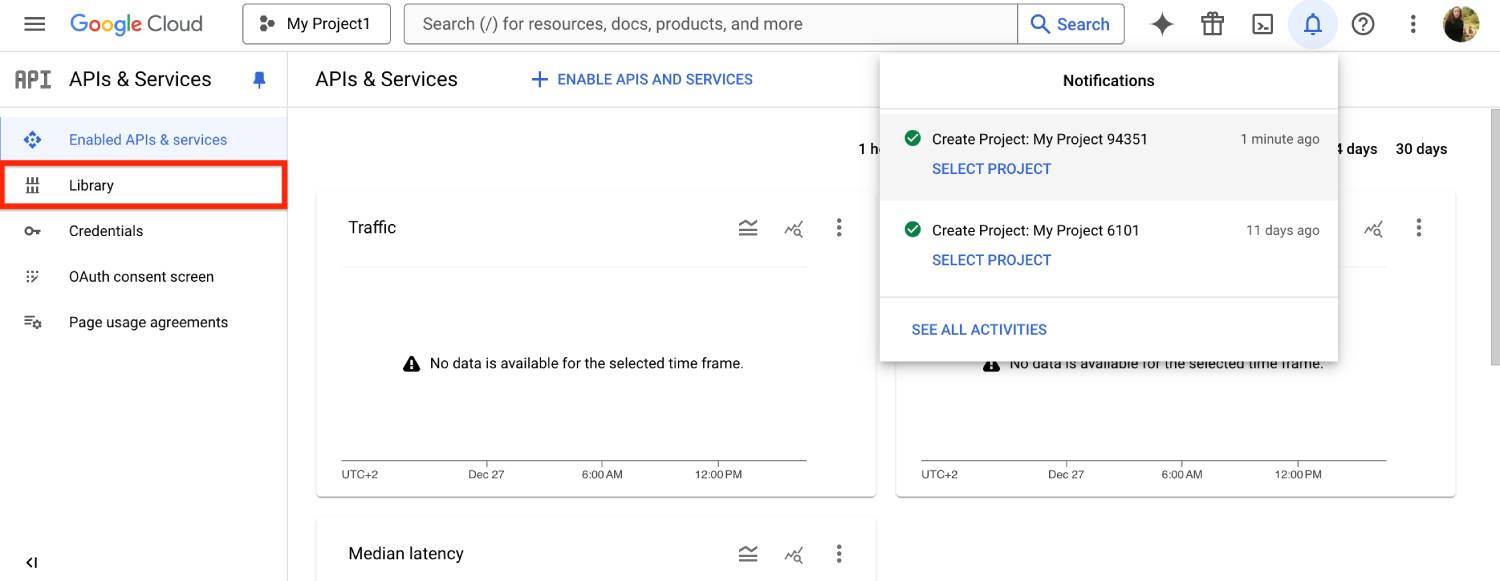
- Wait to be redirected to the project dashboard.
- Go to “Library” in the dashboard from the left.
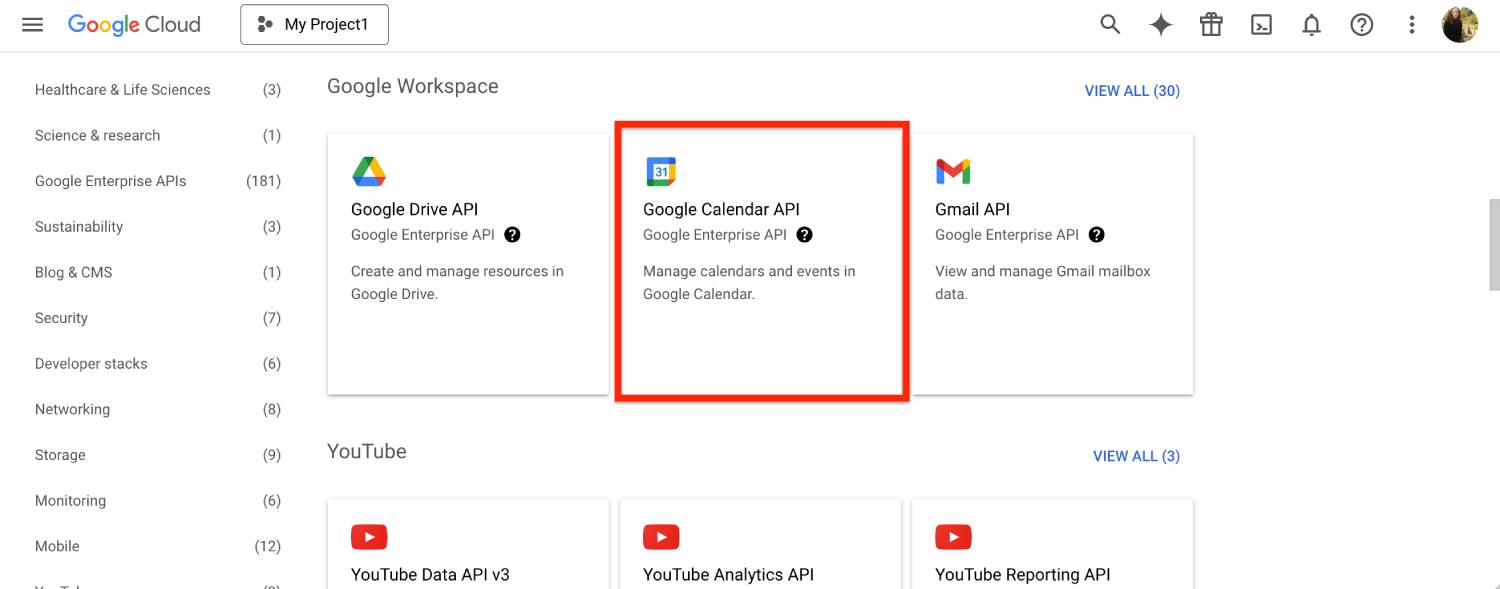
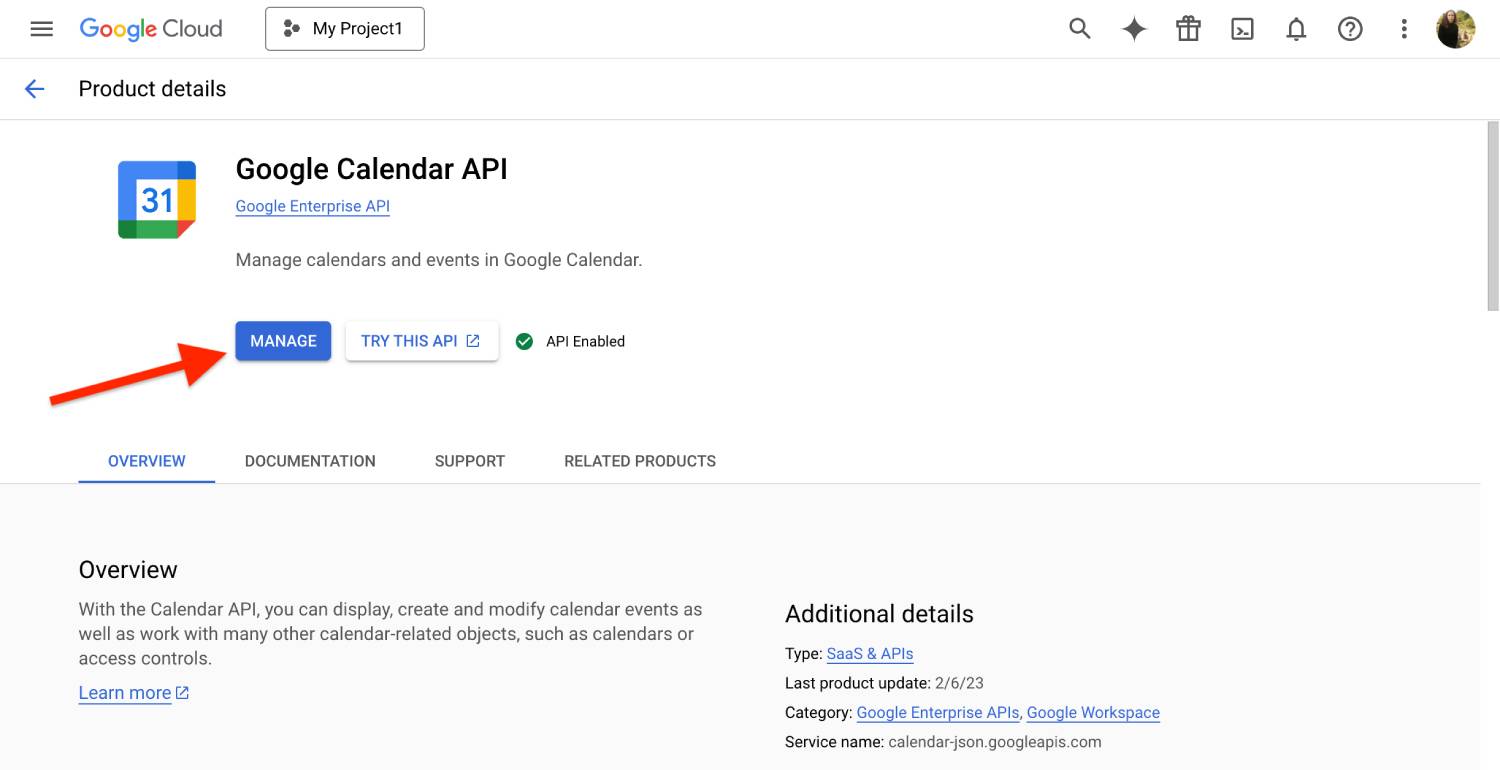
- Scroll down to find Google Calendar API and select it.
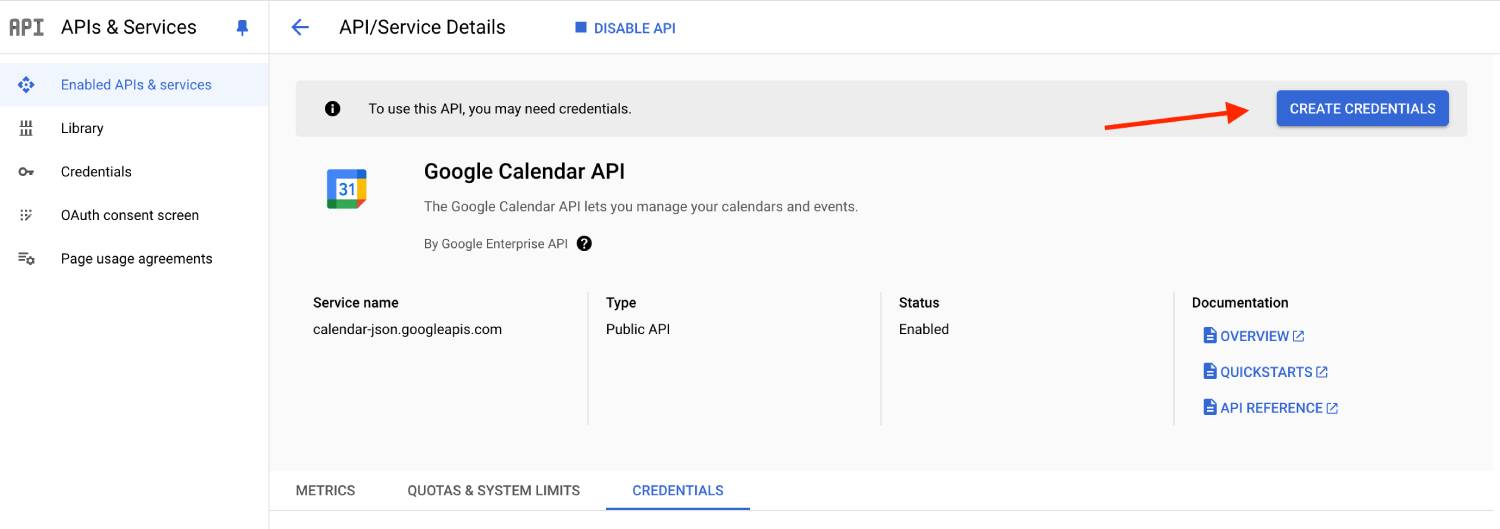
- Click ‘Enable’ if it’s disabled.
- Hit the ‘Create credentials’ button.
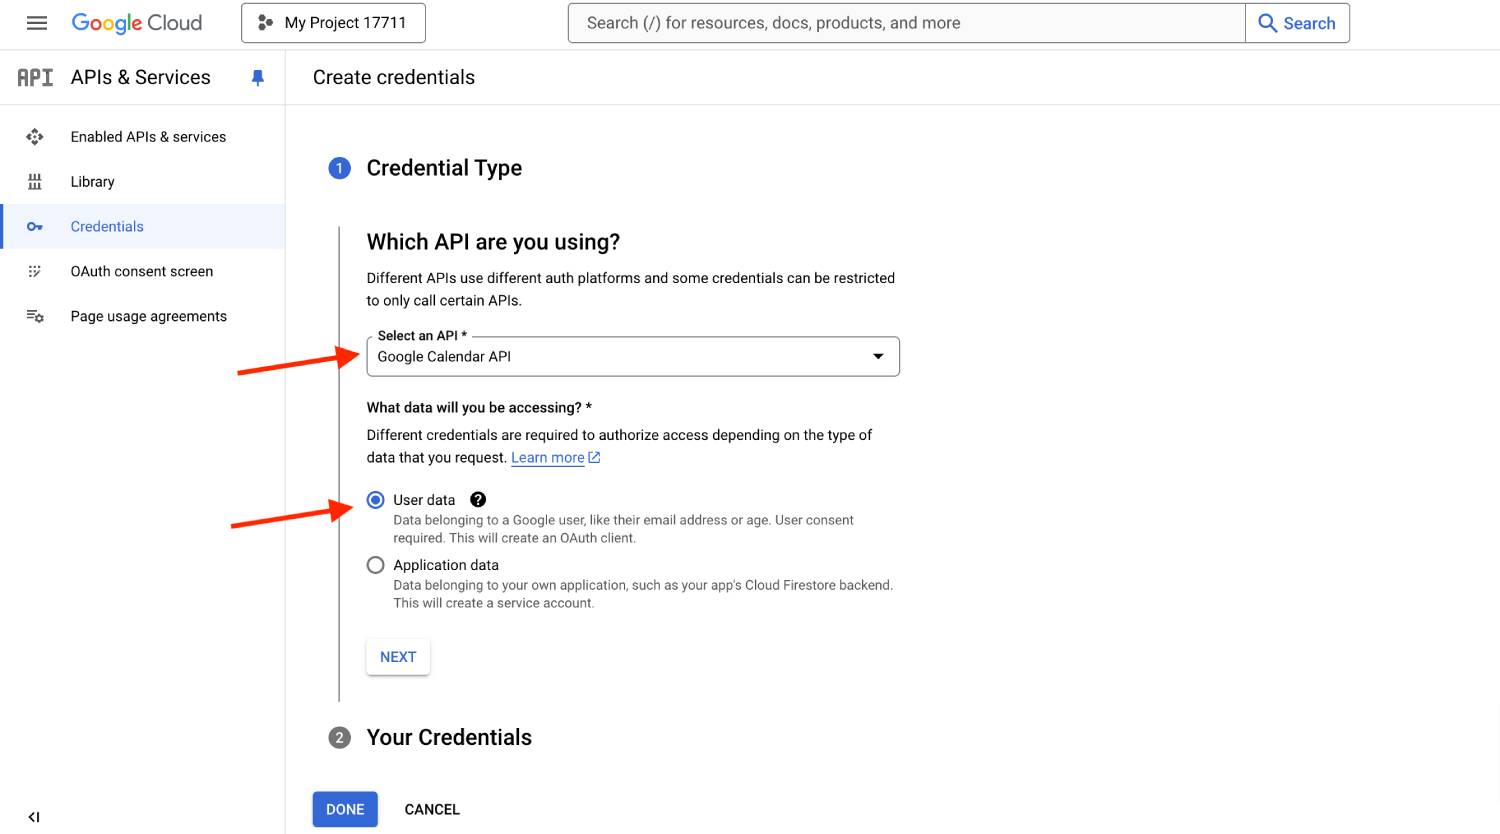
- Set Google Calendar API as your credential type. Also select ‘user data’ and click ‘Next’.
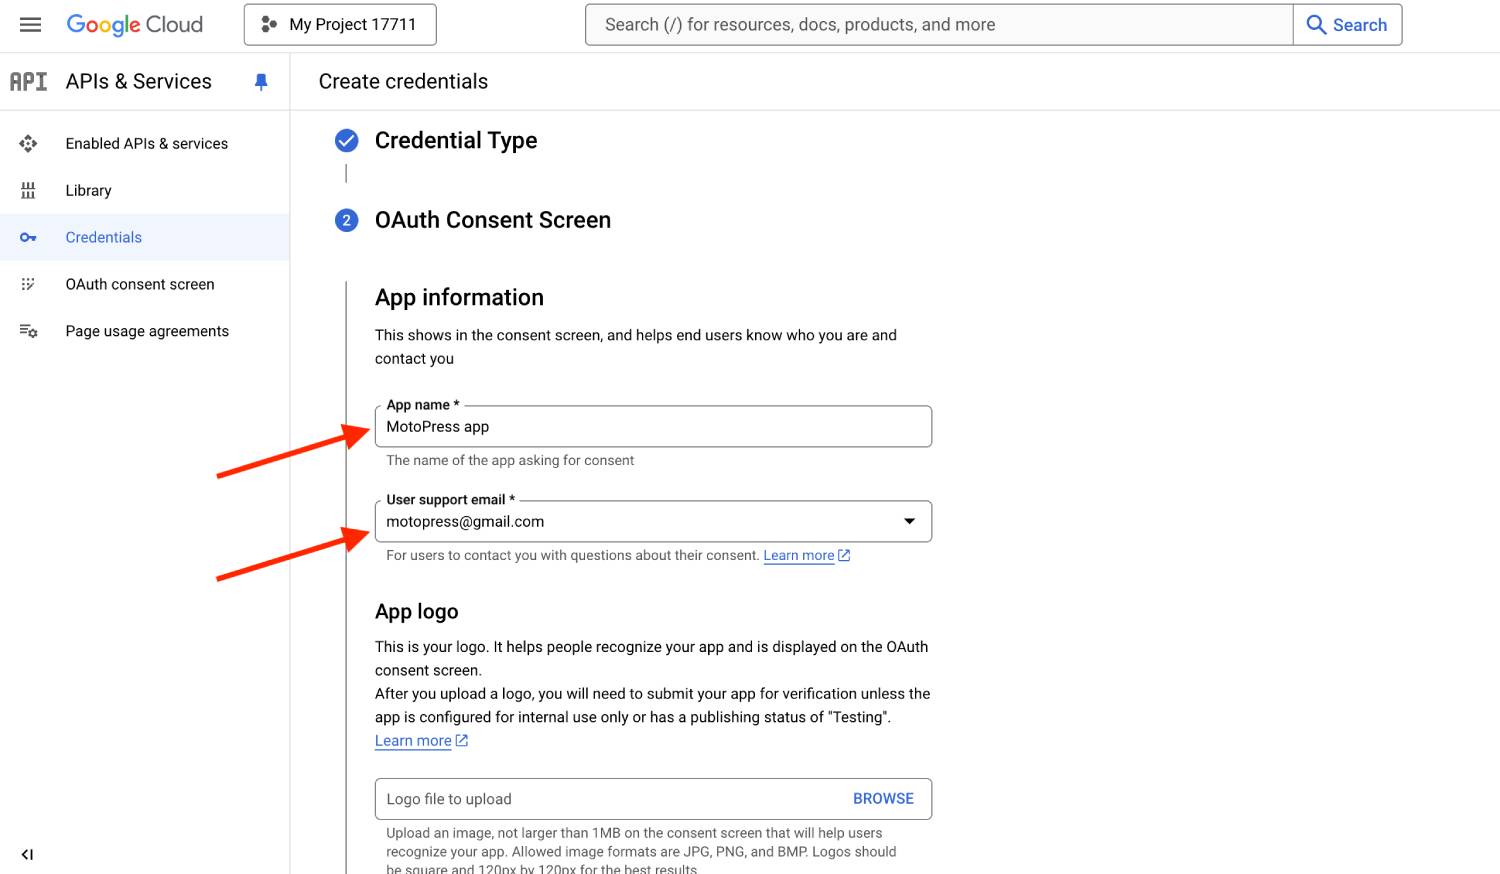
- Create an application name and provide your contact email addresses. Once done, click ‘Save and continue’.
- Skip ‘Scope’ and click ‘Save and continue’ to go to the next step.
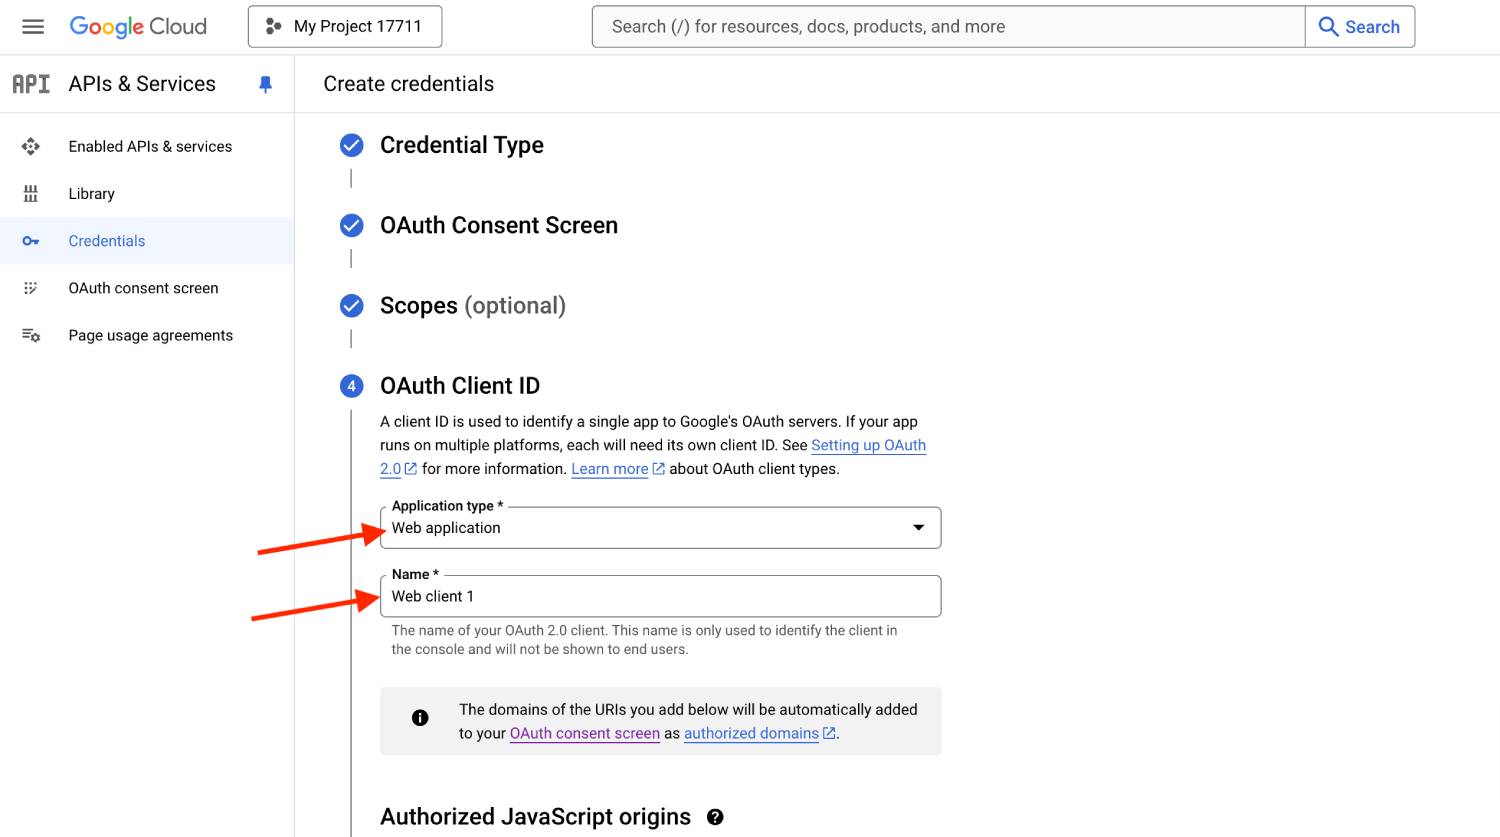
- In the ‘OAuth client ID’ step, select ‘Web application’ and create a name for it.
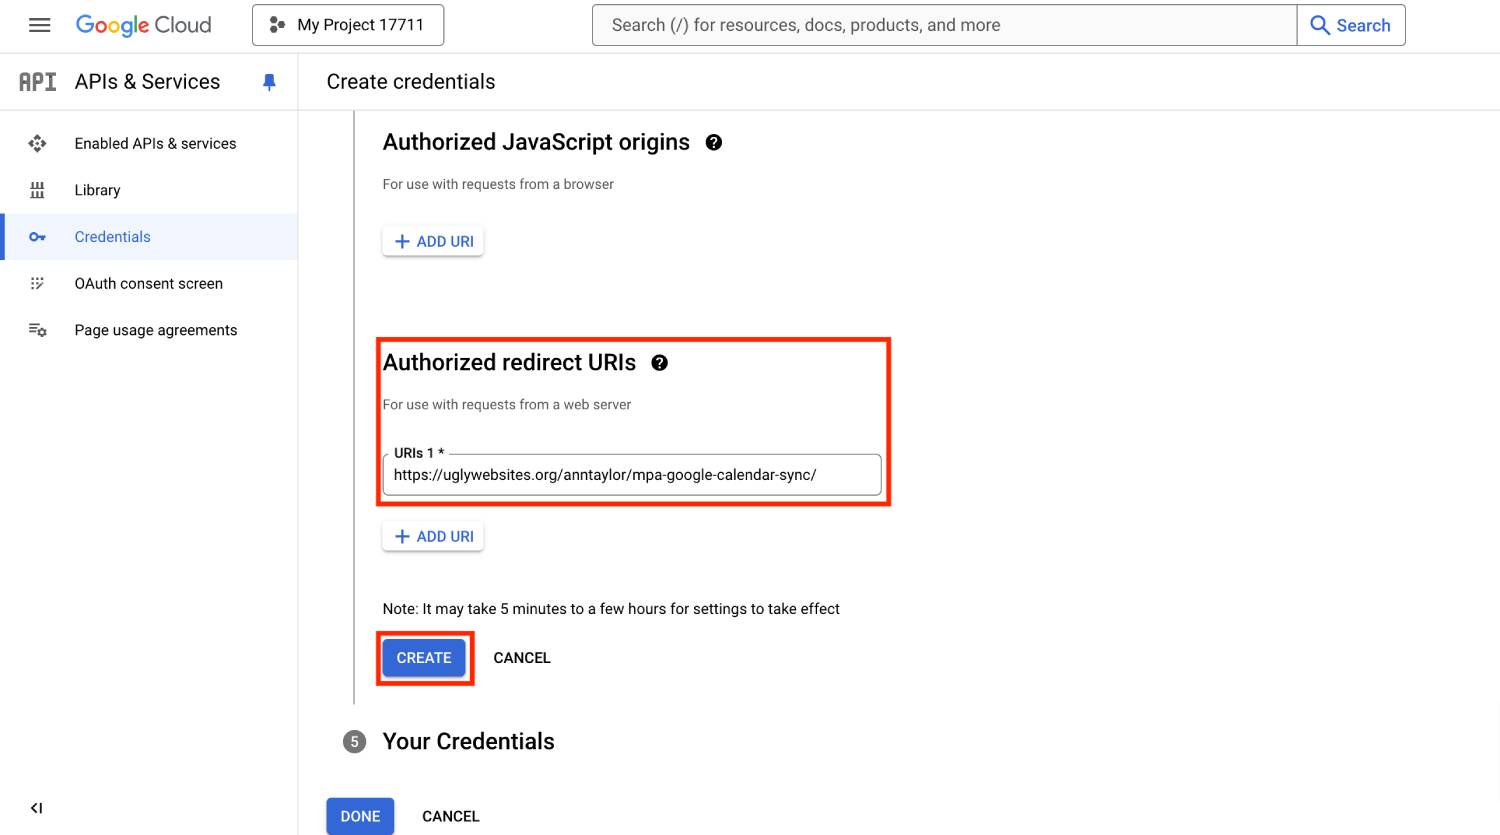
- Scroll down to the ‘Authorized redirect URIs’, click ‘+Add URI’ and paste the URL from your Appointment Booking plugin dashboard. Then click ‘Create’.

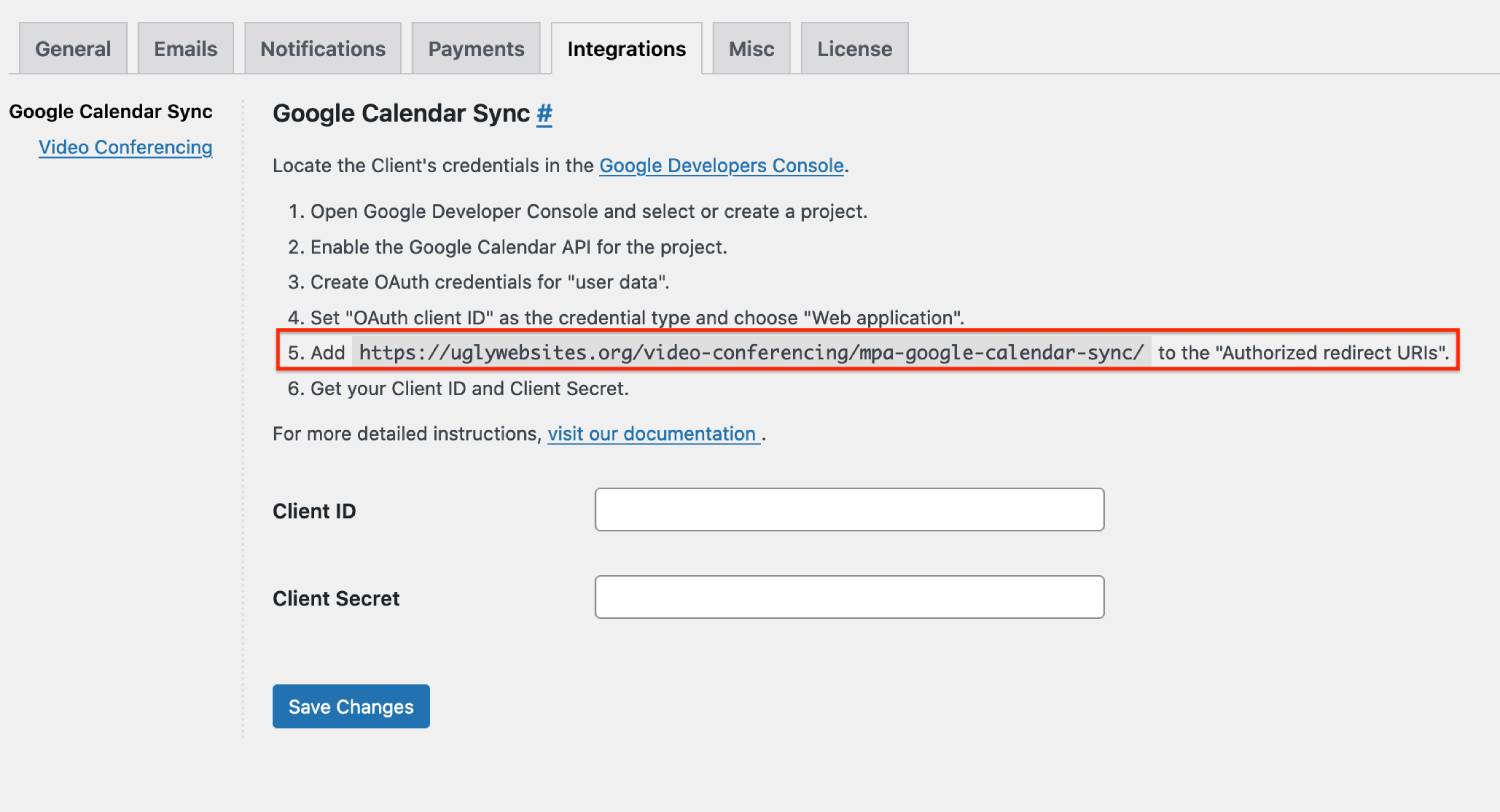
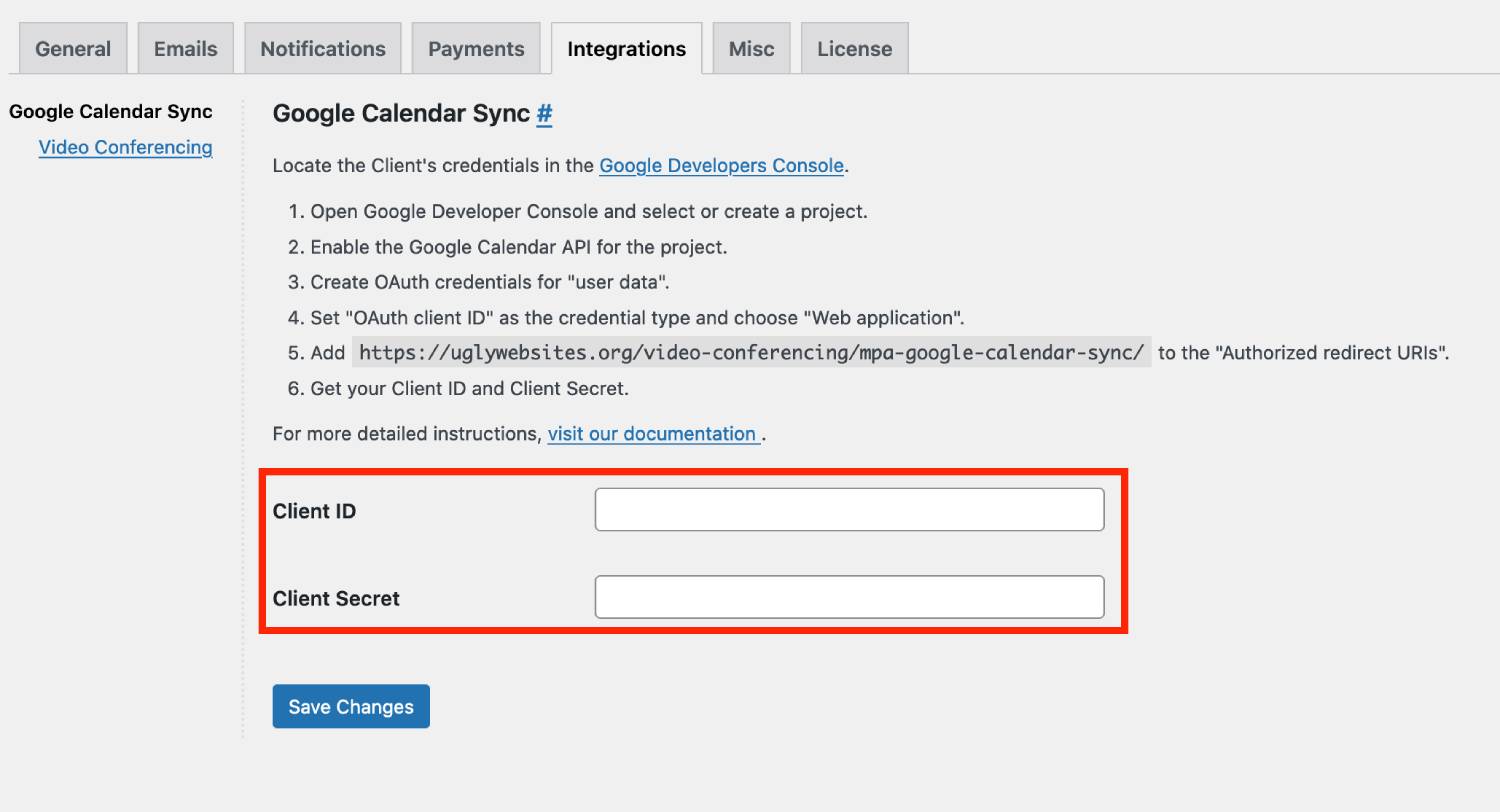
Where to get your redirect URI? Go to Appointment Booking plugin > > Settings > Integrations > Google Calendar sync > Step 5. > copy a link and paste to Google Console.

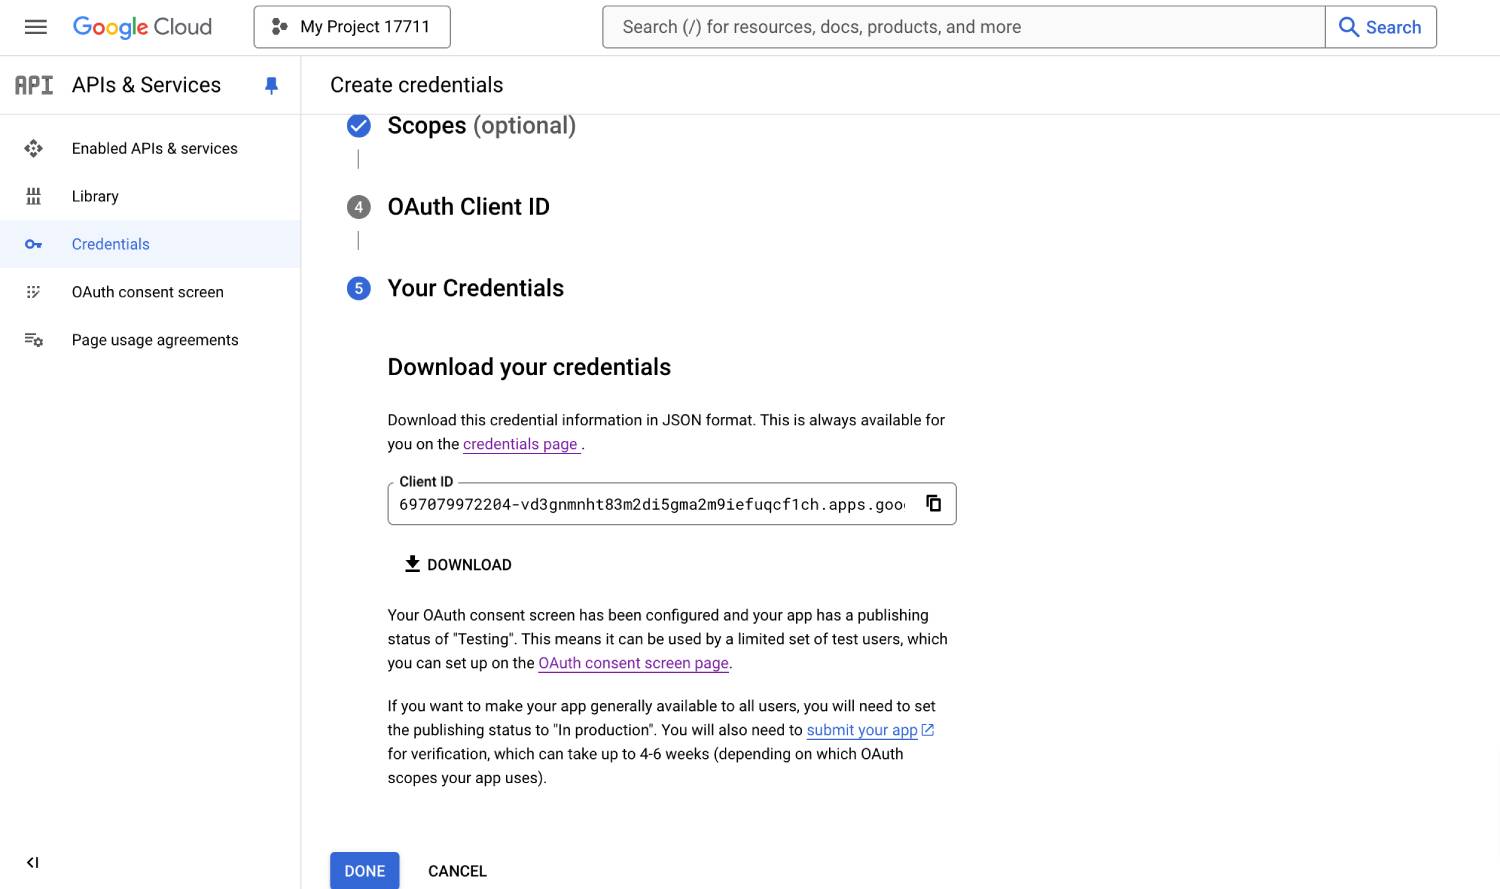
- Your credentials should be created – click ‘Done’.
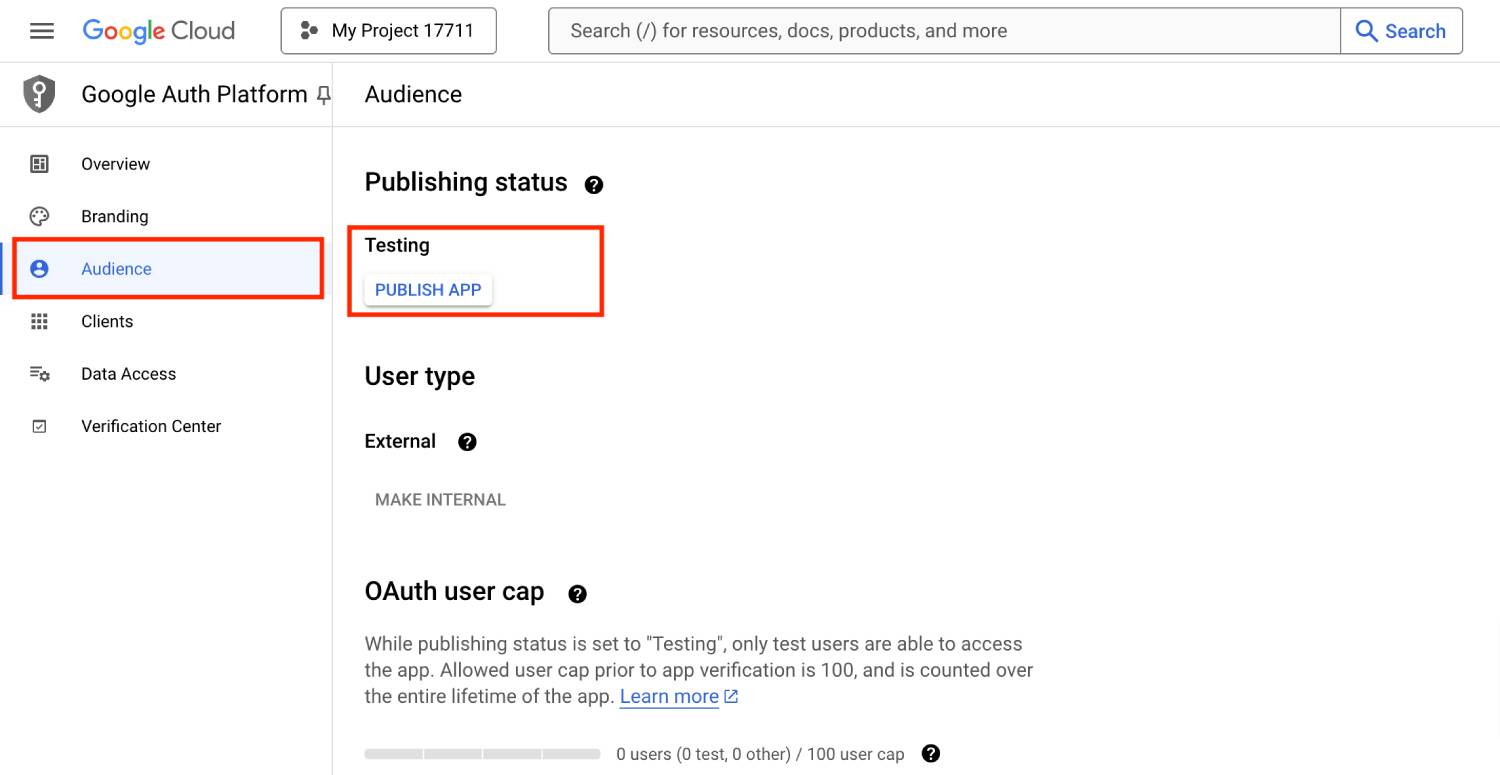
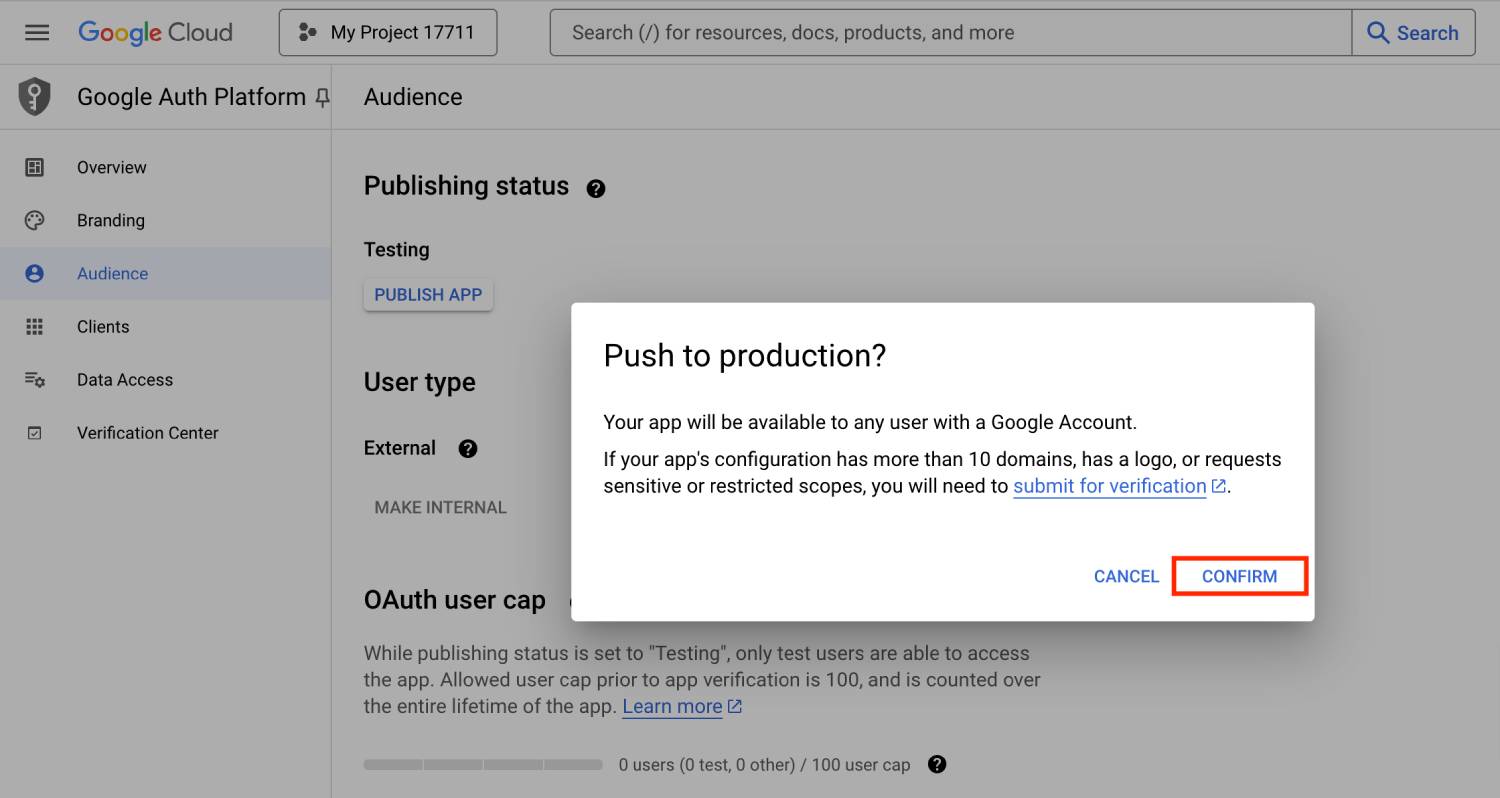
- Go to the ‘Audience’ menu (former ‘OAuth Consent Screen’) and click ‘Publish app’.
- In the ‘Push to production?’ pop-up, click ‘Confirm’.
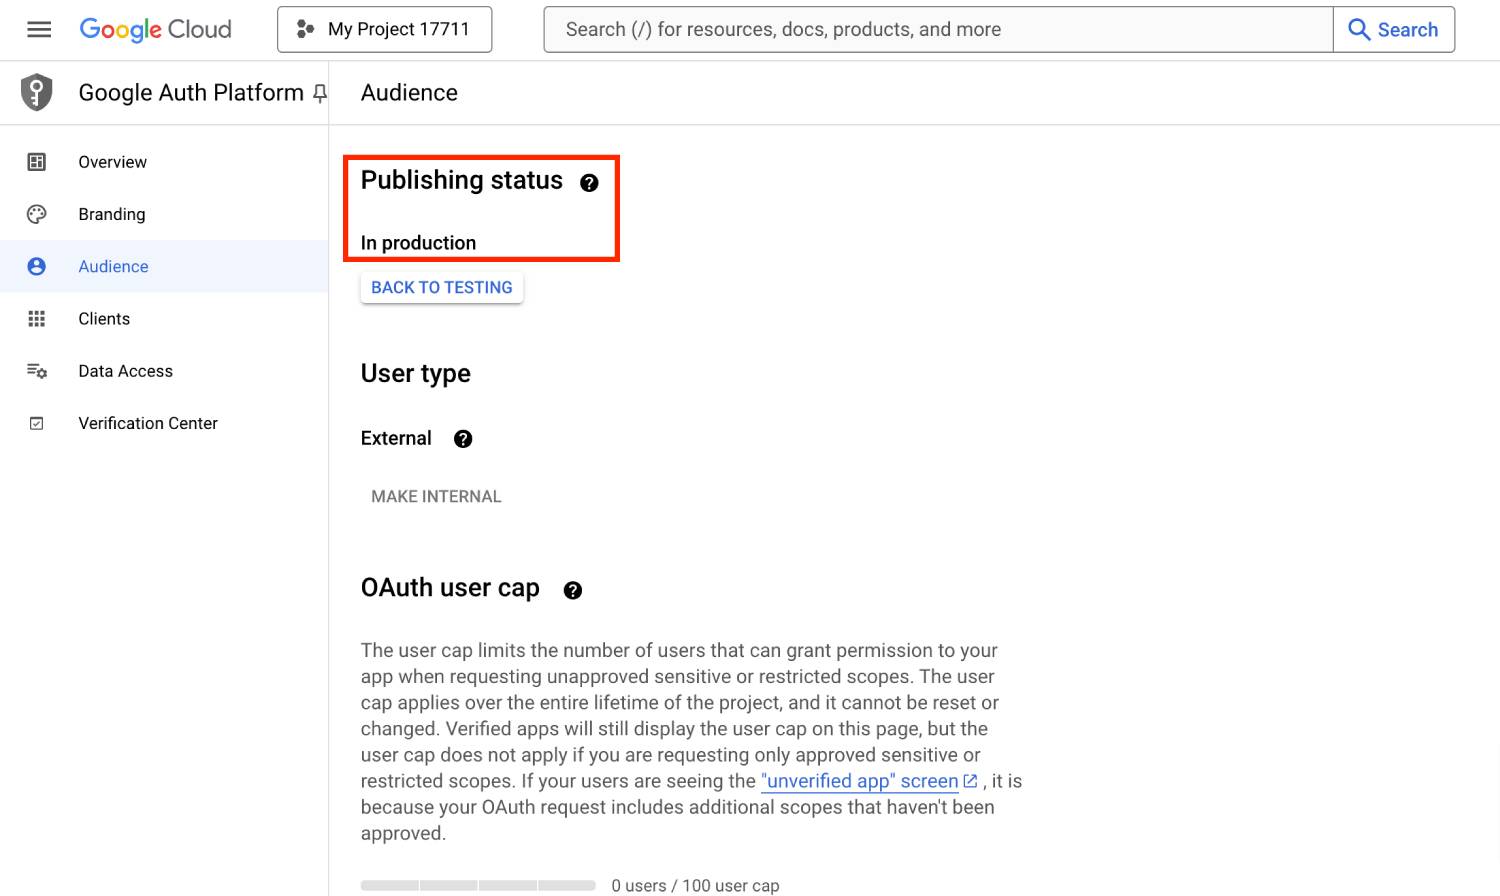
- The publishing status should change to ‘In production’.
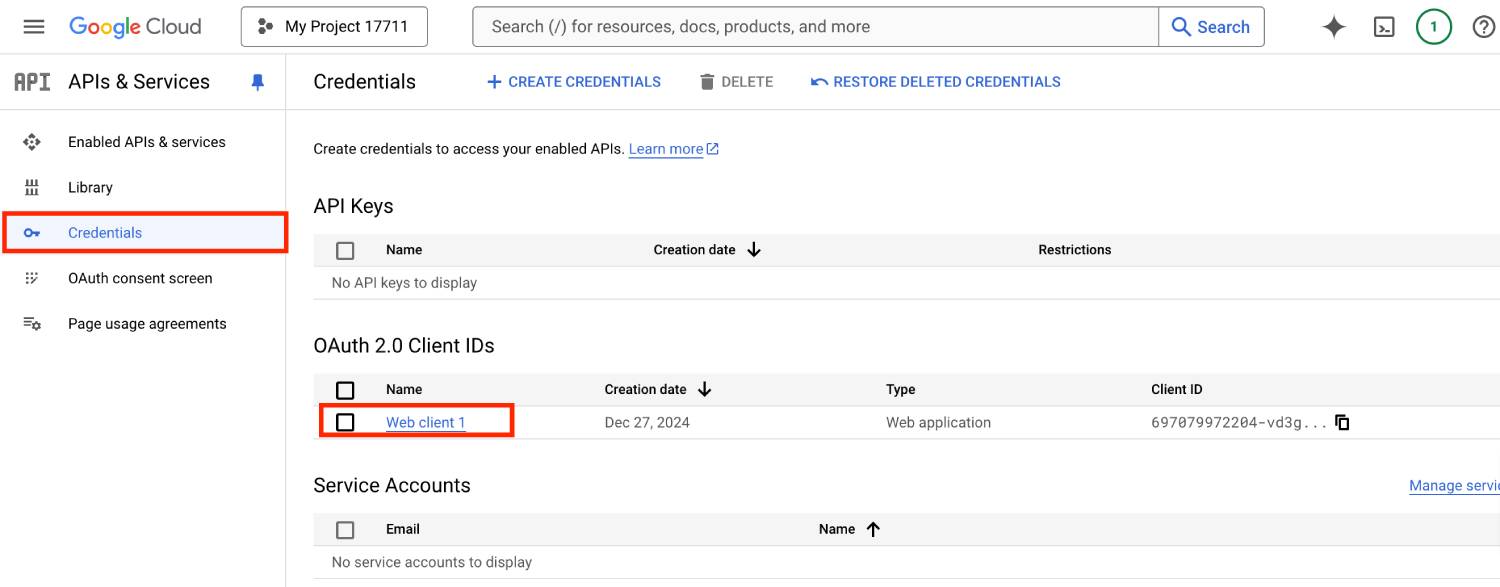
- Navigate to Credentials and click on the newly created application.
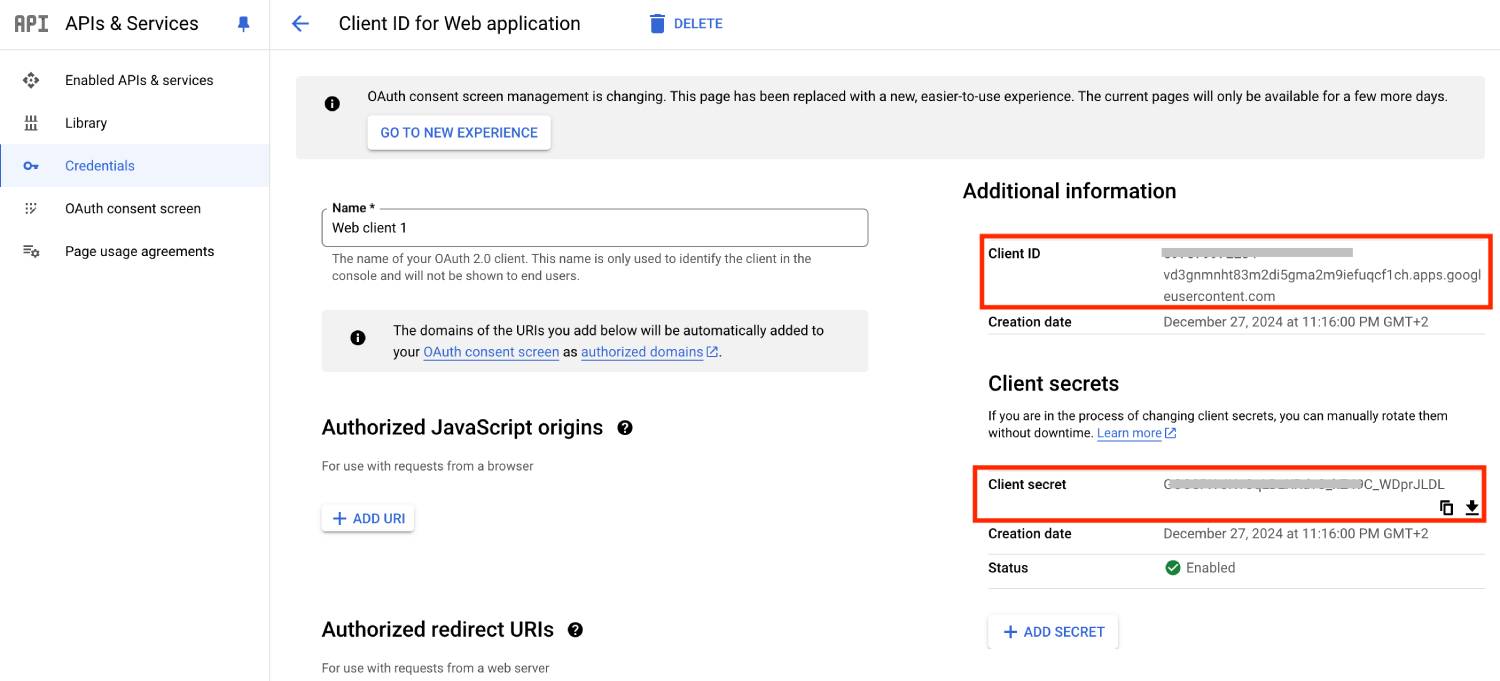
- Find your Client ID and Client Secret key credentials and copy them.
- Insert the generated credentials into the appropriate fields via Appointment Booking plugin > Settings > Integrations > Google Calendar sync. > save the changes.
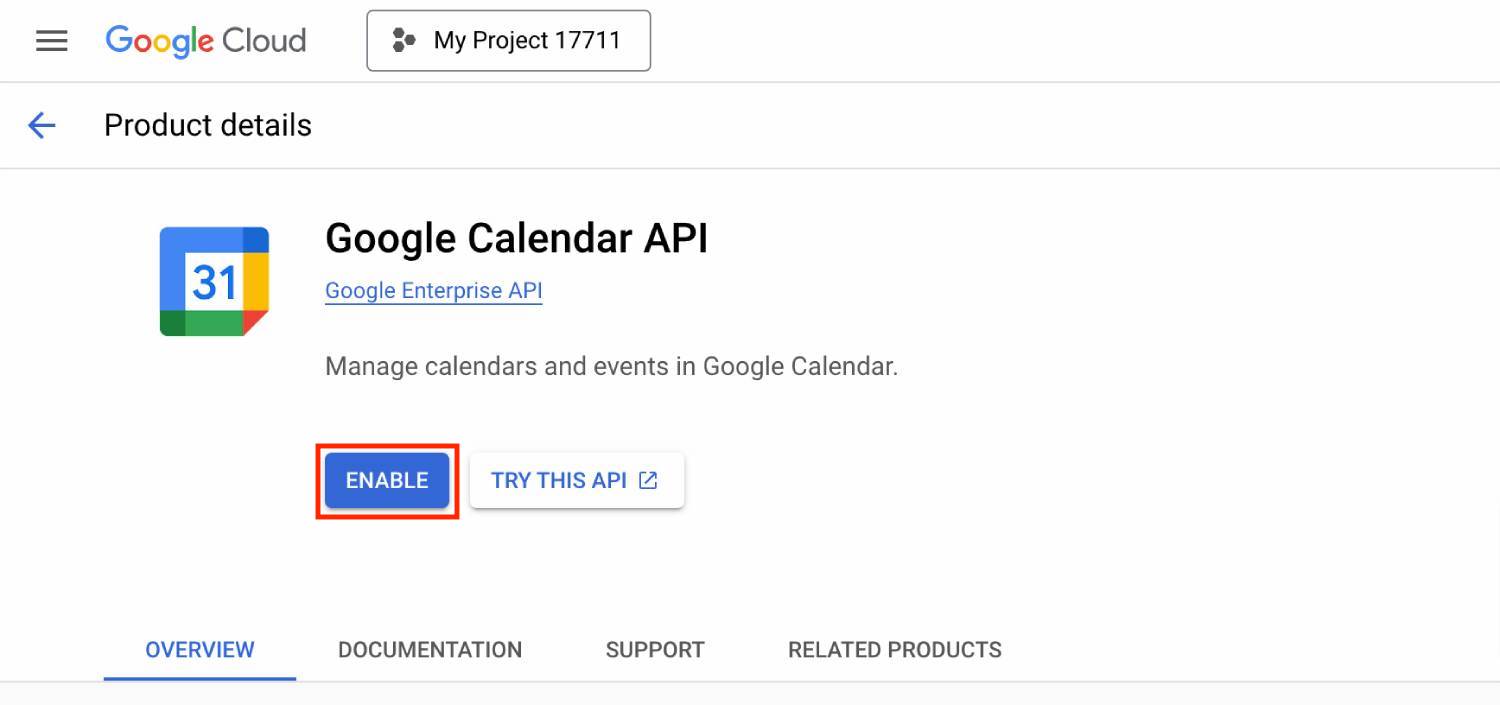
Or click ‘Manage’ if it’s enabled.
Once this connection is established, sync employee’s profile to their Google Calendar (more below).
Connect employee’s Google calendar to your site
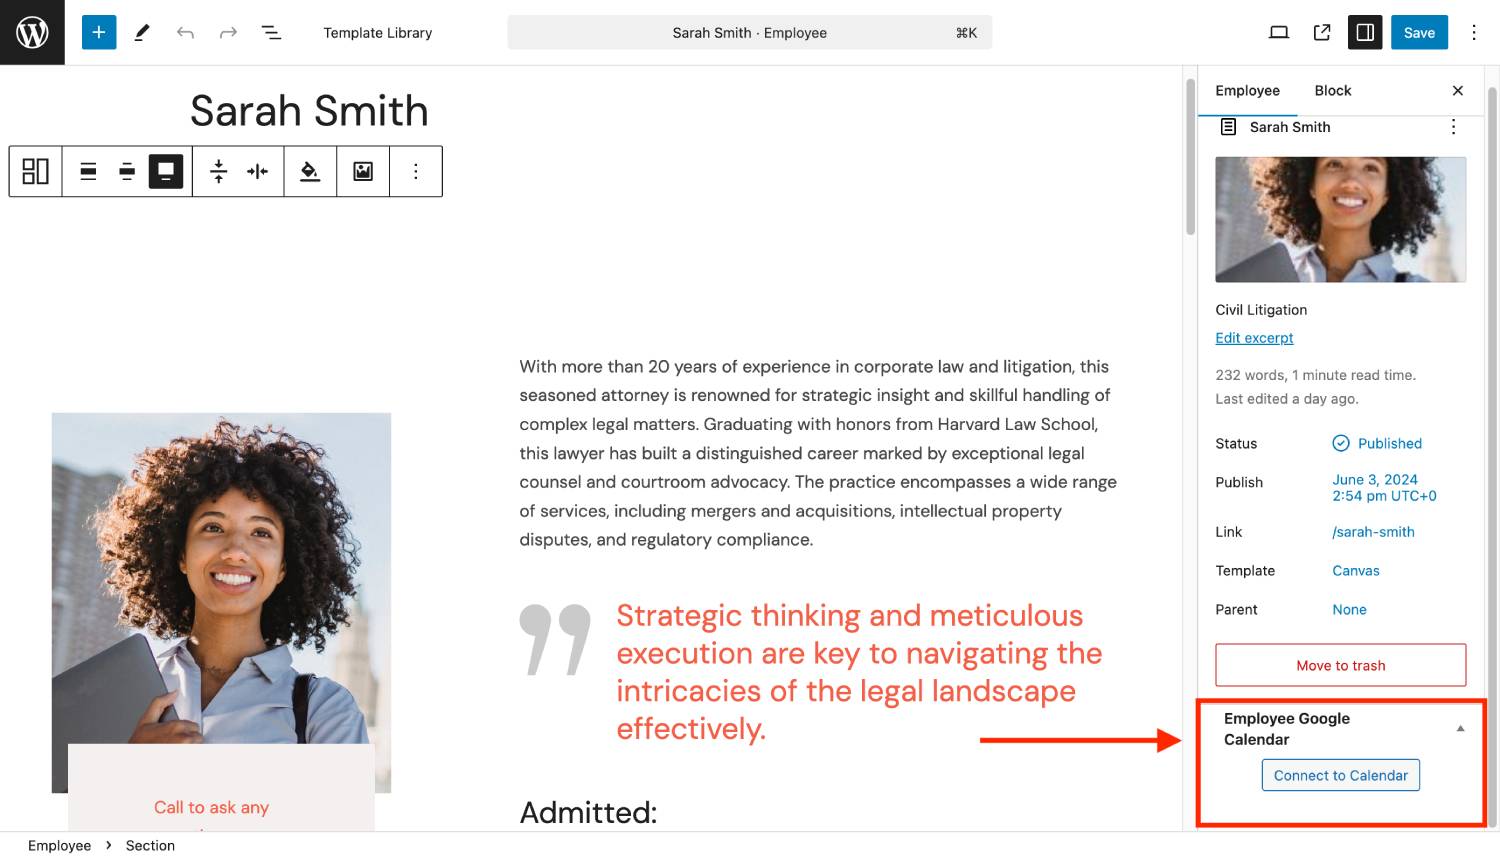
In order to connect a Google calendar, an employee must log into your site dashboard with their login details and go to Employee > Employee Google Calendar > Connect to Calendar.
By hitting on that button, they must be redirected to their Google account for confirmation.
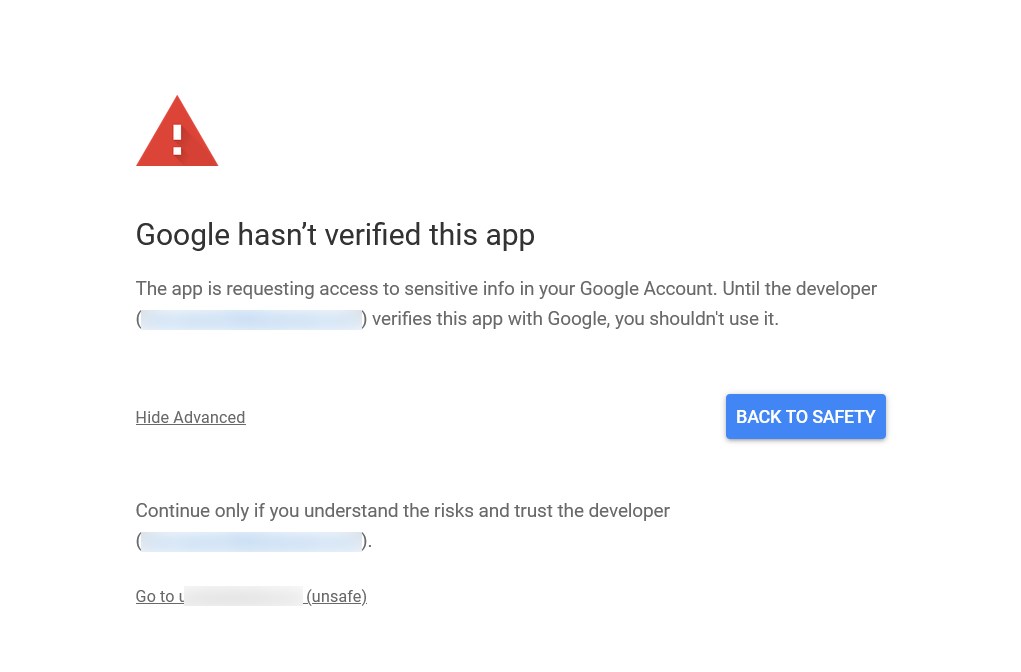
There are chances Google will mark this app as not verified. It’s fine, they just need to hit “Advance” and then “Go to <your domain>”. It’s still secure to log in this way since your employees know you and that your website is verified. They need to click ‘Continue’ to access your site.
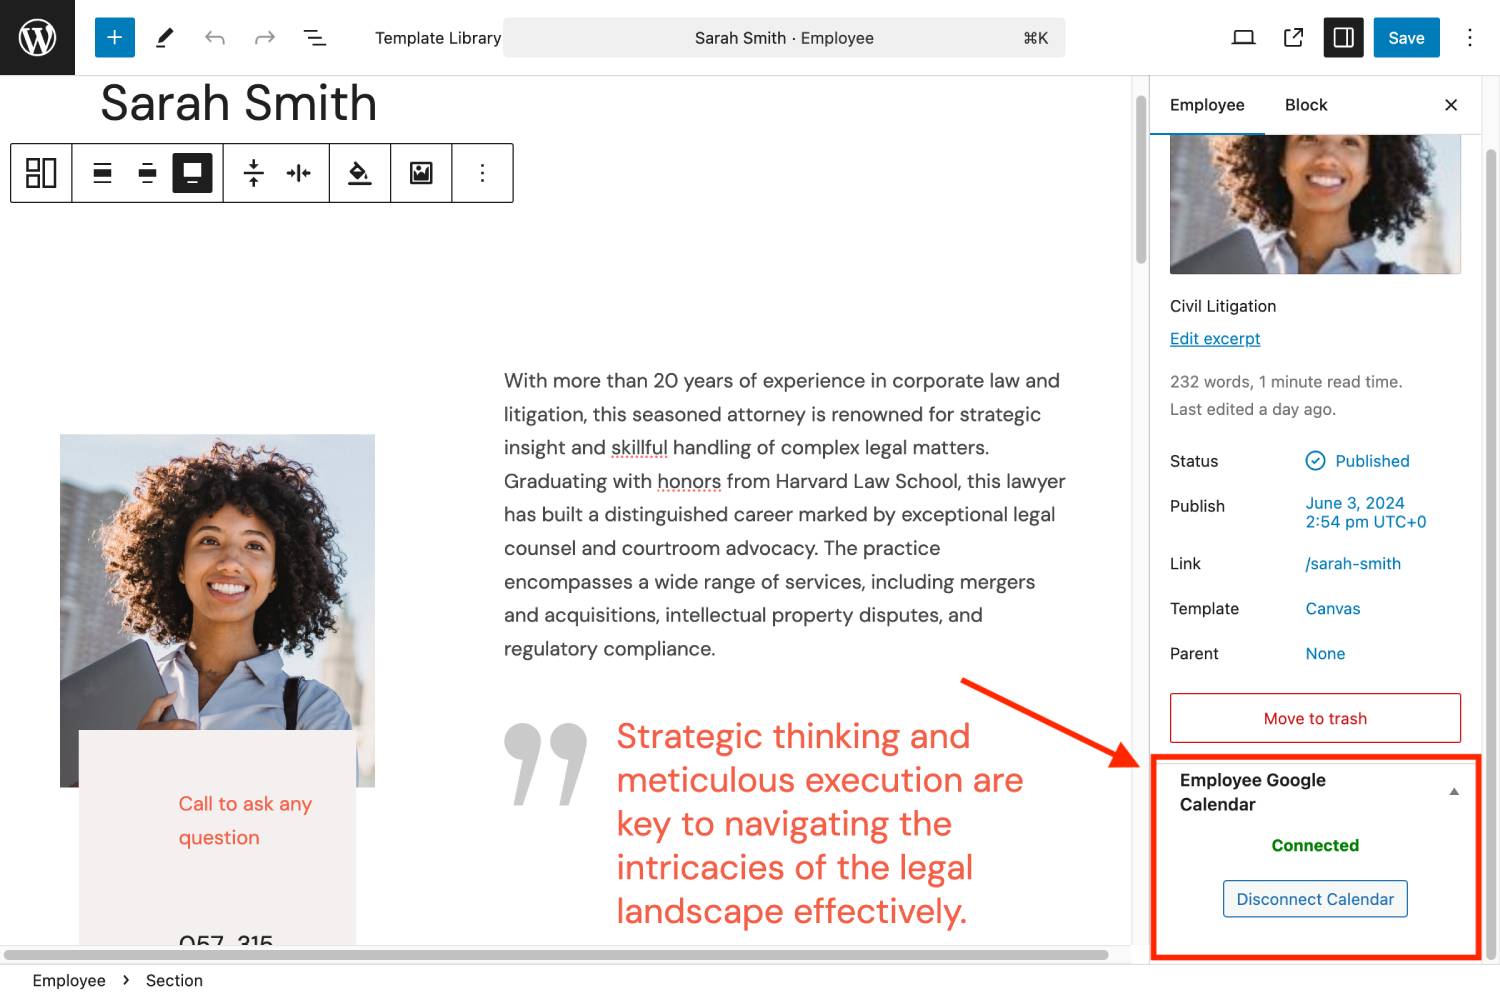
Once the connection is successful, they’ll see that the status ‘Connected’ in their profile.
Employees will see all their bookings submitted via the site or added by hand via the site’s dashboard synced to their Google calendars.
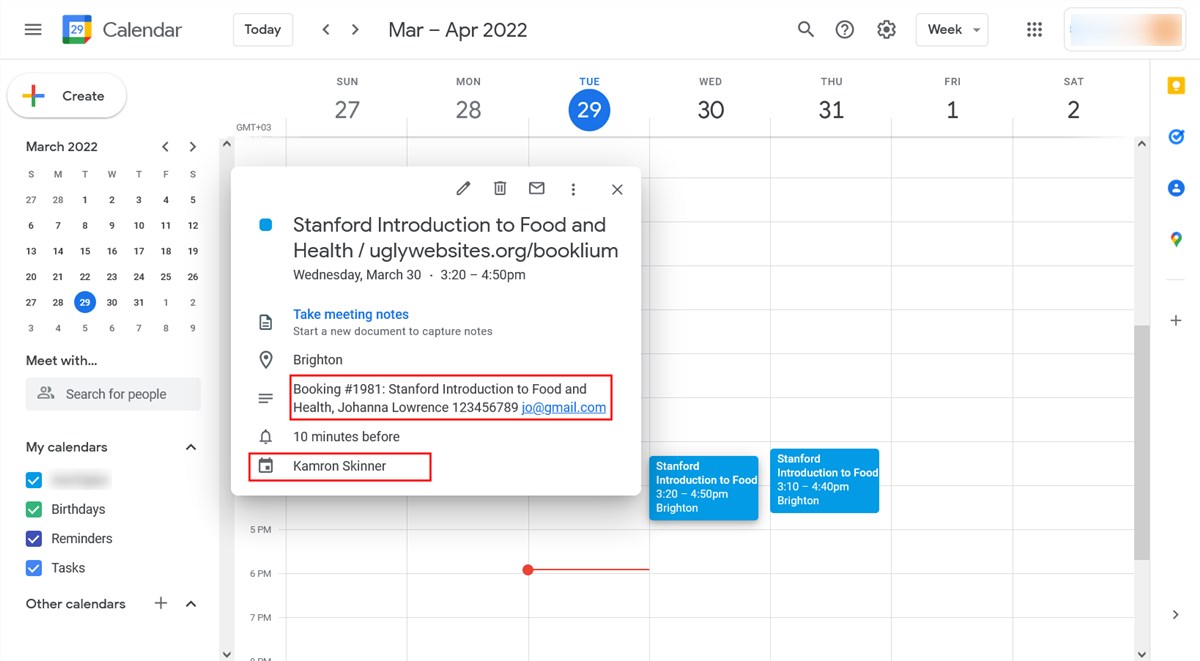
Employees might have different Google Calendar settings which can influence their interaction with the calendar and bookings.
