Table of Contents
This addon allows you to email automated PDF invoices to clients who made a booking on your site via the Appointment Booking plugin forms.
Installation and setup
- Download a .zip archive with the Appointment Booking PDF Invoices add-on files.
- Install the plugin from your WordPress Dashboard via Plugins → Add New → Upload Plugin → Browse → Install Now.
- Activate the plugin (Note: this add-on requires Appointment Booking 2.1.1 or greater).
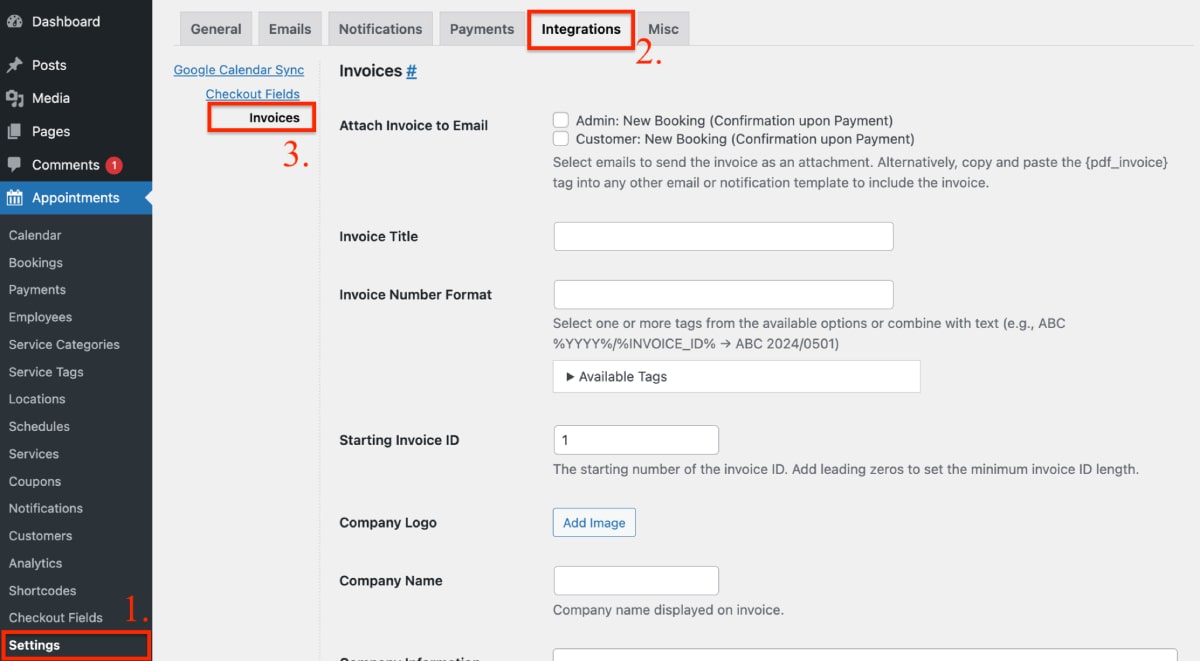
- Go to Appointments → Settings → Integrations tab → Invoices → scroll down to the License Key section → insert your license key → save the changes.
Working with PDF Invoices: A Video Guide
Customize the invoice template
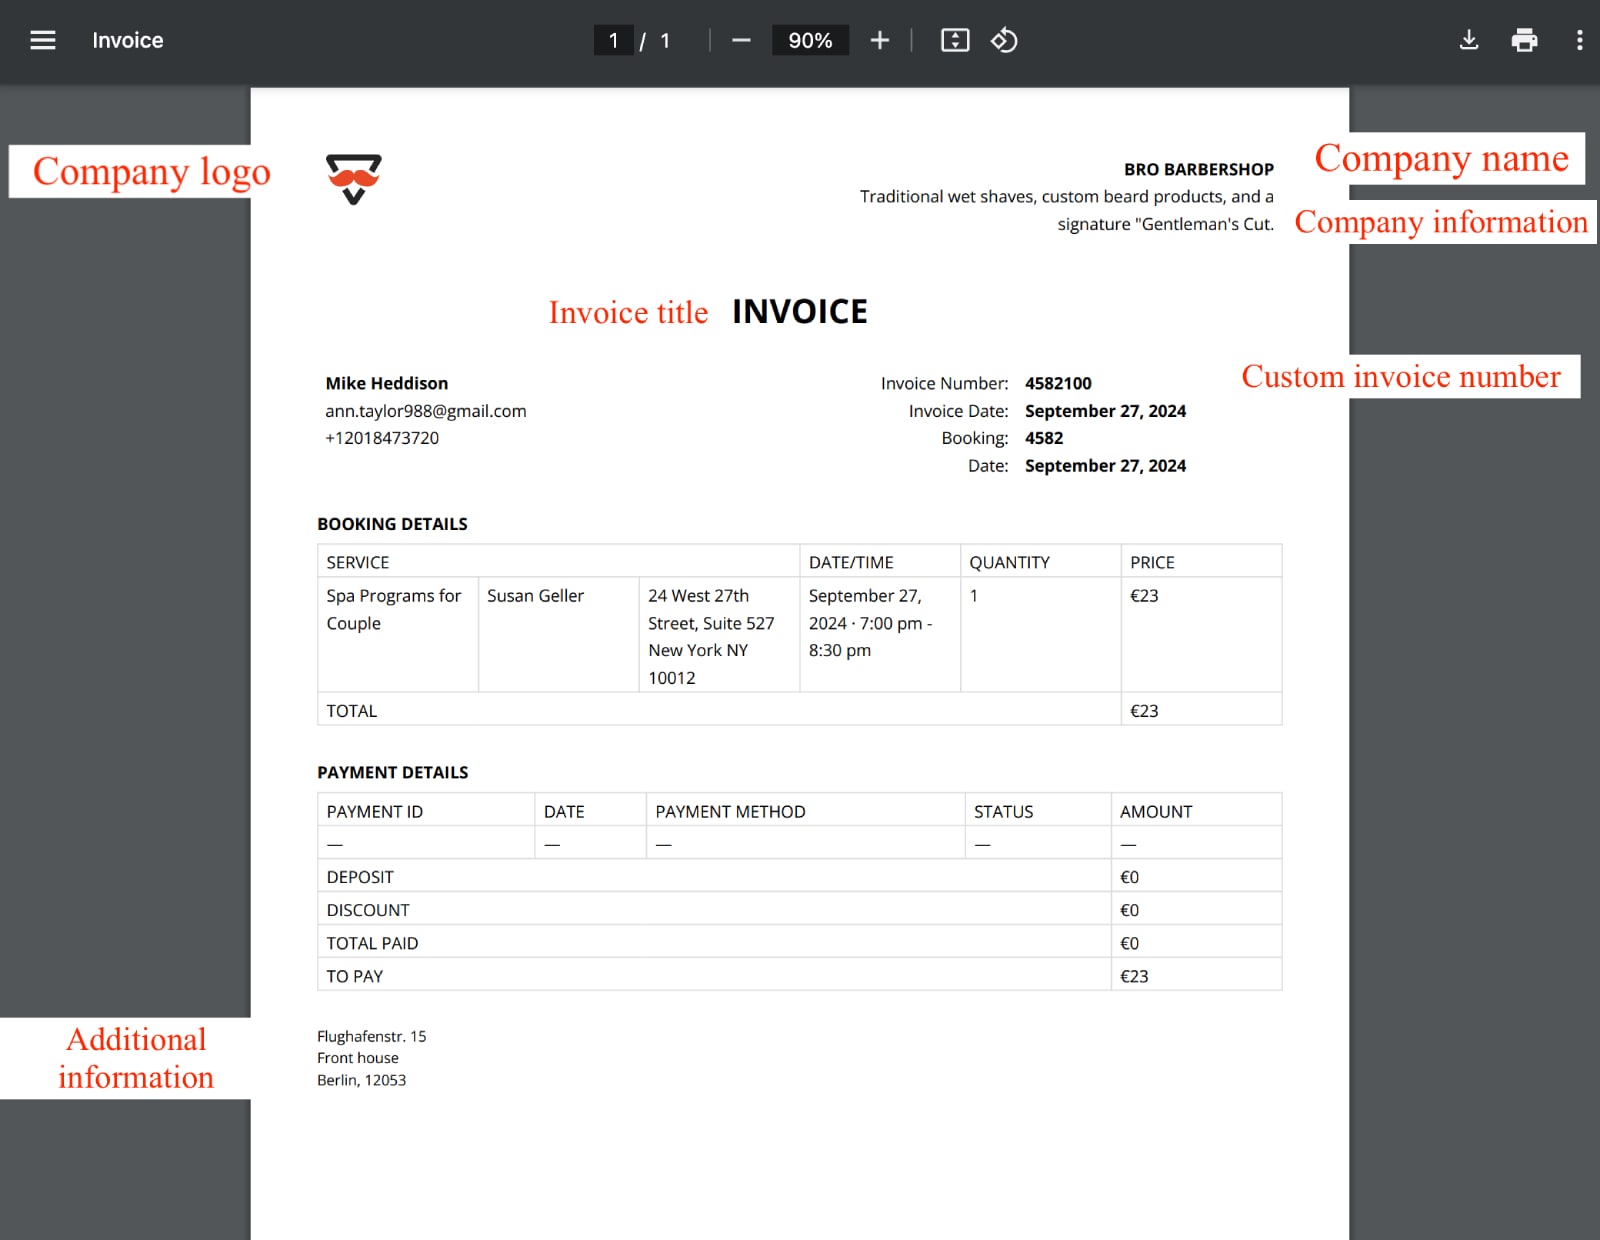
A PDF invoice is composed of two sections:
– dynamic customer and booking information generated for every booking individually.
– static company information that you can customize in the invoice settings.
Step 1. Select the invoice recipient
Attach Invoice to Email
Select the recipients of the automatic PDF invoice.
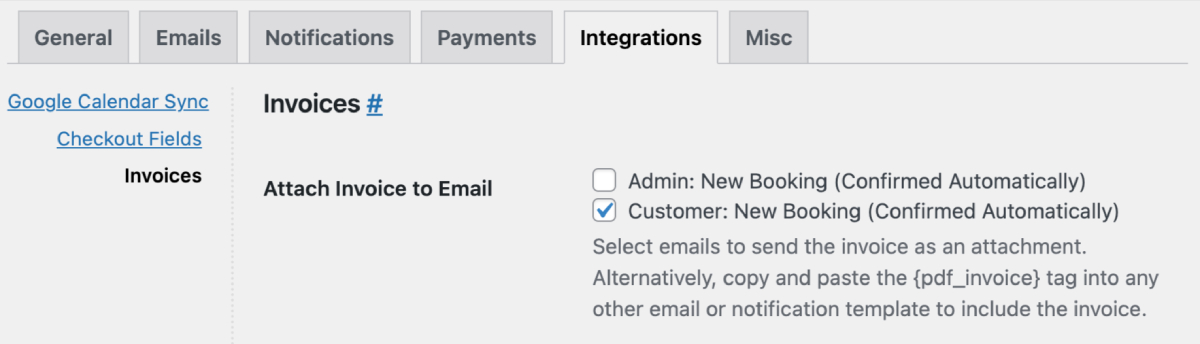
The booking confirmation method is determined by your confirmation mode preferences in the Appointments settings (Appointments → Settings → General → Confirmation mode).
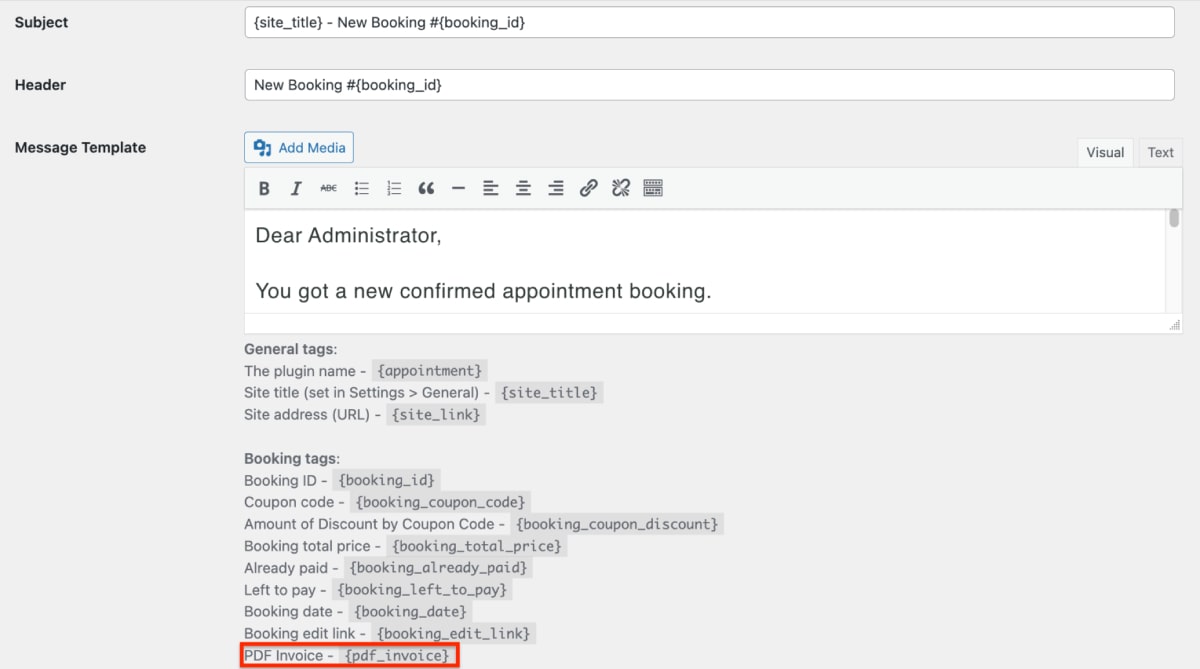
Alternatively, copy and paste the {pdf_invoice} tag into the needed email template. For this, go to the Emails tab, open the needed email template and paste the tag.
Step 2. Fill in PDF template details
To make your invoice reflect your branding, add the following information:
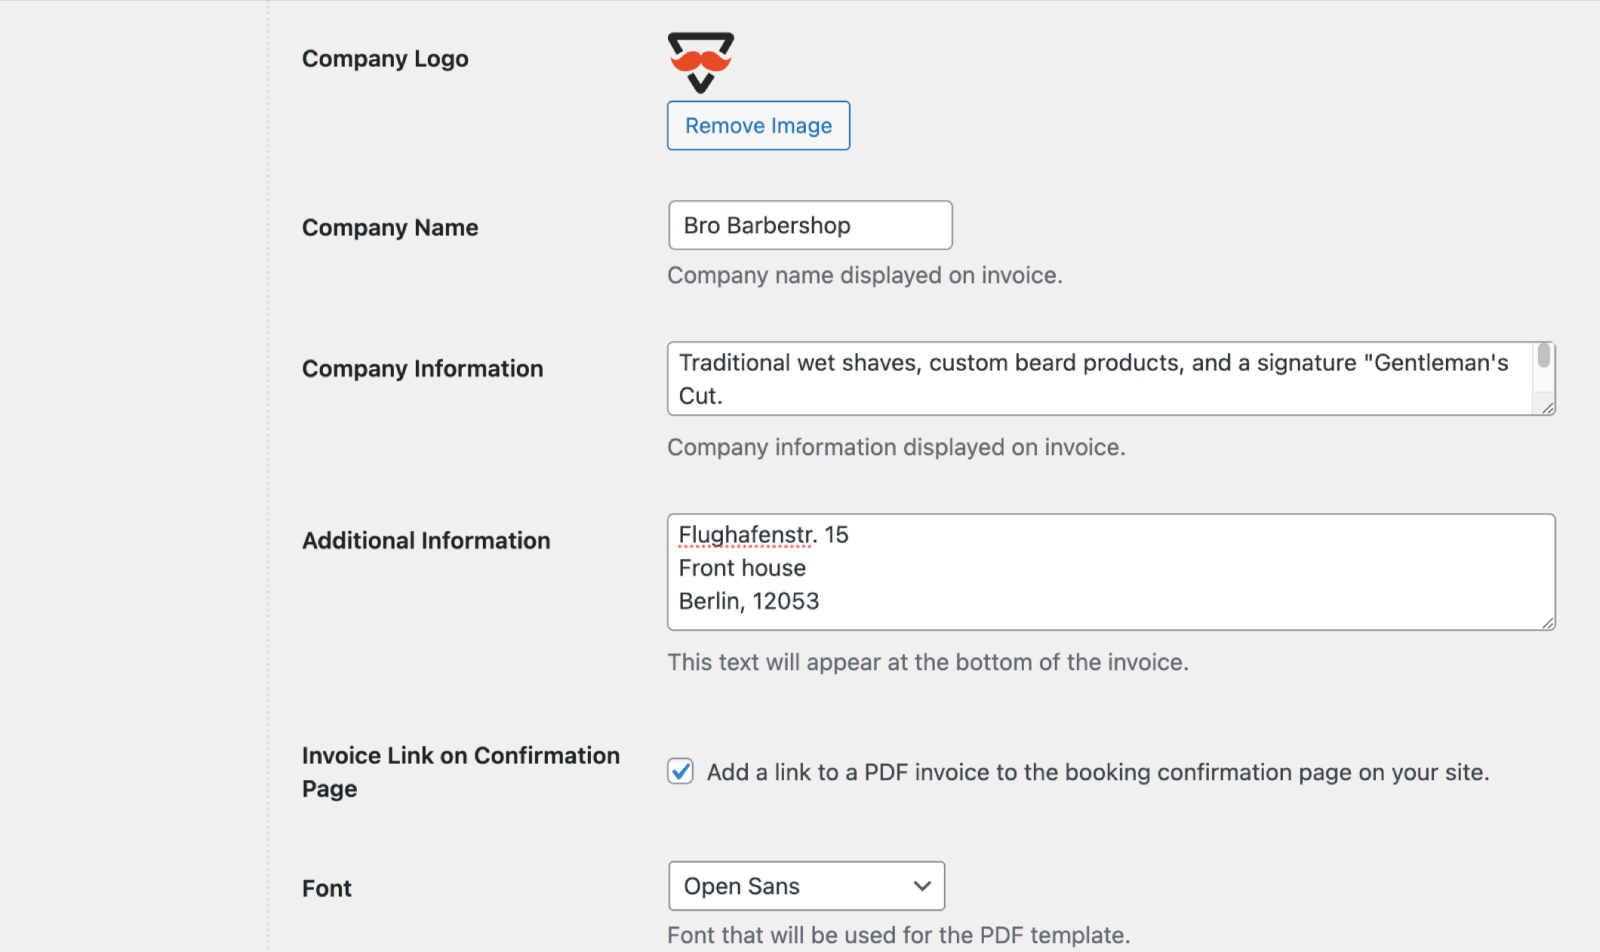
- Company name.
- Company logo.
- Company information (e.g. address).
- Company additional information (legal details, links, etc. displayed at the bottom of the invoice).
- Fonts for your invoice.
Step 3. Select invoice numbering format
Create a unique invoice number format by combining text with any of the available tags. To choose tags, go to “Available tags,” copy the ones you need, and paste them into the “Invoice Number Format” field.
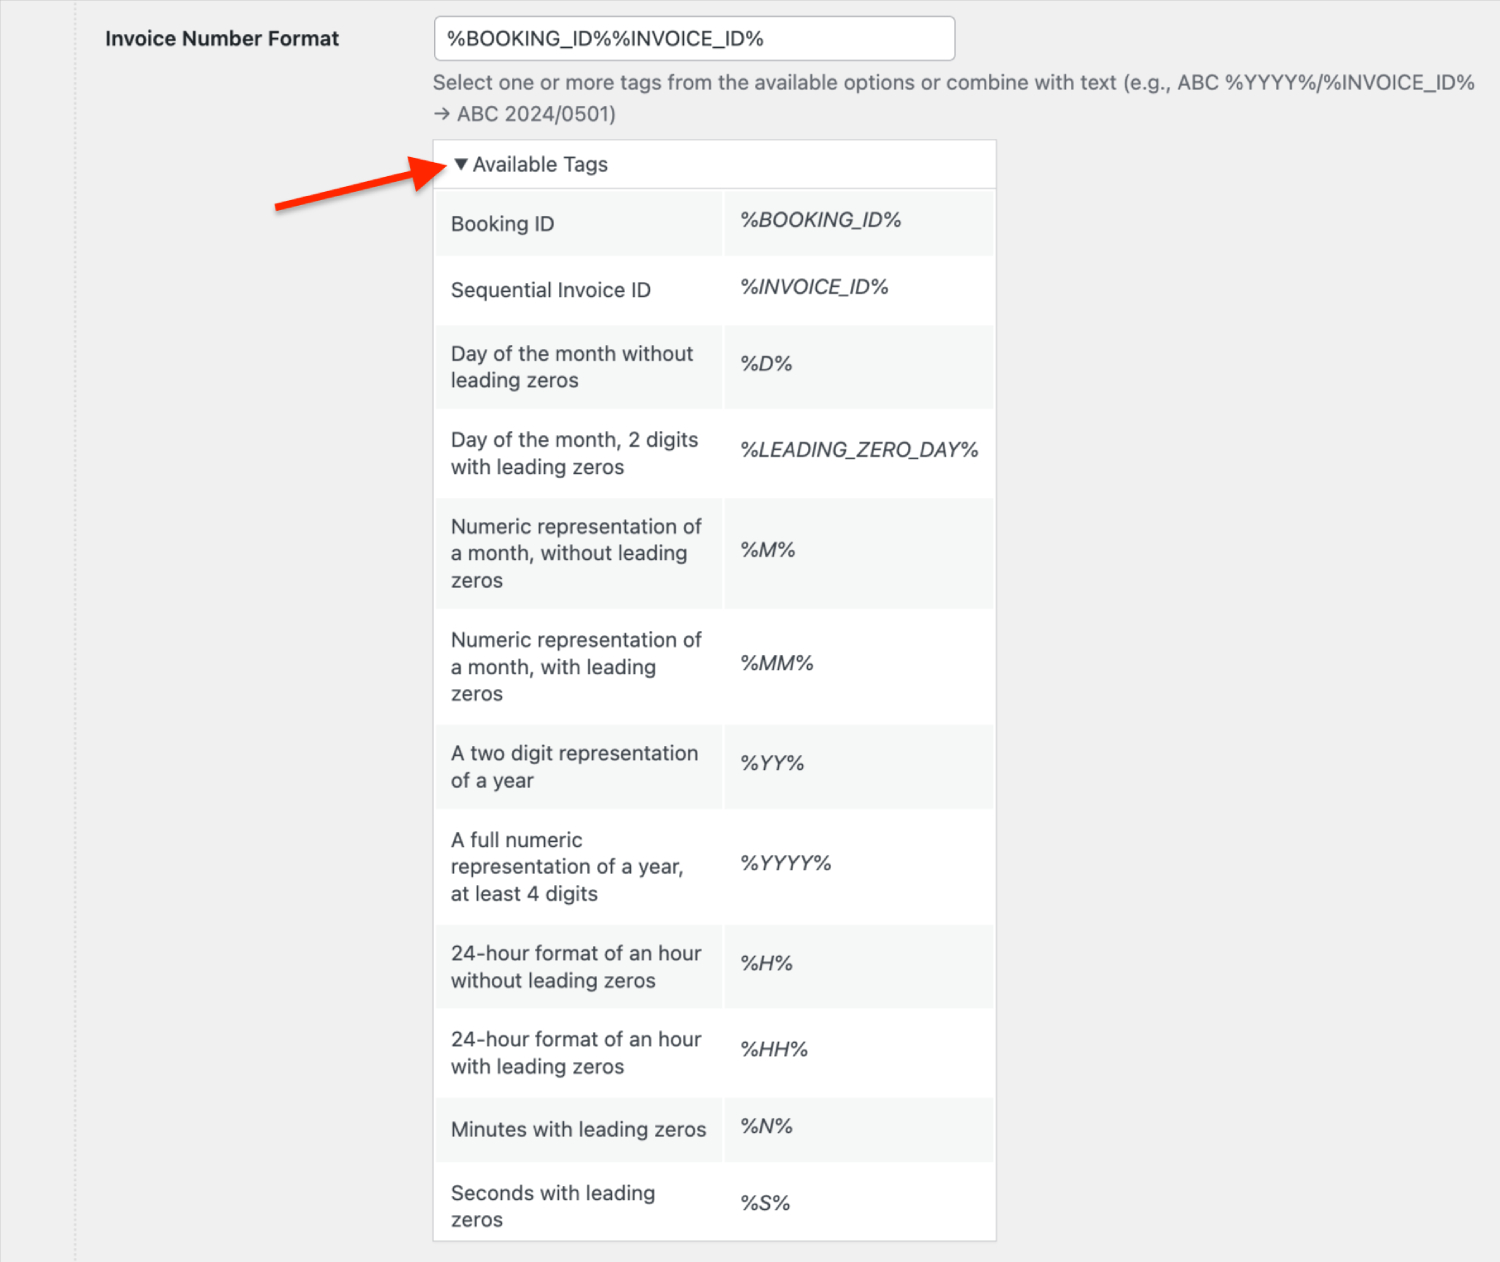
If you’ve chosen the Sequential Invoice ID %INVOICE_ID% tag for your invoice number format, it’s required to specify the starting invoice ID for sequential numbering in the designated field.
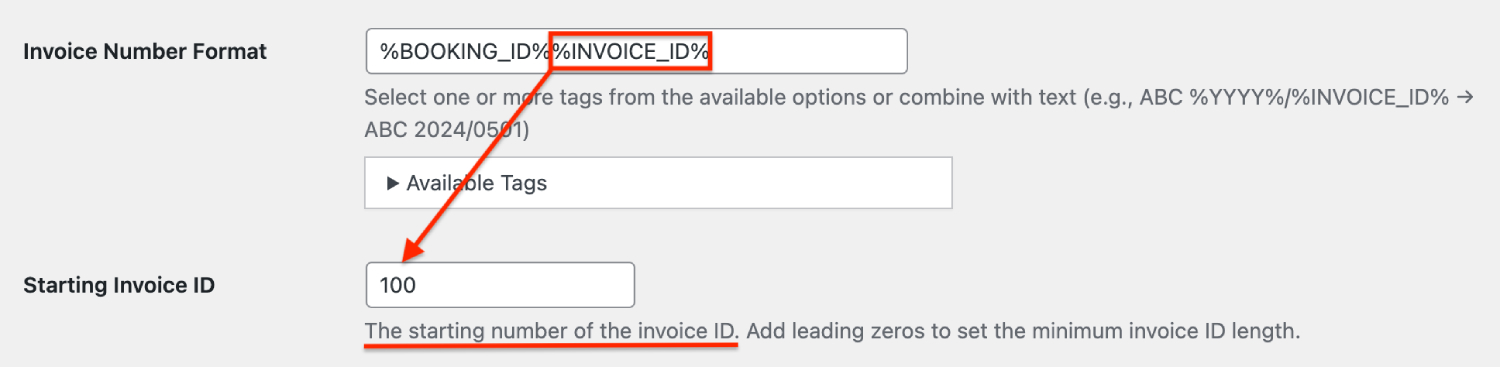
Every new booking will be assigned a sequentially increasing number, beginning with the starting number you’ve specified, e.g., if you set the starting number to 100, the first invoice will have the invoice ID 100, and subsequent invoices will follow in numerical order.
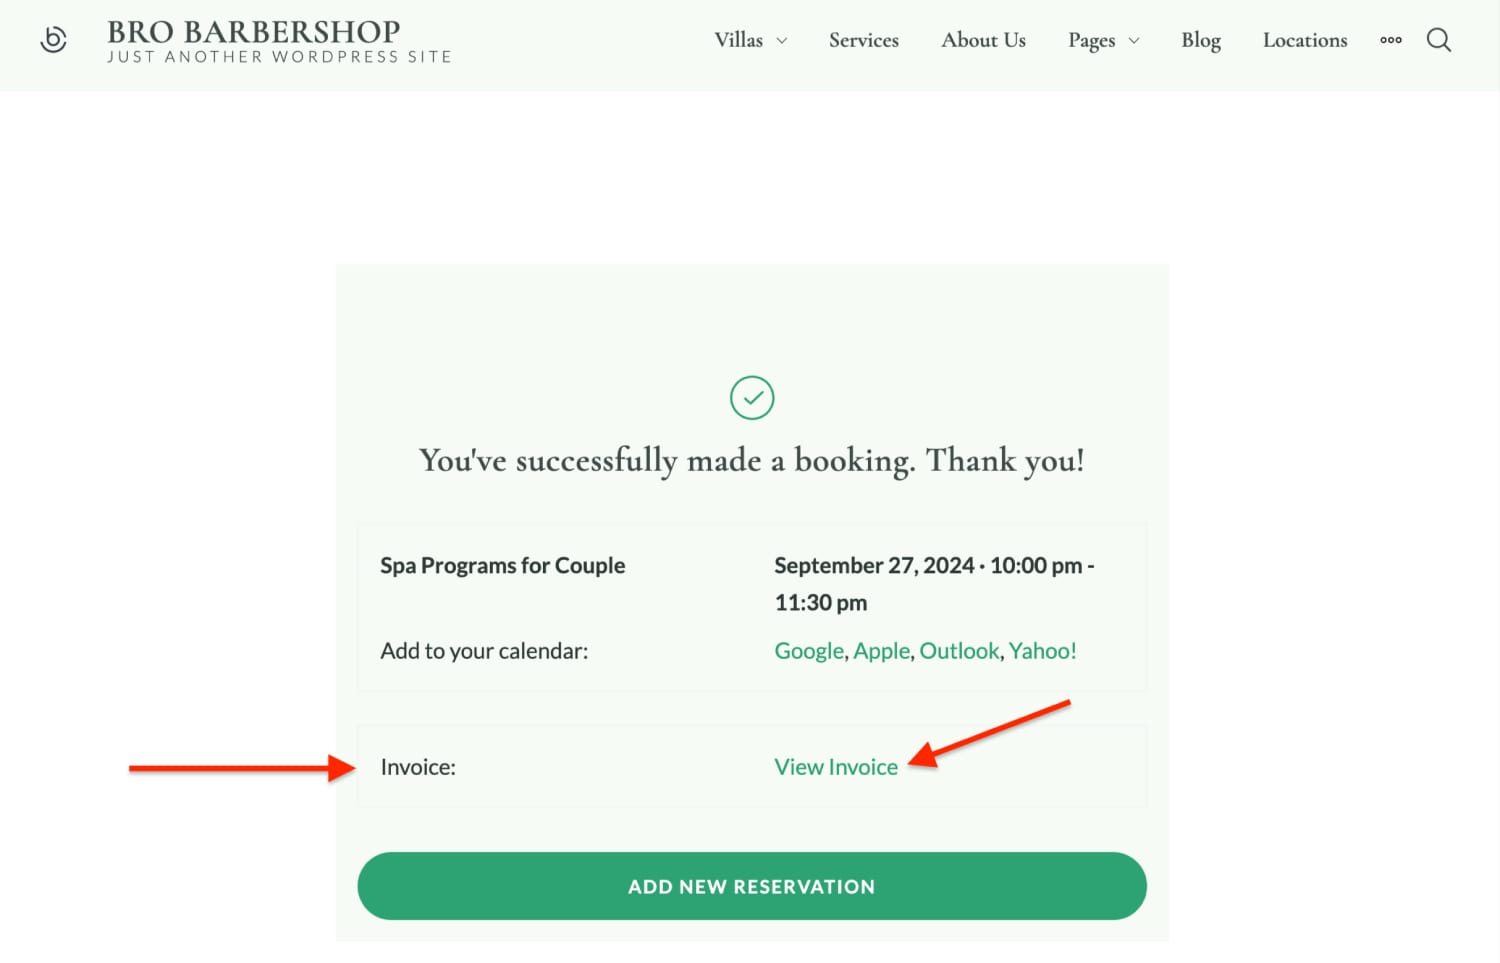
Step 4. Allow viewing invoices on the website

The “Invoice Link on Confirmation Page” setting allows you to include a download link for the invoice directly on the booking confirmation page of your website.
A client can view and download it from their internet browser once the booking is made:
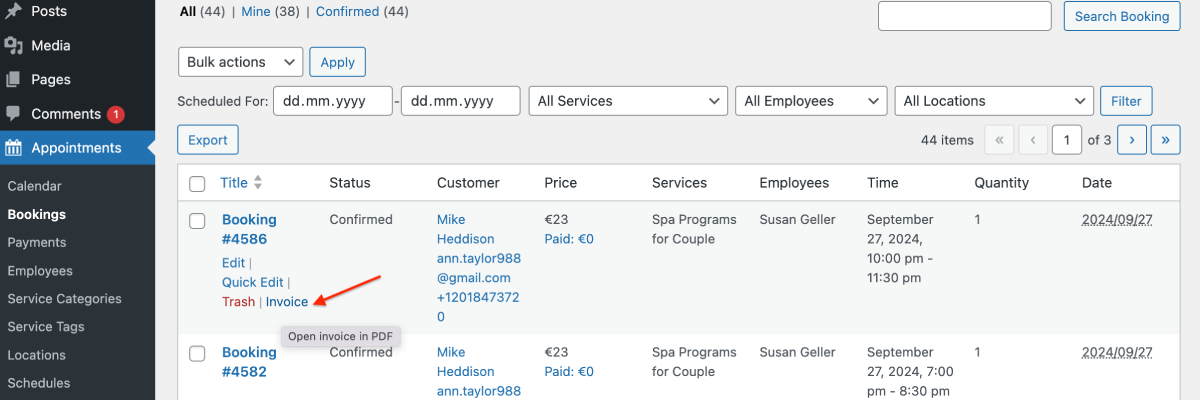
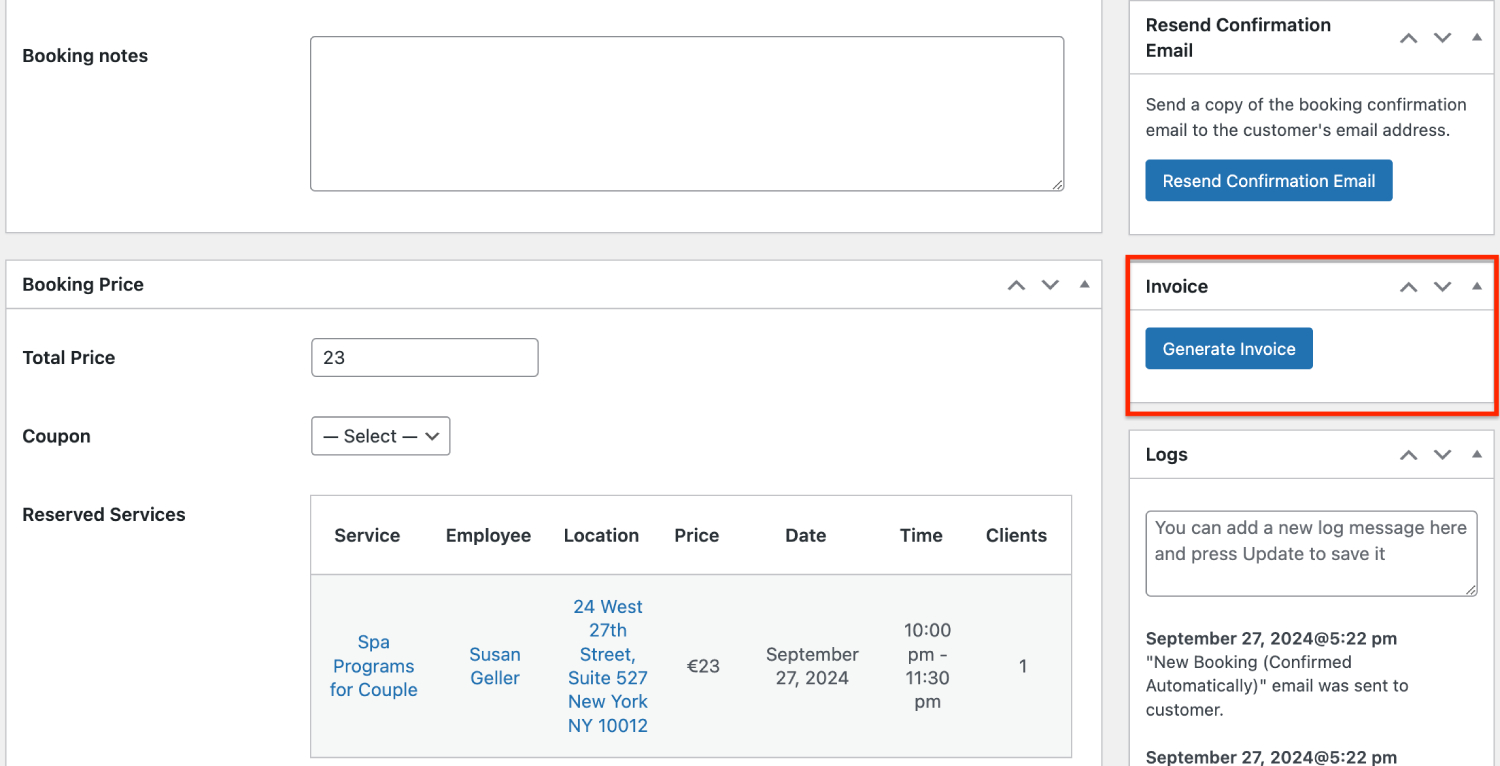
Viewing invoices in the admin dashboard
In your WordPress dashboard, you can also view customer invoices:
- From the list of all bookings (hover the mouse over the needed booking).
- From any individual booking (open a booking > click on the Generate Invoice button).
Invoice example
Here is a PDF Invoice example generated by the Appointment Booking PDF Invoices extension.
Please note:
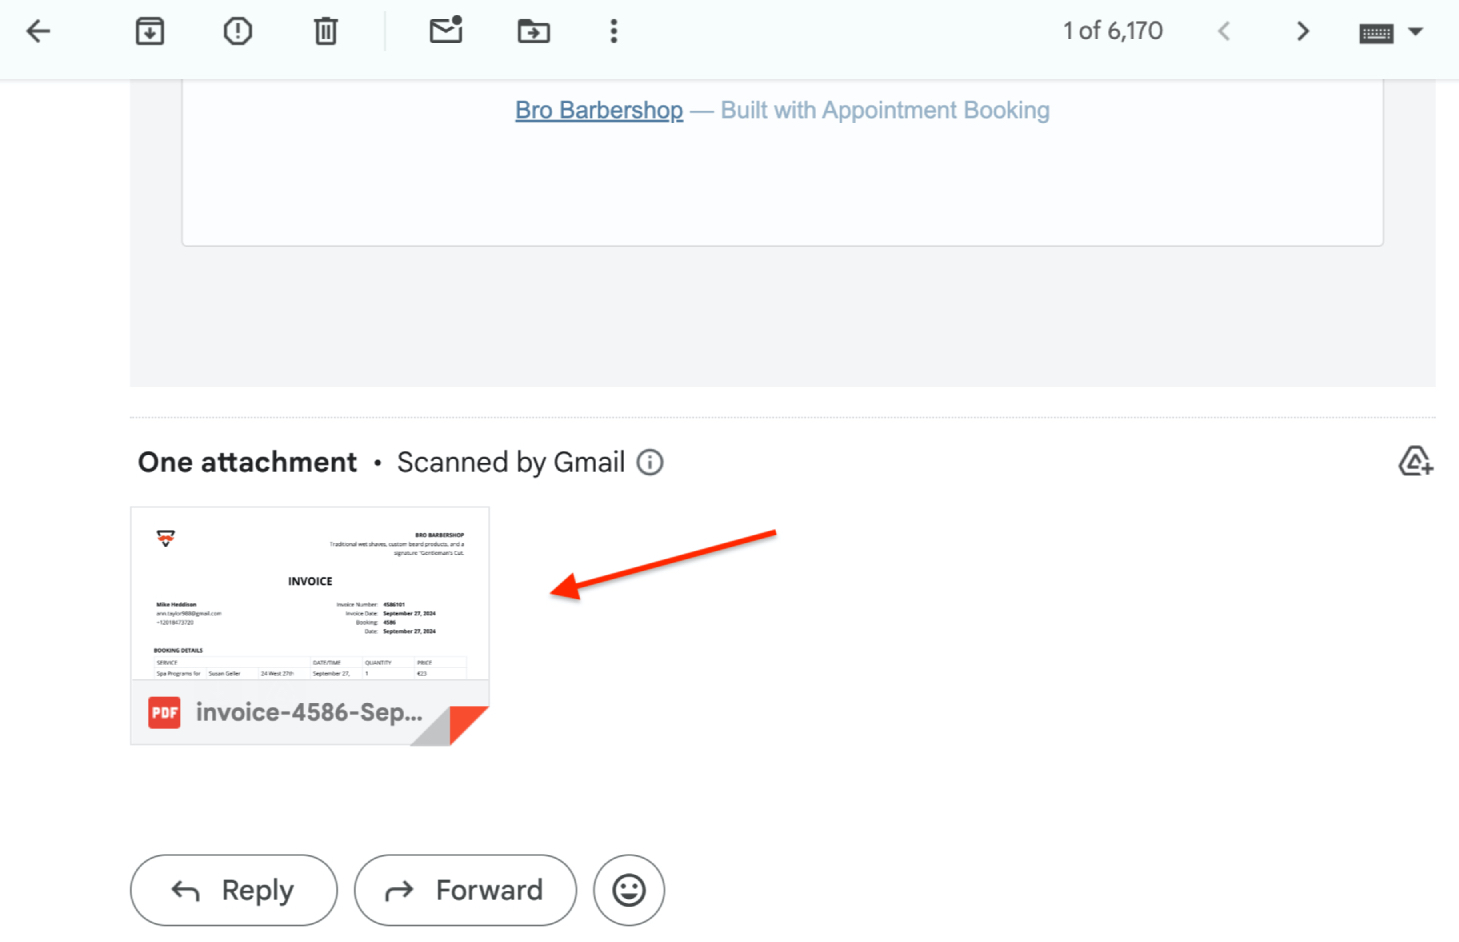
– Clients will find PDF attachments in emails – they can view, download and print them using their browser or email client.
– Invoices are generated even for unpaid bookings. Once the booking is paid or details are changed, the invoice will update accordingly.