Meet iCalendar Import & Export in the MotoPress Events Calendar Plugin
Table of Contents
One of our most recent plugins, the WordPress events calendar, is an upgraded version of MotoPress Timetable for some and an absolutely new event schedule building experiences for others. But whatever your take on it is, you’ll for sure like the new features we’ve put in version 1.1.0!
Let’s start with one of the biggest features of the release. The new Events Calendar plugin option enables you to perform quick and smooth export and import of data (your events) using iCalendar (sometimes referred to as iCal).
It allows you to store and exchange calendaring and scheduling information such as events in the .ics format, which is supported by many calendar applications.
In the context of our events WordPress plugin, this means that you are now able to:
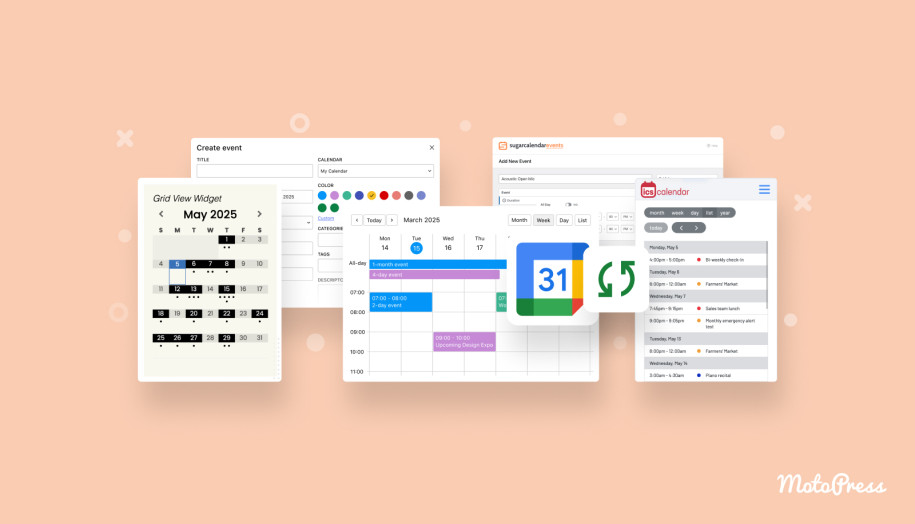
- Import events from your calendar application (e.g. Google Calendar or Apple Calendar) into the Events Calendar-powered schedule on WordPress, without manual data entering.
- Export events added to the Events Calendar to external calendars from your WordPress.
- Import and export events between other WordPress events calendar plugins and the MotoPress Events Calendar!
WordPress Calendar Plugin Register Free Account
Curious how to enhance your event management routine with this great new option? I’m explaining how to get started in the next part.
Where to Find & How to Use iCalendar Import and Export Feature
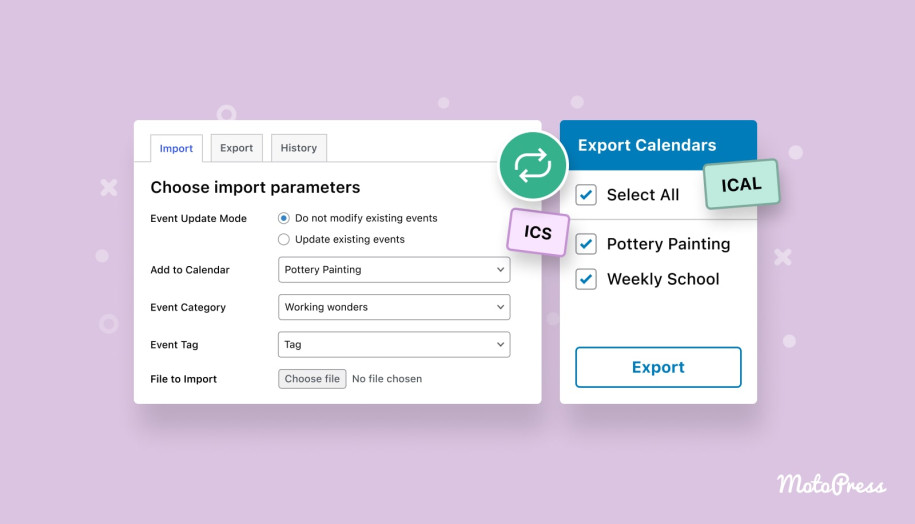
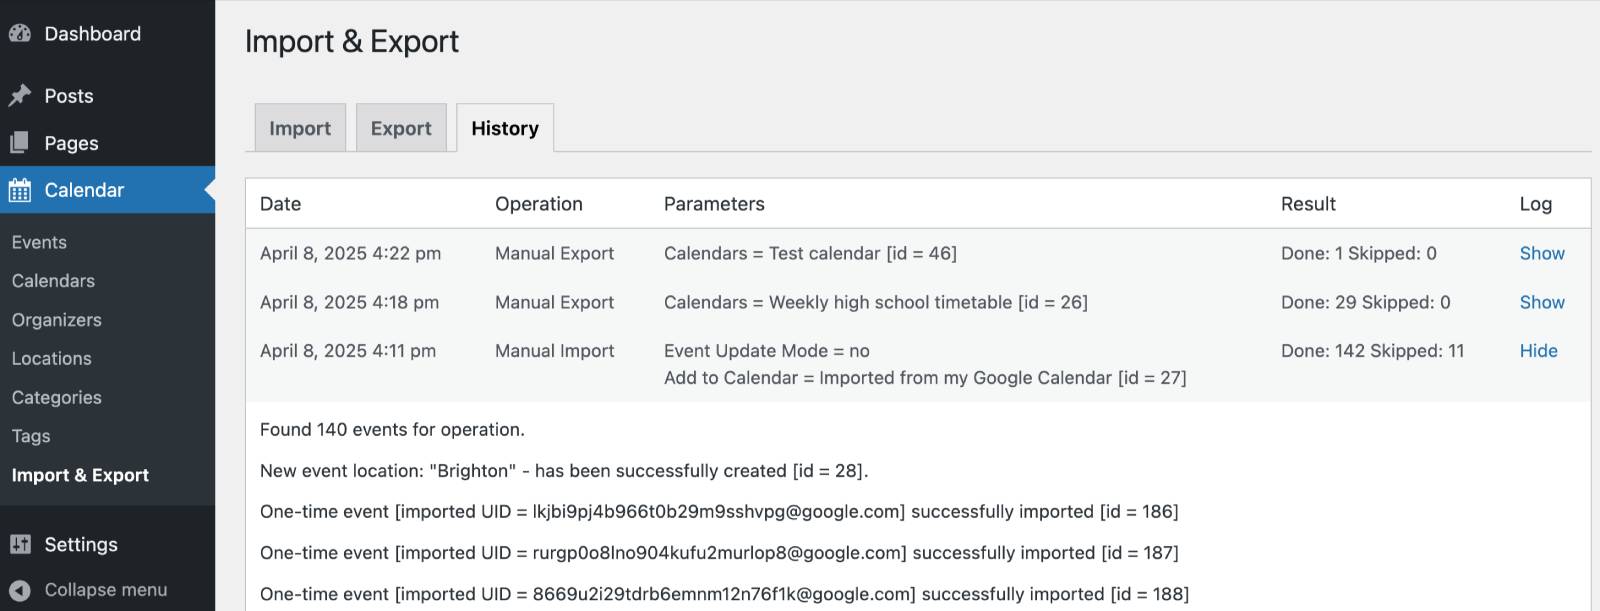
Find the new feature in Calendar > Import & Export. There you’ll find three tabs, for Import, Export and History.
How to import events to MotoPress Events Calendar
1. Get your .ics file ready.
For example, I want to import events from my Google Calendar to WP. For this, I go to my Google Calendar > click on the Settings icon > choose Settings.
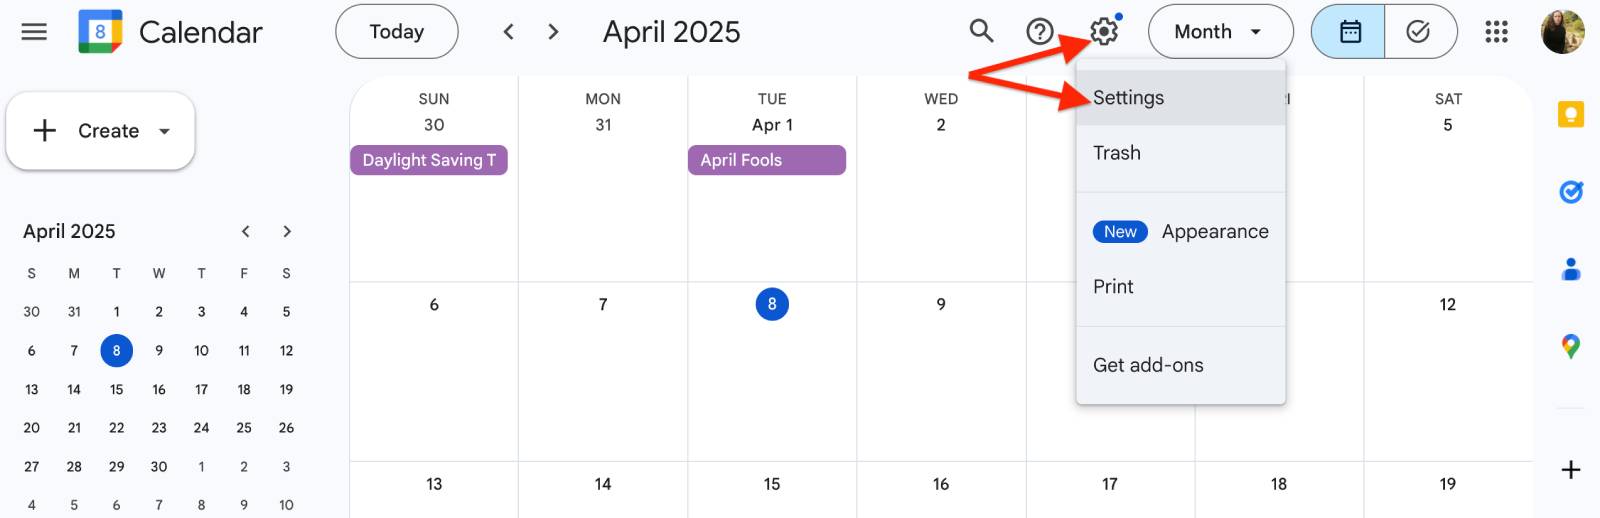
In the calendar settings, choose Import & export.
Then, choose Export and click on the ‘Export’ button. The file will be saved on your device.
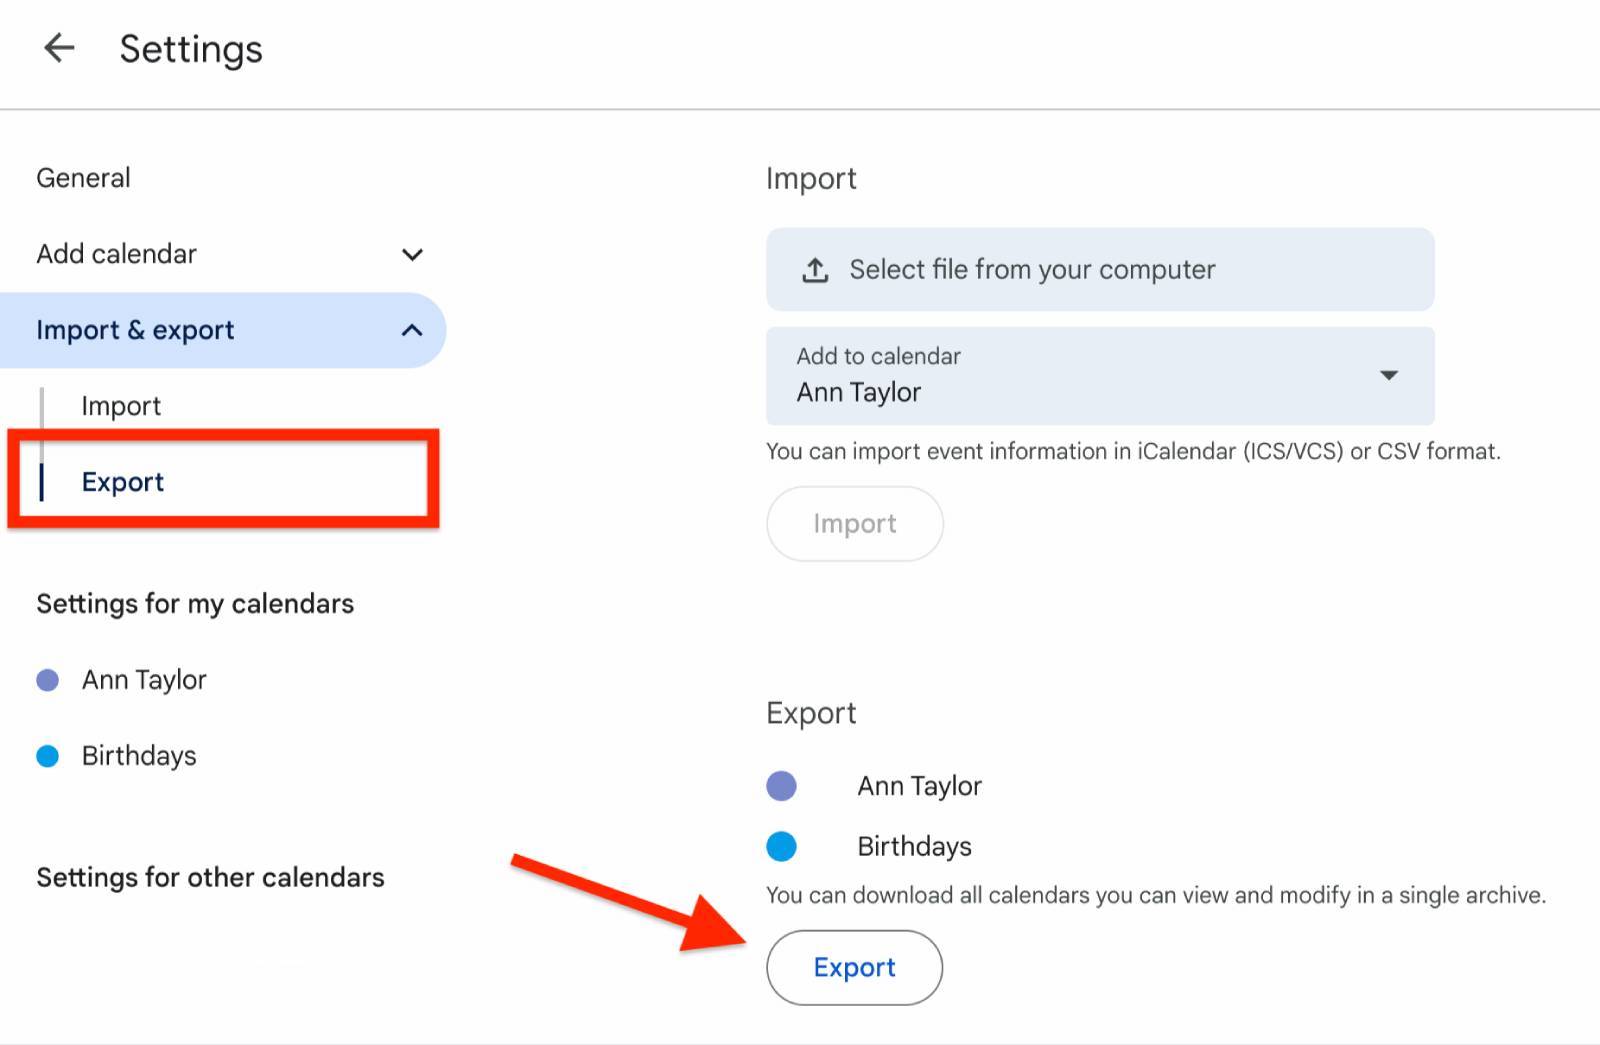
In my case, the export file is saved in a zip folder, so I will also need to unzip it before uploading it to WordPress.
The process of generating this file may differ based on which plugins or apps you use.
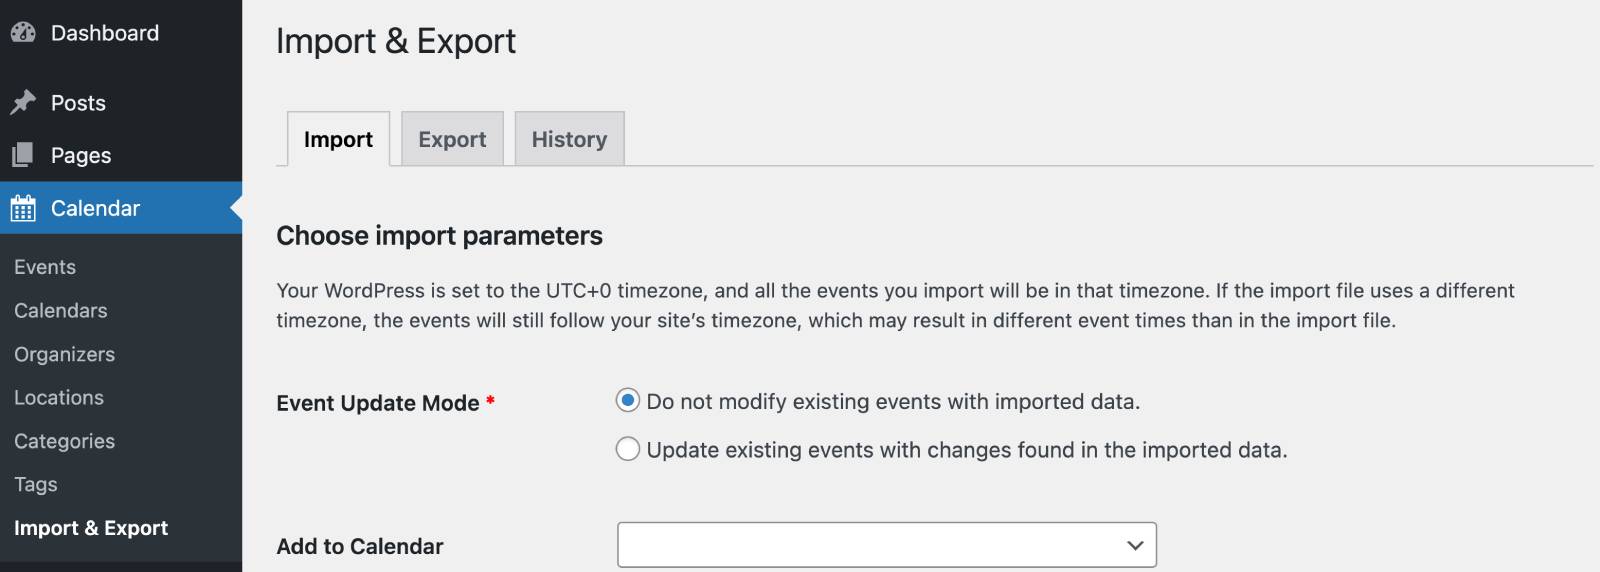
2. Go to the Import tab of the Events Calendar plugin.
Configure the settings as you wish before uploading your file with events. Here are your options:
- Event update mode: choose whether the events you import should modify existing events on your WordPress site with the data from the imported file.
- Add to calendar: select the calendar from those created with the Events Calendar plugin to import your events to. Note that if you don’t select a calendar, events are added to existing calendars (based on event info) or new calendars are created.
- Event category: choose which of the exciting event categories to assign to all imported events (you can manually change that later).
- Event tag: the same as with categories, choose which of the exciting event tags to assign to all imported events (you can manually change that later, too).
- File to import: select the needed events file on your device (ics, ical, or iCalendar).
Worth mentioning, the time zone set on your WordPress site matters – all imported events will be adjusted to match this timezone. If your import file uses a different timezone, the event times may shift when imported. So, to avoid any time discrepancies, we recommend exporting your calendar data in just the same timezone or updating your WordPress timezone to match the timezone used in your import file before importing.
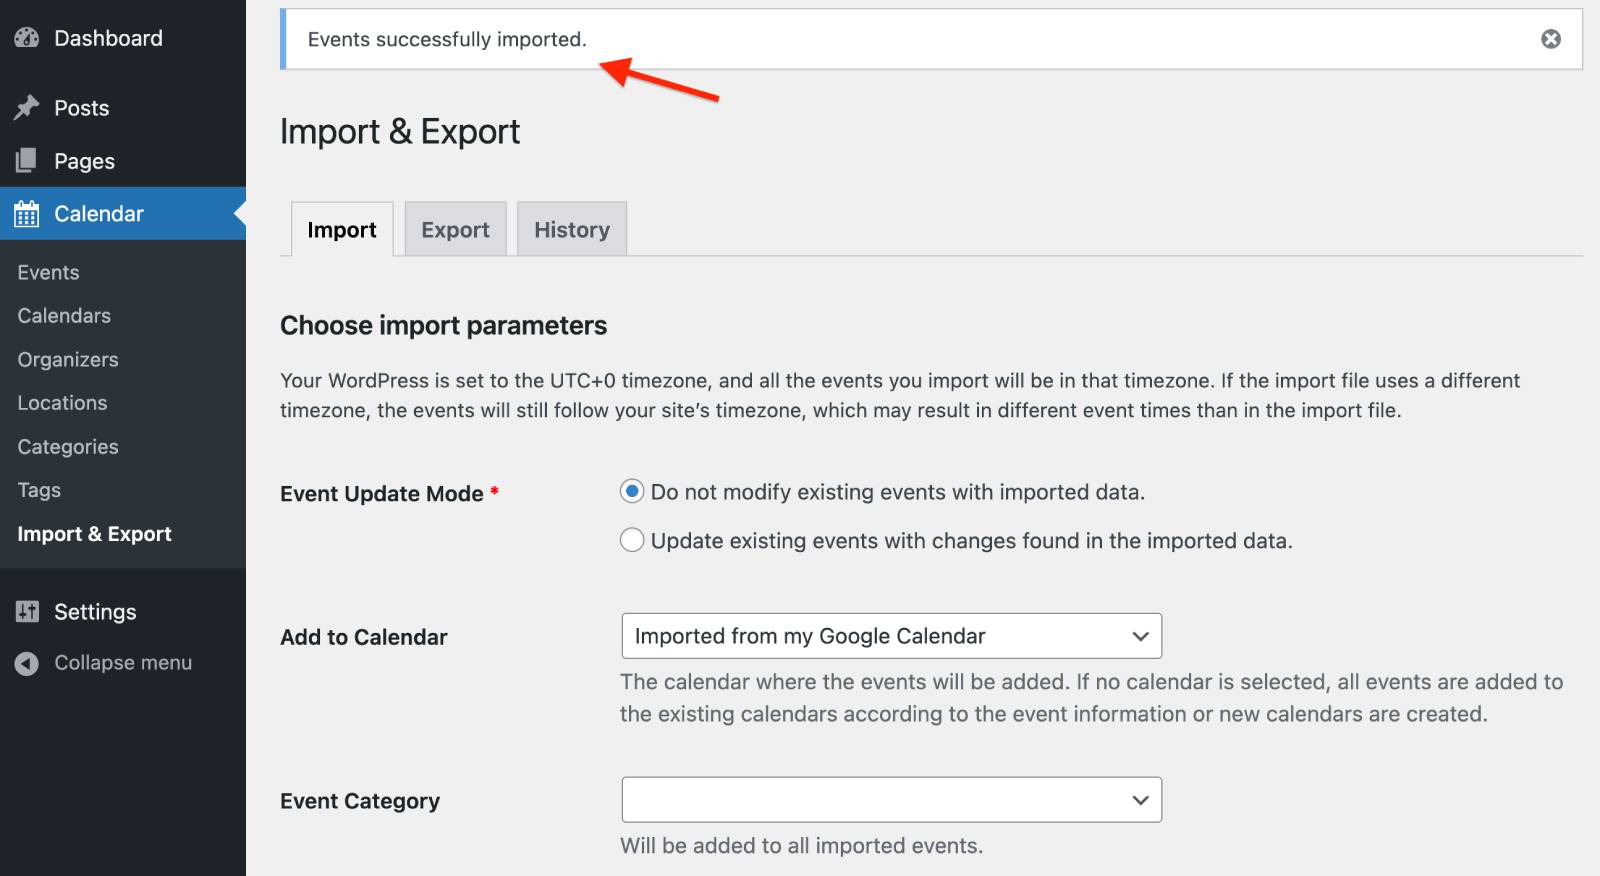
3. Once done, you will be prompted with the ‘Events successfully imported’ message.
4. Go to the calendar and check your events.

How to export events from the Events Calendar plugin
To export existing events from your Events Calendar to external apps, go to the Export tab this time.
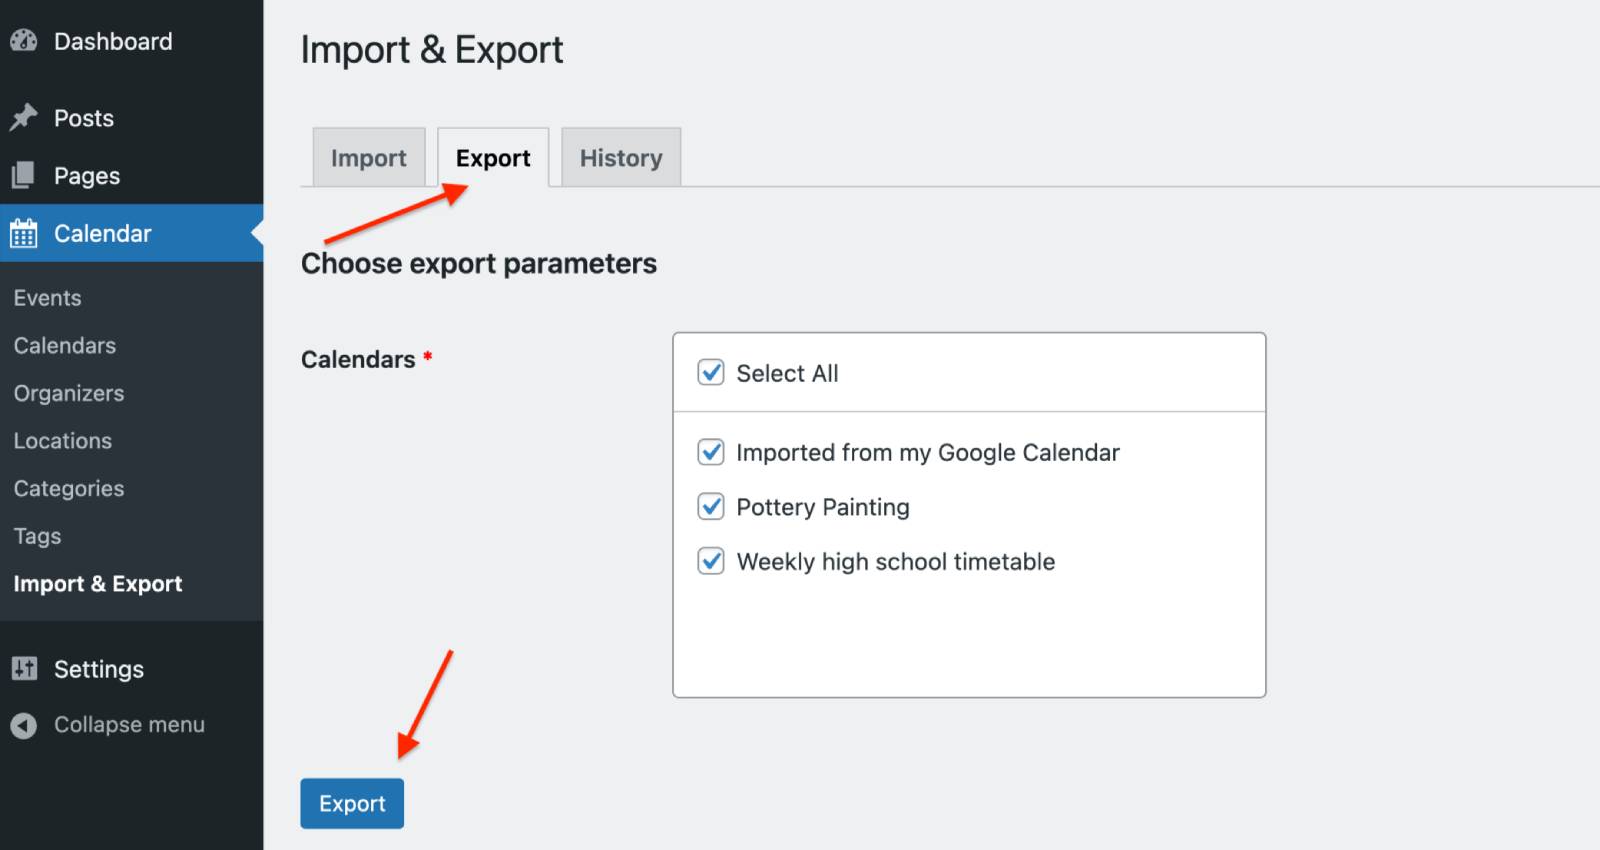
- Select the needed calendar or all calendars to export all events altogether.
- Click ‘Export’.
- Once the export is complete, the export file will be downloaded to your device.
- Go to the app/plugin/software where your events should be added and follow its export events tutorial.
- Check out your calendar.
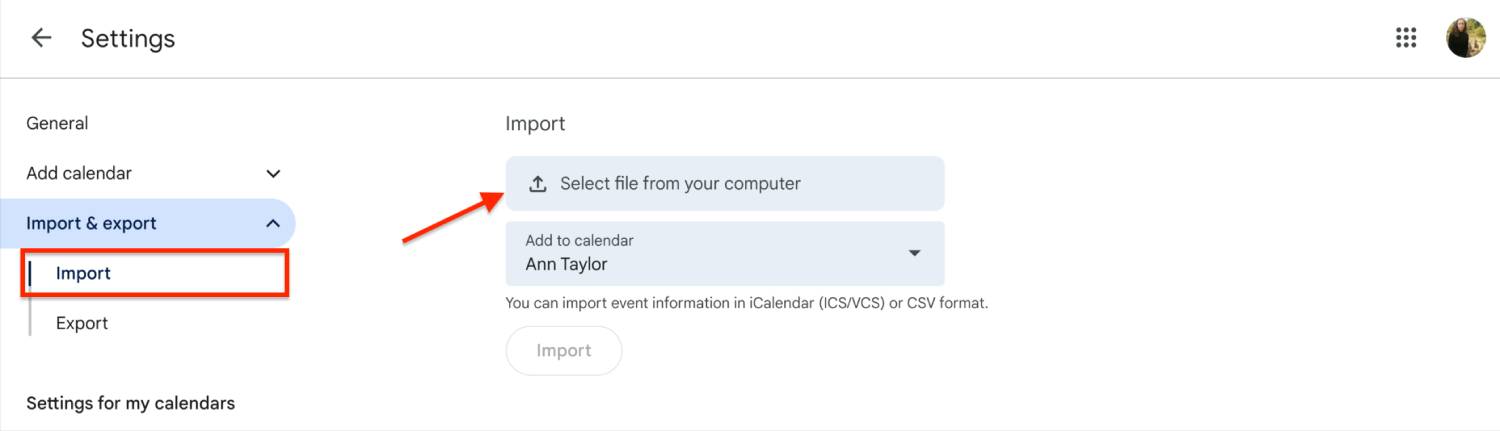
For example, in case with Google Calendar, I’m using the same Settings > Export & Import menu.
Then click ‘Select file from your computer’ > select your file, click ‘Import’. A message about the number of imported events should appear.
In the History menu, you can view all the details about performed actions, and also check out success/error messages for every event.
That’s it!
Well, yes, it doesn’t sync automatically and there is no two-way sync so far, but at the same time, you can just dump a whole bunch of events onto your WordPress super fast, and you can also pull them out to use somewhere else. Not too shabby for what it is, right?
Next, let’s take a look at even more updates of the plugin!
Meet the Events Calendar Shortcode Builder
Anyone missed shortcodes? The Events Calendar free shortcode is now here.
While it’s not required to approach shortcodes when you need to add a calendar using the WordPress calendar (there are awesome WordPress blocks for this), we’ve added a shortcode builder for those of you who needed it.
Find the new events calendar shortcode builder in the Events menu > click on the hamburger menu icon > find ‘Shortcode’ and click on it.
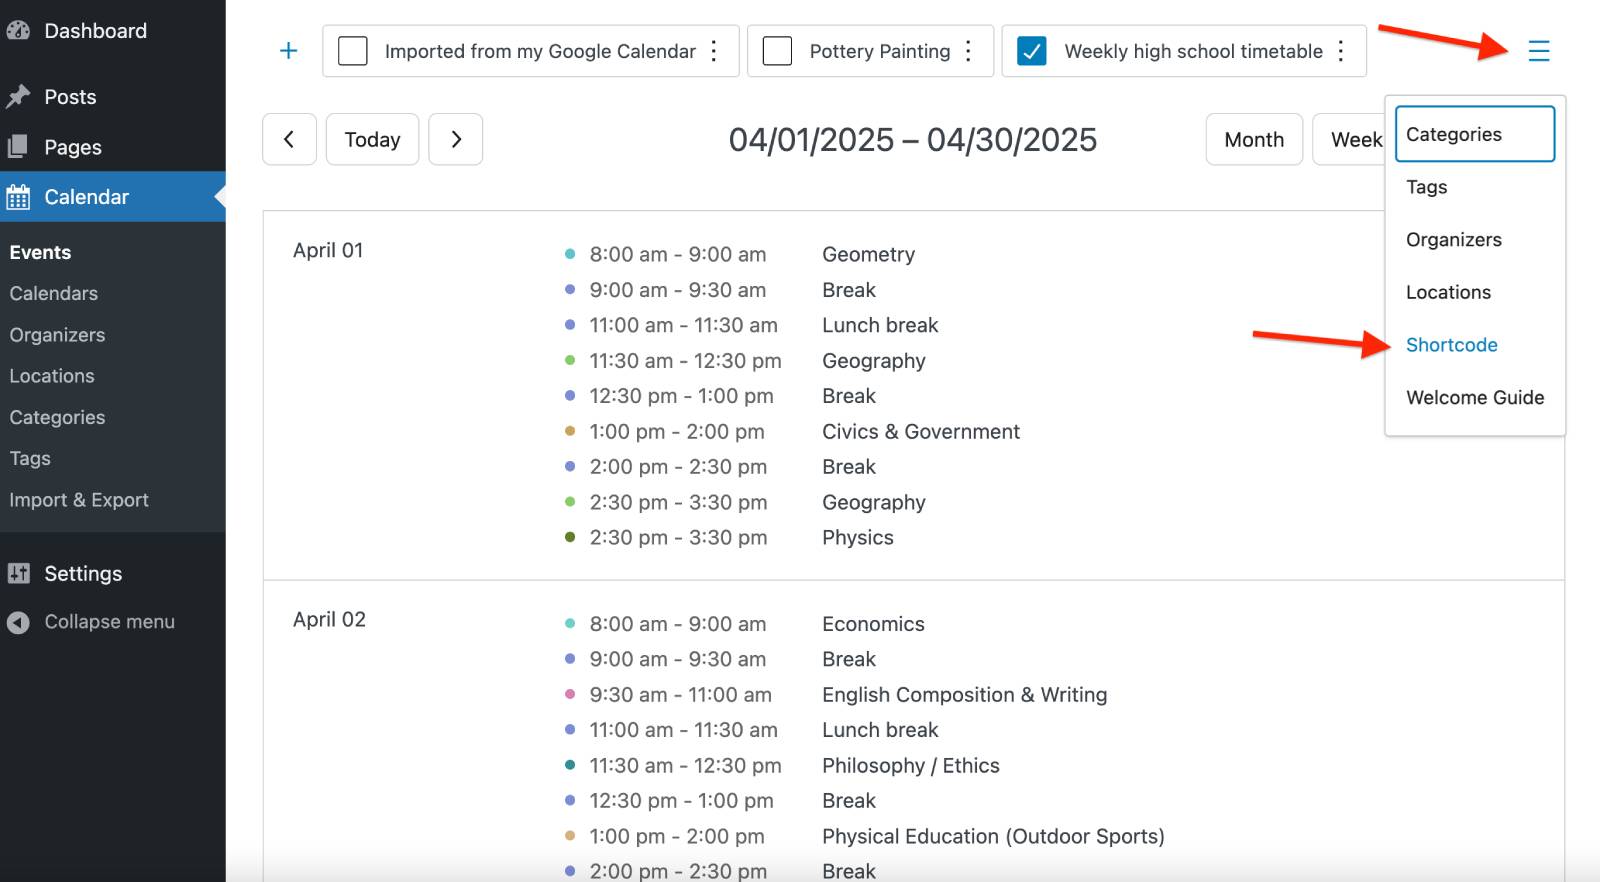
You’ll be prompted with the intuitive menu to build your shortcode. For example, choose the calendar to display events from, which start and end times to show, the needed time interval for the grid, and days of the week to show in the schedule.
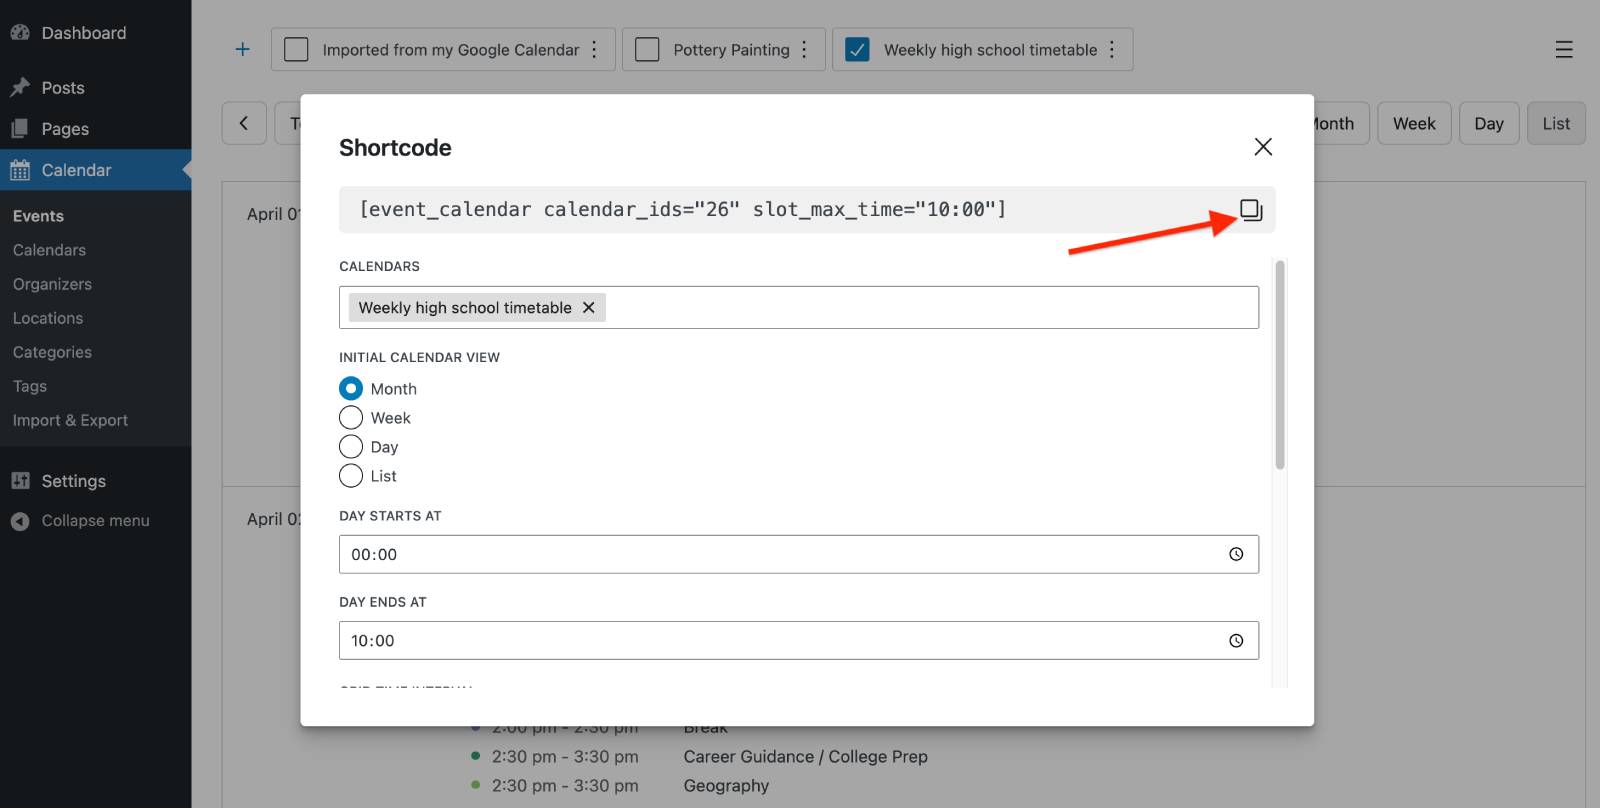
Once you’ve made up your mind, click the copy shortcode icon, then go to the needed site page to insert it where you want your calendar to appear.
If you are on the Classic Editor, insert it as it is; on the block editor, firstly add the Shortcode block and then paste the shortcode into it. Don’t forget to preview your page and save the changes!
More Options to Style Event Descriptions
Event descriptions had too plain text formatting in the first plugin version. But not anymore.
Thanks to the support for the TinyMCE editor we’ve added to the event description menu, you now have more options to style your text content!
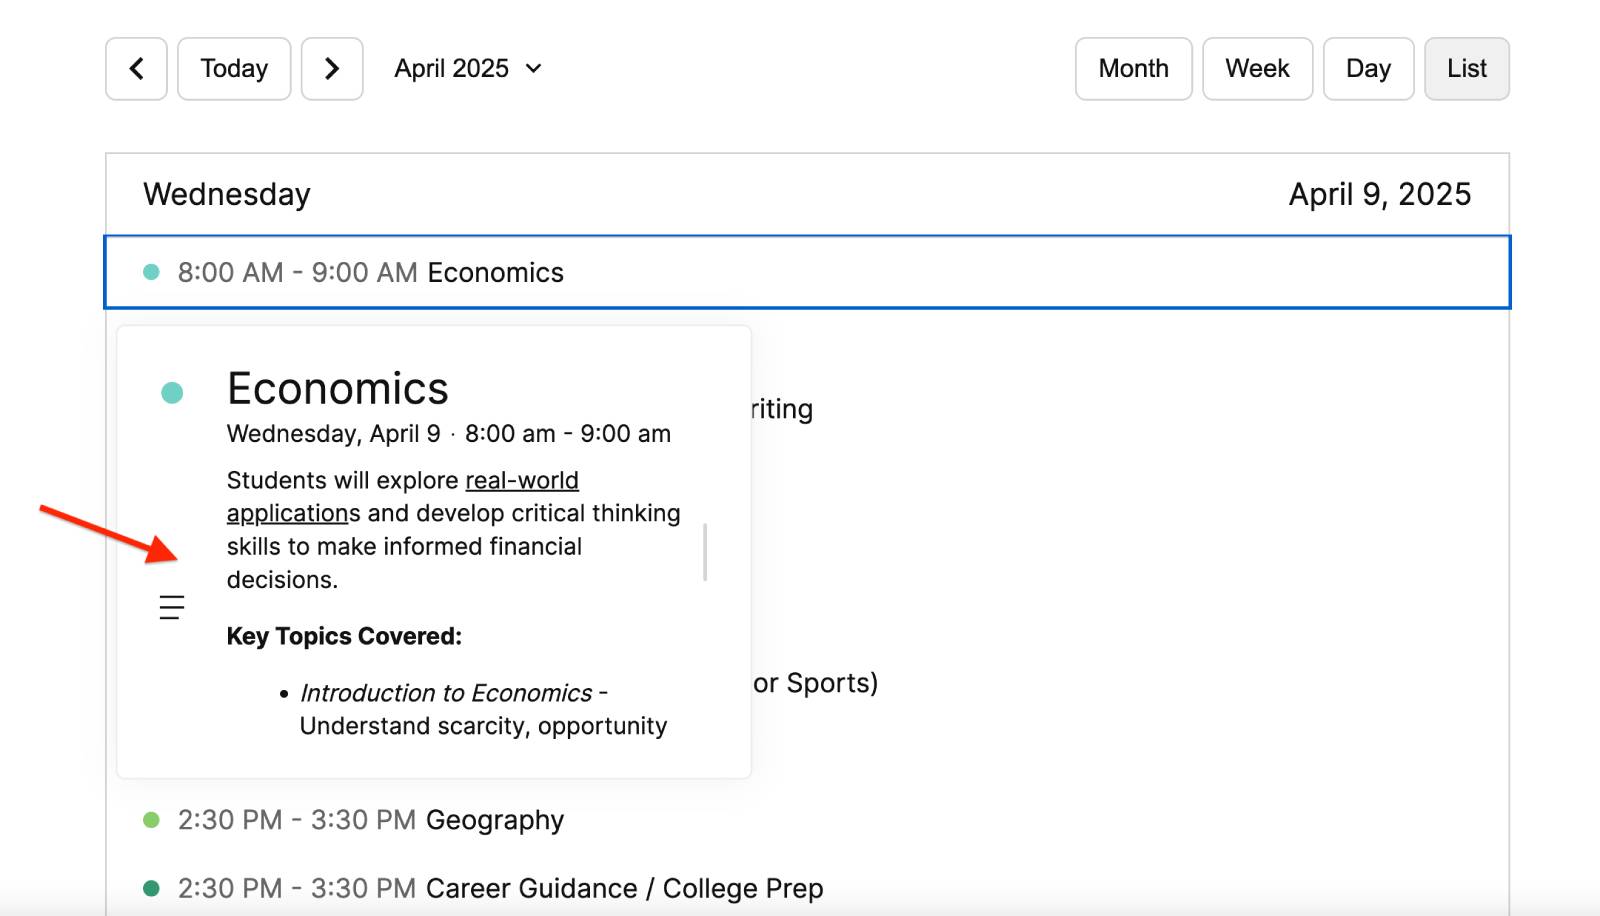
For instance, make your font bold or italics, insert URLs, or create bullet lists.
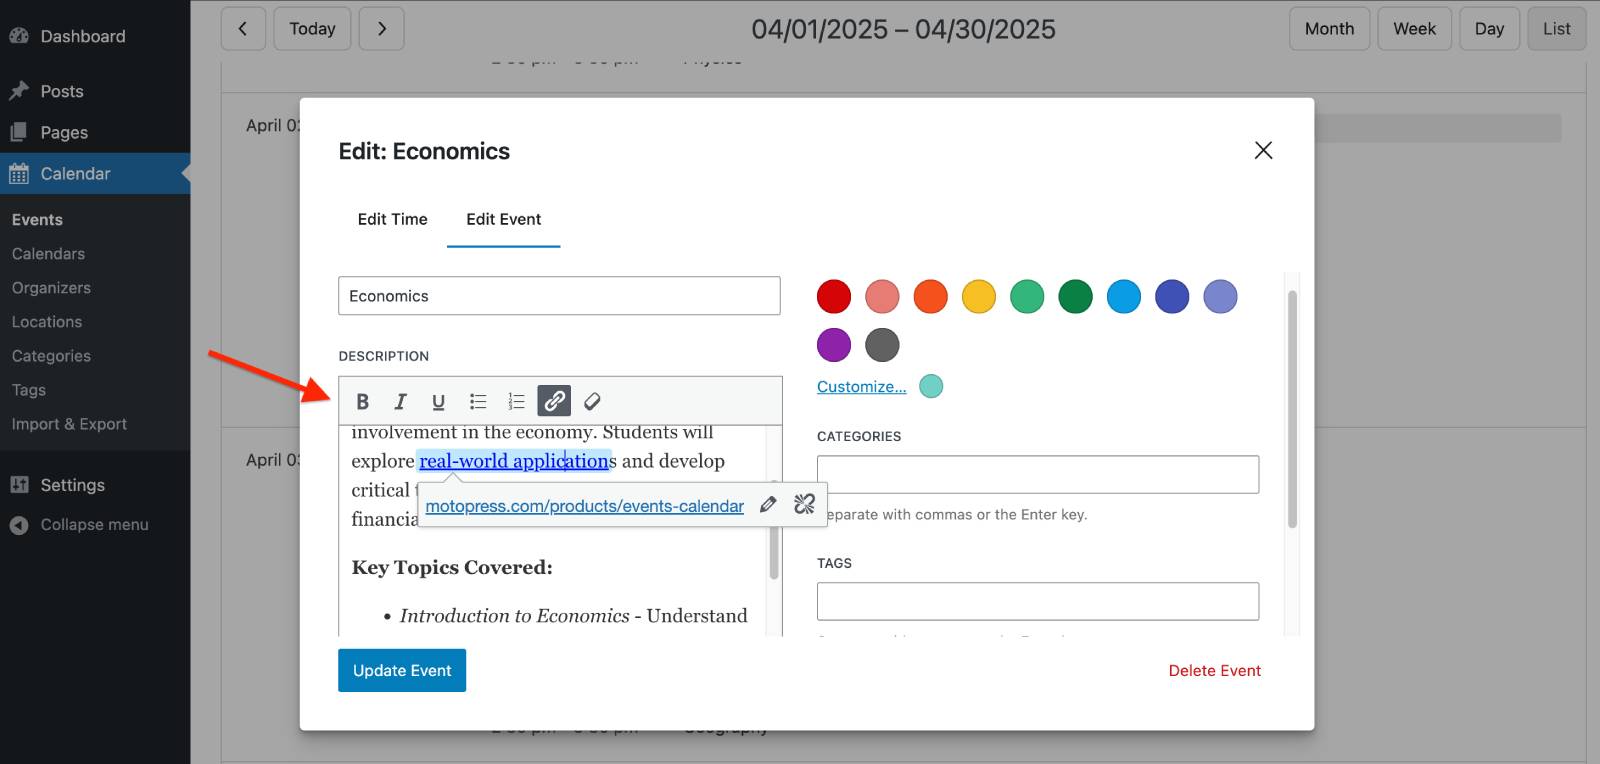
To add it, switch to the ‘Edit event’ tab in the Event editing screen and go to the Description field.
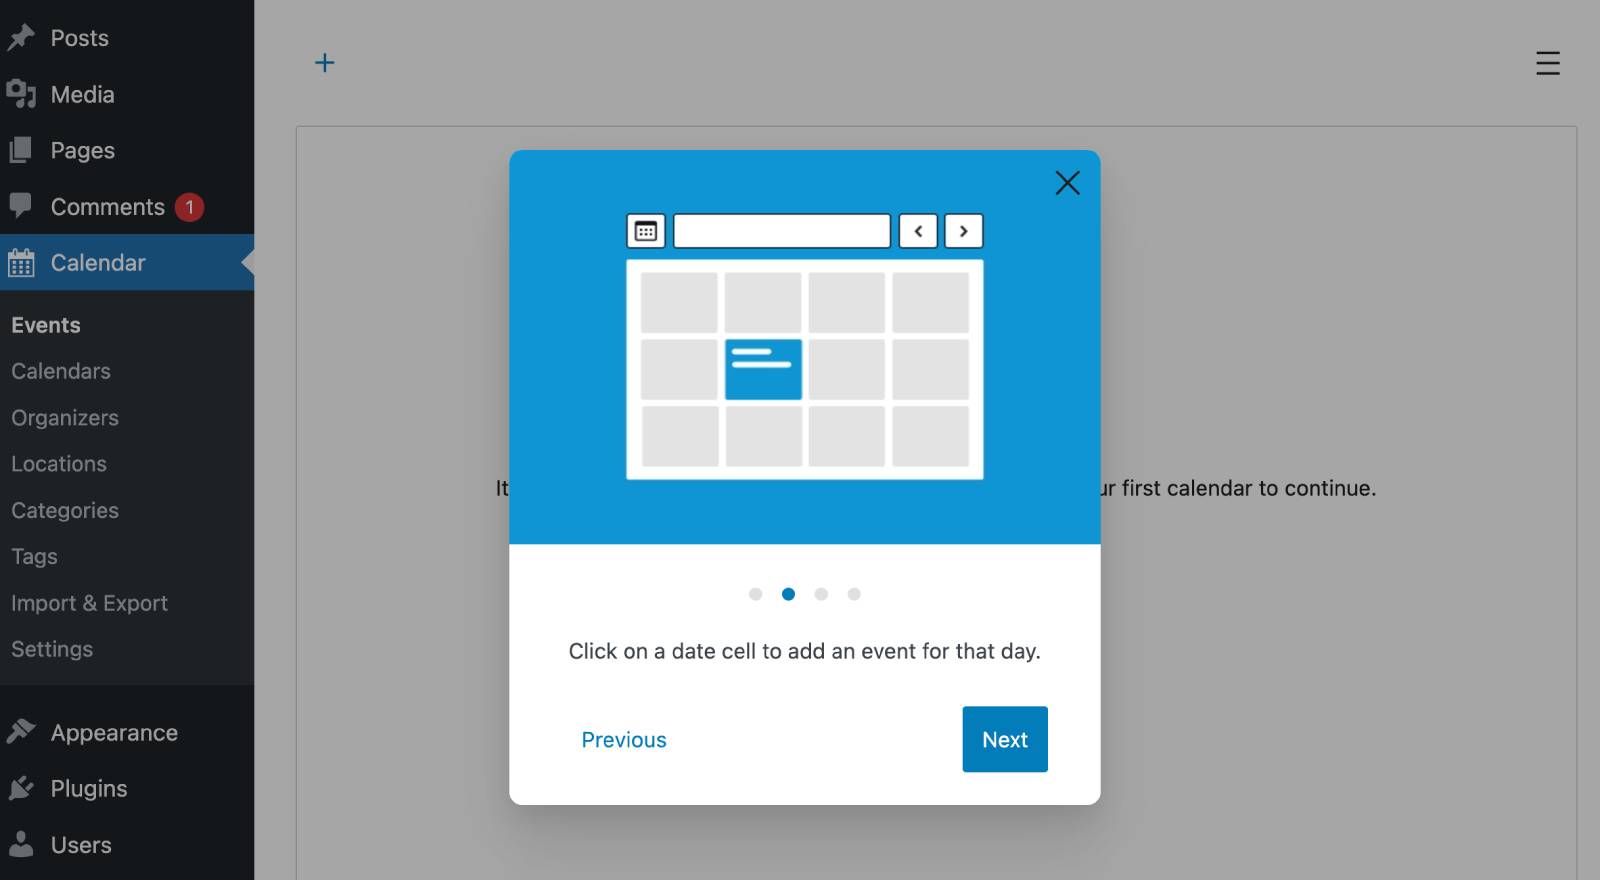
Moreover, we’ve improved onboarding for the new plugin users with the handy plugin wizard, which shows basic drag-and-drop actions of adding events in the visual builder. If you need help, click on the same hamburger icon and you will find the Welcome Guide.
Let’s sum key Events Calendar updates
To recap, the latest updates to the MotoPress Events Calendar include fresh features that allow you to:
- Smoothly import and export events (from WP to external apps and vice versa).
- Use a handy shortcode builder to create the events calendar shortcode faster.
- Use more styling options for the text descriptions.
We’re committed to regularly updating our new WordPress events schedule plugin to give you more powerful tools for event management and workflow automation. Want to have a better Events Calendar? Smoother WordPress import events or WordPress export events processes? Send us your questions and feature requests!