Booking Calendar Plugin 1.3.0: Meet Pay-On-Site & Manual Reservation Approval!
Table of Contents
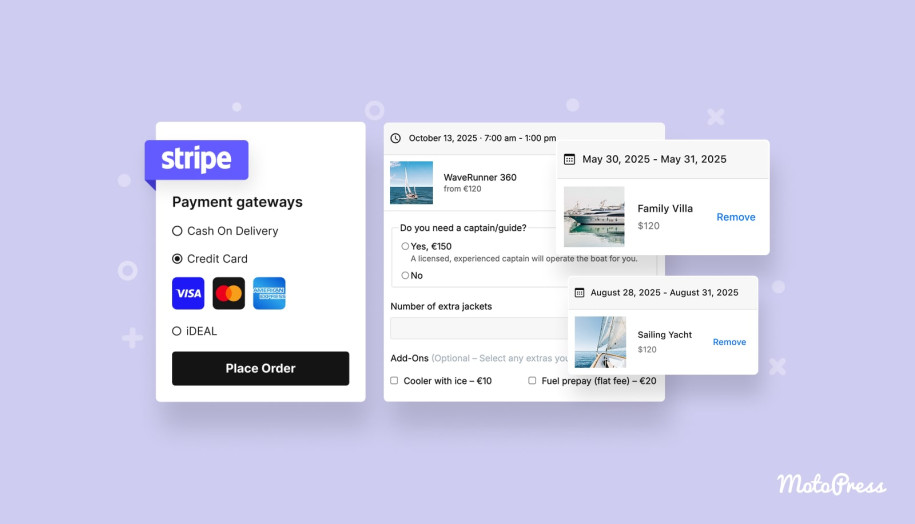
In the previous Booking Calendar plugin version (1.2.0), we introduced the Stripe payment gateway, which enabled your business to accept rental payments online using 20+ payment methods available through your Stripe account!
However, we know that not every business wants or needs to start with online payments right away.
That’s why in version 1.3.0 reviewed here, we’re rolling out a new “pay on-site” option, along with additional tools for handling bookings manually.
More details below!
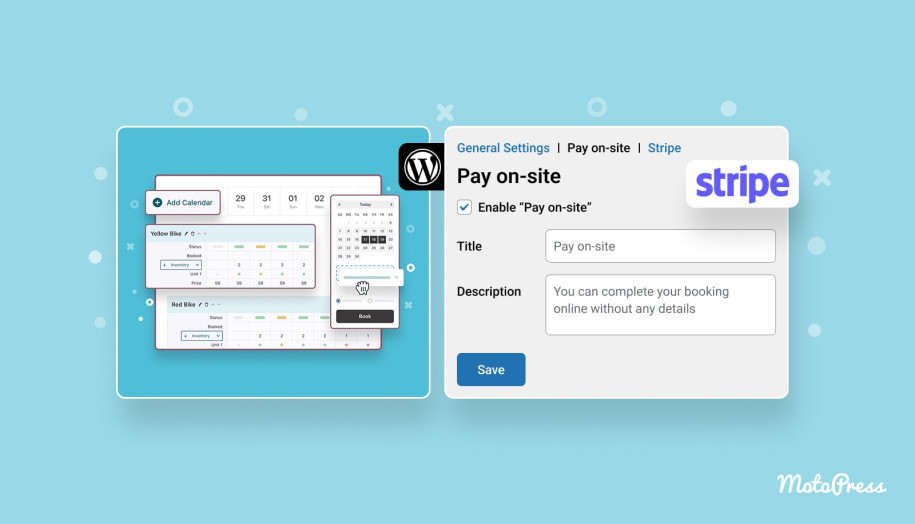
Enable ‘Pay on-site’
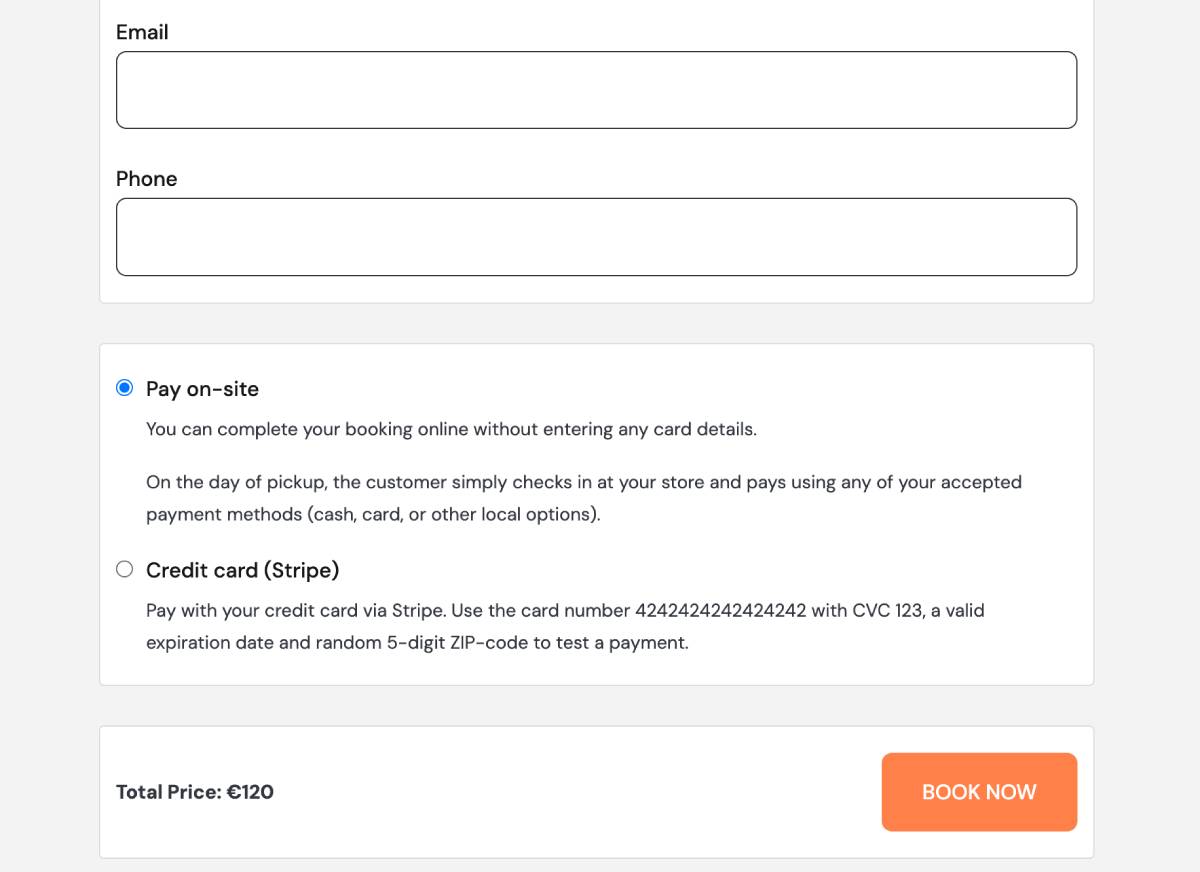
Simple as that, you can now accept bookings with the MotoPress WordPress booking calendar plugin for WordPress without instant payment but when the client arrives.
To add the pay-on-site option to checkout, simply enable it here:
Calendars > Settings > Payments > Pay on-site > click ‘Enable’ > Save changes.
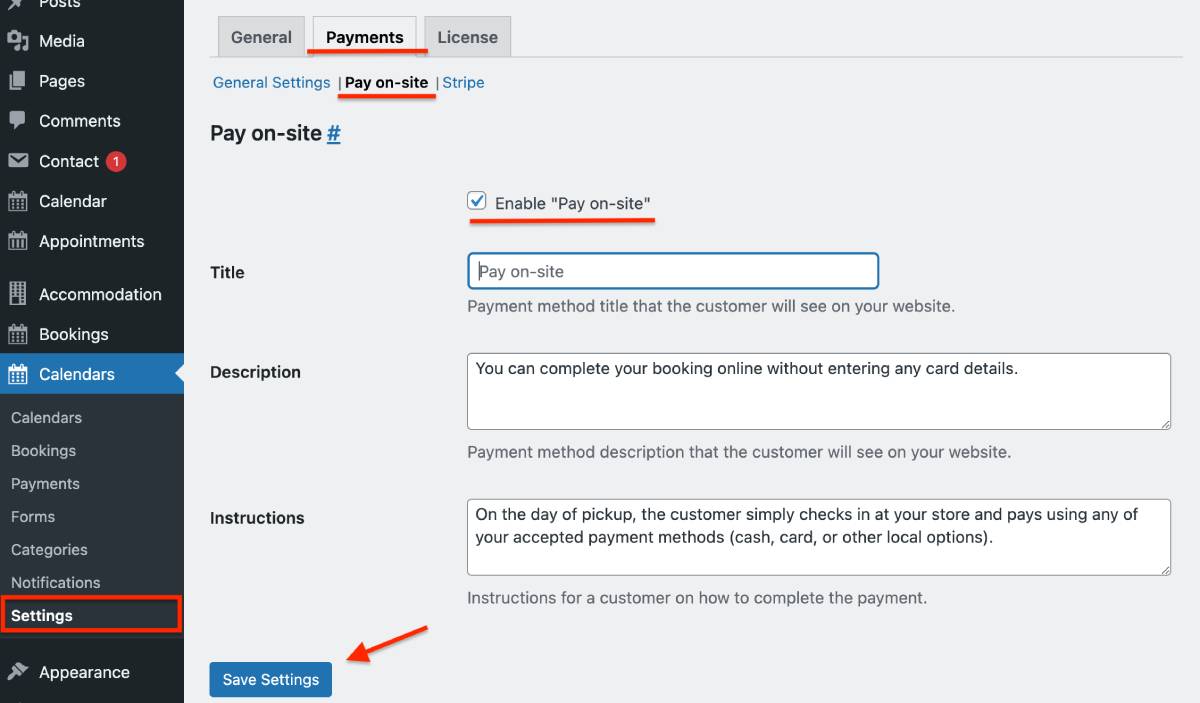
Optionally, provide custom title and description for the method, as well as further payment instructions, which will be visible to your customers on the checkout page.
You may have Stripe and pay on-site methods enabled at the same time so that a client can choose the most suitable one.
Where to control them?
There is the Payments menu, where you can track all payment details. Bookings submitted through the pay-on-site method will have the status ‘On hold’ in Payments, until you manually update the payment status after you have actually received the payment from the client – on site.
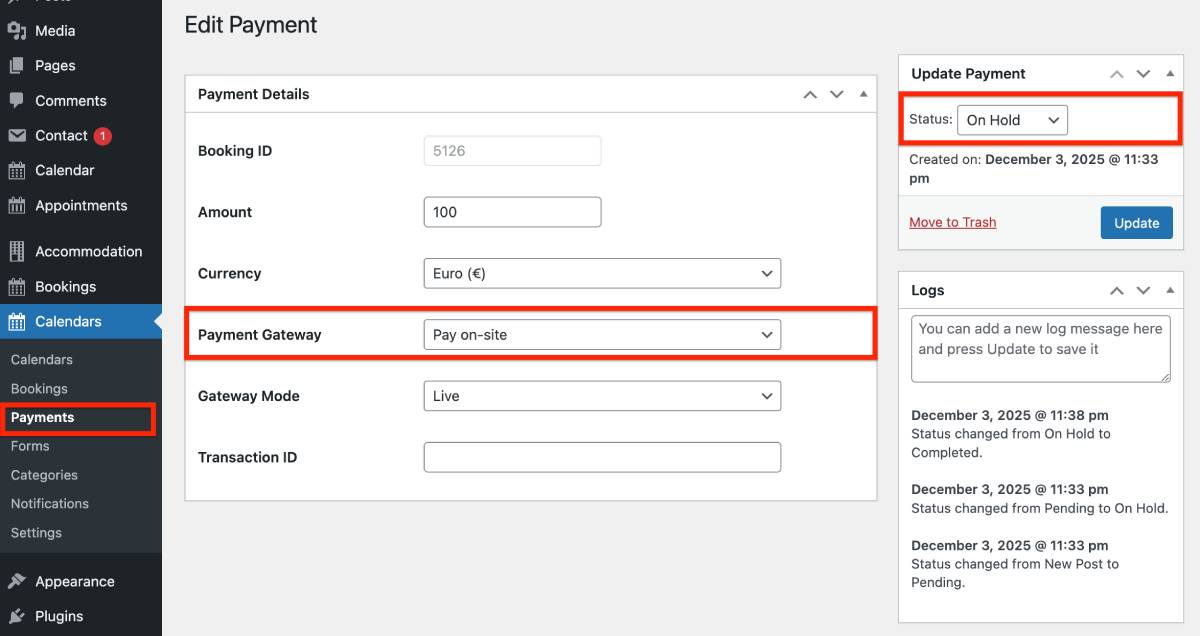
Important: just like with Stripe, this method works only if you set the ‘Booking confirmation mode’ to ‘Confirm upon payment’ in the General plugin settings.
New booking confirmation mode: Manual approval
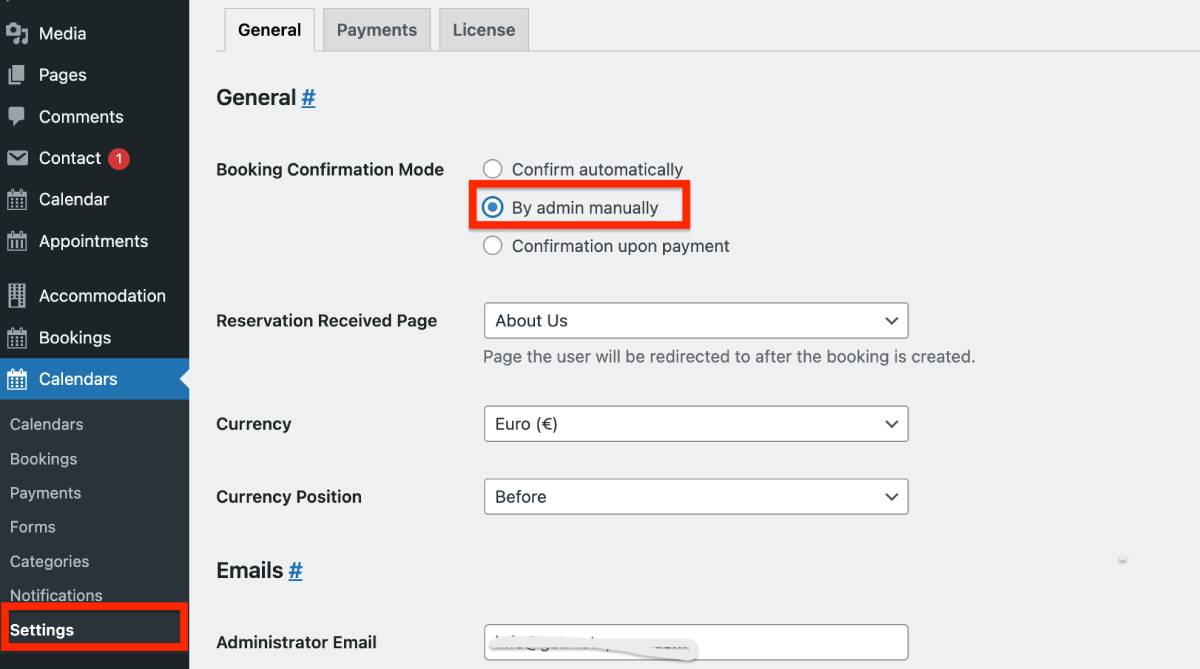
To add even more manual control to your WordPress booking calendar, we’ve introduced a manual admin control option for booking submissions that allows you to vet requests manually.
For example, when your resources (rooms, equipment, staff) fluctuate, you may need to verify availability before confirming a booking.
Or, if you want to check client eligibility, safety requirements, or licenses before accepting a booking (remember, you can collect any client info using handy checkout fields), this mode may also be necessary.
To choose this mode for your settings, go to Calendars > Settings > General > select by Admin manually.
How does it work?
Once a customer places a booking, you get a respective notification email, as well as can see a new booking with a Pending status in the Bookings menu.
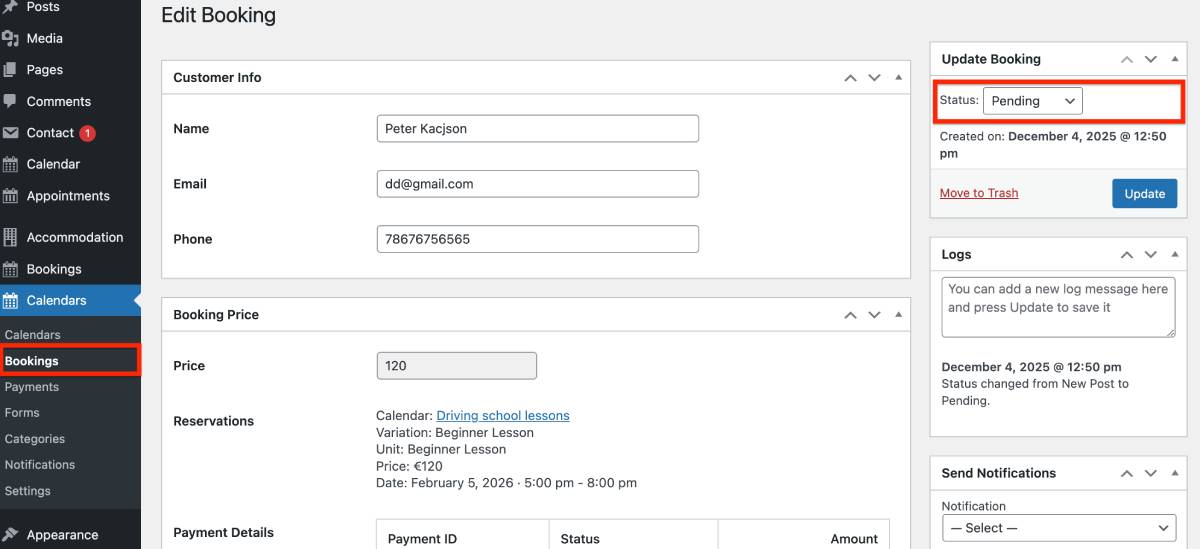
To change the booking status to Confirmed, open it and choose the needed status in the Update Booking section > Click ‘Update’. That’s it! Now you have a manually confirmed booking.
To make sure that your customer and you receive timely notifications about booking requests, go to Calendars > Notifications > Add Notification > add two notifications through Templates:
- New booking (admin)
- New booking (customer)
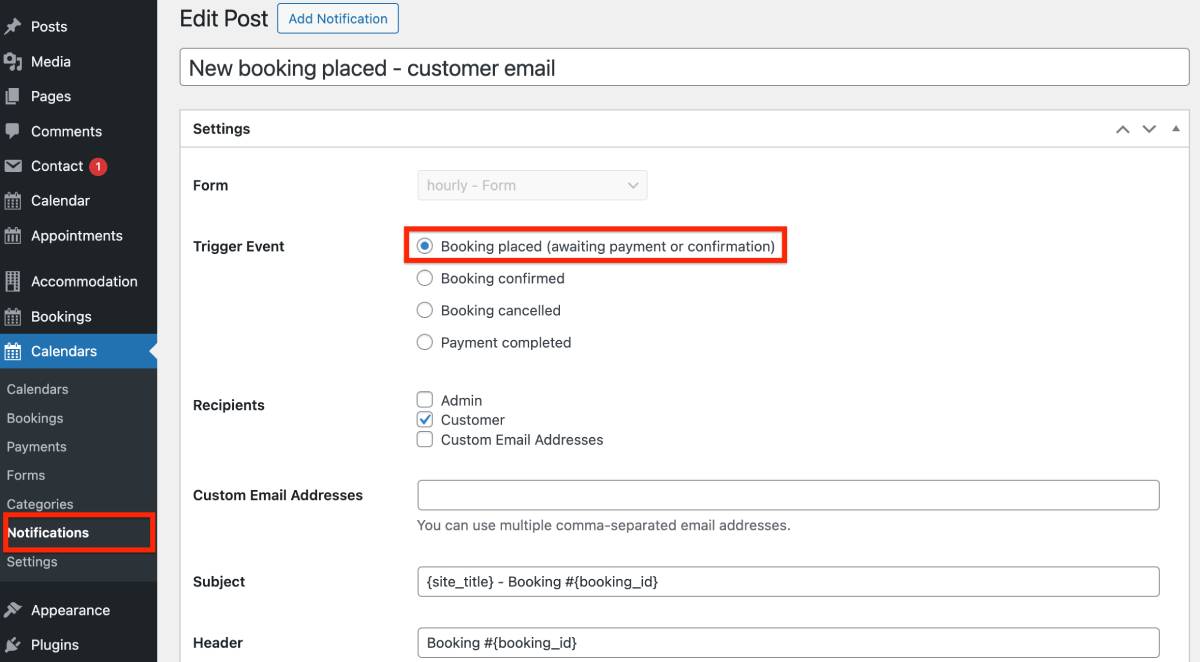
Don’t forget to hit Publish when a new notification is created!
Then you can easily customize what info to include into those email templates. Click ‘Update’ in the notification editing screen once you are ready.
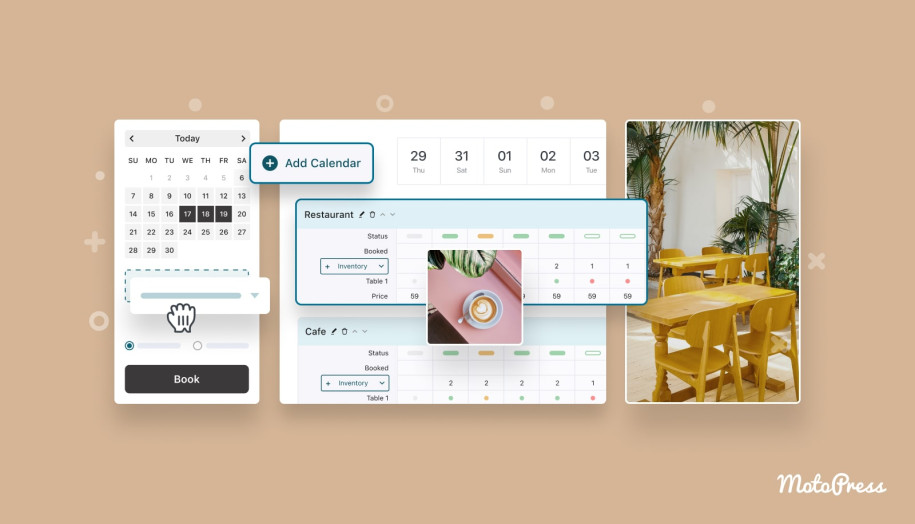
Calendar interface improvements
To make the MotoPress booking calendar plugin even more flexible, we’ve enhanced its label customization features, allowing you to add richer, more relevant content that aligns with your business and resonates with your audience.
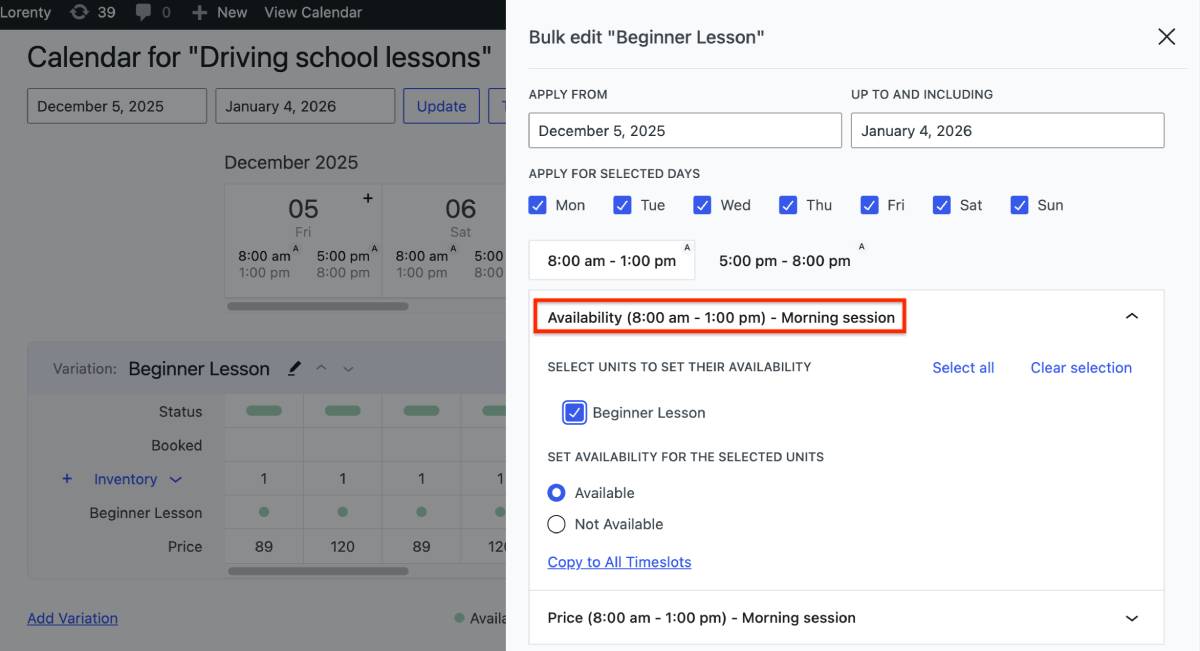
Custom name for an hourly timeslot
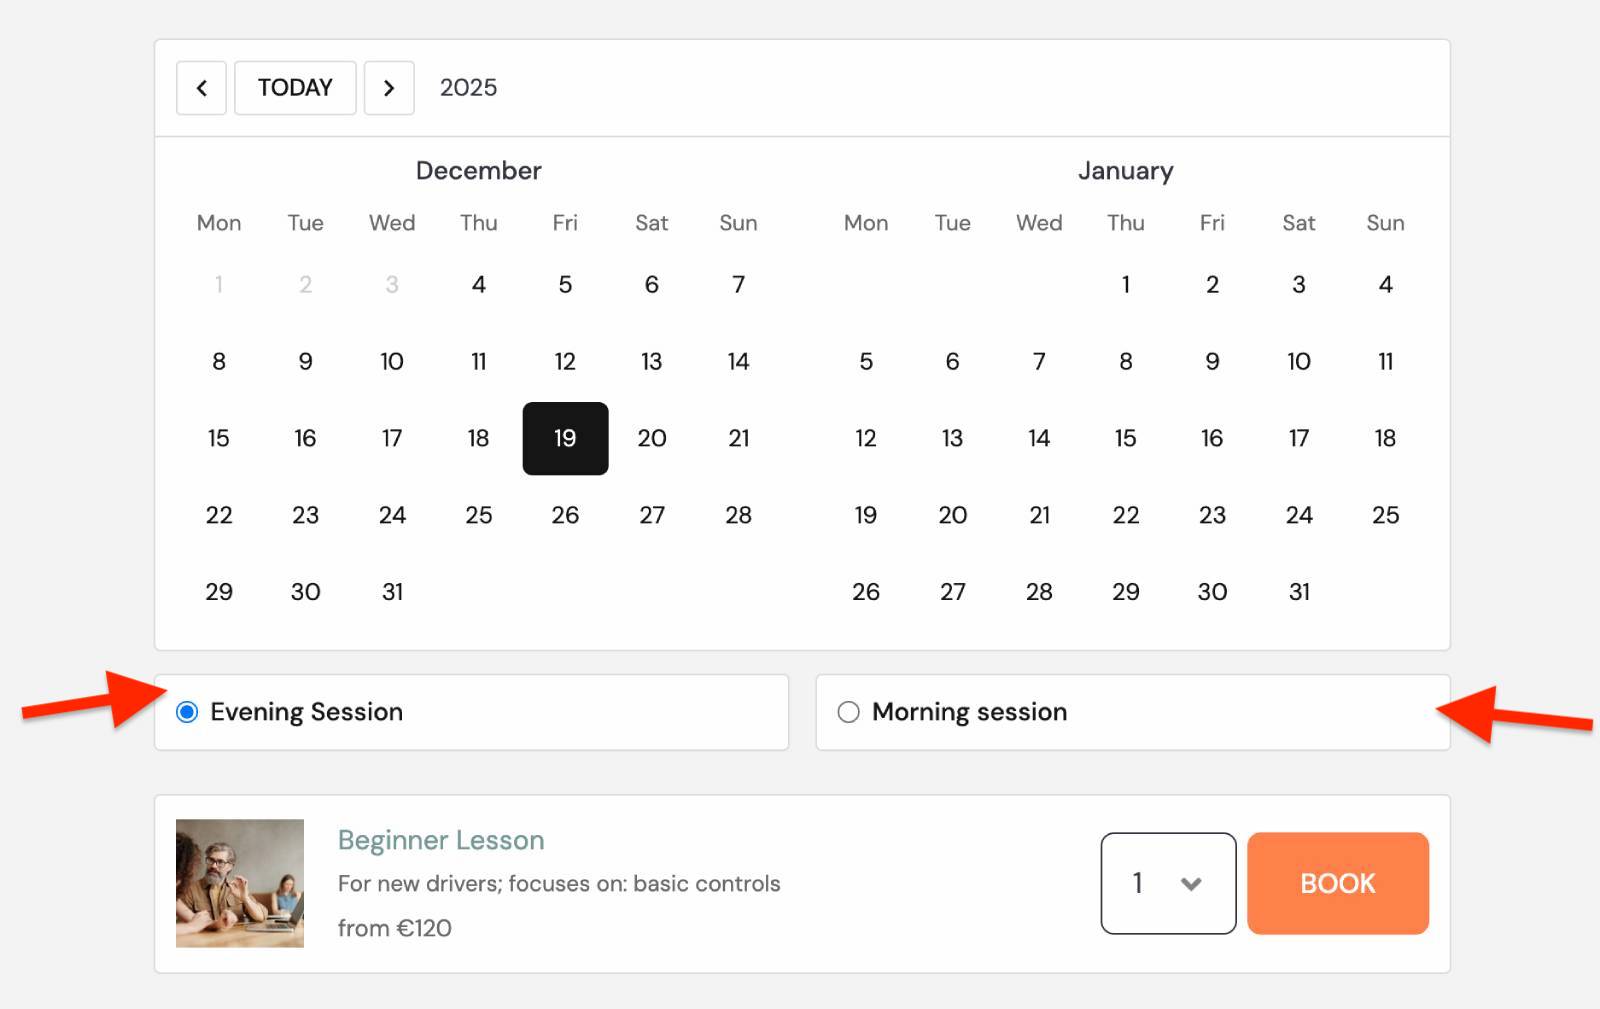
We’ve added an option to set a custom name for a timeslot within an hourly-based calendar that better explains your offer to clients (e.g., Weekend package, Evening Session, Full-day rental, etc.).
Where to set it?
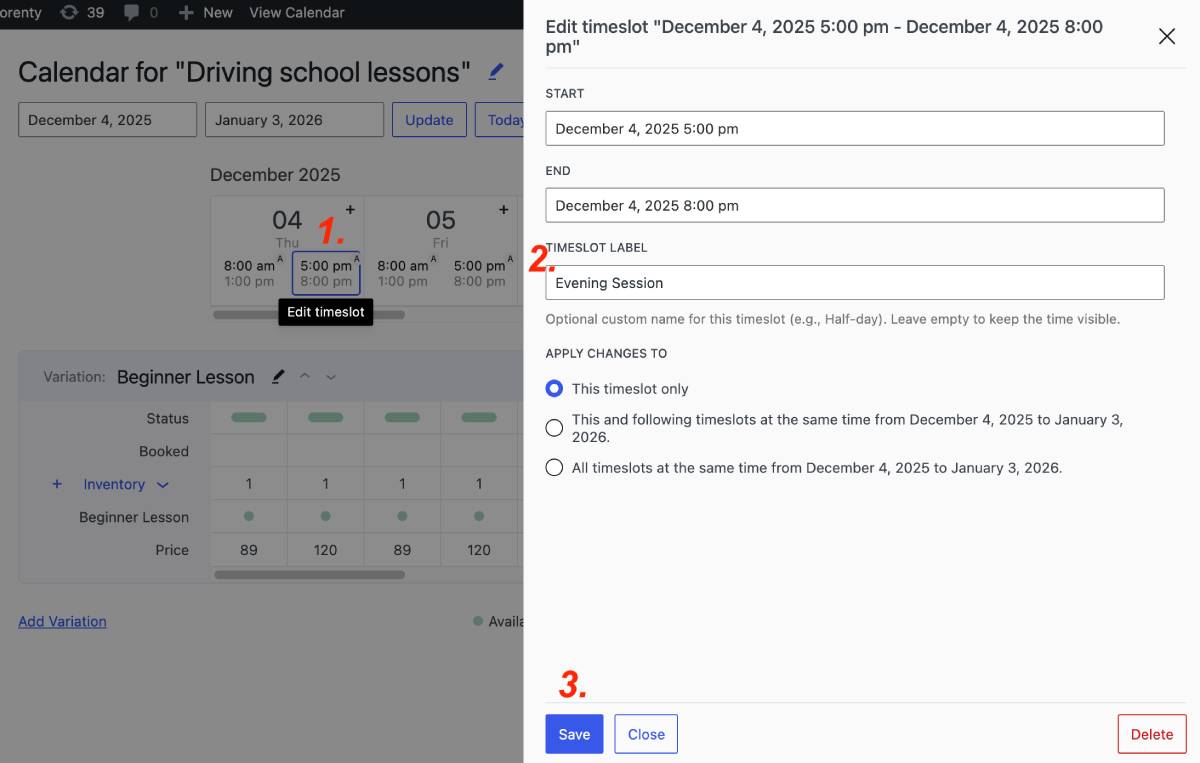
Go to a calendar that has hourly timeslots > open it > click on the needed timeslot > find the new ‘Timeslot’ label field > add your custom name and click ‘Save’.
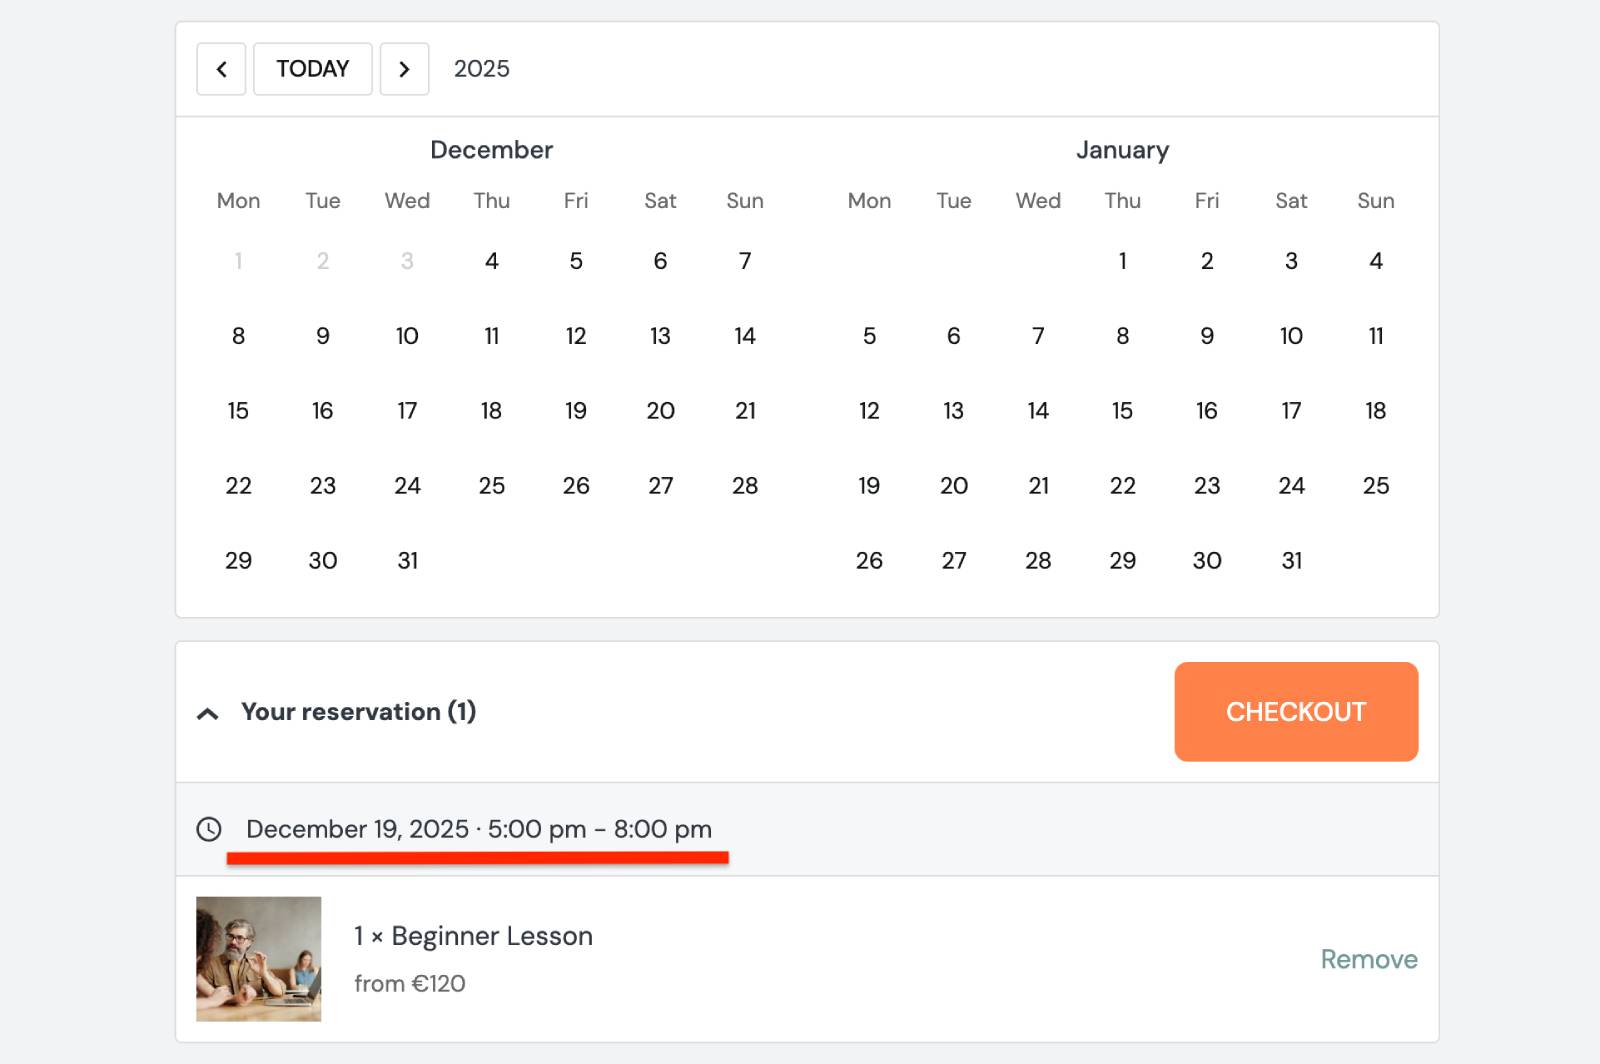
On the website, customers will see custom timeslot labels instead of a standard time range.
However, when they add a timeslot to the cart, the exact start time will still be shown, so there’s no risk of customers not knowing the precise time.
On your side, custom names will also be visible:
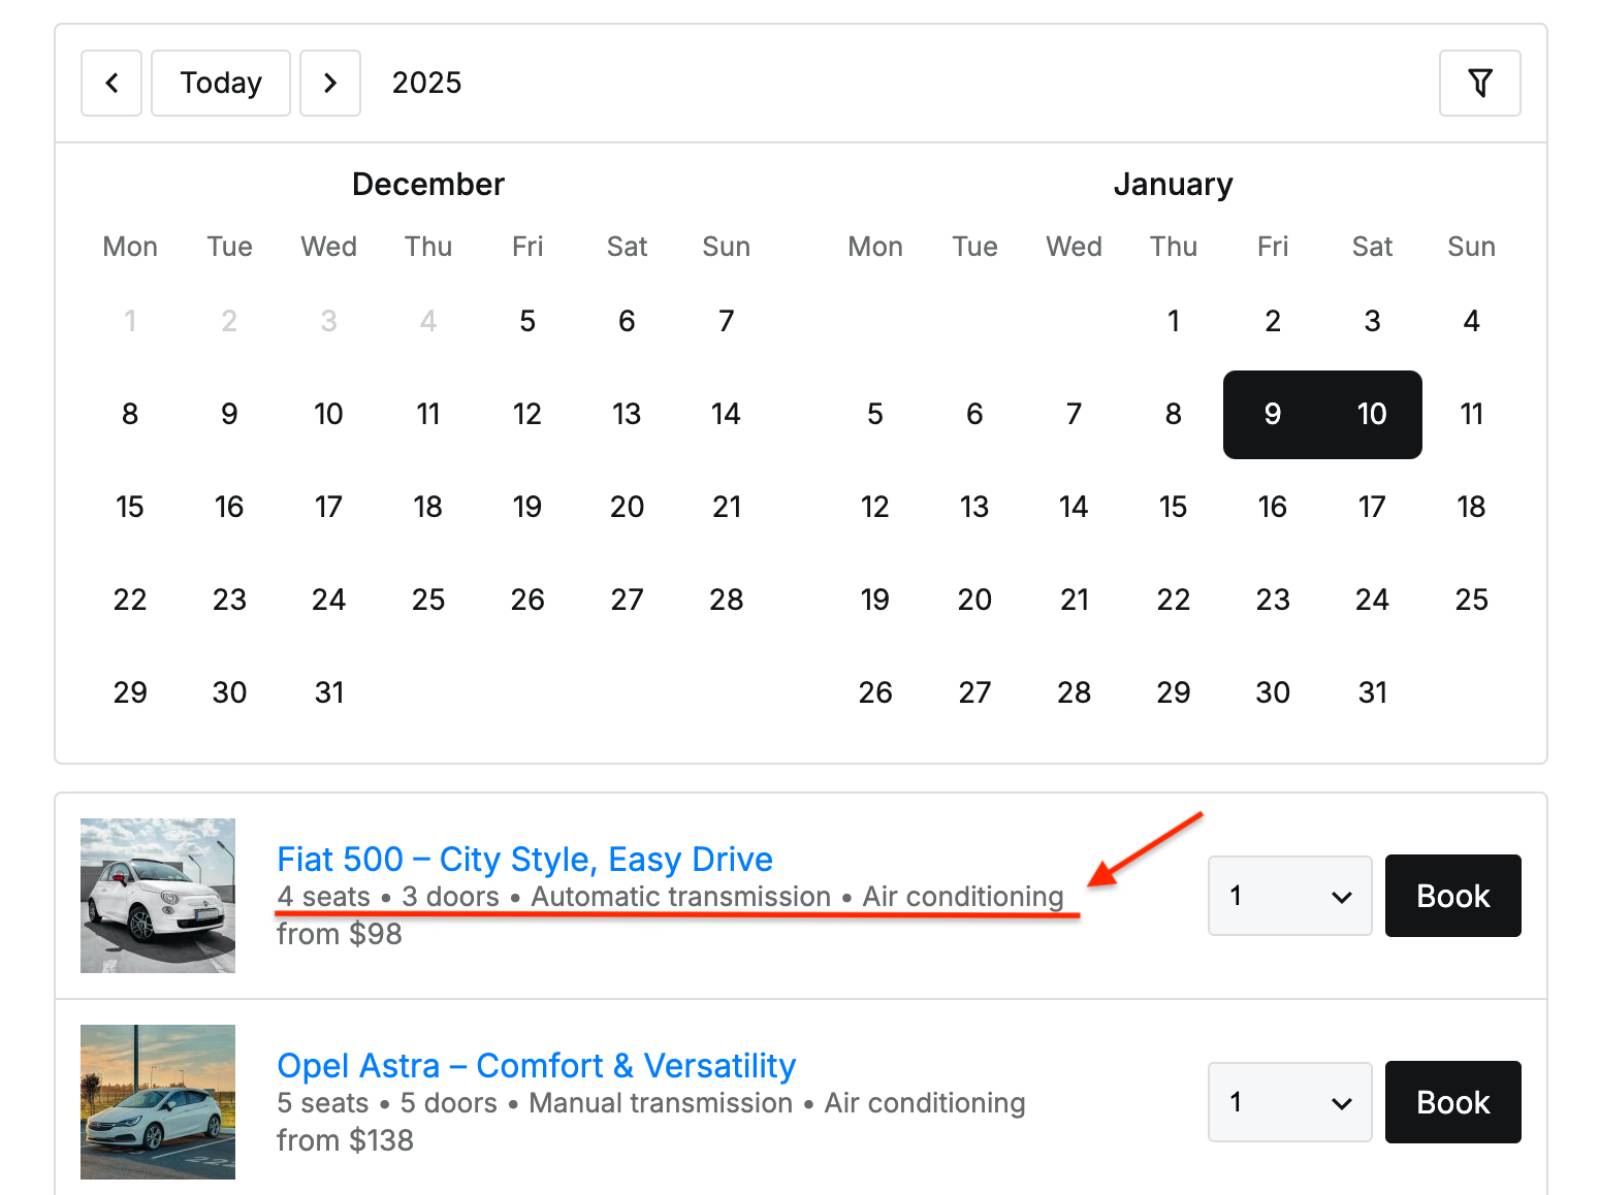
Rental item details
The design approach of a booking calendar is focused on simplicity – we don’t want you or your customers to get cluttered and bloated UX.
But sometimes you need to show slightly more details about a particular rental item or slot, before a client makes up their mind.
To meet this need, we’ve added an additional rental item description field, where you can include more information in any style, for example:
- categorized details
- simple sentence
- special offer mention
It’s visible in the item preview under the rental title, along with the price.
Where to add it?
To add a rental item description, go to the needed calendar, and then open the needed ‘Variation’ (click Edit). You’ll see a new ‘Details’ field.
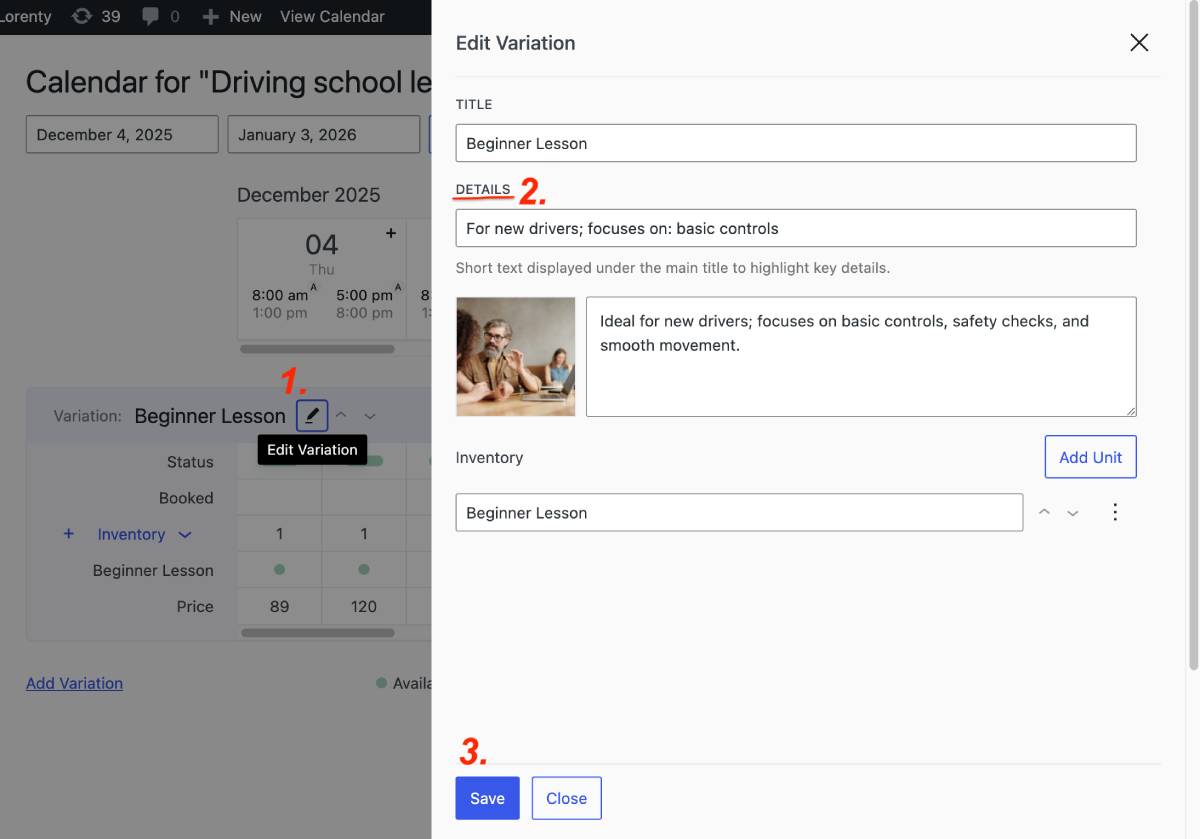
Here, you can use any format and style to add rental details visible before a client can even add it to cart.
Final Word: What’s for You in the Booking Calendar WordPress Plugin 1.3.0?
We’re happy to deliver these updates to businesses that manage reservations, rentals, or appointments, especially when operations are flexible, resource-based, or dependent on in-person interactions.
Let’s summarize the new options:
- On-site payments for businesses that prefer flexible payments or want to give their customers even more options.
- The manual confirmation mode supports those who need to verify availability and rely on manual approval of bookings.
- You can now set custom names for hourly timeslots if you need more descriptive or marketing-friendly language, rather than generic time ranges.
- Show brief item details without overwhelming the UI (when buyers need a bit more context to make a decision, but not full product pages).
To sum up, with the version 1.3.0, you get more control over the booking process, better communication, and flexible payment handling. Let us know what matters most to you!

Great updates, already using them in our deployment. A feature request from us, and our customers, is the ability to pay a percentage deposit upfront and then the remainder “on-site”. Any plans to add this soon?
Hi Greg, Thanks for your feedback and a new request. Please describe it in more detail and submit it here https://motopress.com/support/