How to Add & Edit the Elementor Content Switcher Widget?
Table of Contents
WordPress users are always looking for new ways to optimize site space without sacrificing its content. As often as you use sliders, accordions, or tabs widgets, you may neglect other elements like content switcher. That’s why we’re devoting this post to an Elementor content switcher – one of the easiest interactive elements for your WordPress website.
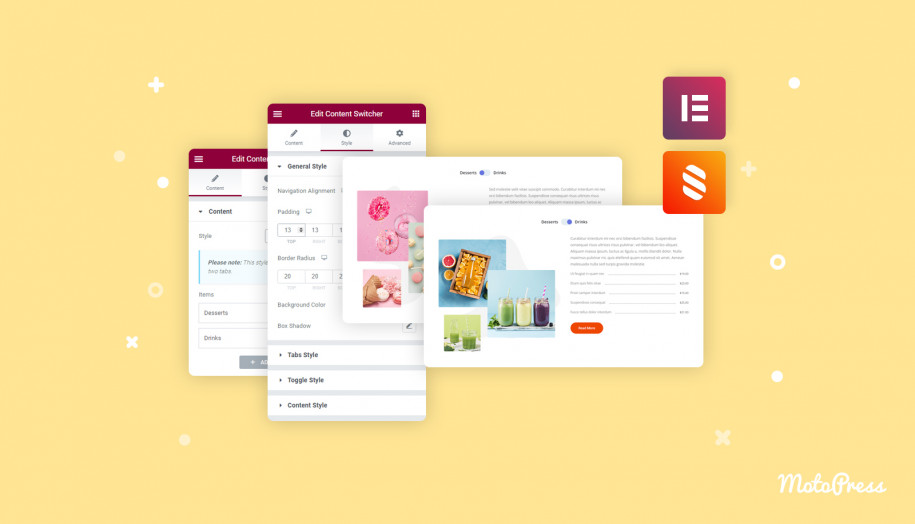
In particular, we will guide you on how to add and customize an Elementor Content Switcher widget with the free Stratum addon.
Where Can I Use a WordPress Content Switcher?
According to the Content Marketing Institute and Ion Interactive, “interactive content is most commonly used on landing pages, social media platforms, microsites, and blogs”.
Of course, you can use a content switcher for any website type whenever it feels necessary. It’s mostly used to organize different pieces of information in one element instead of displaying them one after another. Also, a convenient toggle mode ensures a “quick switch” between the two or more content types.
So here are the common examples where you’d likely use a content switcher:
- Pricing Tables with different plans (e.g. monthly VS annual, Free VS Pro)
- List of Features (each toggle is a separate feature)
- Switchable features
- Categorized content (e.g. list of services or staff members)
Elementor Content Switcher by Stratum
By now, you should already know the real power of Elementor. A great number of free solutions are concentrated around this WordPress page builder. One of them is Stratum for Elementor – a freemium collection of 23+ advanced Elementor widgets for personal & business use.
Main Stratum features are:
- 23+ multipurpose widgets in one plugin;
- Automatic style adjustment to the style of your current theme;
- Advanced design toolchain for each widget;
- Elementor template library integration.
Unlike similar addons, Stratum allows using all 23+ widgets in its free version. Meanwhile, users of Stratum PRO obtain access to extended customization settings for each element.
So when it comes to the content switcher in Stratum FREE vs PRO, their only difference is the number of toggle tabs. The free version allows creating 2 toggle tabs only, while the PRO version has no limitations on the number of tabs.
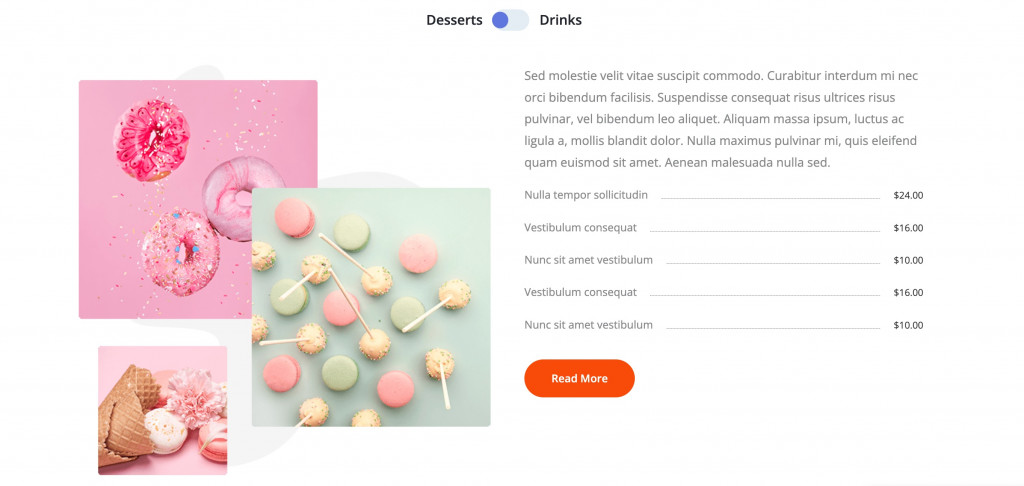
Content Switcher Elementor Widget DEMO
How to Add the Stratum Content Switcher?
We are stepping onto the main part of our tutorial. Most likely, you already have a WordPress website and you’ve just installed Elementor.
Now it’s time to install Stratum. Depending on your plan, you can do it in two different ways:
- Download the Stratum FREE from the official wordpress.org repository.
- Purchase Stratum Pro on our official website.
Finally, upload either one of these files to your site: Plugins => Add New => Upload Plugin. Do not forget to activate the plugin.
When Stratum is activated, open one of the site pages with Elementor. It does not matter if you use a pre-installed template or not.
Now click the “+” icon to select a structure (number of columns) and then, insert the needed widget. The Elements library will now have the Stratum folder. You can find the Content Switcher widget in the list or simply type in the name in the search bar.
Drag the element to the editing page:
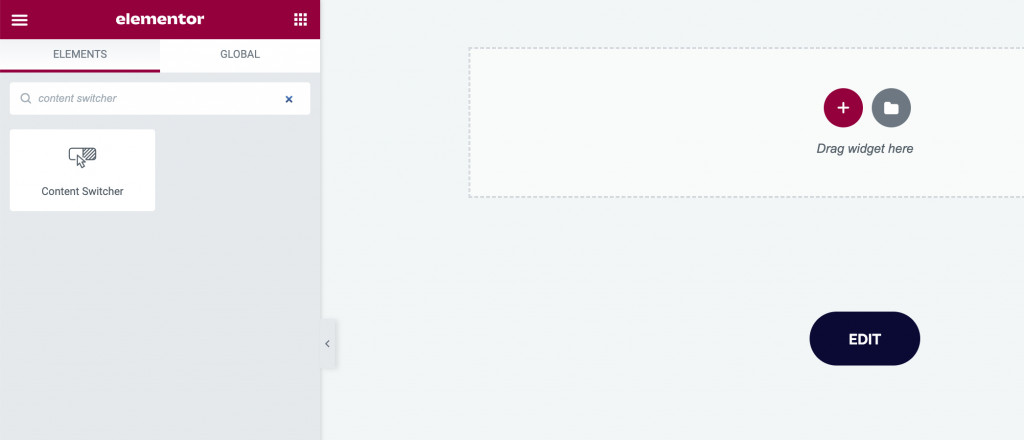
This was a small instruction on how to add an Elementor content switcher to your website. But the tutorial is not over. Now we need to figure out how to customize this widget using Elementor & Stratum settings.
Stratum Content Switcher: Main Settings
So you dragged the Stratum plugin Content Switcher to your editing page. In the left sidebar settings, you will see 3 editing tabs: Content, Style, and Advanced.
Content Settings
The Content tab is where you can select the style & add items (toggles) to your element.
If you use the addon’s PRO version, you can style make your content switcher with both styles: Toggle Tabs (two items only) and Multiple Tabs. With the last one, you can add as many toggle items as you wish.
The free version, however, supports the Toggle Tabs style only. These are examples of Multiple vs Toggle Tabs styles:
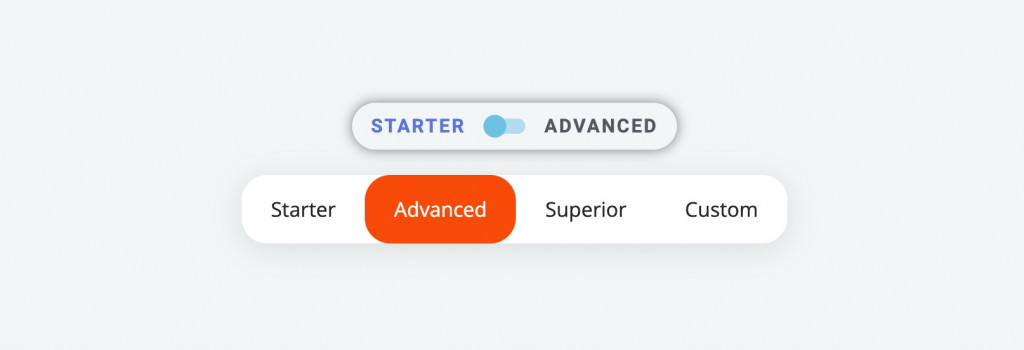
The Items settings include:
- Title of the item
- Template (the content inside each item)
Most likely, you don’t have any saved templates yet, so your next step will be creating an Elementor template for each toggle. To do so, select Templates => Add New in your WordPress dashboard. Select the section type and hit Create:
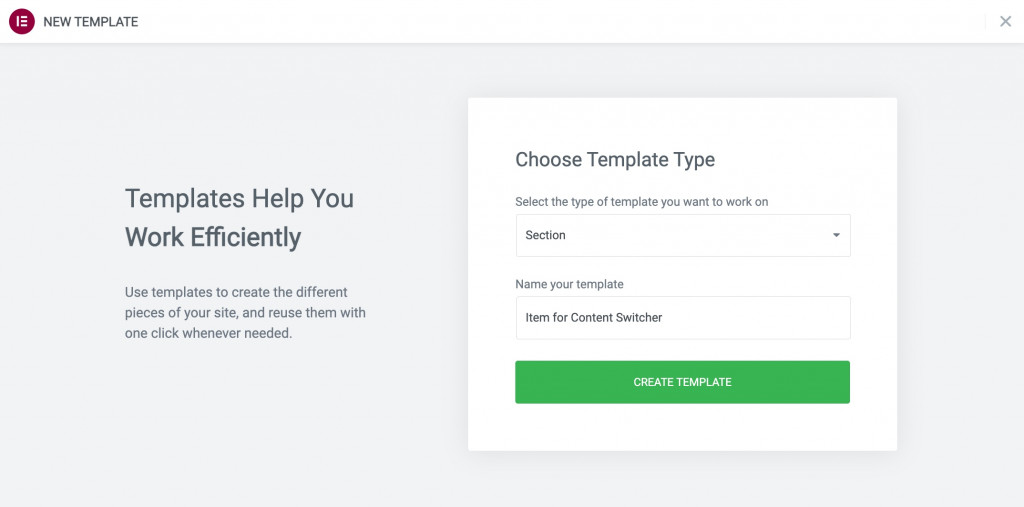
You will be transferred to the Elementor builder so that you may create any section using your current widgets collection. When you’re done creating an element, press Update.
Go back to your customizing your Elementor content switcher. Now you can select the newly-created template and it will be displayed within our widget:
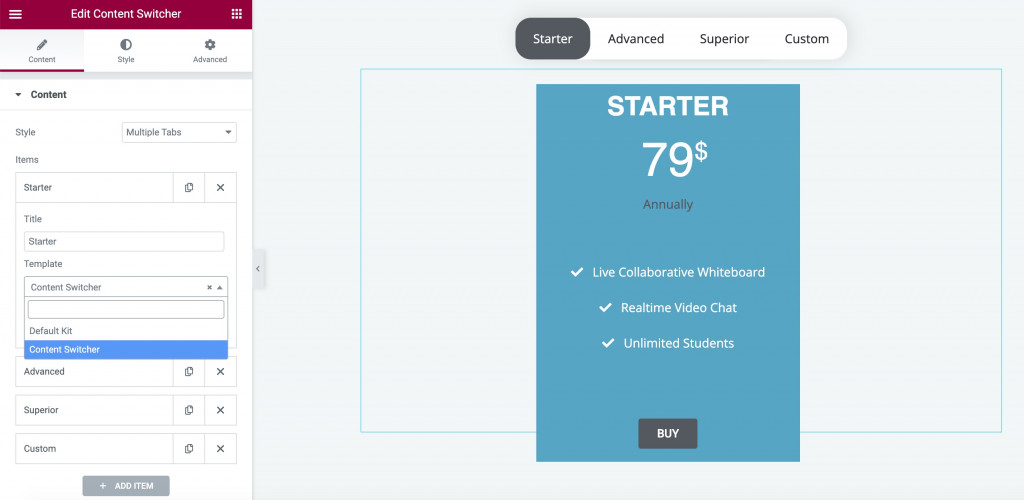
Also, in the Content settings, you can choose which of your items will be unfolded by default.
Style Settings
The Style settings are slightly different for Toggle Tab & Multiple Tabs styles. Both have the same General, Tabs & Content parameters.
The General menu includes settings for:
- Toggle alignment
- Manual paddings
- Background color
- Border radius (this will help your toggle look more like a solid button)
- Box shadow
The Tabs menu includes settings for:
- Full typography panel
- Paddings and border-radius
- Text color for different modes (normal, hover, and active ones).
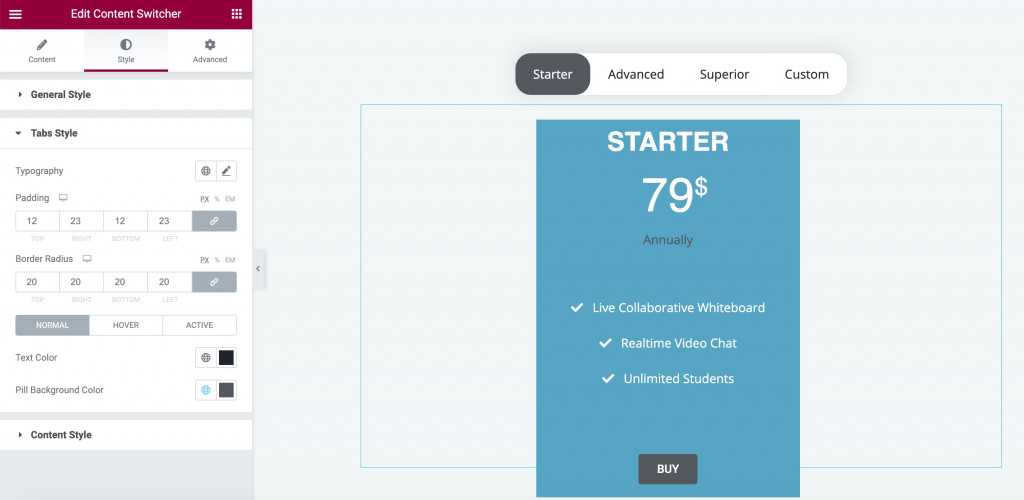
The Content menu includes settings for changing the margins and adding animation effects.
Additionally, the Toggle Tabs style includes toggle customization:
- Paddings
- Content switcher size
- Colors and radius
Advanced Settings
Do not forget that each Elementor widget is backed up with Advanced settings. They always include the next customization options: layout, motion effects, transform, background, border, mask, responsive settings, attributes, and custom CSS.
Final Words
Note that none of the Elementor versions (Free or Pro) has an alternative Content Switcher widget. But with the Stratum addon, you can set this easy element in a few clicks.
All you need to do is download one of the Stratum versions.
