How to Handle WordPress Inventory Management for Rental Business
Table of Contents
What’s the best wordpress inventory management plugin that you can use to make your rental business more successful? As one of the biggest CMS, WordPress delivers a wide choice of ready-made tools for any purpose, including rental businesses. With the right solutions, you can positively influence your rental workflow and achieve more while doing less. One of such tools is MotoPress Booking Calendar. In today’s post, we’ll take a look at how it can be of use to different rentals and what you need to make this plugin positively impact your business.
MotoPress Booking Calendar – a Versatile Tool for Rental Management
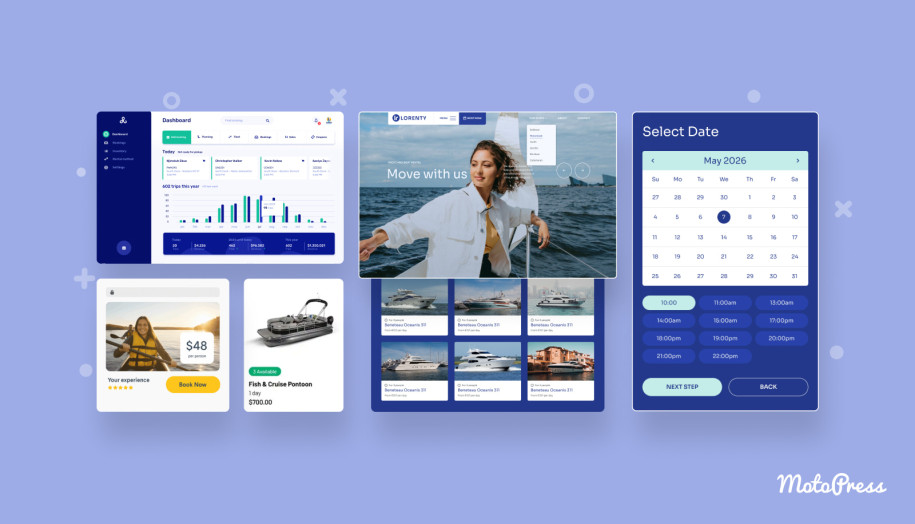
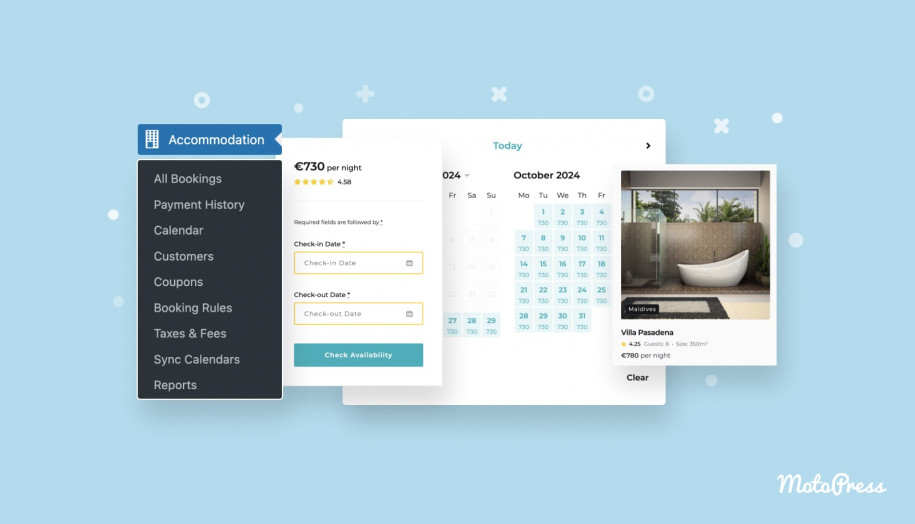
 MotoPress Booking Calendar is a flexible and versatile plugin designed for modern booking and rental purposes. Its visual calendar and inventory manager are just a few of its diverse benefits that you can use to enhance your website. Aside from helping you with inventory management and availability planning, the best WordPress inventory management plugin can boast of a booking form builder and automated email notifications. Even with these essential features, the plugin makes it easy to manage rentals without overencumbering your website with unwanted scripts or tools.
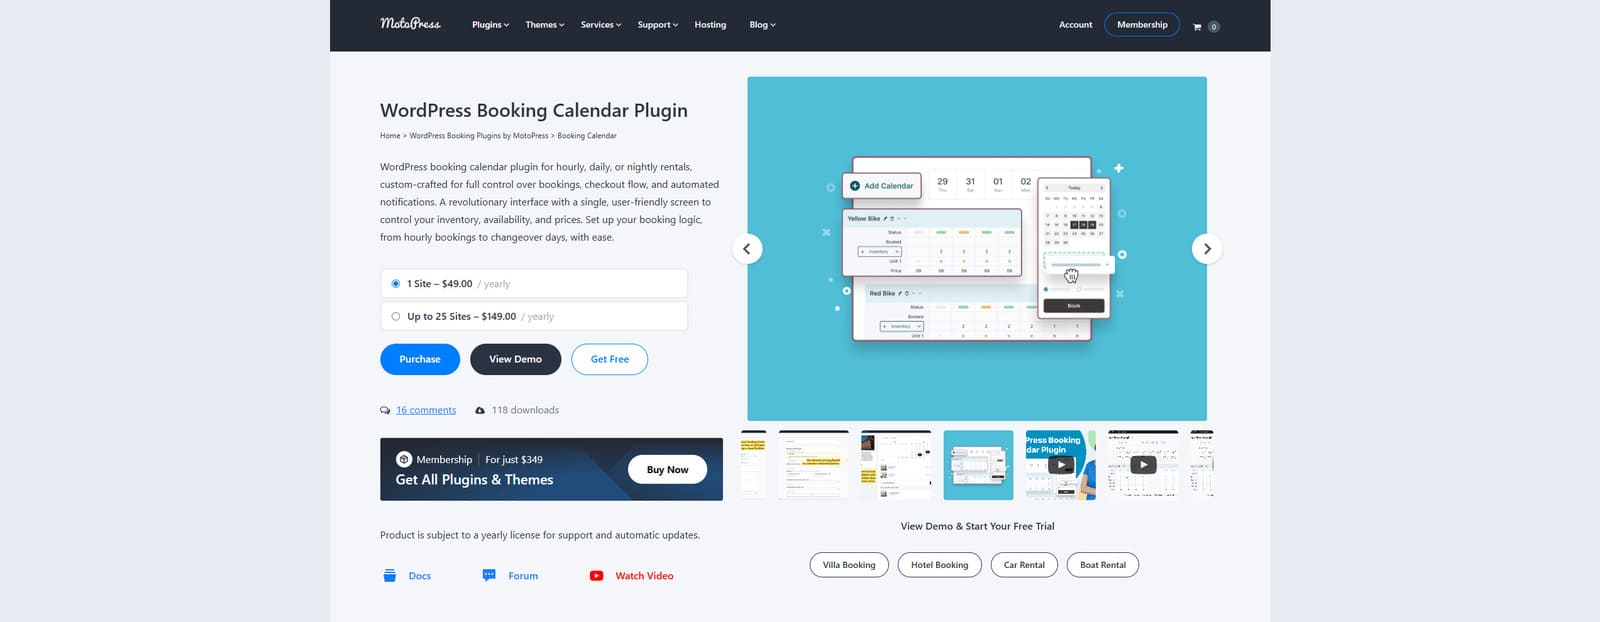
As an affordable and well-designed WordPress inventory management solution, Booking Calendar is also available for free. While it lacks some extra features in its Lite version, such as online and on-site payments, it can be used to get started with rental inventory management. This WordPress inventory management plugin also delivers a smart booking cart feature to improve user experience compared to other plugins. Still, it doesn’t provide WordPress ecommerce inventory management and is developed specifically for rental businesses. For that purpose, we recommend using WooCommerce and its booking extensions. Thanks to its easy-to-configure calendar and inventory manager, the plugin suits almost any business that rents out items. As a result, you get a small yet powerful tool built to make inventory management smooth.
Key features:
- Visual calendar with 3 booking modes (overnight, daily, hourly);
- Dynamic pricing support;
- Bulk item editing;
- Stripe payment gateway integration;
- Gutenberg block and shortcodes.
| Name | Developer | Price |
|---|---|---|
| Booking Calendar | MotoPress | Free or from $49/year |
Using WordPress Booking Calendar for Rental Management
As one of the versatile and highly reliable rental booking plugins, Booking Calendar can be used by a variety of businesses. From party equipment to apartment rentals, this inventory management plugin for WordPress can be configured for use in multiple rental scenarios. As a result, with the best WordPress inventory management plugin, you get tools that can adapt to different inventory types, booking rules, and pricing models with ease. Let’s look closer at 3 different use cases of Booking Calendar and what steps you need to take to make it work.
Use Case 1: Party Rentals
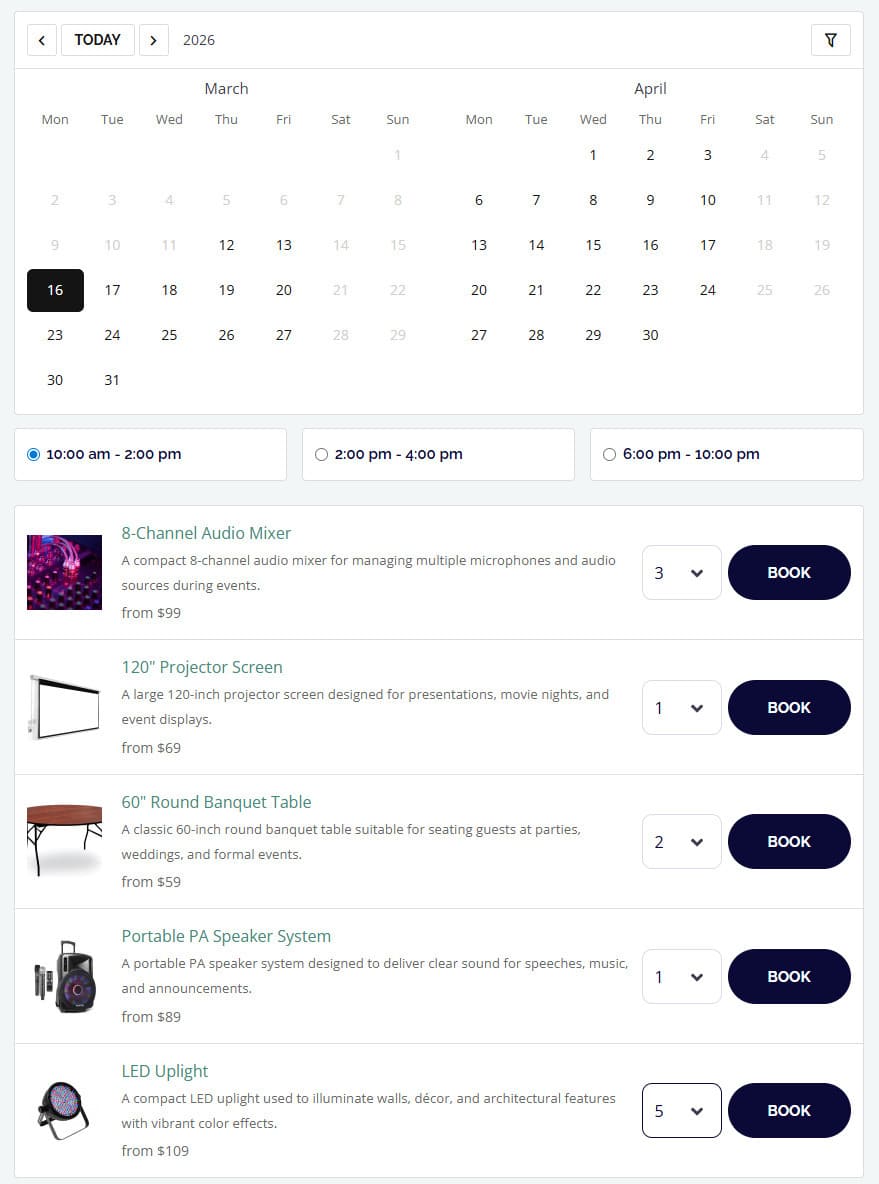
 Providing party equipment for rental is one of the most popular use cases for applying the Booking Calendar WordPress rental store inventory management plugin to your website. Whether you’re offering lighting, tents, or tables, the mentioned WordPress inventory management system allows you to present each item easily and accept bookings directly through your WordPress website. This way, customers can plan events while avoiding scheduling conflicts and manual coordination for themselves and your business.
When it comes to party rentals, Booking Calendar can work as a great tool for simplifying the entire reservation process. It enables flexible rental durations thanks to its hourly booking mode, custom booking fields, and automated confirmations. The best WordPress inventory management plugin also supports accurate inventory tracking while delivering a professional, user-friendly booking experience. As a result, your clients get enhanced customer satisfaction, while you improve your operational efficiency.
Configuring Booking Calendar for Party Rentals
As you see, using WordPress for inventory management can be quite useful when it comes to renting out party equipment. Let’s take a closer look at what you need to set it up and use its features after installation.
Step 1. Creating a Calendar
 Booking Calendar allows you to create any number of calendars you need to manage bookings. To get started, navigate to the Calendars tab in your dashboard and follow these steps:
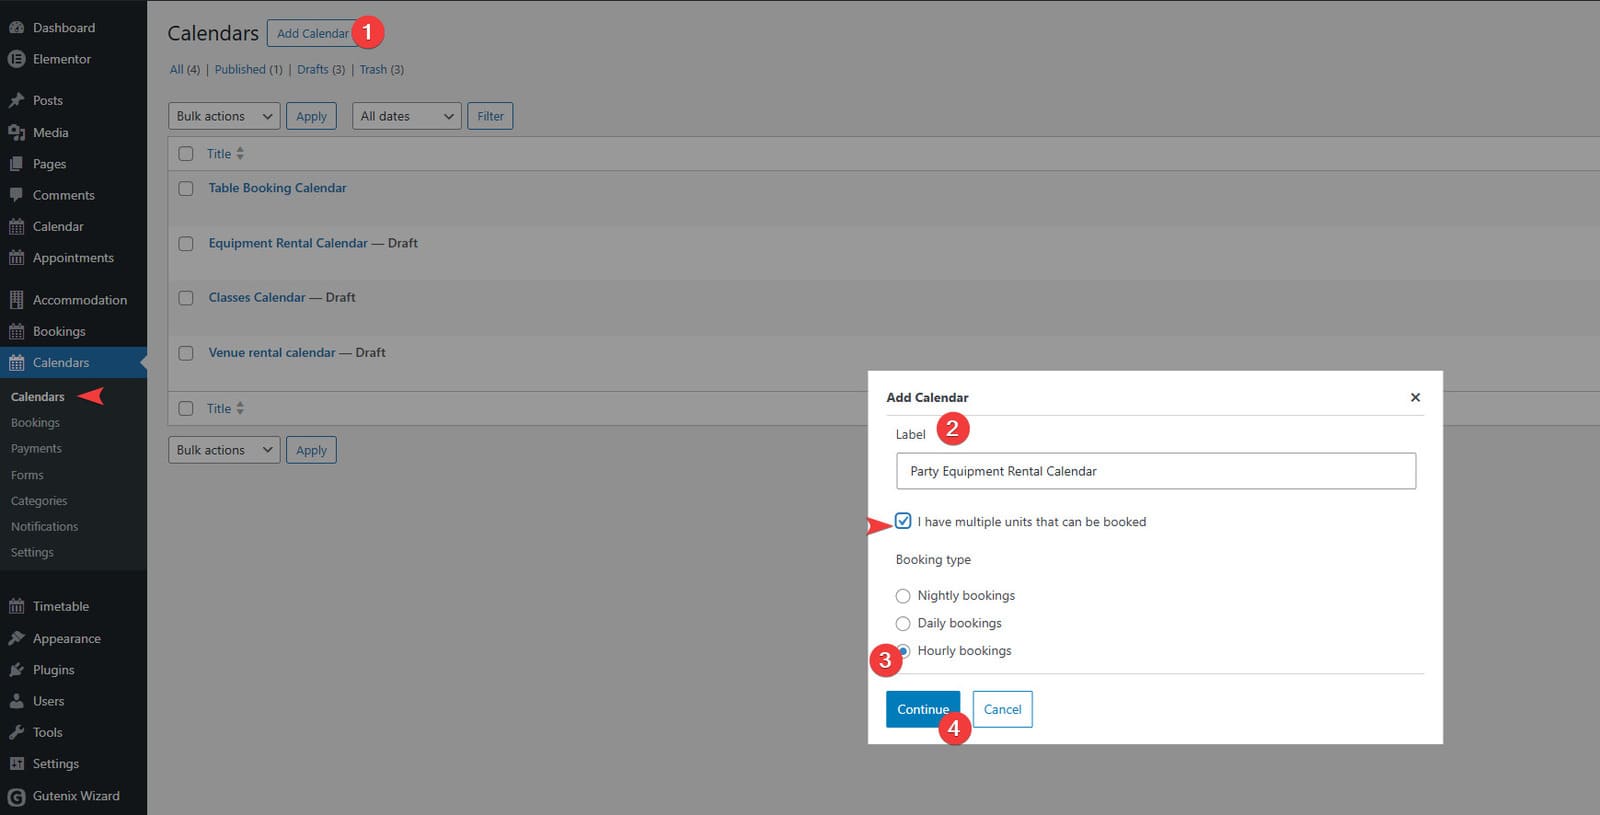
- At the top of the page, press the “Add Calendar” button.
- In the window that appears, provide the calendar title using the “Label” field. You can also select the “I have multiple units that can be booked” option if you offer multiple units of the same item.
- Choose the”Hourly bookings” type to allow reservations based on a timeslot.
- Finally, press “Continue” to create the calendar.
Step 2. Adding Bookable Items
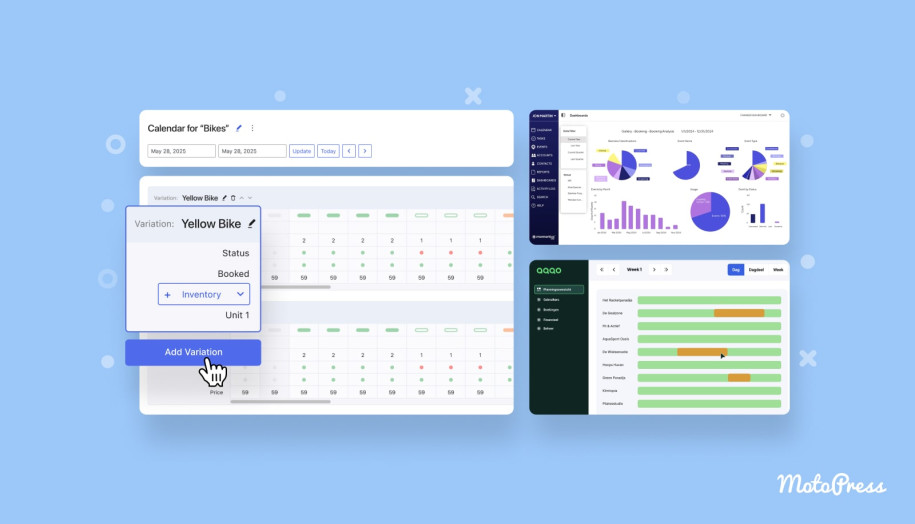
After creating a calendar, you’ll see the visual calendar and inventory management interface designed to help you add items for renting out. Here’s how you can add items and their variations in a few steps using the best WordPress inventory management plugin:
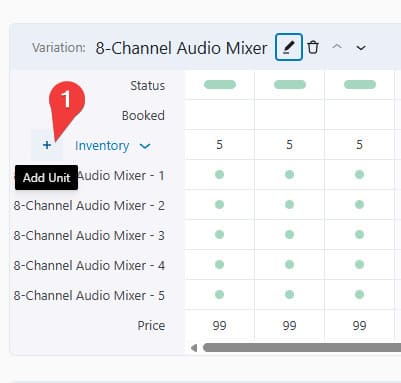
- Using the already available variation section, you can add the number of bookable items you want to rent out. This way, you can differentiate party furniture from audio-visual equipment, for example. To edit the category, press the “+” button to the left of the Inventory heading.

 In the opened sidebar, you’ll be able to change the variation name and other WordPress inventory management information, including:
- Item details (short text displayed under the category title);
- Variation image and description.
- Additionally, you can add, edit, or remove inventory units – the amount of items that you plan to rent out. This is useful if you want to rent out multiple equipment items of the same manufacturer or type on your party rental website. Feel free to reorder the newly added units using the arrows to the right.
- Press the “Save” button to finish editing.
Step 3. Adding Timeslots
 Before you can edit the item availability on an hourly basis, you’ll need to create timeslots with the WordPress inventory management system. It can be done using the same calendar interface:
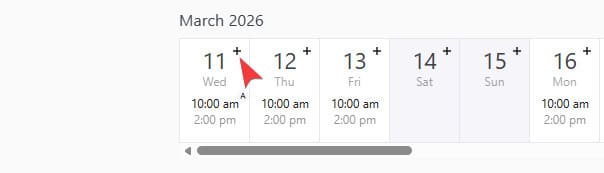
- Using the calendar, find the date from which you want to start adding timeslots.
- Press the “+” button next to it.
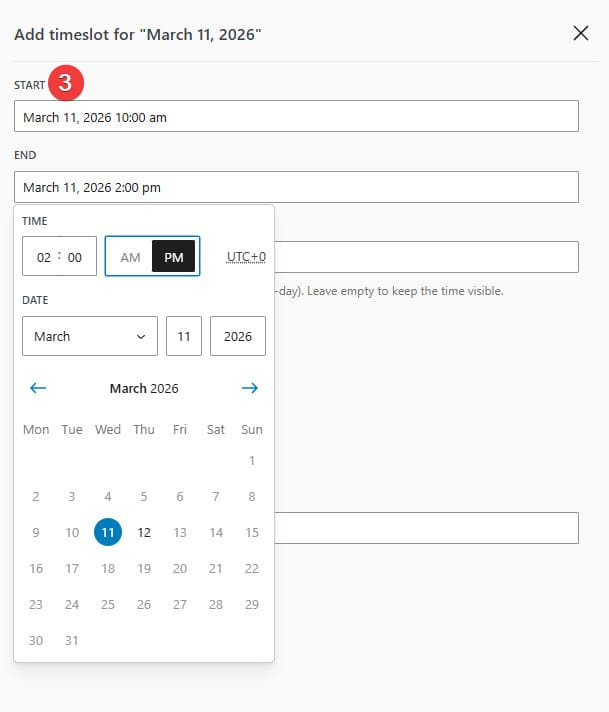
 In the opened sidebar, set the start and end time & date of your time slot.
- Using the Timeslot label field of this inventory management plugin for WordPress, you can add an optional custom name for any timeslot.
- Finally, define whether the timeslot will be repeated. The plugin supports recurring timeslots based on the following options:
- Daily;
- Every weekday;
- Weekly;
- Monthly.
- Press the “Save” button to finish editing.
Step 4. Customizing Item Availability
Now you can edit the availability of added items using the calendar’s inventory manager. The best WordPress inventory management plugin supports customization of pricing and item status with a few simple steps:
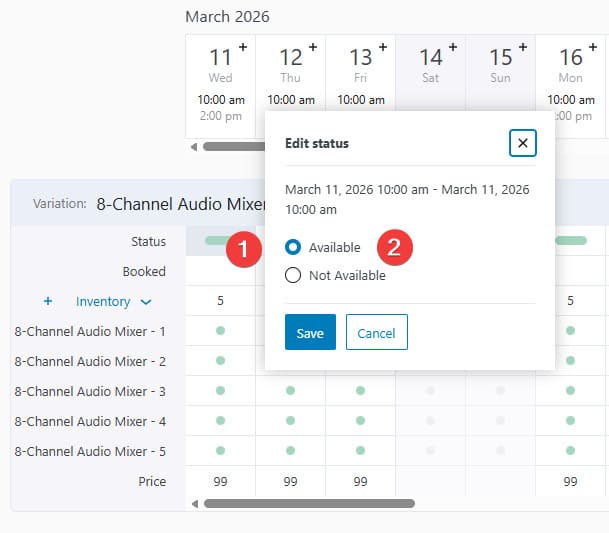
 If you want to make items bookable within a single variation and timeslot, press the status button in the corresponding timeslot row.
- You’ll see a pop-up window with two options to make items either available or not available.
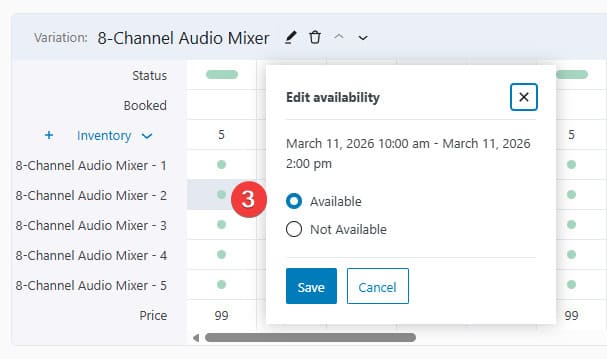
 Alternatively, you can edit the availability of individual items by modifying their statuses next to them.
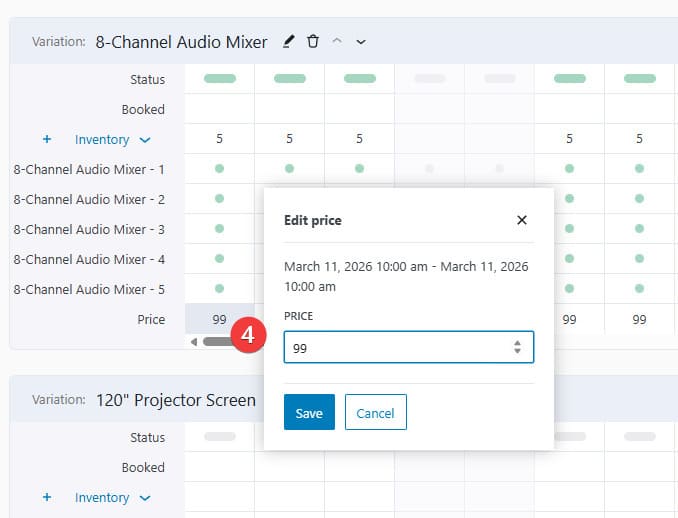
 The last row of the variation section allows you to change the rental price within a timeslot. This can help if you want some slots to be more affordable than the others or define custom pricing based on the seasonal load using this inventory management WordPress plugin.
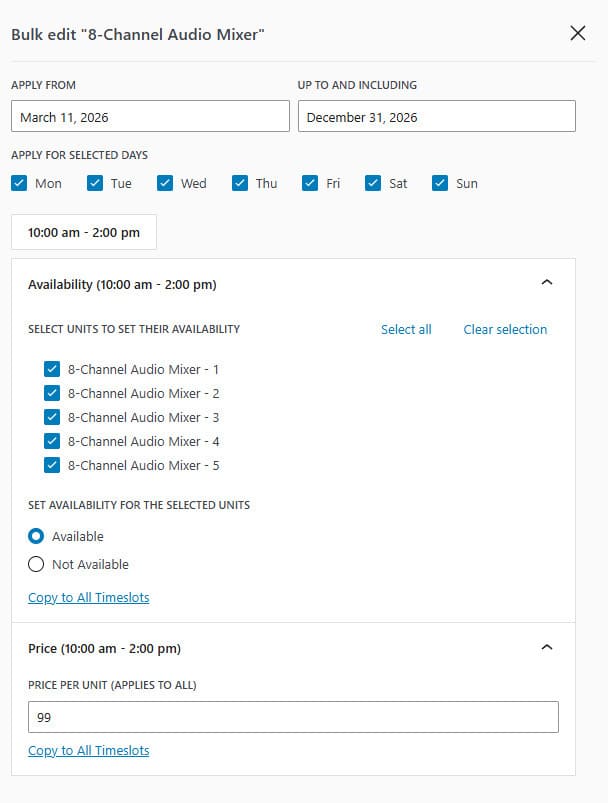
 If you have many bookable party equipment items, the best option is to use the Bulk Edit feature (top right of the variation section). It is available separately for each item variation, giving you an option to define availability within multiple timeslots, dates, and for various items you rent out, but only within one product category at a time.
- In the bulk edit sidebar, you can:
- Choose the affected date and individual days;
- Define Availability settings for different timeslots and units;
- Copy the settings to other timeslots with one click;
- Set prices per unit for all items.
- After making any necessary changes, don’t forget to press “Save”.
Step 5. Adding a Booking Form
Now that you’ve defined availability, it’s time to add a booking form using the mentioned WordPress inventory management plugin so that you can gather necessary information later. Here’s how to do it:
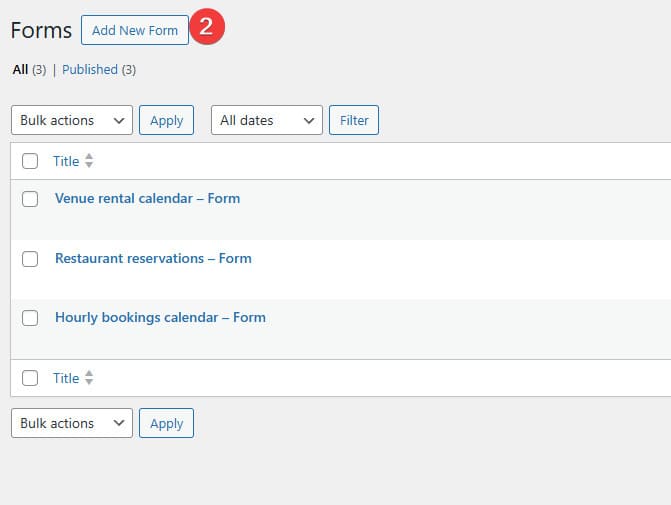
 Navigate to the Calendars – Forms page.
- Press the “Add New Form” button at the top of the page to get started.
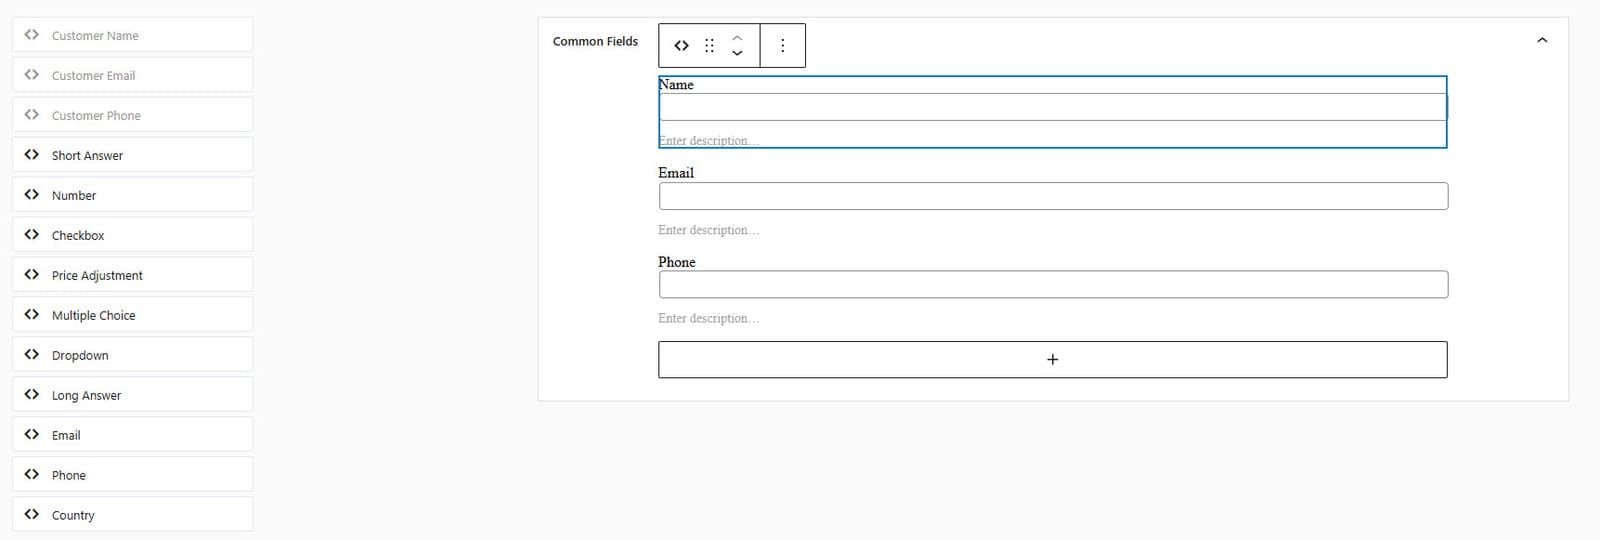
 In the form builder, you’ll see the default booking form, which you can change how you like. The builder supports drag-and-drop of multiple fields, including:
- Short and long answers;
- Checkboxes, numbers, and dropdowns;
- Price adjustment;
- Multiple choice;
- Country.
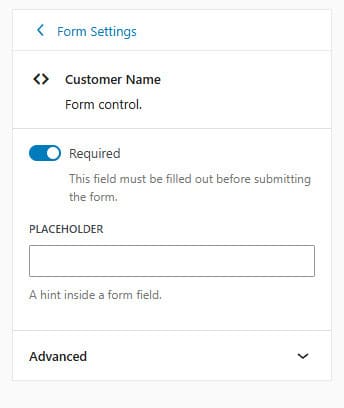
 For each field, separate settings are available. Select the field in the builder to edit them.
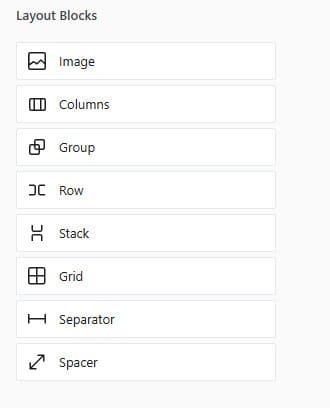
 You can also add images, group fields, create columns, and do more with the layouts section of the builder.
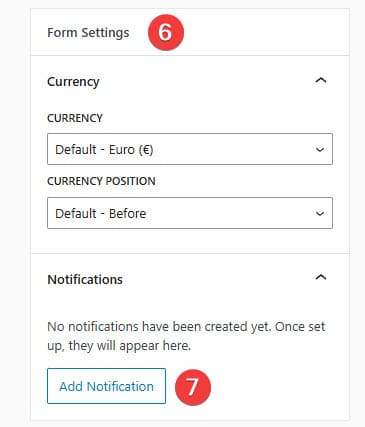
 After editing your form, you can set the currency in the form settings on the right.
- We also recommend adding notifications by pressing the “Add notification” button (see the next step for more information).
- Press the “Create” button to save your booking form.
Step 6. Enabling Email Notifications
To enable email notifications and connect them to a specific calendar and booking form, follow these steps when using the best WordPress inventory management plugin:
- Navigate to the “Notifications” tab in the calendar dashboard. Press Add Notification to get started.
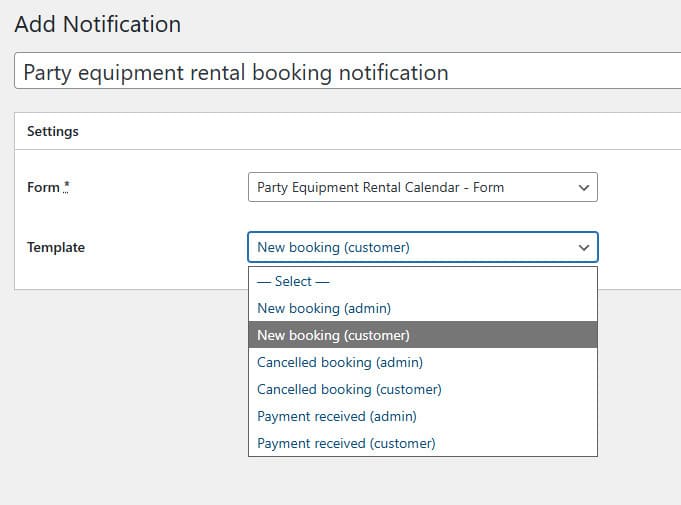
 Choose the preferred form and email template. By default, these templates are available:
- New booking;
- Cancelled booking;
- Payment received.
- Press the Publish button to continue
- Add the notification title at the top of the page to name your notification.
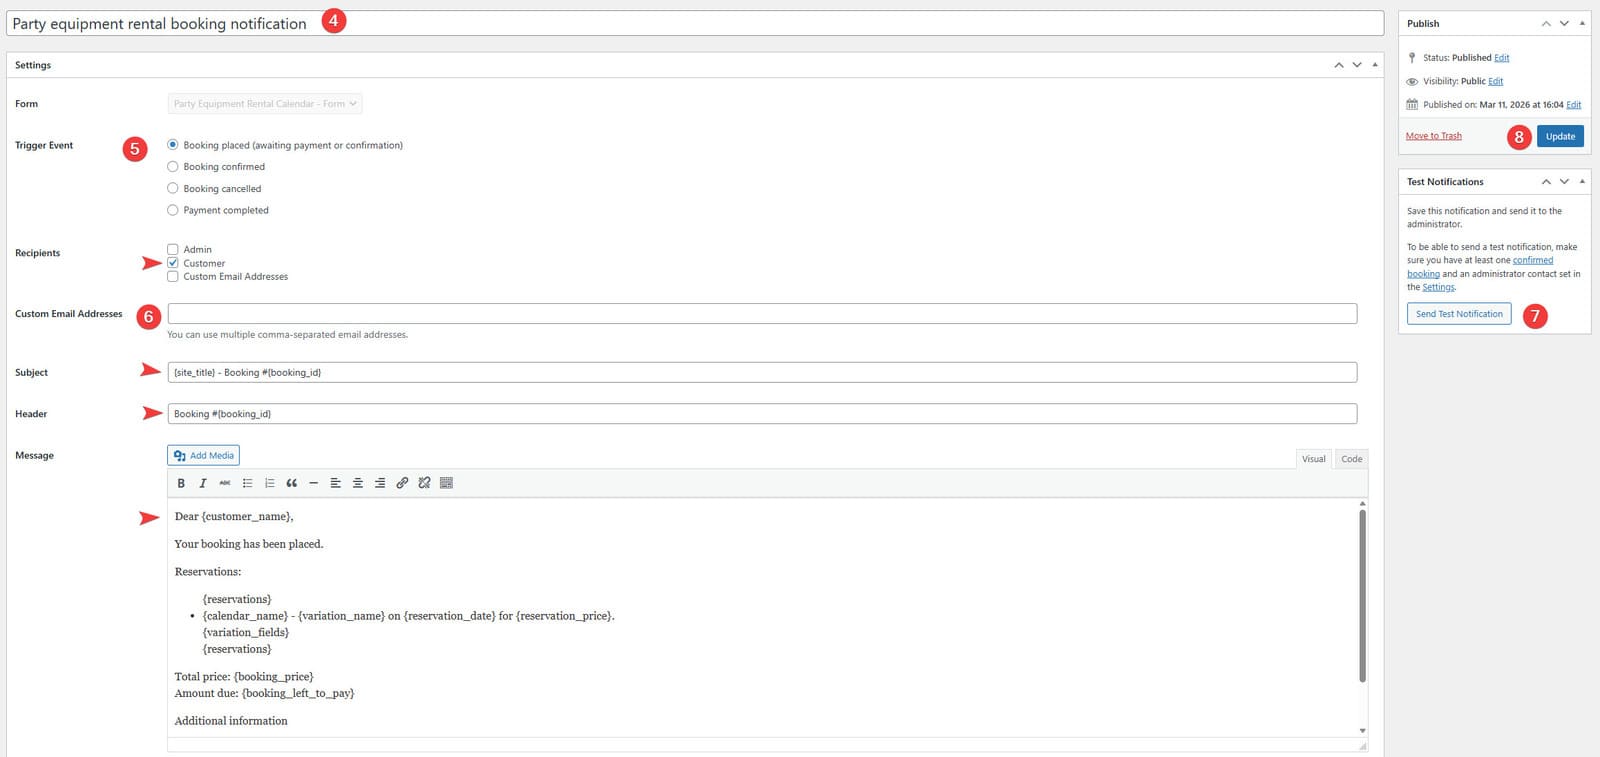
 Using the page UI, define the trigger and recipients of the newly created email notifications.
- Additionally, on this page, you can:
- Provide custom email addresses to which the notification will be sent;
- Edit the subject and header of the message;
- Customize the notification template using the built-in editor and supported tags.
- On the right, you can test the confirmation notification before publishing it using the “Send Test Notification” button.
- After adding the necessary changes, press the “Update” button to save the notification changes.
Step 7. Adding a Booking Form for Your Site
Now that your calendar, form, and notification settings are complete, you can add the calendar and form to your website. Here’s how to do it:
- Navigate to Pages – Add page in your WordPress dashboard.
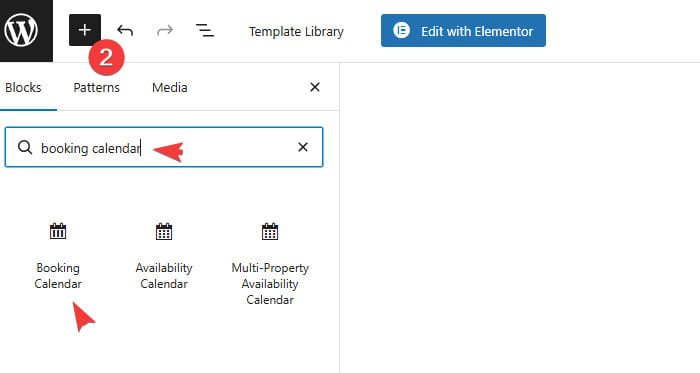
 In the new Gutenberg editor window, find the Booking Calendar Gutenberg block using the block inserter (press the “+” button and enter “booking calendar” in the search field).
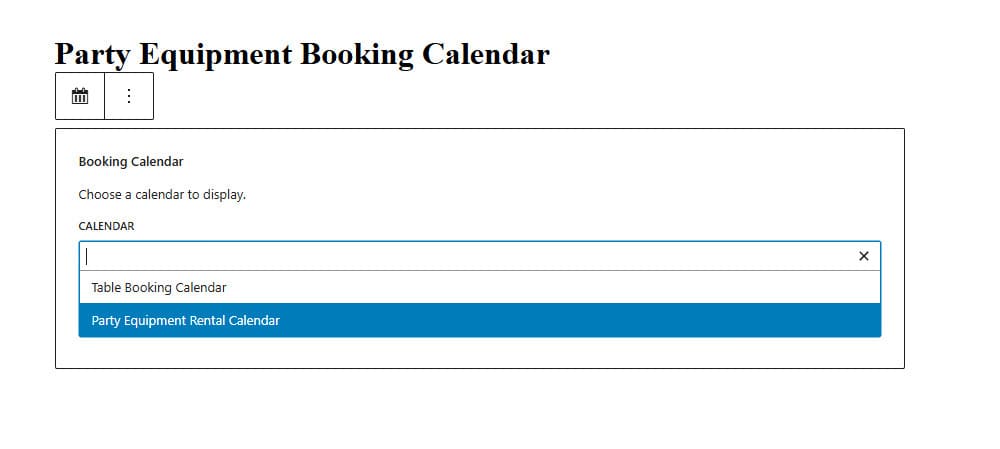
 In the block, choose the calendar you want to display on your website.
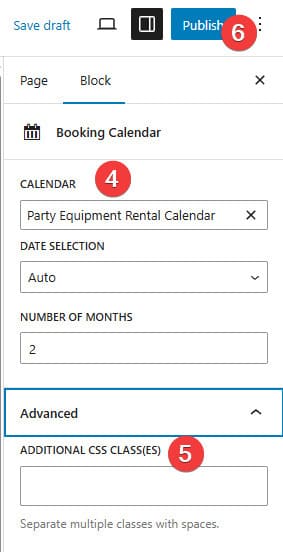
 On the right, you can configure the block if necessary. For example, the settings allow you to:
- Change the chosen calendar;
- Choose the date selection mode;
- Define how many months are displayed at once.
- Add additional CSS classes in the advanced block settings.
- After adding and customizing the calendar block, press the “Publish” button to make your booking page public and fully visible.
Use Case 2: Vacation Rentals
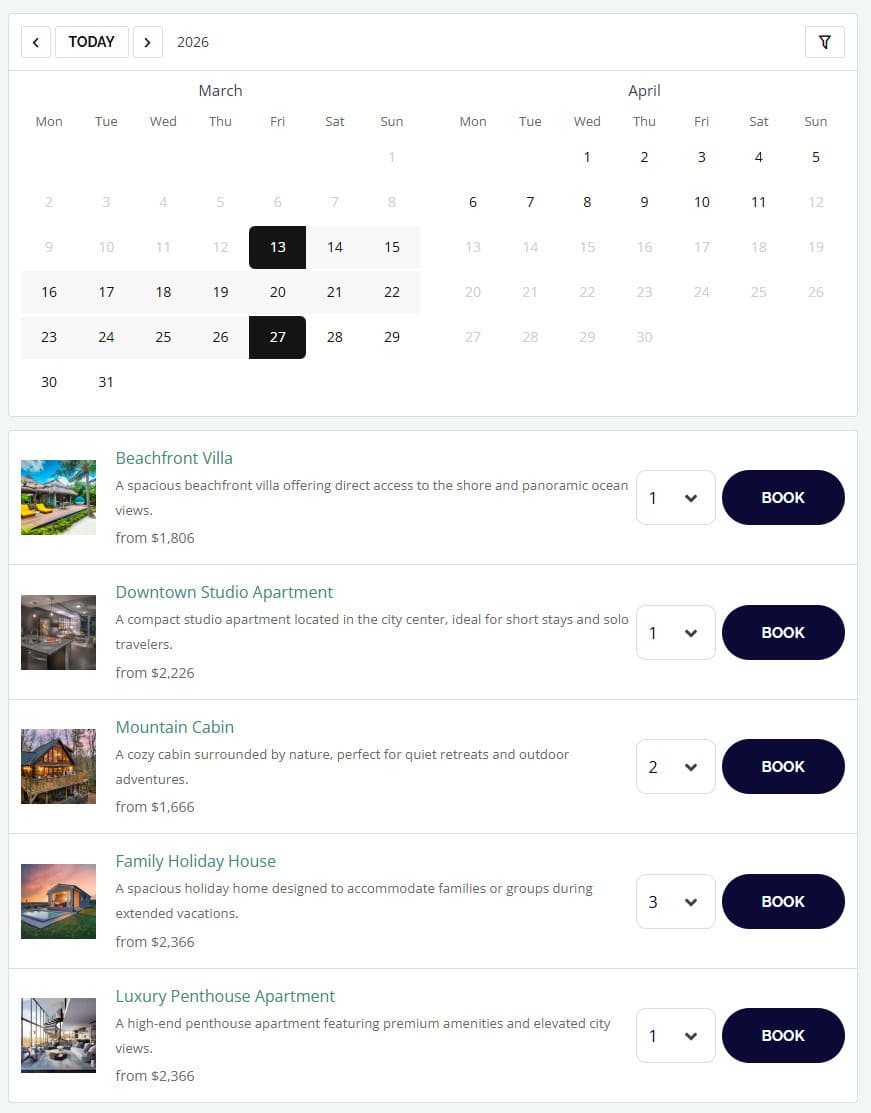
 Booking Calendar is also an excellent solution for vacation rental businesses that you may want to rent out on a nightly basis. From apartments and guest houses to villas and holiday homes, the best WordPress inventory management plugin can be used to clearly display availability and accept property reservations directly through your website. Thanks to the inventory manager and built-in email notifications, you can control every property’s status and rental rate without relying on third-party platforms. This gives you greater control over bookings, pricing, and guest communication while reducing commission fees.
In addition to that, the WordPress plugin inventory management helps streamline day-to-day STR management by granting you user-friendly tools to add new properties and connect them with custom booking forms. The latter makes it easy to collect essential details in advance. Also, with the form builder, you don’t need to install any extra plugins or use external vacation rental management software, which is especially useful if you want to get one plugin for all essential tasks. As a result, Booking Calendar offers a smoother guest experience and more organized property management thanks to its essential but powerful tools.
How to Use Booking Calendar for Nightly Property Rental Bookings
As we’ve already mentioned, the booking calendar plugin provides several booking modes, and the nightly option is the best for vacation rentals. However, here we’ll just cover the advantages this mode provides and how they can be used for managing rentals of your property.
 When creating a nightly booking calendar, you have to follow the same steps as with the hourly one. Simply choose “Nightly bookings” when creating it. Afterwards, you can add properties or rooms you want to rent the same way you’d manage party equipment using the best WordPress inventory management plugin.
This mode has no timeslot functionality, so it supports only one booking option, providing your clients with the ability to rent a room for one night or several, depending on what they choose. For example, if a guest chooses two dates that follow one another as check-in and check-out dates, they will be considered as a single night for renting a property. So all you have to do after adding accommodation options is to manage their availability manually or using the Bulk Edit feature, create a booking form, and publish your calendar.
Use Case 3: Car & Bike Rental Services
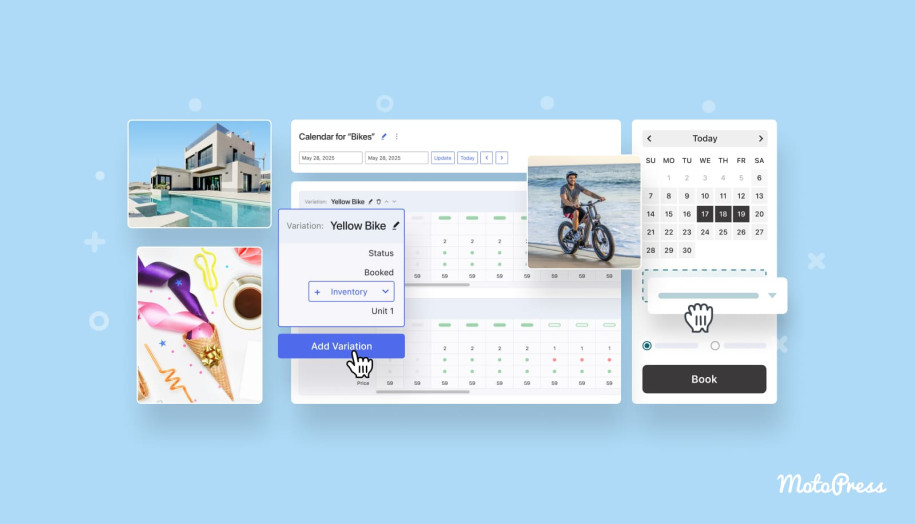
 One more usage case we’d like to talk about concerning the Booking Calendar is car and bike rental businesses. Needing precise control over availability and rental periods, the websites of such companies heavily rely on automation solutions that a WordPress plugin can provide. By applying the daily booking mode, each vehicle can be managed as a separate bookable item using this inventory management WordPress solution. This allows customers to check availability for specific dates and book them directly online using an integrated calendar.
With a flexible and customizable inventory manager and calendar, planning the availability of bookable vehicles becomes really easy. Using these tools of the best WordPress inventory management plugin, you can adapt to different customer needs and improve transparency. Overall, Booking Calendar enables all rental businesses, no matter how big or small, to operate more efficiently. This can be done through categorizing rentable items, managing their rates, and delivering a smooth, reliable booking experience by customizing reservation forms.
Daily Booking Calendar for Car Rentals
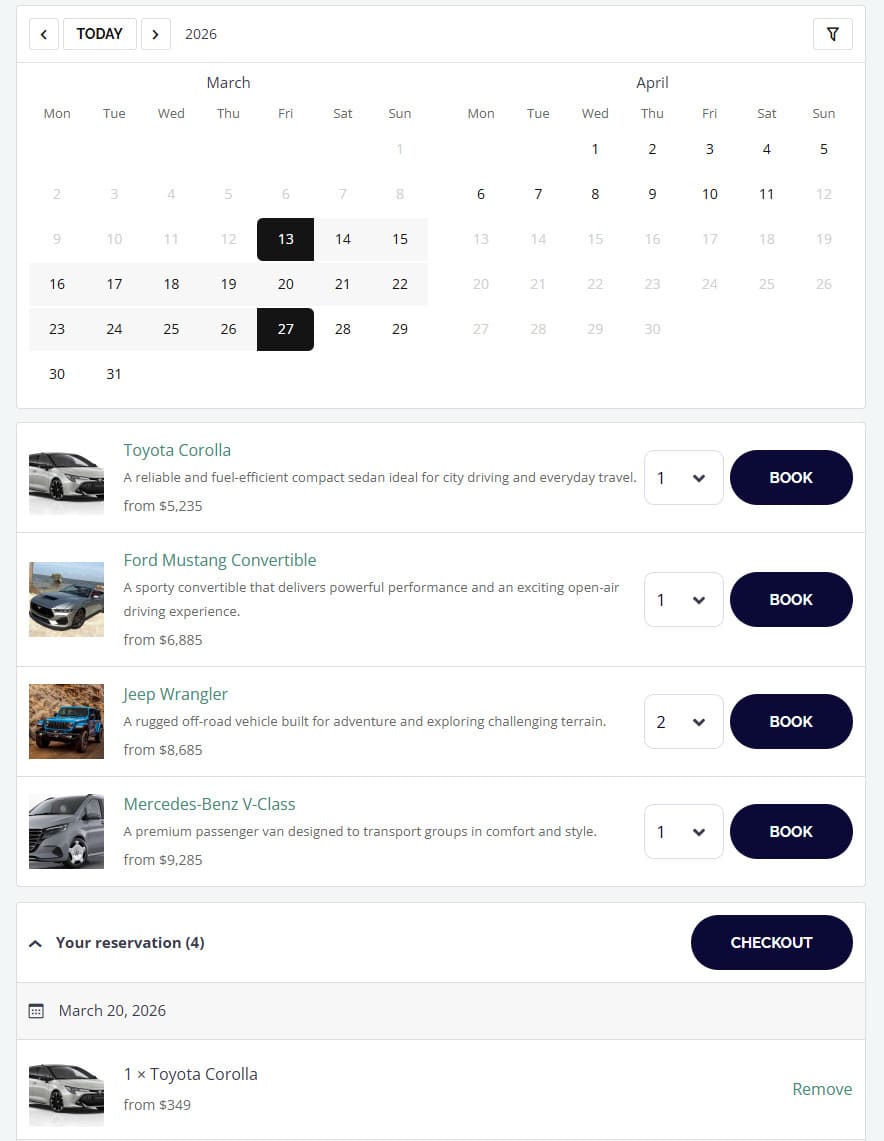 When creating a calendar and using the plugin and choosing the “Daily Bookings” option on the Calendars page, you visibly get the same UI options as with the Nightly bookings. However, in this mode, every booked day counts as a separate date in your calendar. The calendar supports manual availability customization and bulk editing for daily bookings, too.
While you also don’t have time slots functionality in this mode, you simply need to add items using the “+” button in the inventory manager and update their availability status. As a result, you’ll get a functional booking calendar and a form for booking any available item in a few steps. This works perfectly for anything you may want to rent out daily when using the WordPress rental store inventory management system, ranging from cars and bikes to boats, yachts, cameras, and various specialized equipment.
Conclusion
We hope this overview of Booking Calendar and guide to its configuration helped you choose how to use the best WordPress inventory management plugin for your rental business. Be it for managing equipment rentals, services, or accommodation, this plugin can give your site both the flexibility and functionality necessary to streamline core operations. Additionally, with solutions like the one described above, you also get access to other benefits:
- Centralized WordPress inventory management: With plugins like Booking Calendar, you can manage all rentable items and their availability from a single dashboard. This ensures accurate scheduling and easier planning across multiple products or rental locations.
- Reduced double bookings: Real-time availability updates help you to block reserved dates and minimize human error. As a result, this helps prevent overlapping bookings and eliminates constant manual checks.
- Convenient booking experience: Customers can view items available for rent and complete bookings in just a few clicks. Additionally, when using WordPress for inventory management or table bookings with these types of plugins, you can avoid confusion and improve overall user satisfaction during WordPress ecommerce inventory management.
- Automated notification emails: By applying email reminders, you can easily send all booking details to your clients. This saves time and improves communication, eliminating the need for external solutions.